
Federated Login to the Admin UI
On this page
The Curity Identity Server can be managed in a few different ways. One way is to do it programmatically, through the CLI or the REST interface. Another convenient way for administrators is to use the admin UI. In a production instance, this user interface will be accessible through a browser either from the Internet or, more often, from an intranet, and thus must be secured from unauthorized access. Administrators can have accounts saved directly in the configuration, but managing another set of accounts in a company can be tedious. To solve that issue, you can configure the admin UI to enable (or even require) logging in with a federated account. This option also enables multi-factor authentication and secure authentication to the admin UI with the same features as used to log in users on other frontends.
Options for Admin UI Sign In
There are three ways for configuring login to the admin UI:
-
Using local accounts. A root admin account is created during the installation of the Curity Identity Server, and this account can be used to create more accounts. Administrators use their login and password to sign in to the UI. This option is enabled by default.
-
Using an External OpenID Connect Provider. The admin UI can be configured to perform an OIDC flow directly to an external provider.
-
Using an Internal OpenID Connect Provider. The admin UI performs an OIDC flow to one of the Curity Identity Server's Token Service Profiles. The profile can be configured with any authenticator and action that can normally be used in the Curity Identity Server. This option gives you the most control over the login flow.
Configuring an External Provider
To enable federated login using an External OpenID Provider go to System -> Deployment -> Admin Service. Enable the Federated Login option.

Then, enable External OpenID Provider.
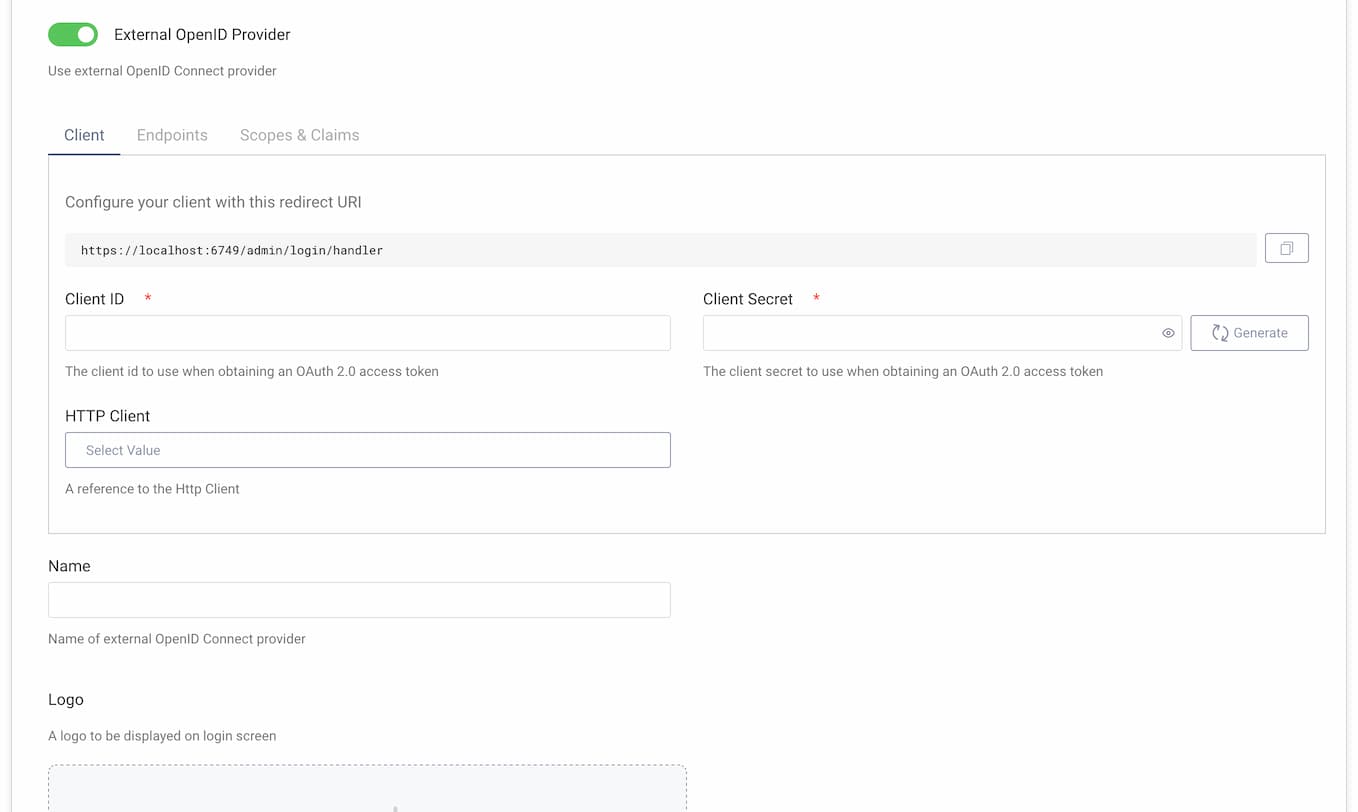
Configure necessary options:
- the client ID,
- the client's secret,
- in the endpoints tab, URLs to Authorization and Token Endpoint.
You can provide an HTTP client if the connection to your OIDC Provider requires some special settings on the client.
In the endpoints tab, you can provide a URL to the userinfo endpoint, if claims about the user should be obtained from the endpoint in addition to the ID token. The claims from the ID token and the userinfo endpoint will be merged, with the user-info response taking precedence.
In the Scopes & Claims tab, you can configure what additional scopes and claims should be requested in the authorization request sent to the OIDC provider. By default, only the openid scope is requested.
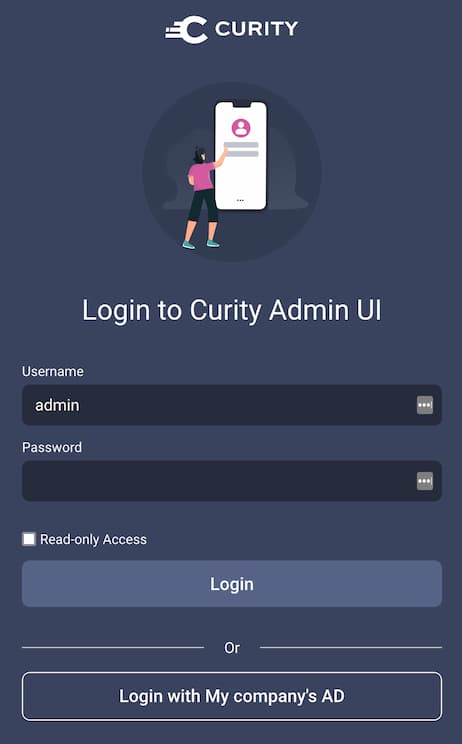
Give the provider a name. This name will be used on the login screen.

You can also add a logo icon that will be displayed on the login button.
Configuration at the External Provider
At the top of the client panel, you will see a URI that is the redirect URI for this client. Use this URI when registering the client in the external OIDC provider.
Change Redirect URI
The base URL of this redirect URI can be changed at the top of the System -> Deployment -> Admin Service page.
The client created in the Curity Identity Server for the external OpenID provider only supports client ID and client secret for client authentication. It uses the client_secret_post method. Make sure that the external OpenID provider supports this method for this client.
Client Authentication
The client uses client_secret_post to authenticate at the external OpenID provider. It does not support client_secret_basic.
Configuring an Internal Provider
To enable federated login using the Internal OpenID Provider go to System -> Deployment -> Admin Service. Enable the Federated Login option, then enable Internal OpenID Provider.
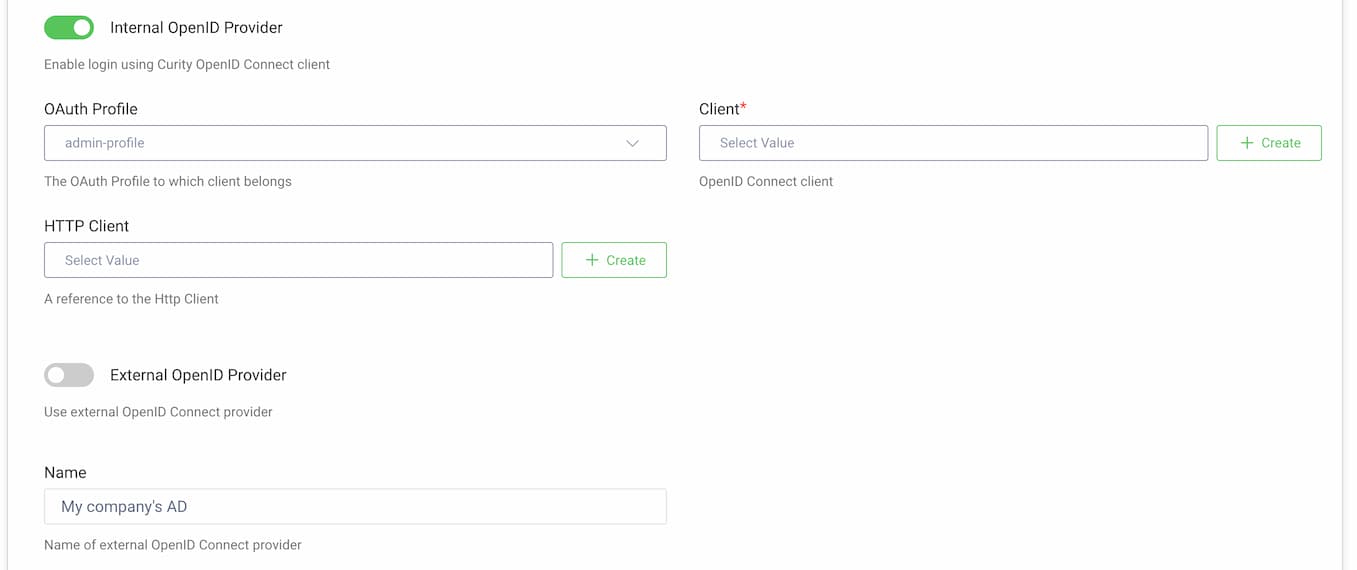
Choose a Token Service Profile that will be used to issue tokens to admin users.
The admin UI will use a dedicated client. You can choose a pre-configured client or generate the client by clicking on the + Create button.
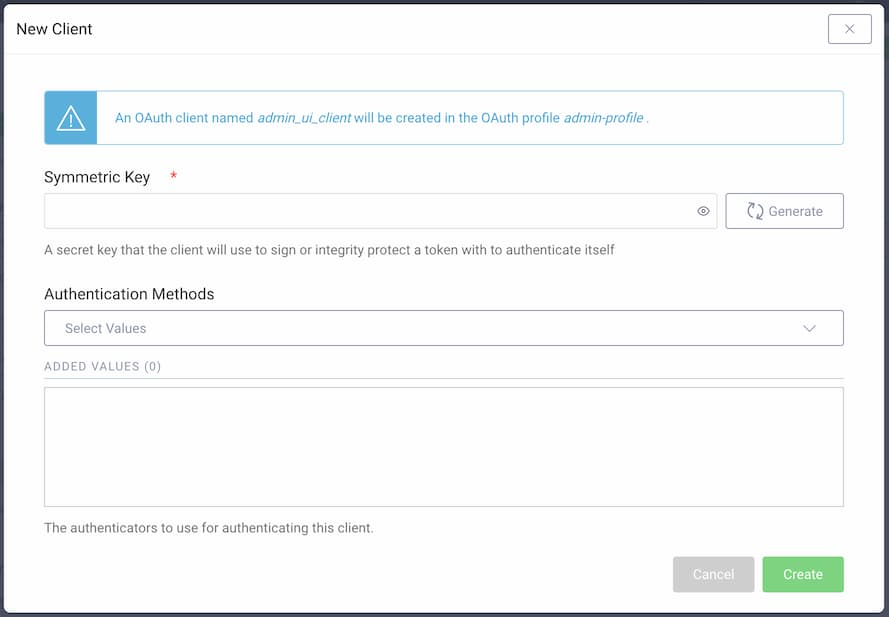
Provide a symmetric key or generate one automatically. This key will be used to sign authentication JWTs. You can also choose which authenticators should be available to log in to the admin UI.
If you want to use a pre-configured client, you must choose one that uses symmetric-key as the client authentication method.
Now, you can configure the authenticators and token service as you would for a front-end login. For example:
- Authenticators can be chained together to require multi-factor authentication.
- Actions can be configured to require multi-factor authentication under certain conditions, e.g., outside business hours or when a login attempt from another country is detected.
- The Token Designer can be used to tailor the contents of the tokens returned to the admin UI.
As described in the previous section, a name and logo icon can be configured and will be displayed on the admin UI login screen.
Disabling Local Accounts
By default, admins can log in with accounts created directly in the Curity Identity Server's configuration. Most notably, the root admin account that is created during the installation of the Curity Identity Server. Very often you will not want these accounts to be able to log in, once you configured the federated login. Logging in with local accounts can be disabled by toggling the option Disable Local Accounts in System -> Deployment -> Admin Service -> Federated Login.
CLI and RESTCONF API can be used to restore access
Note that you can continue to use the CLI and RESTCONF APIs to log in with the root admin account. This could be useful if something happens and you need to re-enable local account login. If this break-glass option isn’t preferred though, be sure to delete the root account entirely.
Access to Local Accounts Configuration
Users, who log in using federated login, by default will not have access to pages that allow configuration of local admin accounts.
If you want a user to have access to these pages, then the ID token returned by the OpenID Connect flow (or the response from the user-info endpoint) must contain a groups claim with the group admin (there can be other groups as well, if your deployment requires it).
Similarly, if you leave access with local accounts enabled, but don't want users logged in with federated accounts to be able to change the configuration of local accounts (e.g., add new admin accounts), then make sure that the ID token (and response from the user-info endpoint) does not contain admin value in the groups claim.
Managing the Displayed Admin Username
The username displayed at the top of the admin UI is the value of the ID token's sub claim (or sub field from the user-info response). In systems which use Pairwise Pseudonymous Identifiers (PPIDs) it can lead to cryptic values being shown to the end user.

To change it, ensure that your external provider sets the proper value in the sub claim. If this is not possible, you can switch to using the internal provider with proper authenticators and actions. For example, instead of using Microsoft Entra ID as an external provider directly, you can use the internal provider, add Entra ID as an authenticator (a standard OIDC authenticator), then use a script action to transform the attributes, e.g., substitute the subject attribute for an email attribute returned from Azure.
Conclusion
Federated login allows you to manage your company accounts in one place and allows admin users to log in with your company's credentials. It also allows configuring two-factor authentication to the admin UI, which can greatly increase the security of your assets and strengthen the zero-trust policy inside your organization.

Join our Newsletter
Get the latest on identity management, API Security and authentication straight to your inbox.

Start Free Trial
Try the Curity Identity Server for Free. Get up and running in 10 minutes.
Start Free TrialWas this helpful?