Multi-Brand Customization Example
On this page
The Single Brand Screen Customization Example demonstrates some techniques to create a custom theme for the Curity Identity Server's login screens. This tutorial shows how to extend those techniques to implement multiple distinct themes, where each theme can be applied to a set of applications. The following fake brands are used, for a fictional banking organization that also provides insurance services.
Locate Customized Files
Clone the GitHub repository at the top of this page, then inspect the customized files in the recipes/multi-brand folder, to understand a typical folder layout that you could use to store branding customizations in source control. Note the use of template areas, where sb-group represents a fictional banking theme and sb-insurance represents a fictional insurance theme.
├── multi-brand│ ├── images│ │ └── sb-group-logo-white.svg│ │ └── sb-group-logo.svg│ │ └── sb-group-symbol.svg│ │ └── sb-insurance-logo-white.svg│ │ └── sb-insurance-logo.svg│ │ └── sb-insurance-symbol.svg│ ├── messages│ │ └── overrides│ │ └── en│ │ └── authenticator│ │ └── html-form│ │ └── authenticate│ │ └── messages│ ├── css│ │ └── sb-group-theme.css│ │ └── sb-insurance-theme.css│ ├── templates│ │ └── overrides│ │ └── authenticator│ │ └── html-form│ │ └── authenticate│ │ └── get.vm│ │ └── template-areas│ │ └── sb-group│ │ └── settings.vm│ │ └── sb-insurance│ │ └── settings.vm
The customized files are summarized below, and can be inspected to understand how to make similar changes for your own brands. Each file contains only small changes to the default resources shipped with the Curity Identity Server:
| File Location | Customizations |
|---|---|
images/* | Custom image files used by the brand. |
messages/overrides/en/authenticator/html-form/*/messages | Customized English text for both brands. |
css/*-theme.css | Custom theme overrides for each brand. |
templates/overrides/authenticator/html-form/authenticate/get.vm | A custom velocity template file, which can use distinct message IDs per brand. |
templates/template-areas/sb-*/settings.vm | Customizations to the most common settings for each brand. |
Develop Using UI Kit
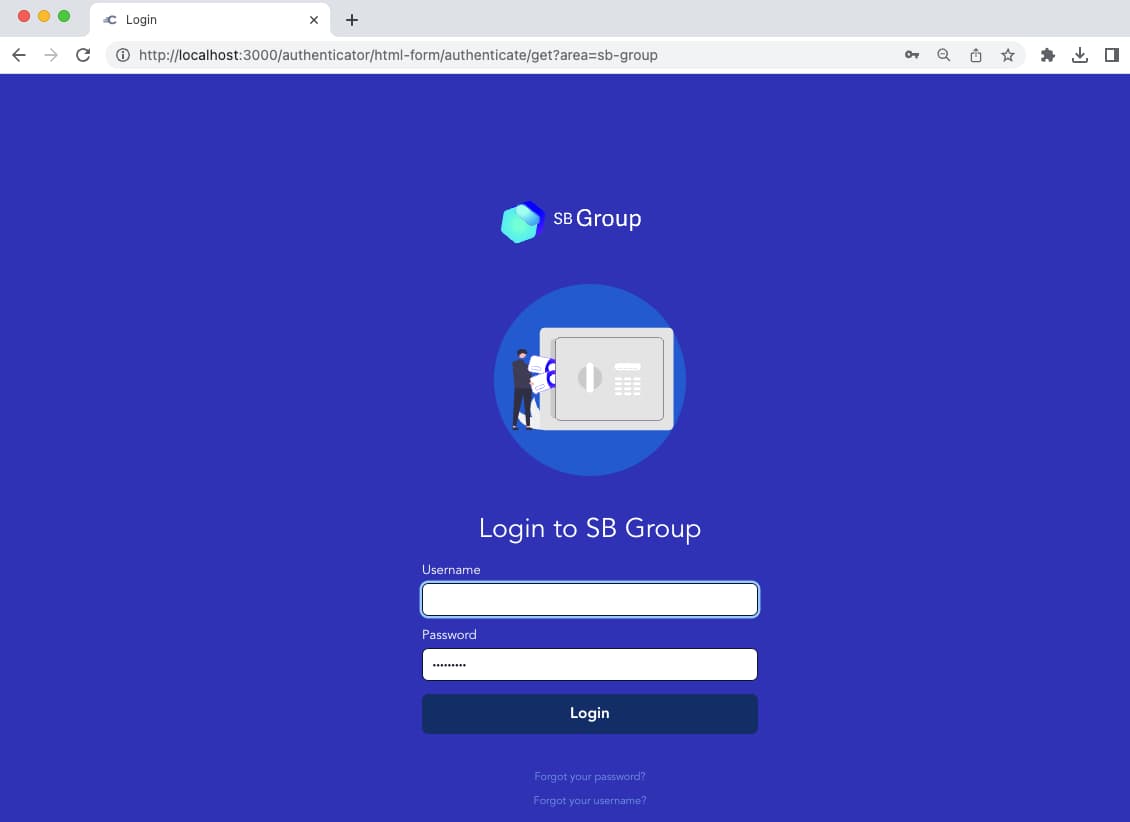
You can do most theming work using the UI Kit, which renders Curity Identity Server templates without the need to run a login flow. You then get fast feedback for branded login screens in the browser at http://localhost:3000. To render a screen with a template area, append a query parameter such as area=sb-group.
Look and Feel Updates
Each brand has its own settings.vm file within a template-areas subfolder. An abridged version of the settings for the sb-group brand is shown below. Note that dark mode and a transparent background are used, along with a white logo. A custom velocity variable called $current_area has also been assigned the value 'sb-group':
#parse("settings-defaults")#set ($logo_white_path = $!_staticResourceRootPath + '/assets/images/sb-group-logo-white.svg')#set ($logo_inside = true)#set ($show_symbol = true)#set ($body_background = 'body-dark')#set ($login_form_background = 'form-transparent')#set ($page_symbol_path = $!_staticResourceRootPath + '/assets/images/')#set ($page_symbol_bank = $page_symbol_path + "sb-group-symbol.svg")#set ($powered_by = false)#set ($main_css_path = $!_staticResourceRootPath + '/assets/css/main.css' )#set ($theme_css_path = $!_staticResourceRootPath + '/assets/css/sb-group-theme.css')#set ($current_area = "sb-group")
There are separate web assets for each brand, and assets deployed to the css and images folders use distinct file prefixes of sb-group and sb-insurance.
Text Customization
Message files are located at the root level, and most commonly the same text is used for all brands. When there are exceptions to this rule, you can manage them by using distinct message IDs, with a brand specific identifier. The built-in message ID of view.authenticate renders the text Login by default. To render different text for each brand, the example resources introduce two new message IDs:
view.authenticate.sbgroup=Login to SB Groupview.authenticate.sbinsurance=Login to SB Insurance
It is possible to use distinct templates for each brand, by maintaining multiple customized copies of the get.vm file for the HTML form login screen. This is done by copying the template to the same relative location under the template-areas/brand-name folder.
For minor text changes, a better option is to avoid duplicating an entire HTML template. The example shows how to use a single get.vm file in the overrides folder. Within the template HTML, an if condition is used to render the login heading using the message ID for the active brand. The default case is also handled, for any clients that are not assigned a template area:
#if ($current_area == "sb-group")<h1 class="mt0 center">#message("authenticator.html-form.authenticate.view.authenticate.sbgroup")</h1>#elseif ($current_area == "sb-insurance")<h1 class="mt0 center">#message("authenticator.html-form.authenticate.view.authenticate.sbinsurance")</h1>#else<h1 class="mt0 center">#message("authenticator.html-form.authenticate.view.authenticate")</h1>#end
Deploy Customizations
To deploy the example customizations, follow the README from the GitHub repository to run a local Docker deployment. The example customizations get deployed to the following folder structure under the $IDSVR_HOME root folder, which evaulates to /opt/idsvr for Docker deployments.
├── usr│ ├── share│ │ ├── webroot│ │ | └── assets│ │ | └── images│ │ │ └── sb-group-logo-white.svg│ │ │ └── sb-group-logo.svg│ │ │ └── sb-group-symbol.svg│ │ │ └── sb-insurance-logo-white.svg│ │ │ └── sb-insurance-logo.svg│ │ │ └── sb-insurance-symbol.svg│ │ | └── css│ │ │ └── sb-group-theme.css│ │ │ └── sb-insurance-theme.css│ │ ├── messages│ │ │ └── overrides│ │ │ └── en│ │ │ └── authenticator│ │ │ └── html-form│ │ │ └── authenticate│ │ │ └── messages│ │ ├── templates│ │ │ └── overrides│ │ │ └── authenticator│ │ │ └── html-form│ │ │ └── authenticate│ │ │ └── get.vm│ │ │ └── template-areas│ │ │ └── sb-group│ │ │ └── settngs.vm│ │ │ └── sb-insurance│ │ │ └── settngs.vm
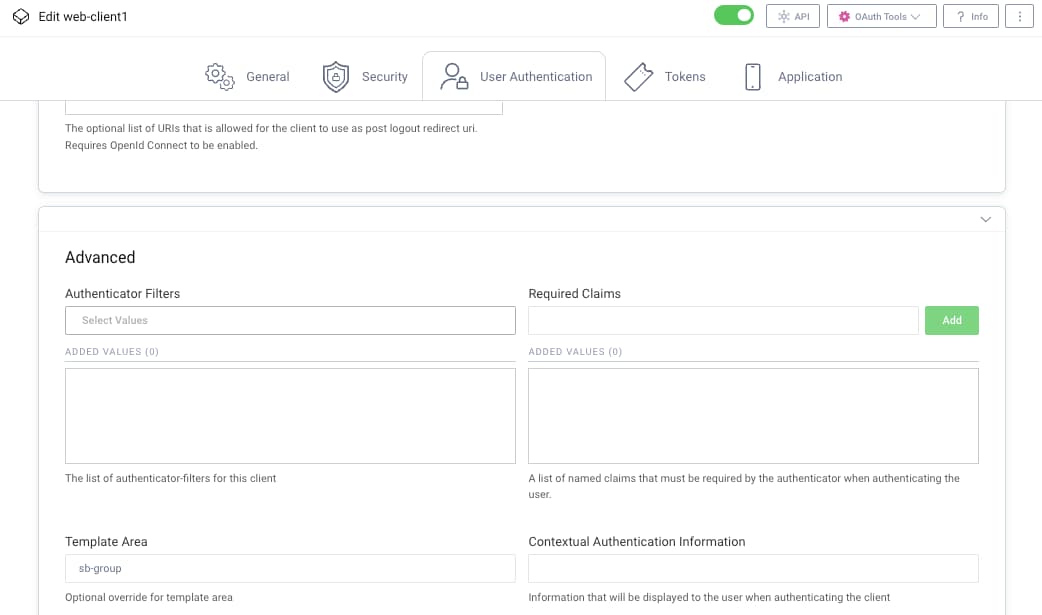
Once the deployment is complete, follow the instructions in the README to sign in to the Admin UI. Navigate to Token Service → Clients and edit the client named web-client1. View the User Authentication tab to see how the template area is assigned:
Test Customizations
The example deployment also provides a local test setup, to show how to quickly run real login flows with customizations, using OAuth Tools as a test client. Follow the README instructions to test login operations for any of the three test clients, two of which use a template area with a custom theme.
| Client ID | Template Area |
|---|---|
| web-client | None |
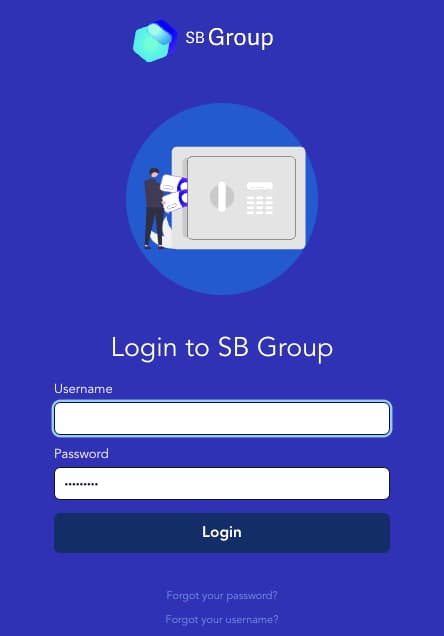
| web-client1 | sb-group |
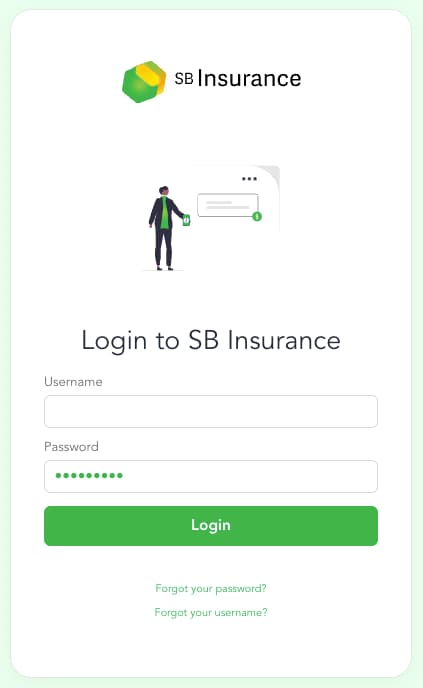
| web-client2 | sb-insurance |
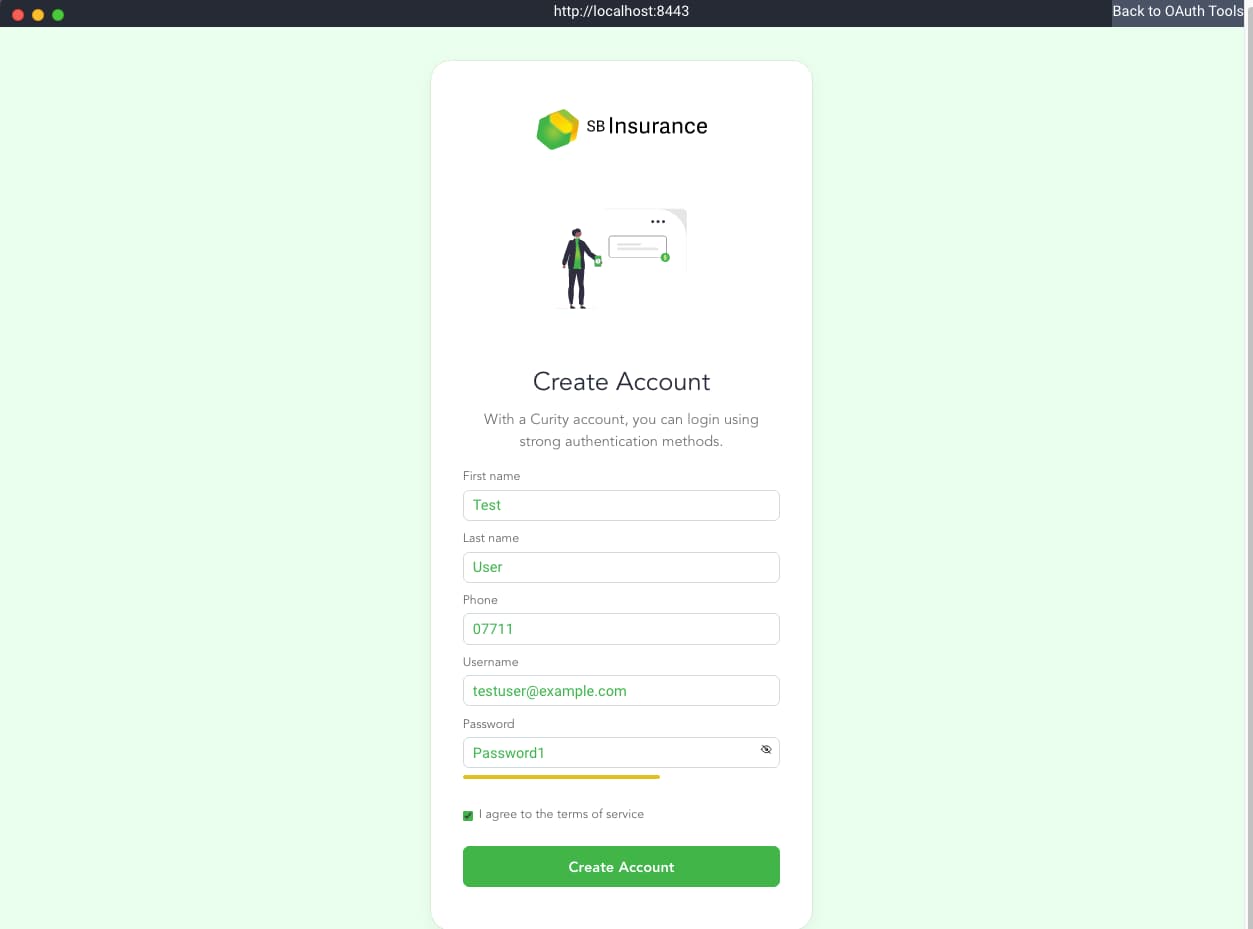
When signing in, select the HTML form authenticator and the Create Account option, then create a user for login testing. The login screen appearances are significantly different for each of the client applications:
Conclusion
The Curity Identity Server enables you to implement multiple branded login screens as separate themes. Each theme can then be assigned to one or more OAuth clients in the configuration settings of the Curity Identity Server. Multi-brand customizations are managed simply by deploying resources to a different folder structure. Multiple brands can thus be implemented without code duplication.
Customer Stories
Learn how organizations run identity and API security at scale.
Read customer storiesWas this helpful?