Implementing Impersonation
On this page
There are different methods for implementing an impersonation flow in the Curity Identity Server. If you are not familiar with the approaches yet, checkout the article discussing different impersonation approaches.
In this tutorial you will learn how to issue an Access Token for a different user than the one who is authenticated. The solution will use plain OAuth and OpenID Connect requests together with an Authentication Action, Claims Provider and Token Procedure.
The Example
Requirements
Assume a situation where users test a client before it gets deployed. Assume the test cases involve running the application with different test users. Instead of giving each tester access to the credentials of the test user, the testers should log in with their own credentials and act on behalf of the test users. Traceability is required so that the testers can investigate issues they discover. To achieve this, the Authorization Server should return a token on behalf of the test user with a claim for the actor (tester). The client must use the same flow for testing and production. It is not possible to add any specific parameters to the request for testing purpose. Actually, the client is completely unaware of the impersonation.
Implementation
As the client is not able to communicate which account to impersonate, the user will be asked to manually enter a username for the test user as part of the authentication process. The Curity Identity Server includes different kinds of actions that can be triggered after an authentication. For this use case an action of type Attribute Prompt will open a window asking the user to enter an account id.
The test account is supposed to be the subject of the token (impersonation). An action of type Script will override the authentication subject with the test account id. A separate attribute called actor will contain the original subject for the traceability requirement.

The actor attribute will end up in the act claim as specified in RFC 8693. This claim will be added to the default scope to ensure that tokens include the claim by default. Before issuing a token, a Token Procedure will verify that the request complies with the business rules. If the tester is allowed to impersonate the given test account it will issue a token for the test account.
User Prompt
First add an Authentication Action for prompting the user to enter a test account for impersonation.
- In the admin UI go to Profiles -> Authentication Service -> Authenticators and select the authenticator which will be used by the testers to login at the application.
- In the login flow add a new action. Choose a suitable name and select the Attribute Prompt type action. Click Next.
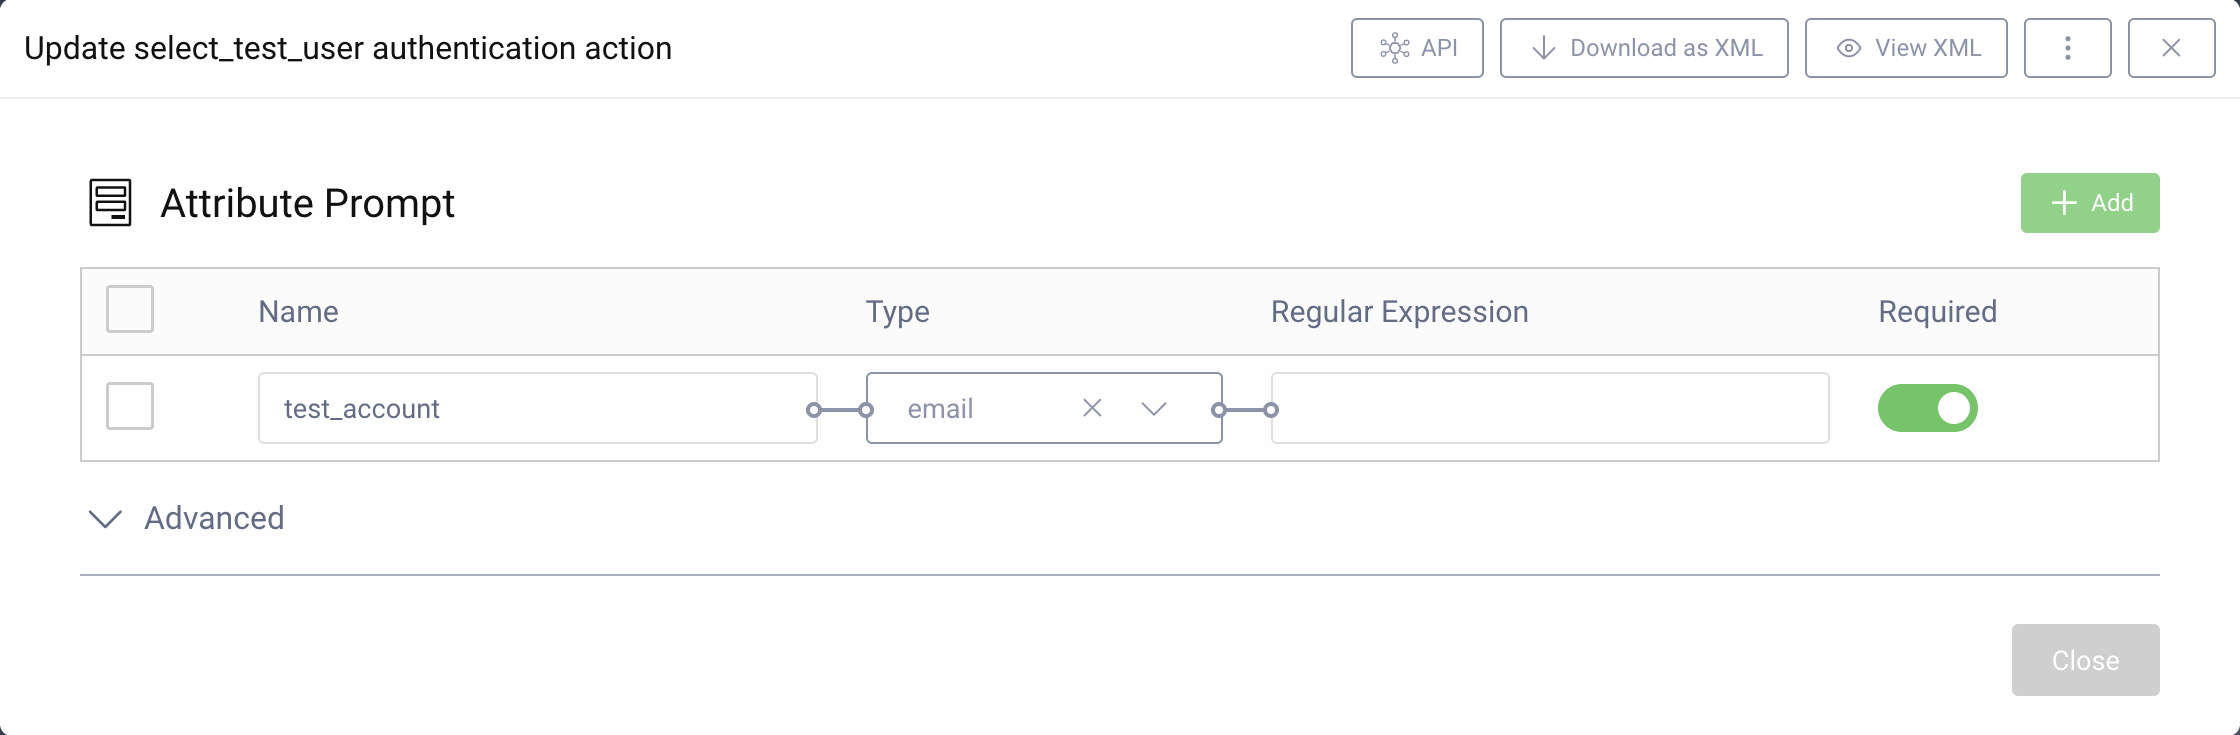
- Click the + Add button above the upper right corner of the table to add a new attribute.
- Enter
test_accountas the name of the attribute. Chooseemailfrom the dropdown for the type and mark it as Required. - Close the window.
Change Subject
In the next step, add another Authentication Action to transform the authentication attributes.
- In the login flow add a new action. Choose a suitable name and select the Script type action. Click Next.
- Click on New next to the dropdown for the Transformation Procedure.
- Enter a suitable name and click on Create.
- In the script popup add the following code to the procedure:
function result(context) {var attributes = context.attributeMap;var testaccount = attributes.test_account;if (testaccount) {// Keep original authenticated subjectattributes.actor = attributes.subject;// Impersonate test accountattributes.subject = testaccount;}return attributes;}
test_account is the name of the attribute from the attribute prompt.
- Remember to save the procedure and Commit changes to the configuration.
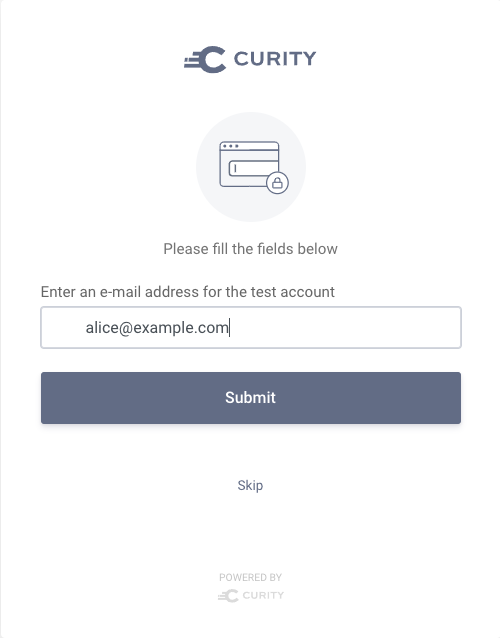
Now, configure a message for the label of the attribute prompt. This is a file-based configuration that is required for every supported language. This tutorial assumes that your system supports English. The language override files for English are located at user/share/messages/overrides/en. Change the last folder to edit the messages for another language.
- Create the folders
usr/share/message/overrides/en/authentication-action/attribute-prompt.
mkdir -p usr/share/message/overrides/en/authentication-action/attribute-prompt
- Add a message for the label of the
test_accountattribute:
echo "attribute.test_account.label=Enter an e-mail address for the test account" > usr/share/message/overrides/en/authentication-action/attribute-prompt/messages
To test the flow, perform a standard authorization request (e.g. using OAuth Tools). After having entered your credentials you will be prompted to enter an email address of the test account.
When you introspect the received token, you can see that the subject differs from the credentials that you entered and instead represents the test account.
Getting Claims
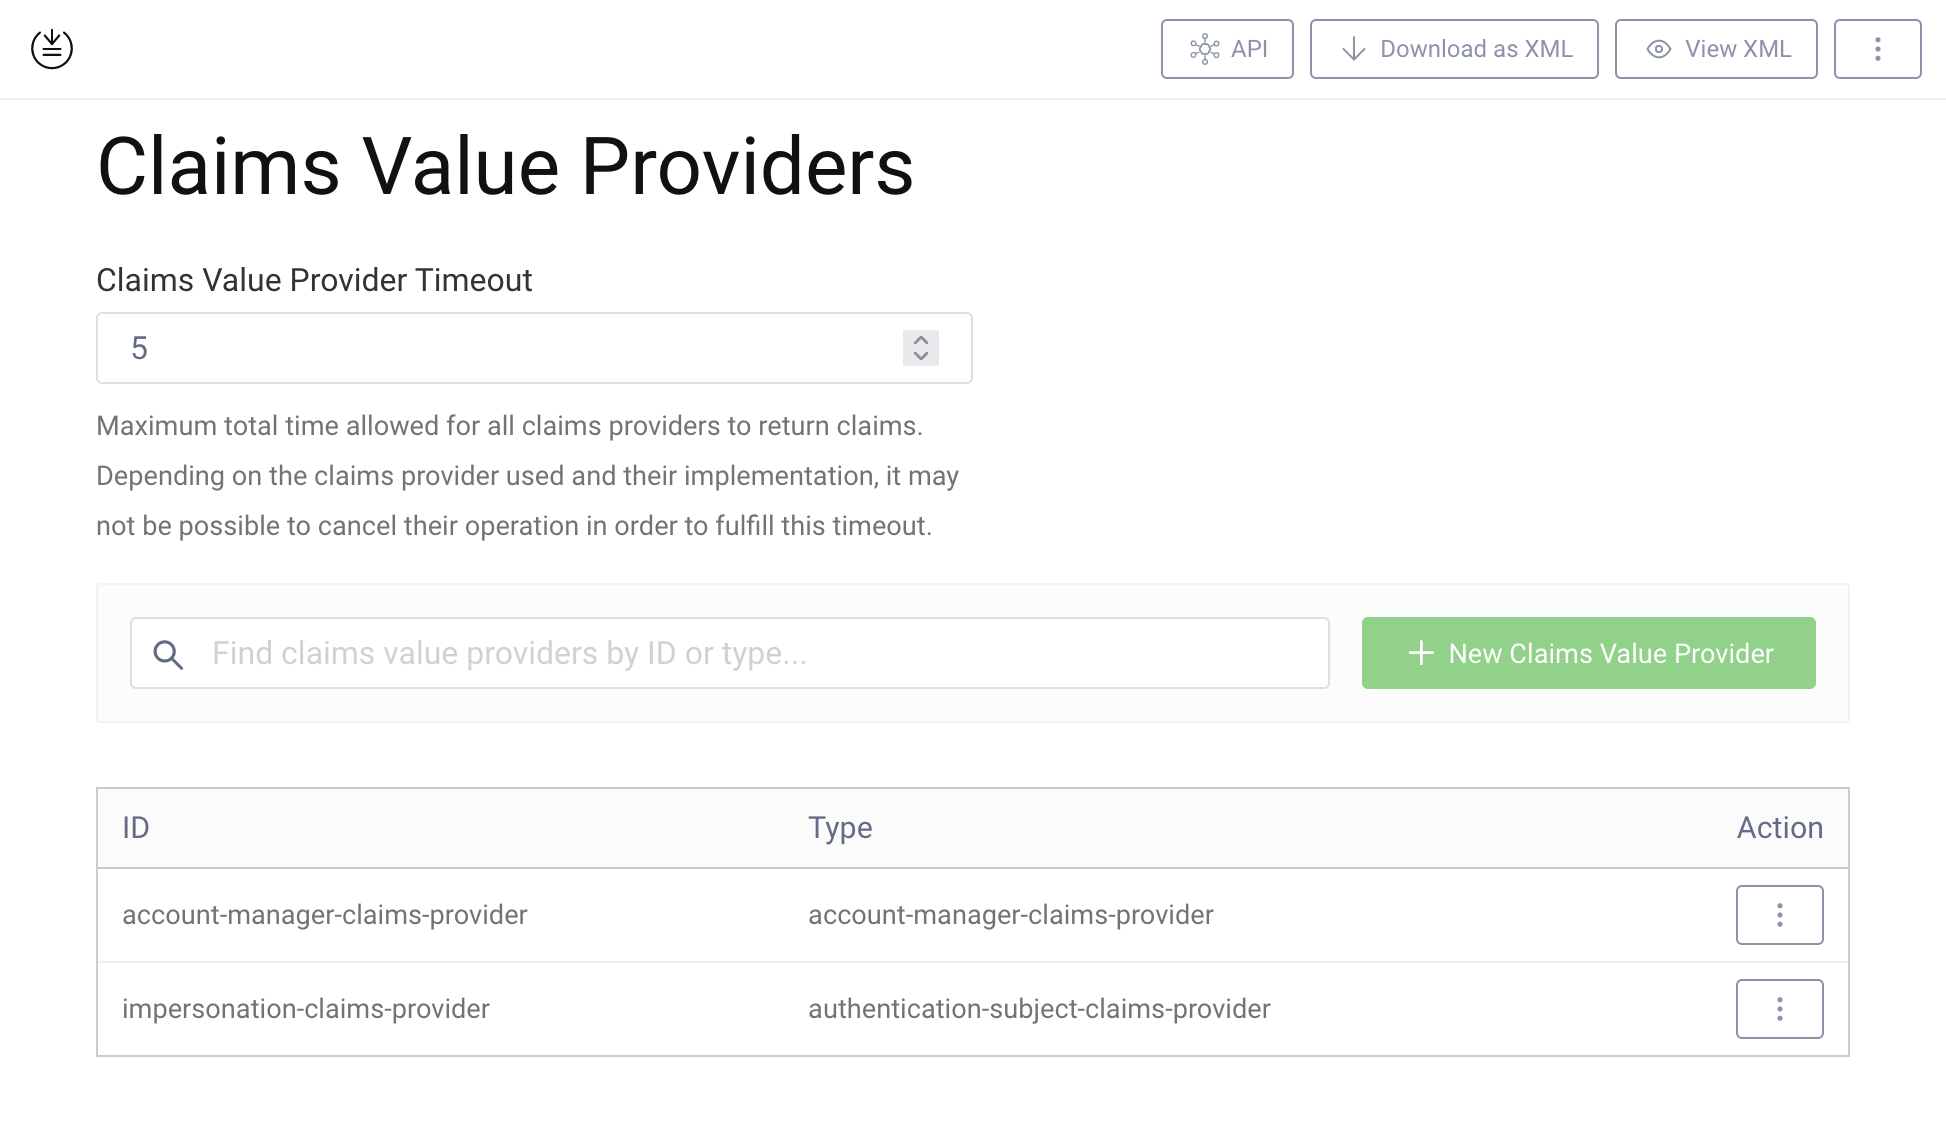
The token should contain the act claim with the original subject. The original subject is stored in the subject authentication attribute called actor. Configure a Claims Provider that exposes all the subject authentication attributes.
- In the admin UI go to Profiles -> Token Service -> Claims Providers. Click on + New Claims Value Provider
- Enter a suitable name. Choose Authentication Subject as the type for the provider. Click Next.
- No further configuration required. Close the window.
Now, configure the act claim.
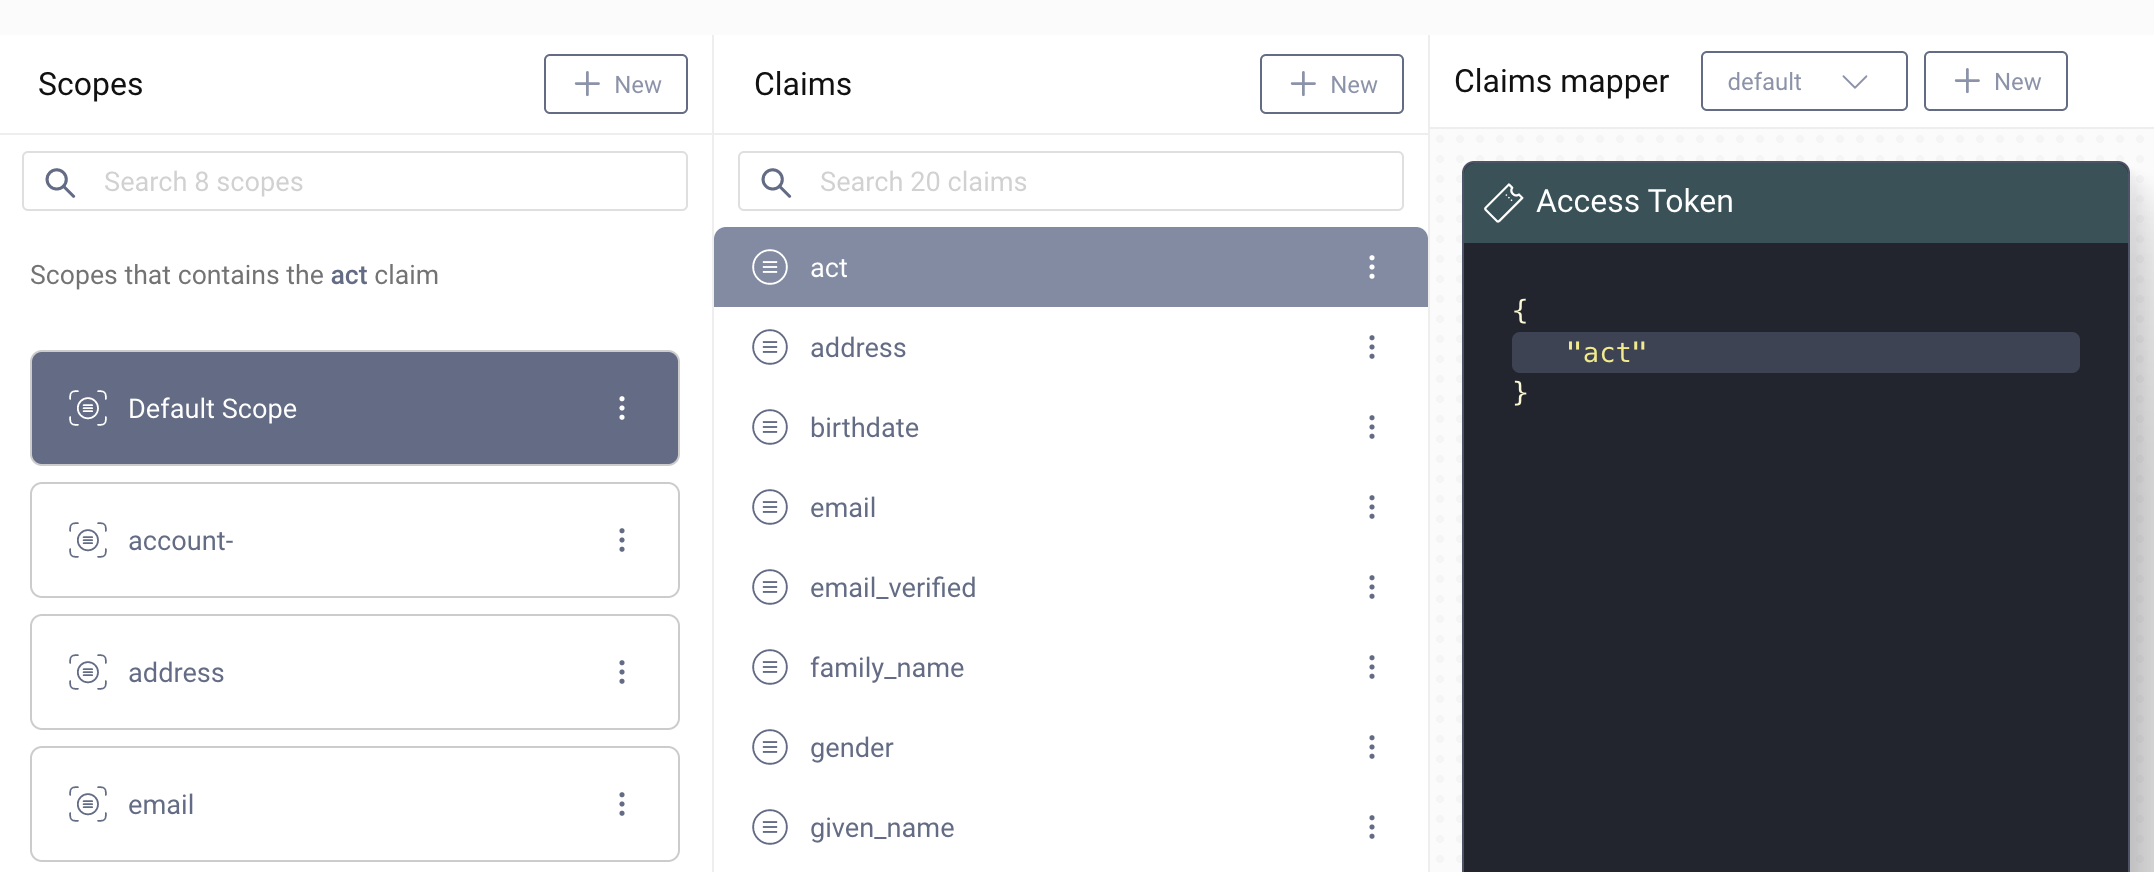
- Navigate to Profiles -> Token Service -> Scopes.
- Click on + New on the right upper corner of the Claims pane.
- Name the new claim
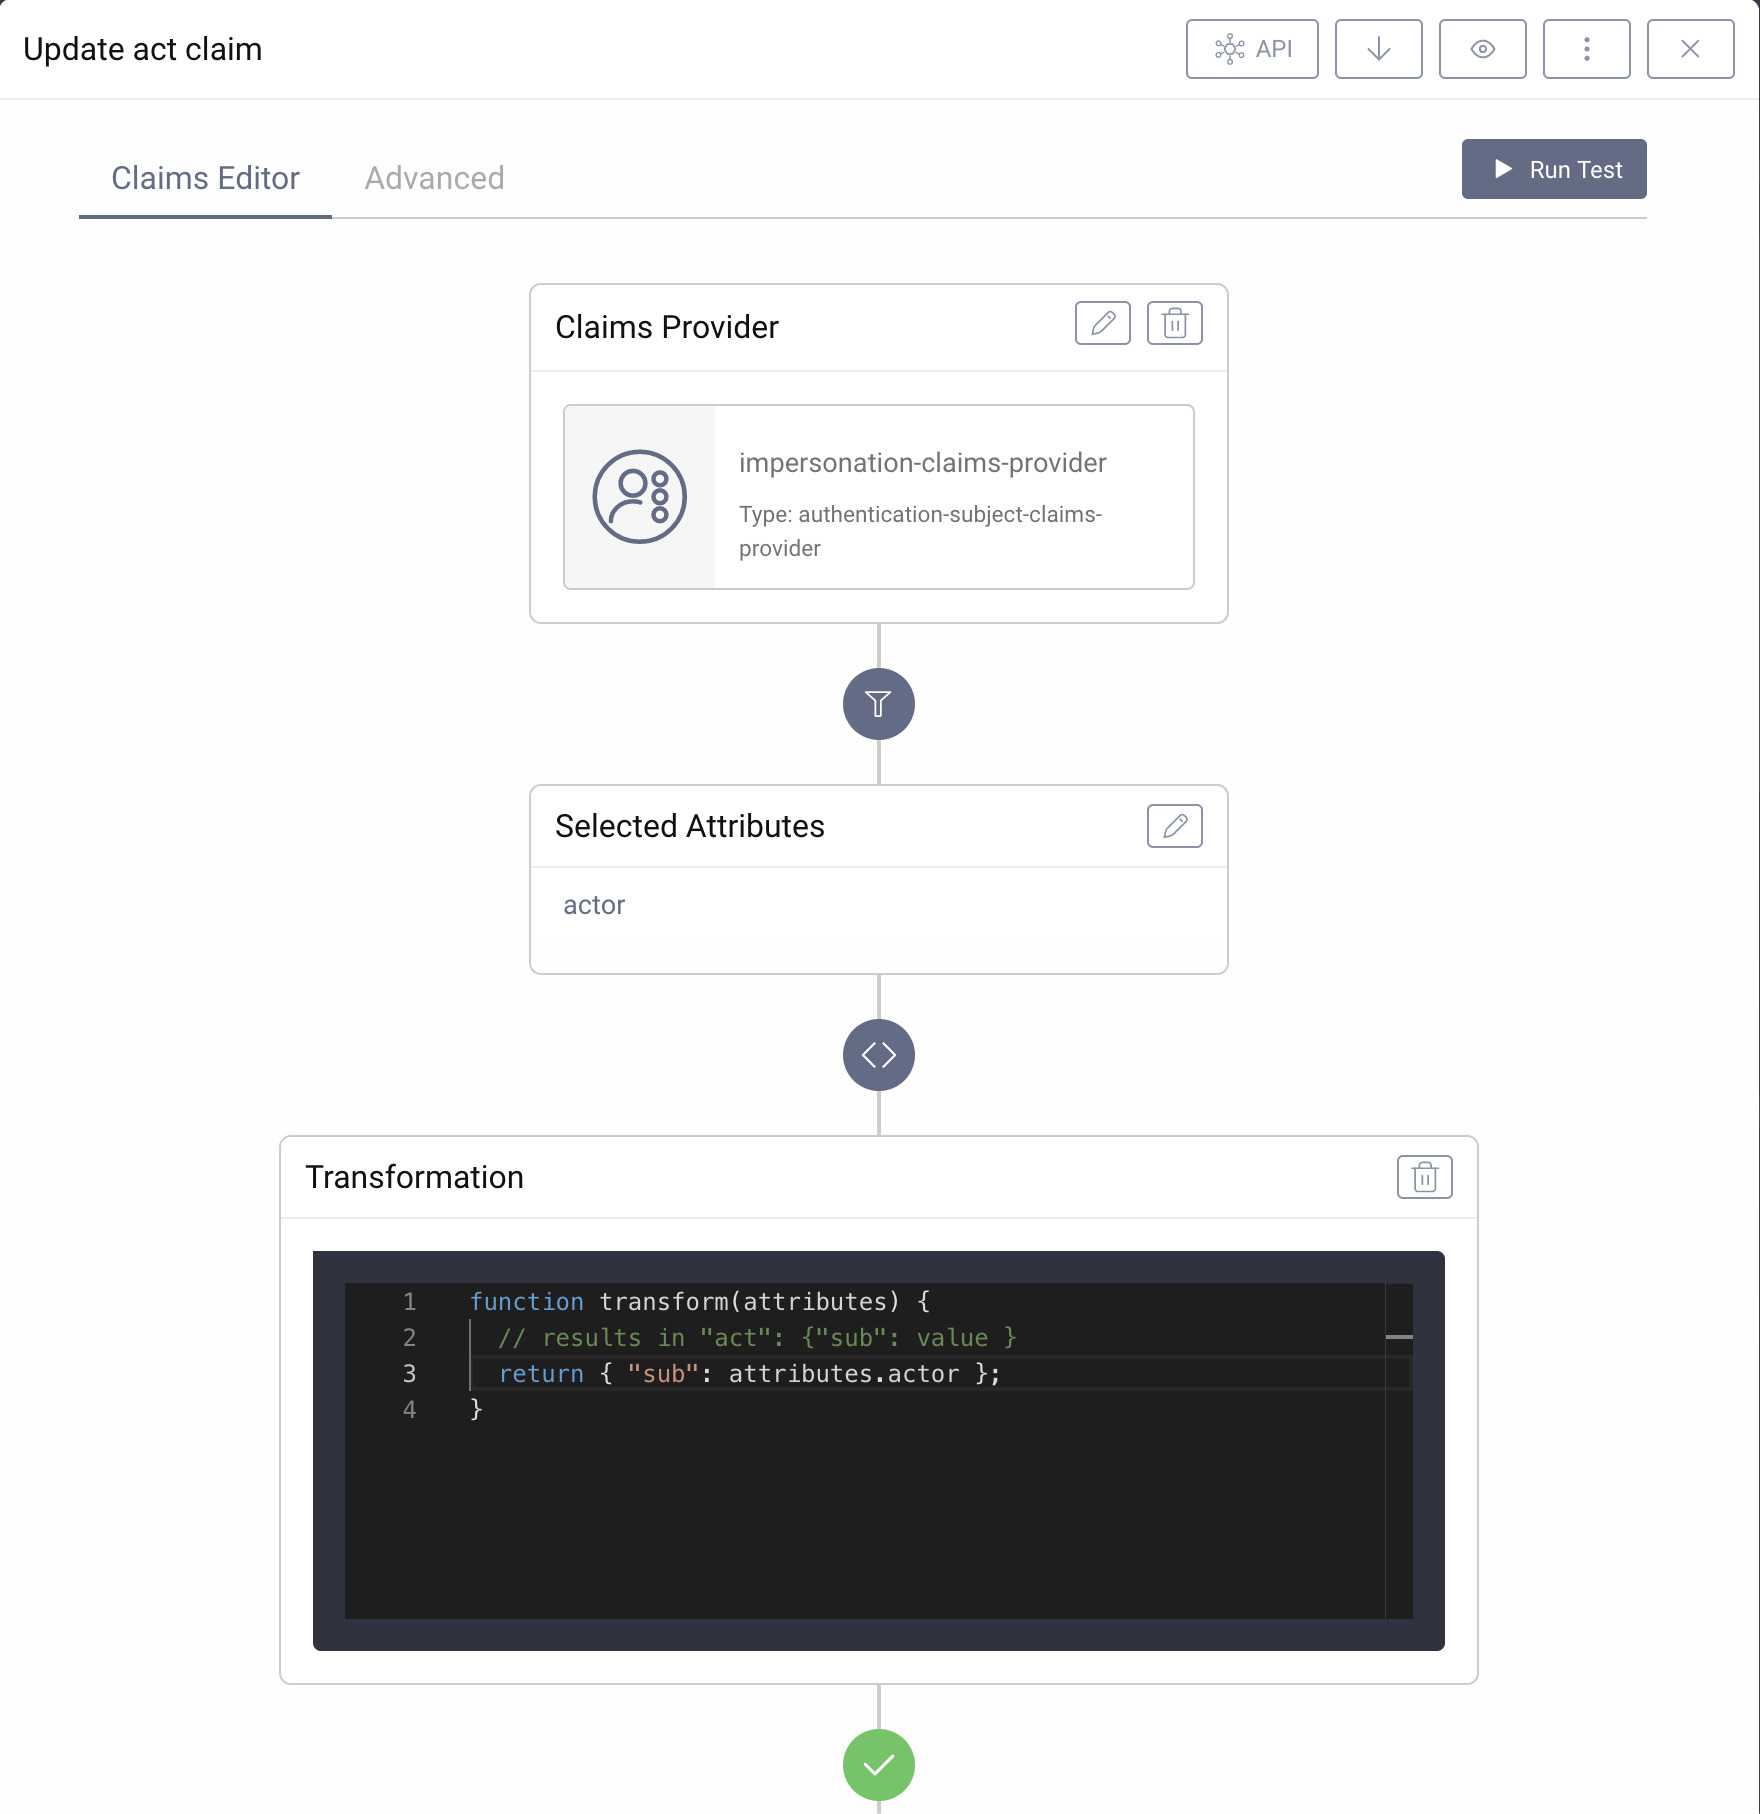
actand click on Create. - In the editor choose the custom Claims Provider from above.
- Click on the pencil to edit the list of selected attributes.
- Enter
actorin the text field for the attribute. Click on Add Attribute. Close the window "Select Attributes". - In the transformation box click on + Add.
- Change the transformation to the following code:
function transform(attributes) {// results in "act": { "sub": value }return { "sub": attributes.actor };}
- Close the editor.
Add the claim to the default Access Token.
- Select
Default Scopefrom the Scopes pane. Click on the +-button to add a new claim to the scope. - Select
actfrom the list. - Now just drag the
actclaim from the claims pane and drop it on the Access Token pane. - Commit the configuration changes.
To test the flow, perform a standard authorization request (e.g. using OAuth Tools). Authenticate with your credentials and enter an email for the test account.
When you introspect the received token, you can verify that the token contains an act claim with your userid and a sub claim with the email of the test account.
Issue Token
In this example use case only testers should be able to impersonate other users. Therefore, add a custom Token Procedure that only issues new tokens if the request complies to the business rules.
- In the admin UI, navigate to Profiles -> Token Profile -> Endpoints, then expand the endpoint with
oauth-tokentype. - Add a new procedure to the Authorization Code flow, by opening the procedures dropdown and selecting + New Procedure. Name the procedure appropriately. If you want to be able to use the impersonation feature in other flows, you will have to create separate procedures for them.
- A pop-up with the procedure code will open. Add the following parts to the procedure before issuing any delegation or tokens:
function result(context) {var delegationData = context.getDefaultDelegationData();var accessTokenData = context.getDefaultAccessTokenData();var clientid = context.client.id;var actor = accessTokenData.act ? accessTokenData.act.sub : undefined;var subject = context.subjectAttributes().subject;if(!isAuthorized(clientid, actor, subject)) {throw exceptionFactory.unauthorizedException("The user " + actor + " is not allowed to act as '" + subject + "' using the client " + clientid);}...return responseData;}
The function isAuthorized() implements the business rules and returns true if the request complies with the rules. It can be a simple check whether the subject is on a list, or maybe a more complicated operation which takes
into account other parameters from the authorization object. A simple example for a check:
function isAuthorized(clientid, actor, subject) {// No impersonationif (!actor || actor == subject) {return true;}// Only allow impersonation for specific client and usersif (clientid == 'test-client') {if (actor == 'tester') {// Restrict the accounts the user is allowed to impersonatereturn subject.toLowerCase().startsWith('test');}}return false;}
- Remember to save the procedure and Commit changes to the configuration.
To test the flow, perform a standard authorization request (e.g. using OAuth Tools). Authenticate with your credentials and enter an email for the test account. Test with different values for the test account and note that the server will return an HTTP error 401 "unauthorized" in case the request does not comply with the business rules. Take a look at the ID token and note that the subject matches the test account which means that impersonation affects both the client and backend.
Custom Token Issuer
The example validation uses hard coded identifiers, whereas a real implementation could implement this more generically. Watch Using Custom Token Issuers for further info.
Conclusion
The numerous options to customize flows allow a seamless implementation of an impersonation flow. With a few scripts and adaptions on the server side any client running OAuth and OpenID Connect can add support for impersonation through the Curity Identity Server.
Customer Stories
Learn how organizations run identity and API security at scale.
Read customer storiesWas this helpful?