Integrating with the Cloudflare Gateway
On this page
The Split Token Approach
The Split Token approach is a variation of the Phantom Token pattern in which you expose opaque tokens to the outside world and leverage the power of an API Gateway to handle JWTs inside of your infrastructure. This pattern helps you to further limit the network traffic between the Gateway and the Token Service, at the same retaining high levels of security.
If you want to learn more about the pattern itself have a look at the Split Token Approach article.
Prerequisites
In order to complete this tutorial you'll need:
-
A Cloudflare account with a website configured to use the Cloudflare CDN. You'll need
Unlimitedworkers plan in order to use the Workers KV store. -
Your Cloudflare accountId and sites zoneId will be needed. You can check these values on the Overview page of the Cloudflare dashboard. In this tutorial we'll use the following values:
- accountId:
894..a6c - zoneId:
13e...b2e
- accountId:
-
The
wranglertool to deploy the Worker's code. Have a look at the documentation if you need to install the tool. -
A microservice which exposes an endpoint through the Cloudfare CDN. The endpoint should be secured with a JWT. Have a look at the Express tutorial to learn how to enable such security in a Node.js application using the Express framework.
-
The Curity Identity Server configured at least with the example configuration. You'll need the Curity Identity Server version 5.1.0 or higher to complete this tutorial.
Setup Cloudflare
Assuming that you have a page configured to use with the Cloudflare CDN, you'll need to complete the following steps in order to start using the Split Token approach:
- Create a Worker KV Namespace.
- Create a Worker which will take care of preparing the JWTs.
Create a Worker KV Namespace
The KV store is Cloudflare's simple and very efficient key-value database. You need a namespace in this store, which will cache the token parts sent by the Curity Identity Server. To create a KV Namespace:
- Go to your site's dashboard on the Cloudflare page.
- From the menu on the of the page choose Workers.
- On the Workers page click the Manage KV namespaces button.
- Choose a suitable name for the namespace and click Add. You will see your new namespace in the table below, together
with its ID. You will need this later on. We'll use the value
5ad...0a7in this tutorial.
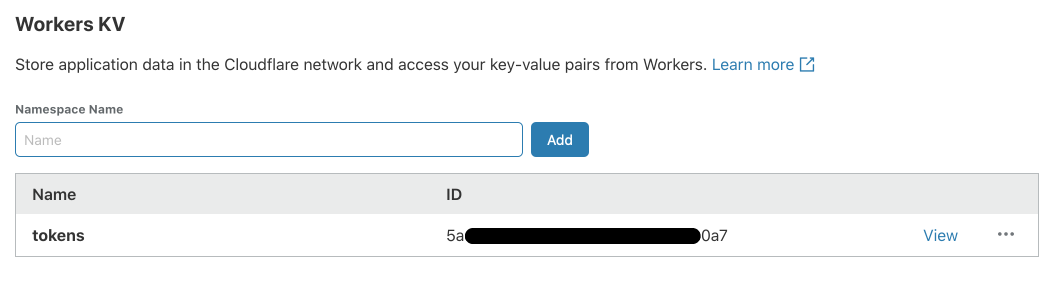
The KV Namespace is now ready to cache the tokens. You can click the View button to see the contents of your namespace.
Create a Worker
Next you'll need a Worker. A Cloudflare worker is a Node.js script which runs whenever a requests comes to a route configured to use the given worker. To create a worker for the Split Token approach:
- On your machine, generate a new worker, by running:
wrangler generate split-tokens-worker
Note that this will create the split-tokens-worker directory in your current location.
- In the
split-tokens-workerdirectory edit thewrangler.tomlfile and put the following contents inside of it:
name = "split-tokens-worker"type = "webpack"account_id = "894..a6c"workers_dev = falsezone_id = "13e...b2e"route = "example.com/*"kv-namespaces = [{ binding = "TOKENS", id = "5ad...0a7" }]
A quick explanation of the settings:
-
type = "webpack"is needed so that we can use therequireclause in the JavaScript code and thus import external classes. -
accountIdis your Cloudflare account ID. -
workers_dev = falsemeans that you'll attach the worker to a route in a zone. This also means that the next two settings are required if this one is set tofalse. -
zone_ididentifies your Cloudflare site. -
routeprovides Cloudflare with information on which route should the worker fire. We want the Gateway to glue the split token on every route, hence the asterisk at the end. -
kv-namespacesis a list of KV Namespace mappings. Each entry takes a KV namespace ID and abindingwhich is the variable name under which this namespace will be available in the worker script. -
Open the
index.jsfile and replace the contents of the file with the following code:
import crypto from 'crypto';addEventListener('fetch', event => {event.respondWith(handleRequest(event.request))})/*** Respond to the request* @param {Request} request*/async function handleRequest(request) {// Check wether the Authorization header is present and is in the form "Bearer ..."const authorizationHeader = request.headers.get('Authorization');if (!authorizationHeader) {return new Response(null, { status: 401, headers: { 'WWW-Authenticate': 'bearer' }});}const headerParts = authorizationHeader.split(' ');if (headerParts.length != 2 || headerParts[0] != 'Bearer') {return new Response(null, { status: 401, headers: { 'WWW-Authenticate': 'bearer' }});}const token = headerParts[1];// hash the value of the token from the requestconst hashedToken = crypto.createHash('sha256').update(token).digest("base64");// fetch the token value from the cacheconst tokenValue = await TOKENS.get(hashedToken);if (!tokenValue) {return new Response(null, {status: 401, headers: { 'WWW-Authenticate': 'bearer, error=invalid_token'}});}// Glue the token together and proxy the request to the APIconst authValue = 'Bearer ' + tokenValue + '.' + token;const newRequest = new Request(request);newRequest.headers.set('Authorization', authValue);return fetch(newRequest);}
- publish the worker to Cloudflare, by running the following command:
wrangler publish
Now, your CDN is ready to use the Split Token approach. On each request to your domain the worker will fire and try to get the corresponding JWT part from the cache.
Setup Curity Identity Server
Now you need to setup the Curity Identity Server to respond to clients with the split token and to properly populate the cache in Cloudflare. To do that you need to:
- Create a Token Procedure, that will modify the access token and return only the signature part.
- Create an Event Listener plugin.
- Enable the plugin.
Token Procedures are a way of modifying the data that is returned by the different endpoints exposed by the Curity Identity Server. You can read more about token procedures in the procedures documentation.
Plugins, on the other hand, are a way of expanding functionality of the Curity Identity Server using the Java SDK. You can read more about plugins in the plugins documentation.
Create the Token Procedure
To create the Token Procedure that will modify the access tokens do the following:
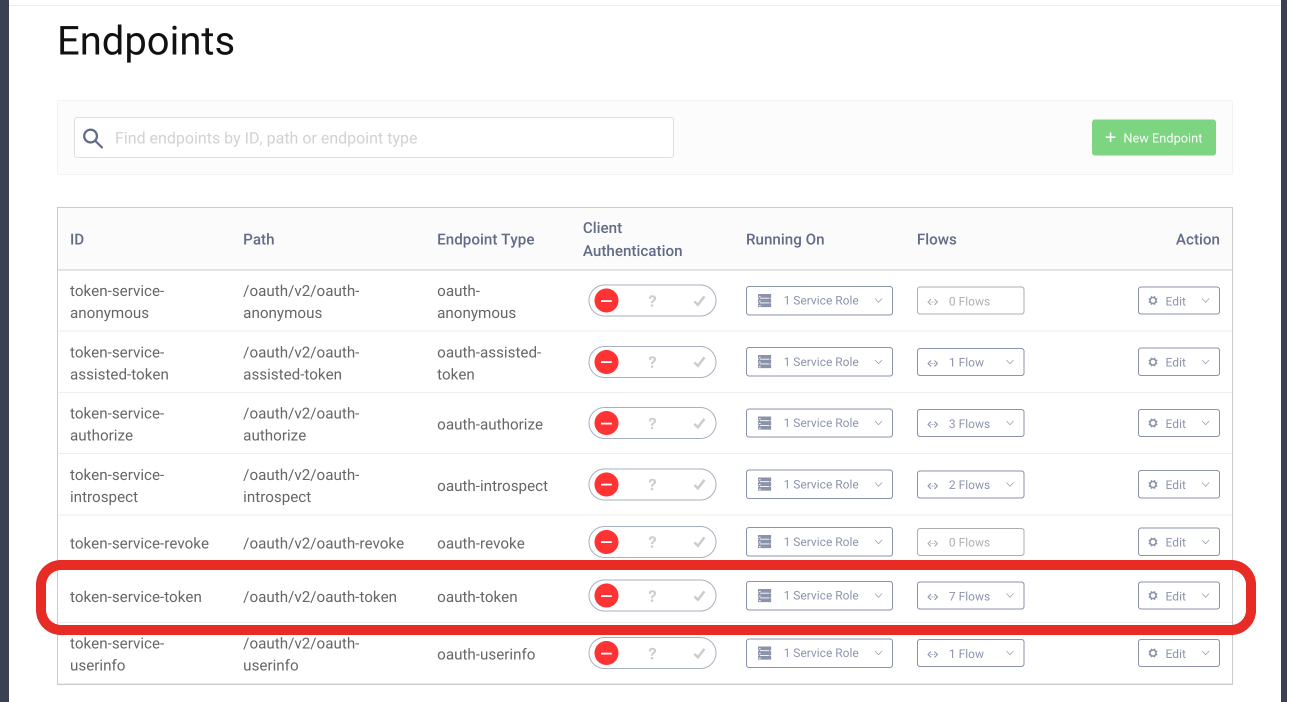
- Go to Profiles > Token Service > Endpoints, find the endpoint with the type
oauth-tokenand click the select box in the Flows column.
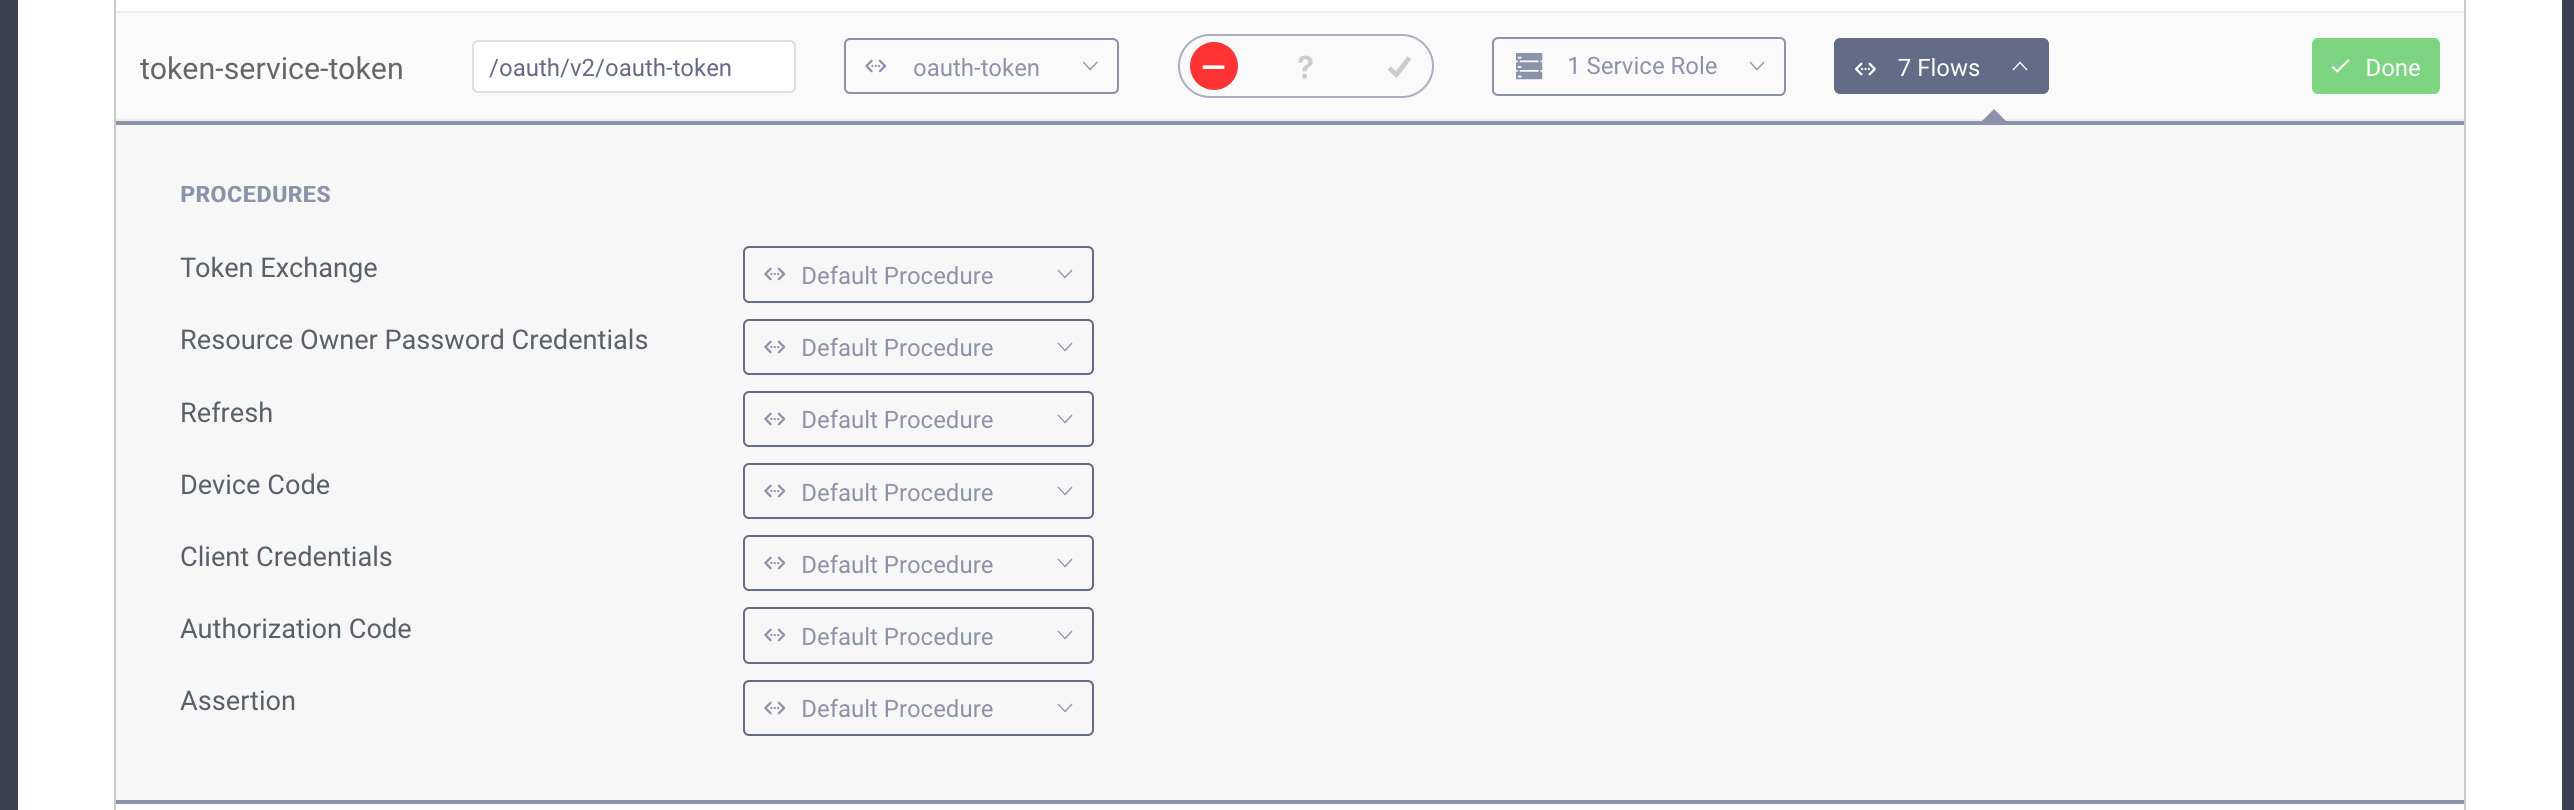
- Next find the "Authorization Code" procedure and click the select box next to it. Enter a name for your procedure and click save.

- A popup will appear where you can type the procedure code. Replace the code in the popup with the following one:
function result(context) {var delegationData = context.getDefaultDelegationData();var issuedDelegation = context.delegationIssuer.issue(delegationData);var accessTokenData = context.getDefaultAccessTokenData();var issuedAccessToken = context.getDefaultAccessTokenJwtIssuer().issue(accessTokenData, issuedDelegation);var token = issuedAccessToken.split('.')[2];var refreshTokenData = context.getDefaultRefreshTokenData();var issuedRefreshToken = context.refreshTokenIssuer.issue(refreshTokenData, issuedDelegation);var responseData = {access_token: token,scope : accessTokenData.scope,refresh_token: issuedRefreshToken,token_type: 'bearer',expires_in: secondsUntil(accessTokenData.exp)};if (context.scopeNames.contains('openid')) {var idTokenData = context.getDefaultIdTokenData();var idTokenIssuer = context.idTokenIssuer;idTokenData.at_hash = idTokenIssuer.atHash(issuedAccessToken);responseData.id_token = idTokenIssuer.issue(idTokenData, issuedDelegation);}return responseData;}
Note lines nr 7 and 8 - this is where we take the original JWT from an issuer and leave only the signature part.
- Click the Update button to save changes in the procedure. You can then close the popup. Save and Commit changes to the server.
Install the Event Listener plugin
An Event Listener plugin lets you run code when one of the many different events in the Curity Identity Server occurs.
The one we'll use, listens to events of type IssuedAccessTokenOAuthEvent, so it will run whenever the Curity Identity
Server issues an access token.
- Download the latest release of the plugin from the GitHub repository.
If you prefer to build from source, download the code from the repository and run
mvn packge. The jar will be saved in the/targetdirectory. - Create a directory for the plugin in your Curity Identity Server plugins directory:
$IDSVR_HOME/usr/share/plugins:
mkdir $IDSVR_HOME/usr/share/plugins/cloudlfare-token-publisher
- Copy the downloaded jar file to the plugins directory:
cp identityserver.plugins.events.listeners.cloudflare-token-publisher-0.1.0.jar $IDSVR_HOME/usr/share/plugins/cloudlfare-token-publisher/
- Restart the Curity Identity Server.
The plugin will now be available in the Curity Identity Server.
Enable the Event Listener
To enable the Event Listener plugin follow these steps:
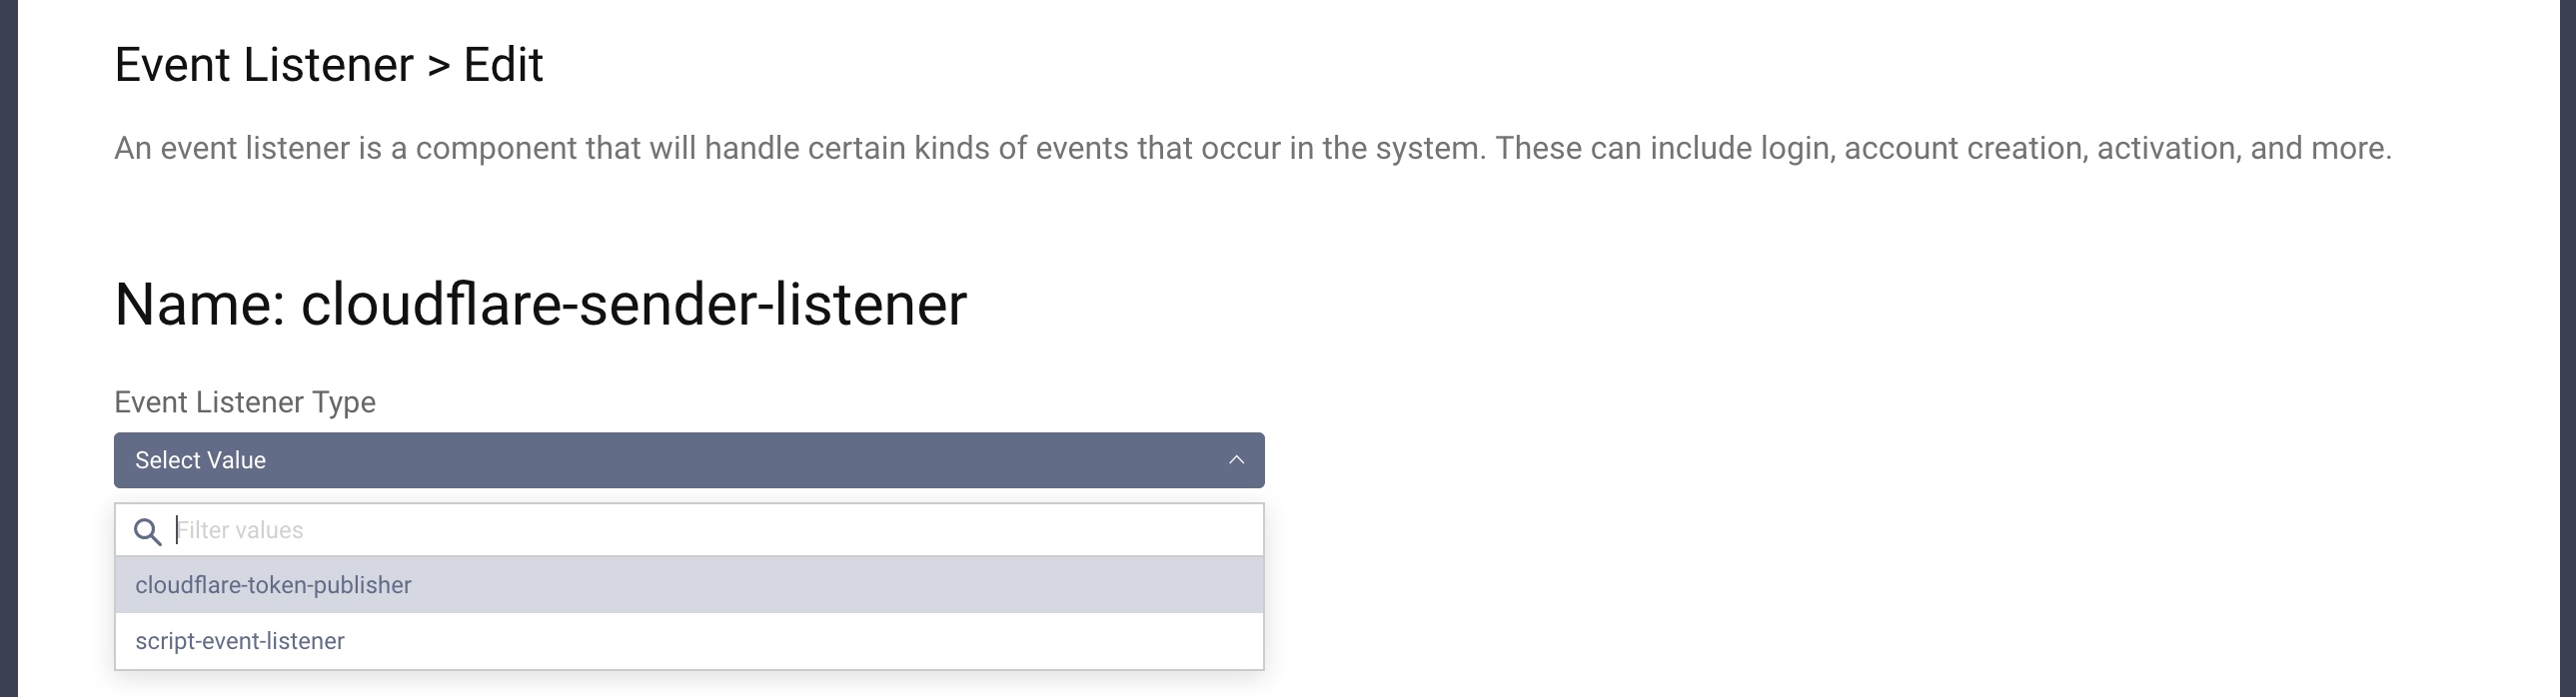
- In the admin UI go to System > Event Listeners and click the New Event Listener button.
- Enter a suitable name and hit Create.

- Select the type
cloudflare-token-publisher.
- Configure your listener by adding:
-- Your Cloudflare account ID.
-- A Cloudflare API token which has permissions to write to the workers KV store. Go here
to create API tokens. If you don't want to pick specific scopes you can use the Edit Cloudflare Workers preset.
-- The ID of the KV namespace generated earlier.
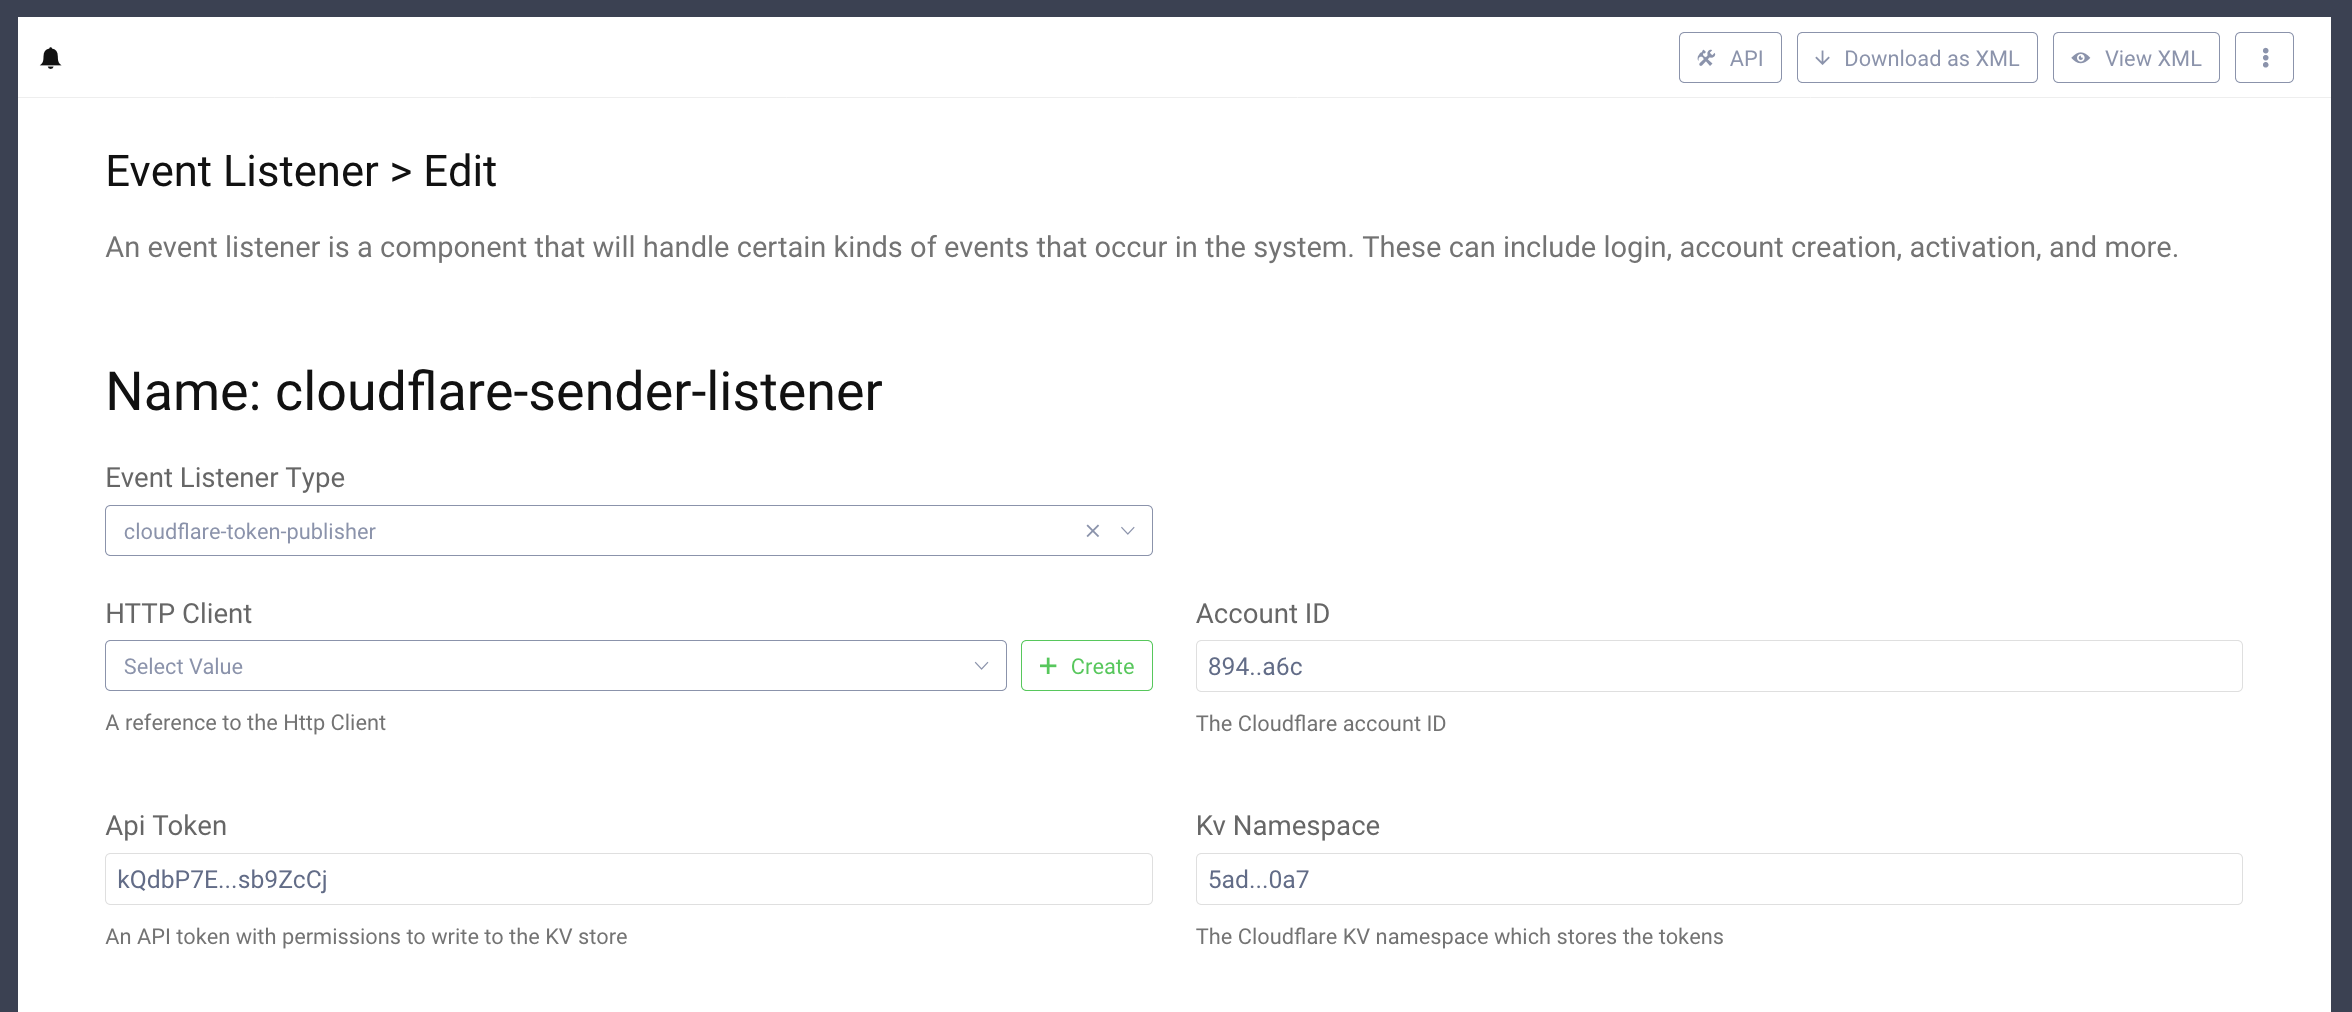
- Save and Commit the configuration changes.
Test the Flow
Everything is now in place to start testing the solution. First generate a token using one of the available flows. If you need to generate a new client use the tutorial here: Setup a Client.
To obtain a valid JWT you can use the online tool OAuth Tools which is a powerful tool to explore OAuth and OpenID Connect. You can easily add configuration of your Curity Identity Server and use any flow to generate a valid access token. If you're not sure how to create an access token using OAuth flows have a look at the Code Flow tutorial.
You will note that token you get is different from the ones you normally generate with the Curity Identity Server. It's much longer than an opaque token, but is not a JWT either - you will not see the typical dot-separated parts you find in JWTs.
The token should look something like this (line breaks added for readability):
bVklKyJloYrakUylwIjAhQucpkTAFbSiLM1i3sYu-_4hunLyxAXUzsY048sSohoRfhR0spSdHCJ1lbzLeddDQoXk0gQmXHAIaluTT4BESoi3HFm6whRZcx0G5wVO_FpSMLP2f3MJ0WGzTORJsDG89HC_jgwAeGRp2Q7V-0dhrUarqSrDl_Wa5fYdRRhvtZ2XTAx7Z31xqn215UDpFNML-6TrBuCgdbSEThS1yQ1ohP4s9LIa0rUiZDX4gVB5-DnbmVwB4k21qnG2qyN4IE0yWA1Im-CZjZfrEckVkURAiYke4b-BGVdIG-q1ns9tx25zd0wA0ERW9cpminAKY3C4cw
If you look into your Cloudflare KV namespace, you should see an entry containing the hash of your token and the value of the JWT. You can copy the value and use OAuth Tools to decode the JWT - you should see the claims that are in the head and body of the JWT.
Now, try to make a request to your API. Assuming that the API has a /secured endpoint send the following request:
curl http://example.com/secured -H "Authorization: bVkl...C4cw" -i
You should see a 200 response, as the API has received the whole token.
Conclusion
In the tutorial we showed how to setup the Split Token approach to work between the Curity Identity Server and Cloudflare. This example shows the basic usage and further tweaks might be needed in specific deployments. E.g. if you enable the refresh flow you would need to also modify the procedure serving tokens from the refresh flow so that it returns the split token. This tutorial gives you a starting point from which you can continue to work on the integration. The Curity plugin system and the Cloudflare workers together give you a powerful tool which can be tailored to suit your needs.
Resources
To learn more about some of the topics touched in this tutorial, have a look at these resources:
- The Curity Identity Server plugins documentation
- The Curity Java SDK
- An article on the Split Token Approach.
- An article on the similar Phantom Token Approach.
- Curity Event Listener plugin
- Cloudflare Workers
Customer Stories
Learn how organizations run identity and API security at scale.
Read customer storiesWas this helpful?