Working With Claims
On this page
Claims are pieces of information asserted by the Curity Identity Server, which end up in tokens or the user info endpoint response. If you're not familiar with how claims work, then have a look at this Introduction to Claims article. To issue claims, the Curity Identity Server must know two things:
- Which claims should end up in which tokens based on the client and requested scopes.
- From where to take values for the claims.
The first point is achieved with claims mappers and can be configured in the Curity Identity Server's admin UI using the Token Designer.
The second point requires the use of a claim source. The claim source need to be configured to populate the values of claims. This tutorial shows how to configure values for claims using the admin UI. The reader also learns how to test claim values from value providers.
Demo Video
The following video shows how to configure claim value providers when populating claims.

Create a Claim
To create a claim within a given token service profile go to Profiles → Token Service → Scopes. Add a new claim by clicking on the + button above the claims list. The token designer page will open, which first prompts for a claim source:
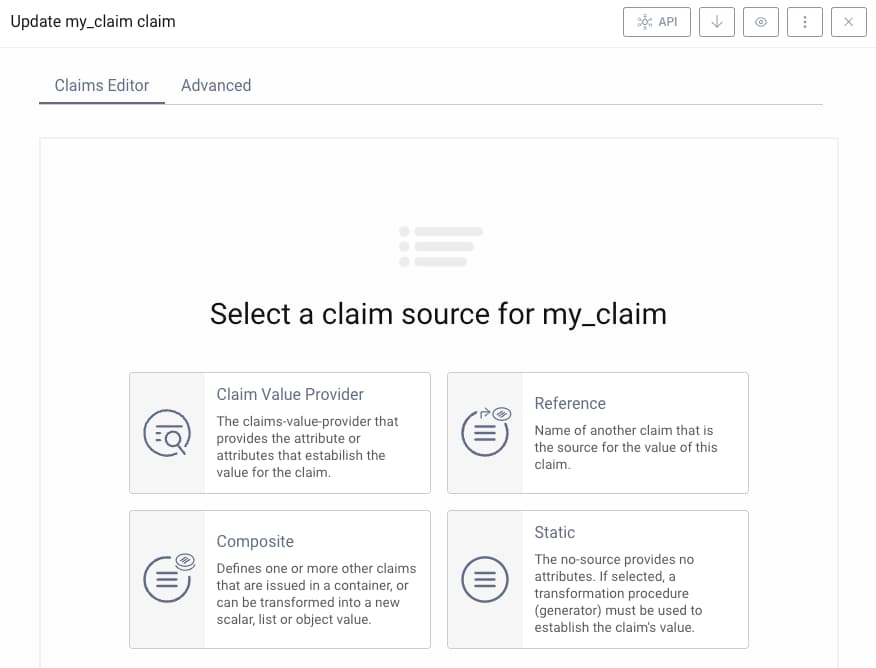
Claim Sources
Claim sources are a new feature in version 8.2 of the Curity Identity Server. If you are using a previous version then all claims are populated by claim value providers.
Once the claim source is chosen, the edit claim window appears. A number of options can then be used to control how the claim is issued, and the options differ depending on the claim source chosen. A claim value provider provides the most powerful options for populating dynamic claims, such as when providing different values per user. The reference, composite and static options provide extra useful ways to design claims:
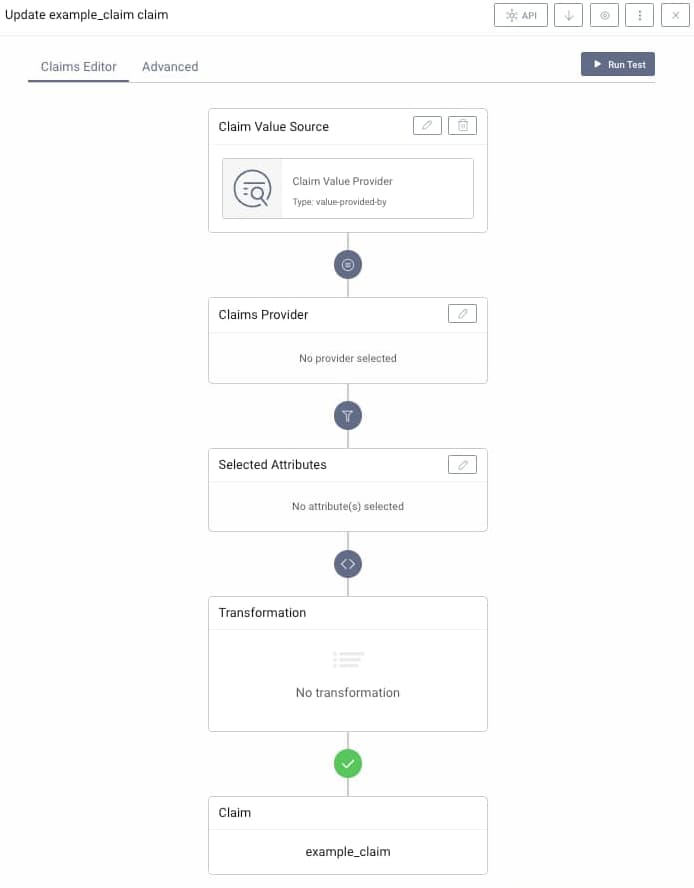
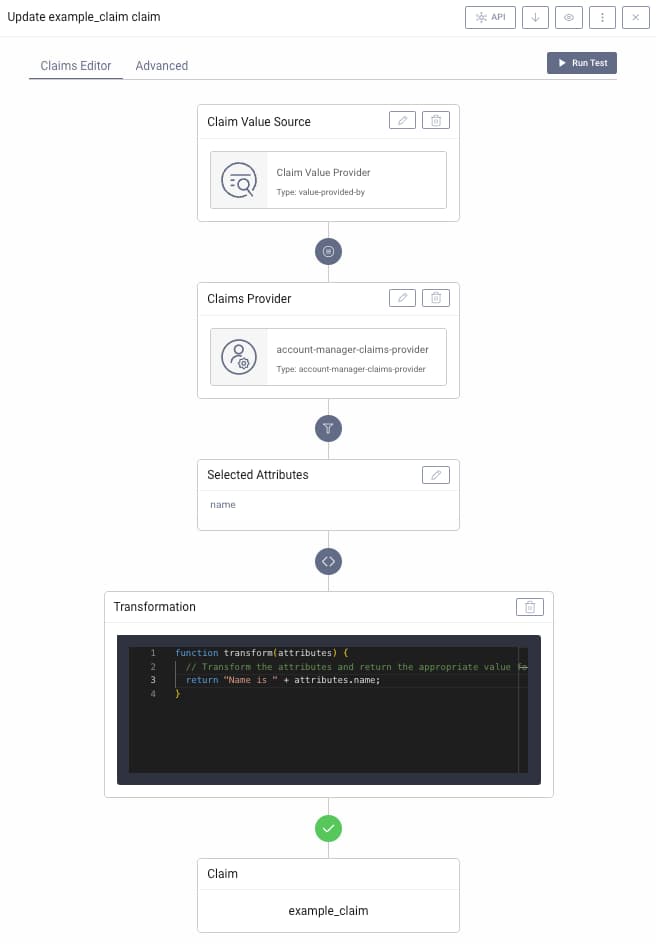
The following options are presented when using a claim value provider as the claim source:
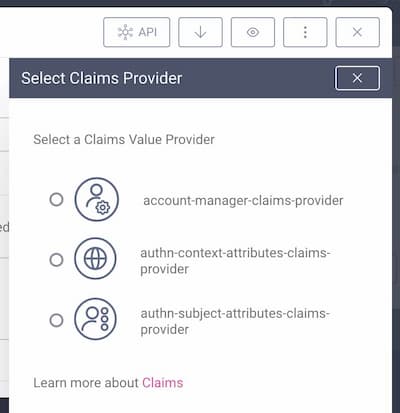
Choose the Claim Value Provider
Click on the Edit button in the Claims Provider panel. By default, there will at least be a claim value provider of type Account Manager available, the Account Manager Provider.
Configuring Claim Value Providers
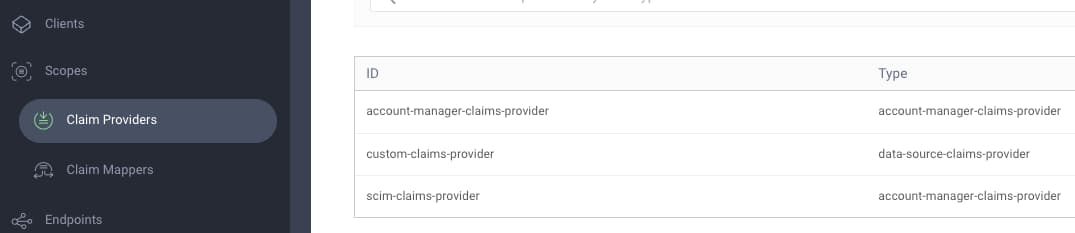
You can add additional claim value providers from the Claims Providers sidebar menu option. The documentation describes the different providers available in the Curity Identity Server, and the Salesforce code example shows how to create a custom claim value provider plugin.
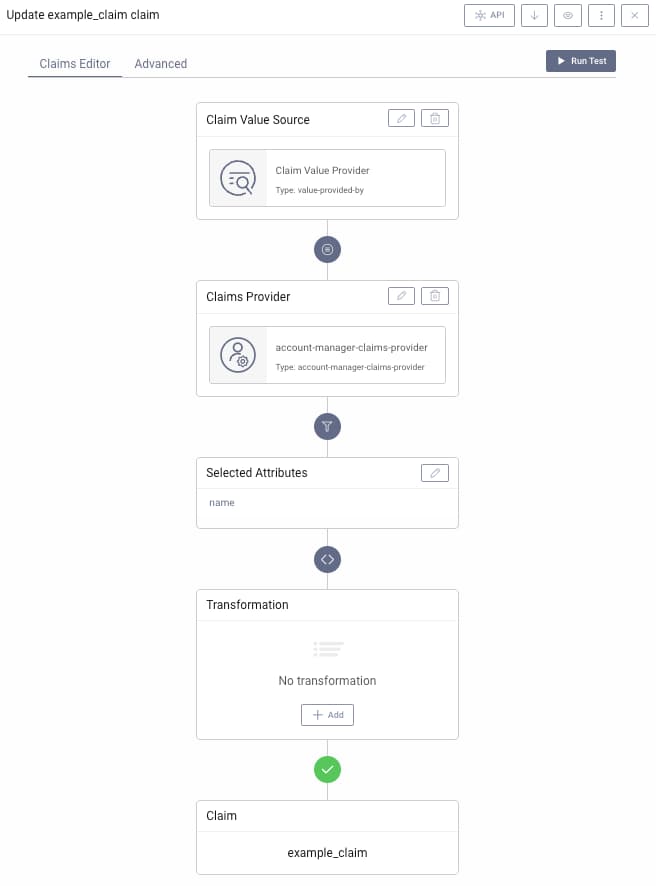
Select Attributes
Next, choose the attributes from the provider which will be used to create the value of the claim. For an Account Manager Provider these are fields of the user's profile. Depending on the setting of this provider, these fields are either the fields as present in a SCIM representation of that account, or, if enabled, the standard OpenID Connect profile claims (e.g. phoneNumbers in SCIM can be mapped to phone_number in OIDC).

The following options issue a simple claim based on an attribute of a claim value provider:
If a different claim value provider is used, the attributes depend on what the provider exposes. A common use case would be to use either Authentication Context Attributes Provider or Authentication Subject Attributes Provider, which expose, respectively, context and subject attributes.
Claims and Data Sources
Claim values can be populated from any data source. The implementing role based security tutorial shows how to issue custom claims from account data, and the implementing custom claims tutorial shows how to retrieve claims from an external data source, such as a microservice or database.
Transform Claims
Raw claim values can optionally be transformed before issuance. If only one attribute is selected as the source of value, then very often the transformation is not needed. The value of the attribute will be used as-is for the claim's value. In some situations, though, you might want to perform additional transformation of the value. A transformation is also required if more than one attribute is used as a source.
The transformation method is a JavaScript function that accepts the attributes object and returns a single result, which will be used as the claim's value. This value can be of a simple type, like string or number, or have a complex form, e.g. an object or array. In the following example a claim value provider is used, along with a transformation that uses string concatenation:
Test Runtime Claim Values
You can easily test the final value of claims whose source is a claim value provider. Doing so also enables you to verify the values of claims that use a reference or composite claim source. The testing panel is used, which avoids the need to run a whole authorization flow. Testing is done based on input data, chosen attributes and applied transformation.
To open the test panel click on the Run Test button in the upper right corner. You will see two tabs that run tests depending on where the attributes come from:
-
Subject - test with this option if you're using an Account Manager Claim Value Provider. This test picks the attributes from a user account registered in the provider's Account Manager.
-
Authentication Attributes - test with this option if you're using an Authentication Context Claim Value Provider or Authentication Subject Claim Value Provider.
Subject Attributes
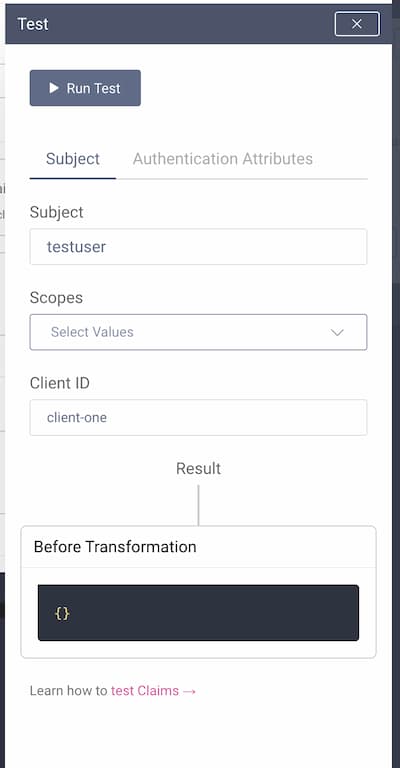
To run a test using attributes from a subject, first enter a username registered in the chosen Account Manager (the one that the Claim Value Provider uses). Attributes of the chosen account will be used as input to the test.
You can choose which scopes should be used for the test. You can leave that option empty. If you choose any scope, then the result will only contain a value if at least one of the selected scopes is associated with the tested claim.
Clients can have overrides for claims mappers. Next, choose a client to take into account potential overrides when running the test.
Note that entering the subject and client is mandatory to run the test.
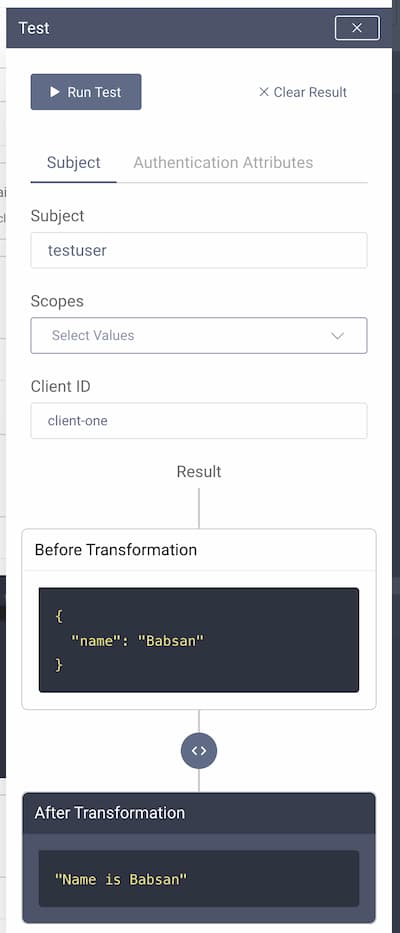
Click on the Run Test button at the top. You will see the result of running the value provider, both before and after any transformation.
Authentication Attributes
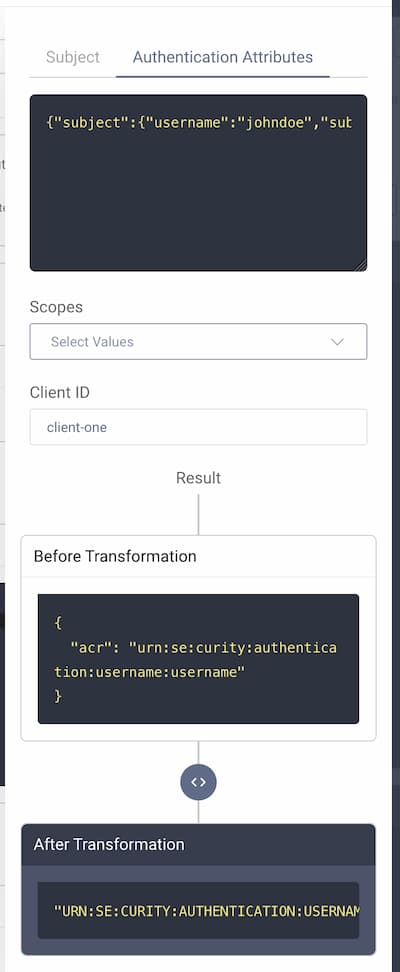
To run a test using attributes from the authentication flow, first enter the JSON object containing subject and context attributes. You can easily acquire this object by attaching a Debug Action to an authentication flow.
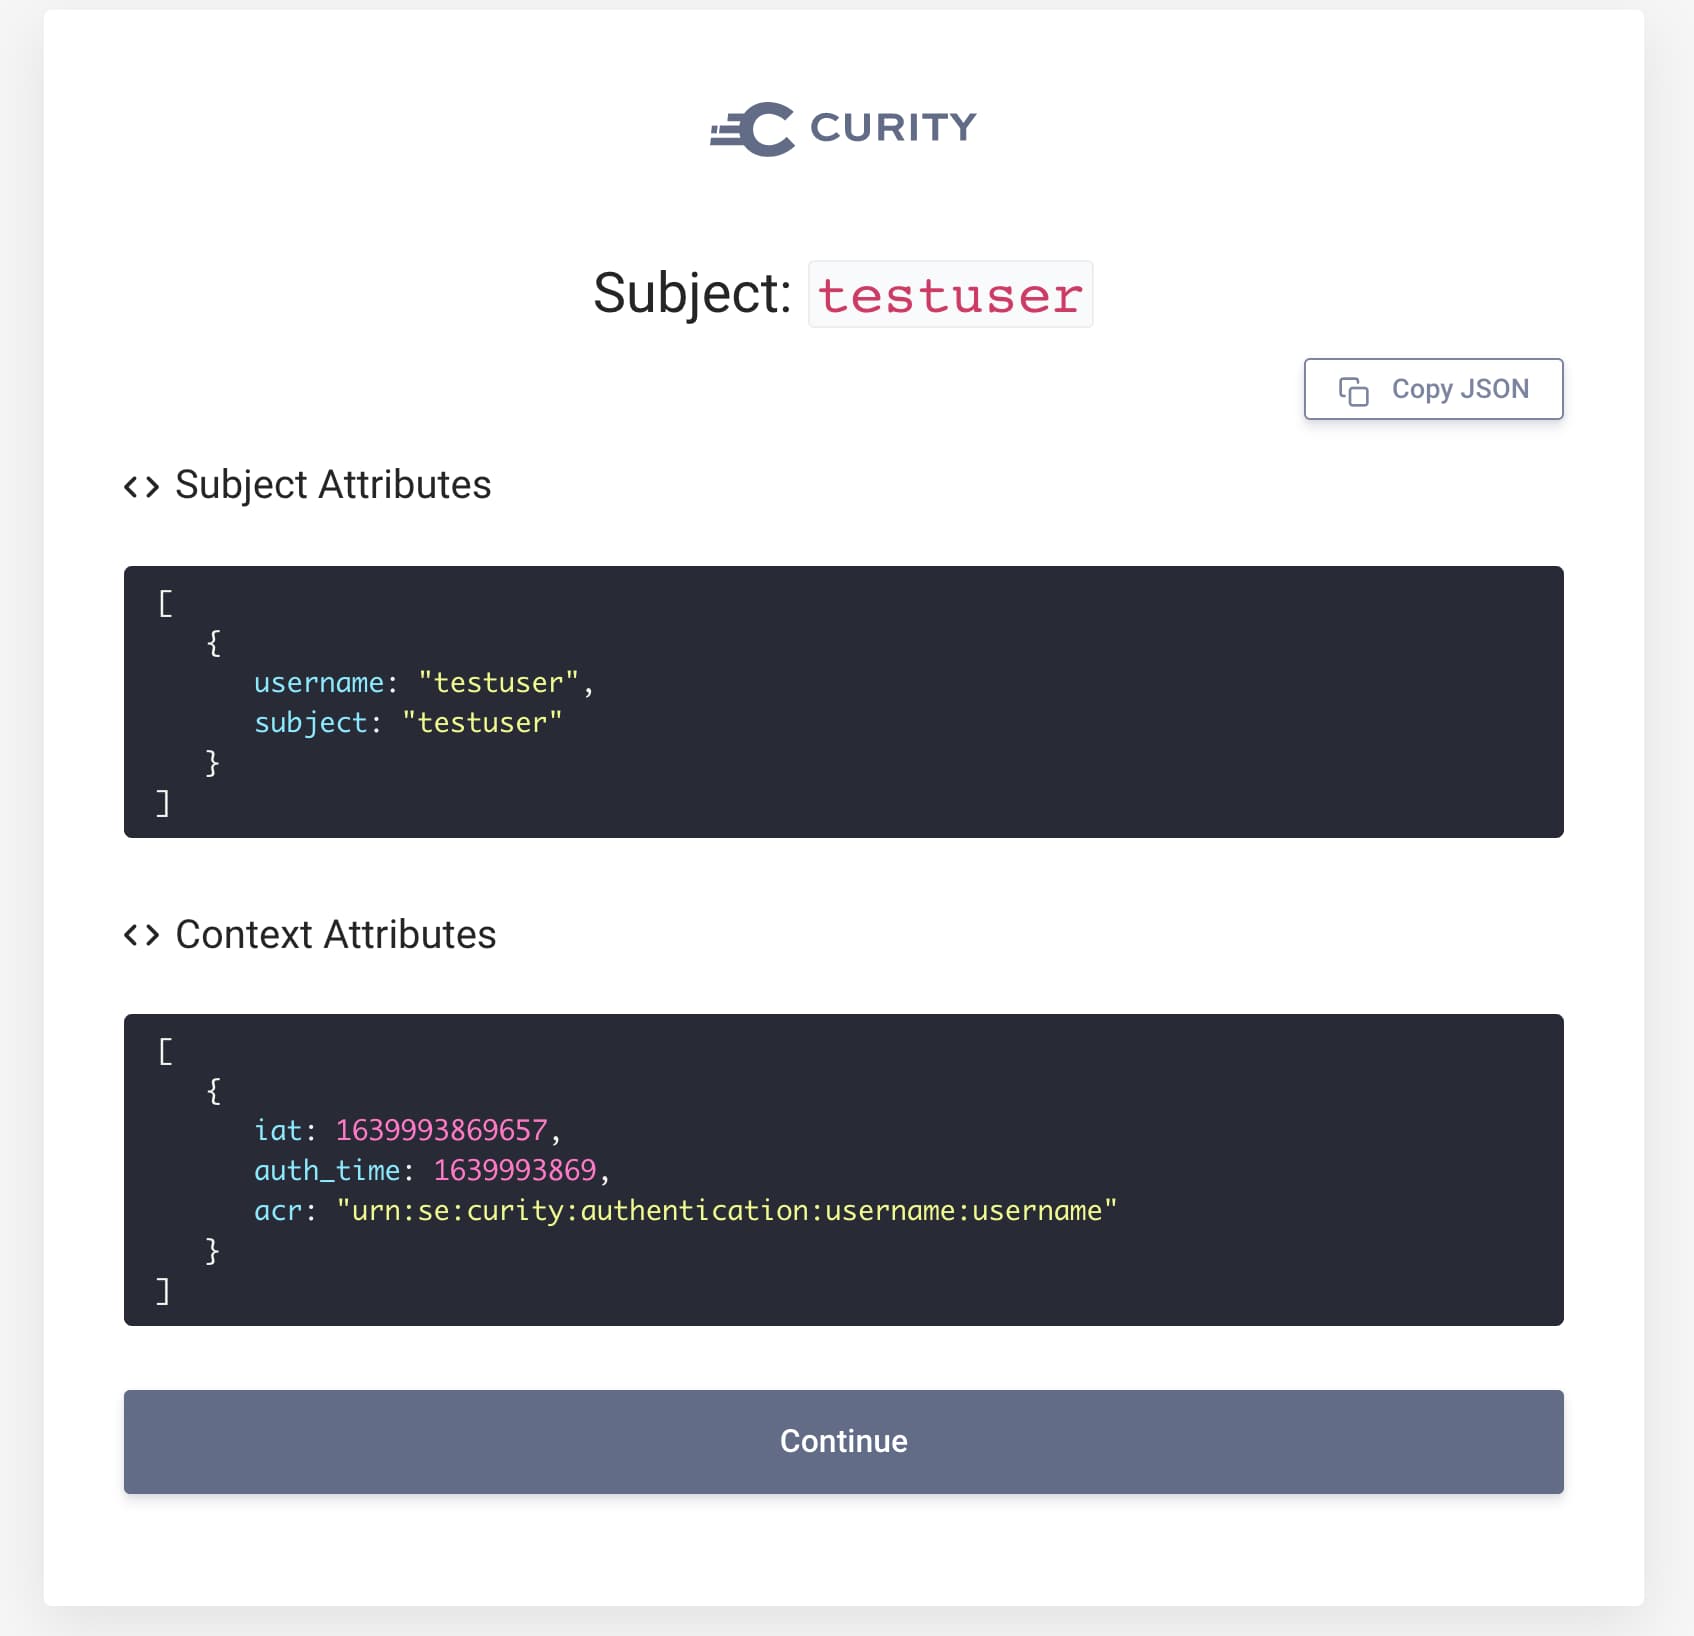
The debug action view has a button, which copies the whole attributes JSON object to clipboard. Simply paste it to the input field in the test tab.
You can choose which scopes should be used for the test. You can leave that option empty. If you choose any scope, then the result will only contain a value if at least one of the selected scopes is associated with the tested claim.
Clients can have overrides for claims mappers. Next, choose a client to take into account potential overrides when running the test.
Note that entering the attributes JSON object and client is mandatory to run the test.
Click on the Run Test button at the top. You will see the result of running the value provider, both before and after transformation.
Issuing User Attributes as Claims
It is common to want to issue claims for other user attributes, in addition to OpenID Connect claims. The User Management with SCIM tutorial describes how any standard or custom user attributes can be saved against user accounts, and stored according to the SCIM schema. To issue such values to tokens as claims, multiple claims providers can be used.
Issuing SCIM User Attribute Claims
To issue standard claims from the SCIM schema, the simplest option is to configure a second account manager claims provider, with the Map Account to OpenID Connect Claims option deselected. You can then issue built-in SCIM claims such as externalId and roles, as illustrated in the following screenshot.
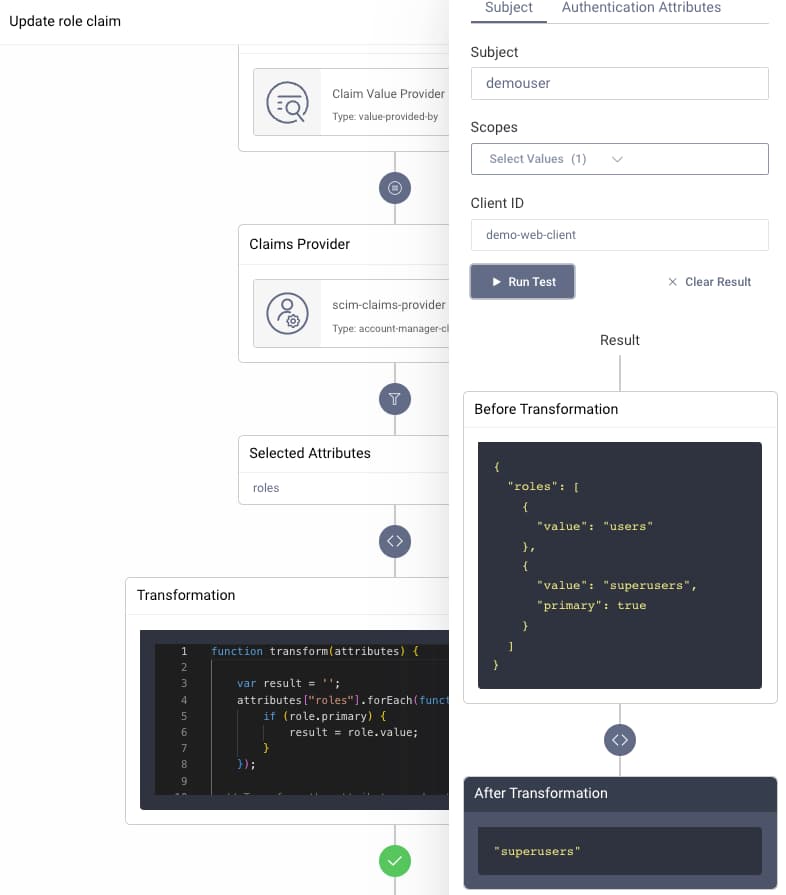
In this example the SCIM roles object array is also transformed using the following JavaScript, to pull out the role marked as primary, and to issue it as a simple string:
function transform(attributes) {var result = '';attributes["roles"].forEach(function(role) {if (role.primary) {result = role.value;}});return result;}
Issuing Custom User Attribute Claims
To issue custom user attributes stored against user accounts, that are not included in the SCIM schema, instead use a data source claims provider, and work with the raw data. You can then issue custom user attributes, as illustrated in the following screenshot, where a claim called customer_id is issued.
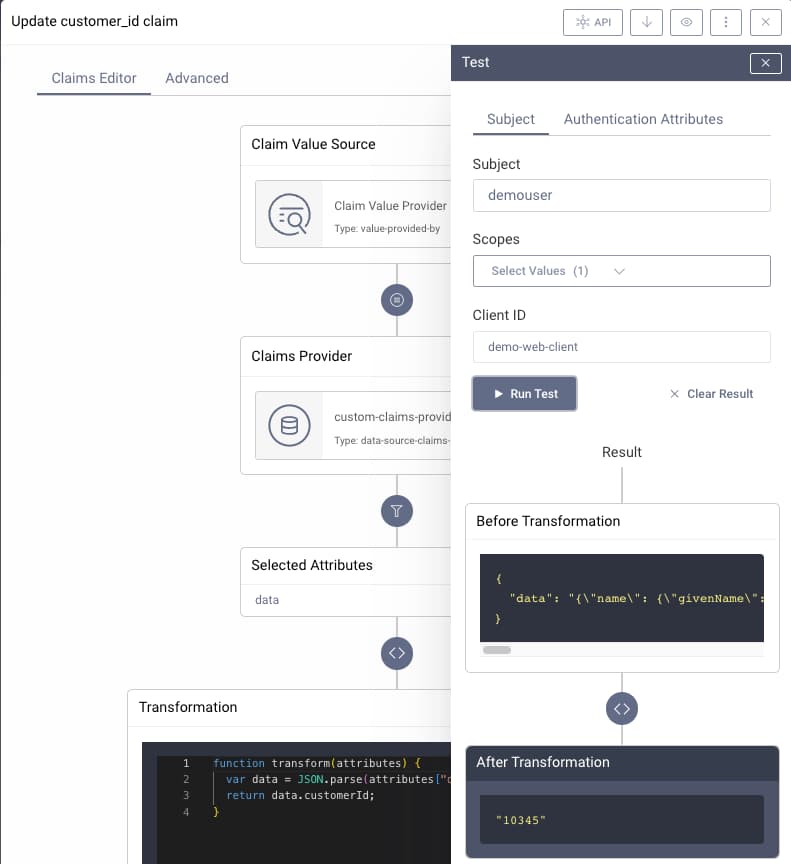
In this example, the raw attributes, stored as JSON, are deserialized to an object, and the value is then extracted using the following JavaScript procedure:
function transform(attributes) {var data = JSON.parse(attributes["data"]);return data.customerId;}
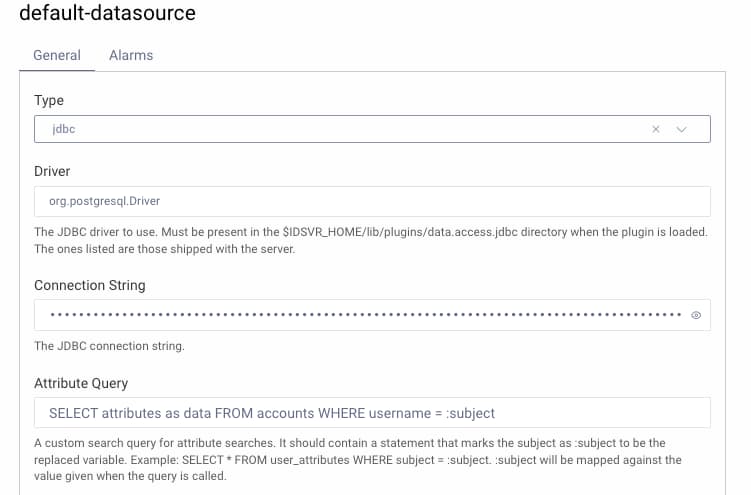
Here, the JavaScript procedure references fields from the attributes query of the data source used by the data source claims provider. This is configured under Facilities → Data Sources in the Admin UI:
Conclusion
The Token Designer's Edit Claim feature enables powerful ways to assign runtime values to claims. The feature also allows you to test runtime values of claims for different users, so that administrators have a good certainty of what the resulting claims will look like.
Customer Stories
Learn how organizations run identity and API security at scale.
Read customer storiesWas this helpful?