Hybrid Flow
On this page
OpenID Connect introduces a new grant for obtaining access tokens and ID tokens from the OpenID Provider (the Curity Identity Server), the Hybrid Flow. This flow is a mix of the Authorization Code Flow and the Implicit Flow. It allows the client to receive, for example, the ID token directly from the authorization endpoint, but use the code exchange to obtain the access and refresh tokens via a backchannel.
This tutorial explains the basics of the hybrid flow and how to configure it in the Curity Identity Server.
Overview
The hybrid flow looks like the code flow or implicit flow, but a different value is used for the response_type parameter. It is
either code token, code id_token or code id_token token:
Authorization Request and Response

-
The browser redirects to the authorization endpoint at the token service of the authorization server.
-
If the user is not yet authenticated, the token service redirects to the authentication service.
-
The user authenticates and is redirected back to the token service.
-
The authorization server redirects back to the client with appropriate parameters in the response, based on the value of the
response_typerequest parameter:- If the client used
code id_token, then the server returns the authorization code and an ID token.
- If the client used
Token Request and Response

- The client sends the authorization code to the token endpoint, like in the authorization code flow.
- The authorization server returns tokens, typically including the access token and the ID token. If the server settings permit, the authorization server also issues a refresh token.
RFC Reference
For reference, this flow is specified in section 3.3. of the OpenID Connect standard
Pre-requisites
This tutorial builds on the configuration setup described in the steps First Configuration and Configure an Authenticator under the menu Getting Started. If you have not gone through those steps yet, you can visit the guides by clicking on the links.
You may run this tutorial on a custom setup also, but keep in mind that names and URLs may be different, as well as the capabilities configured in the profiles.
Setup in the Curity Identity Server
Visit the Profiles screen and click the Token Service. On the left select Clients and click New.
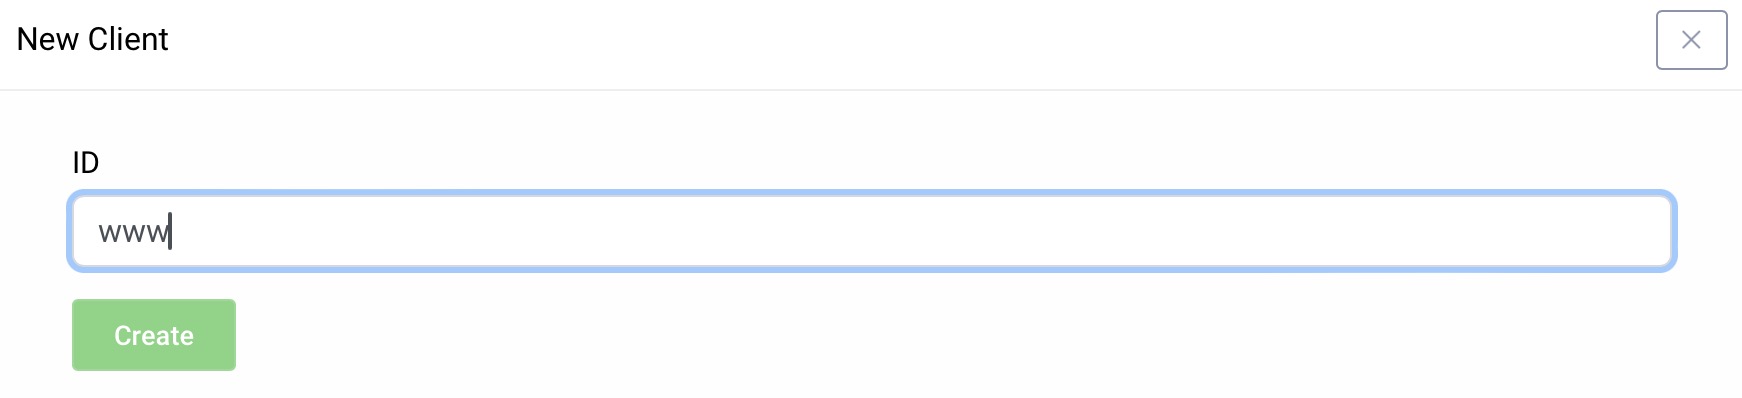
New Client
Give the client an ID (eg. www for a website client).
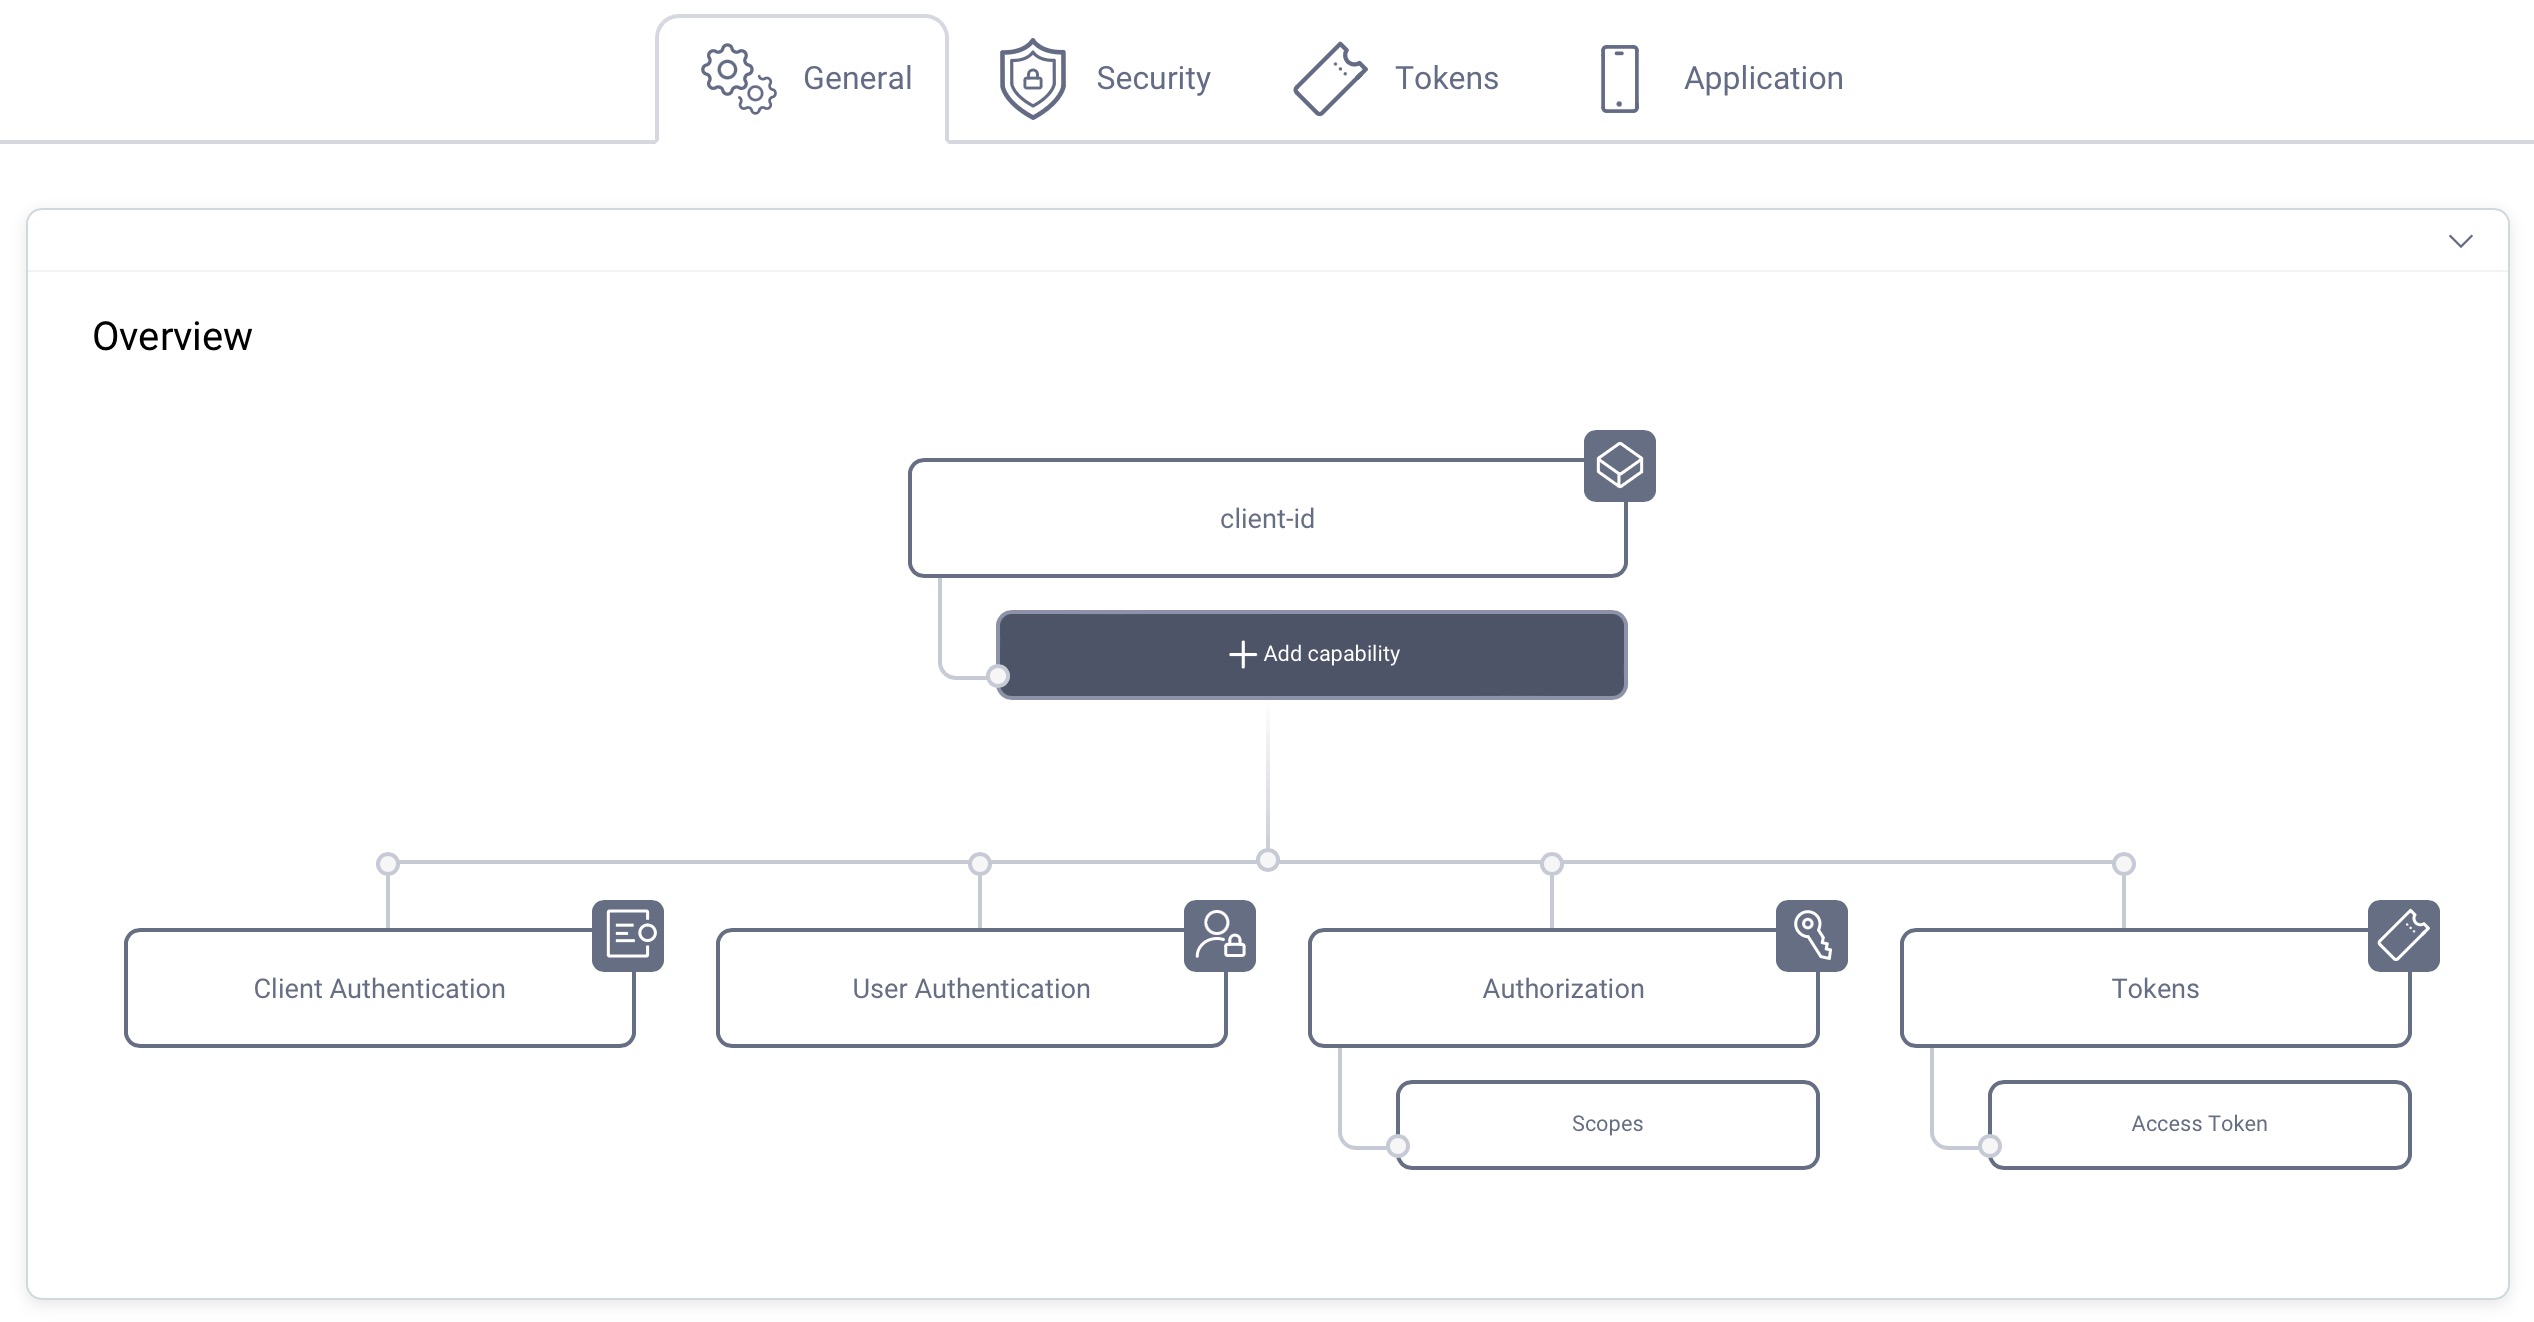
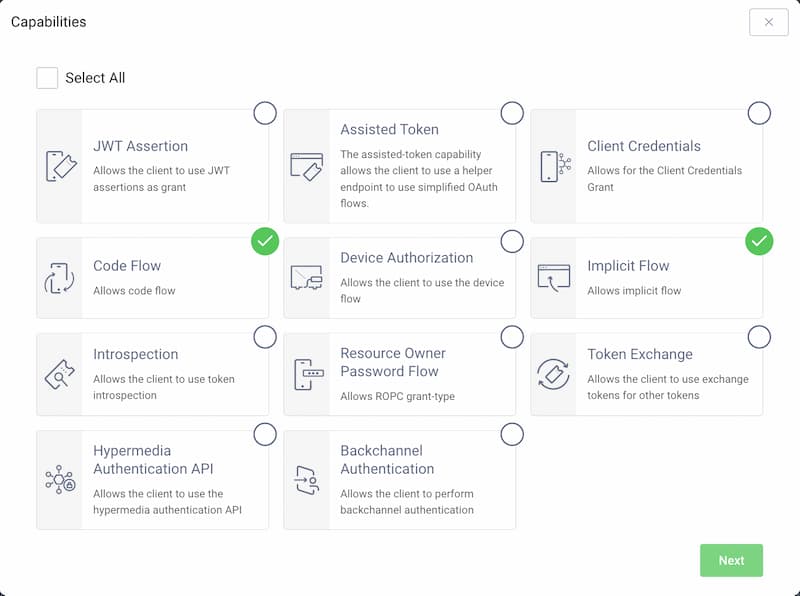
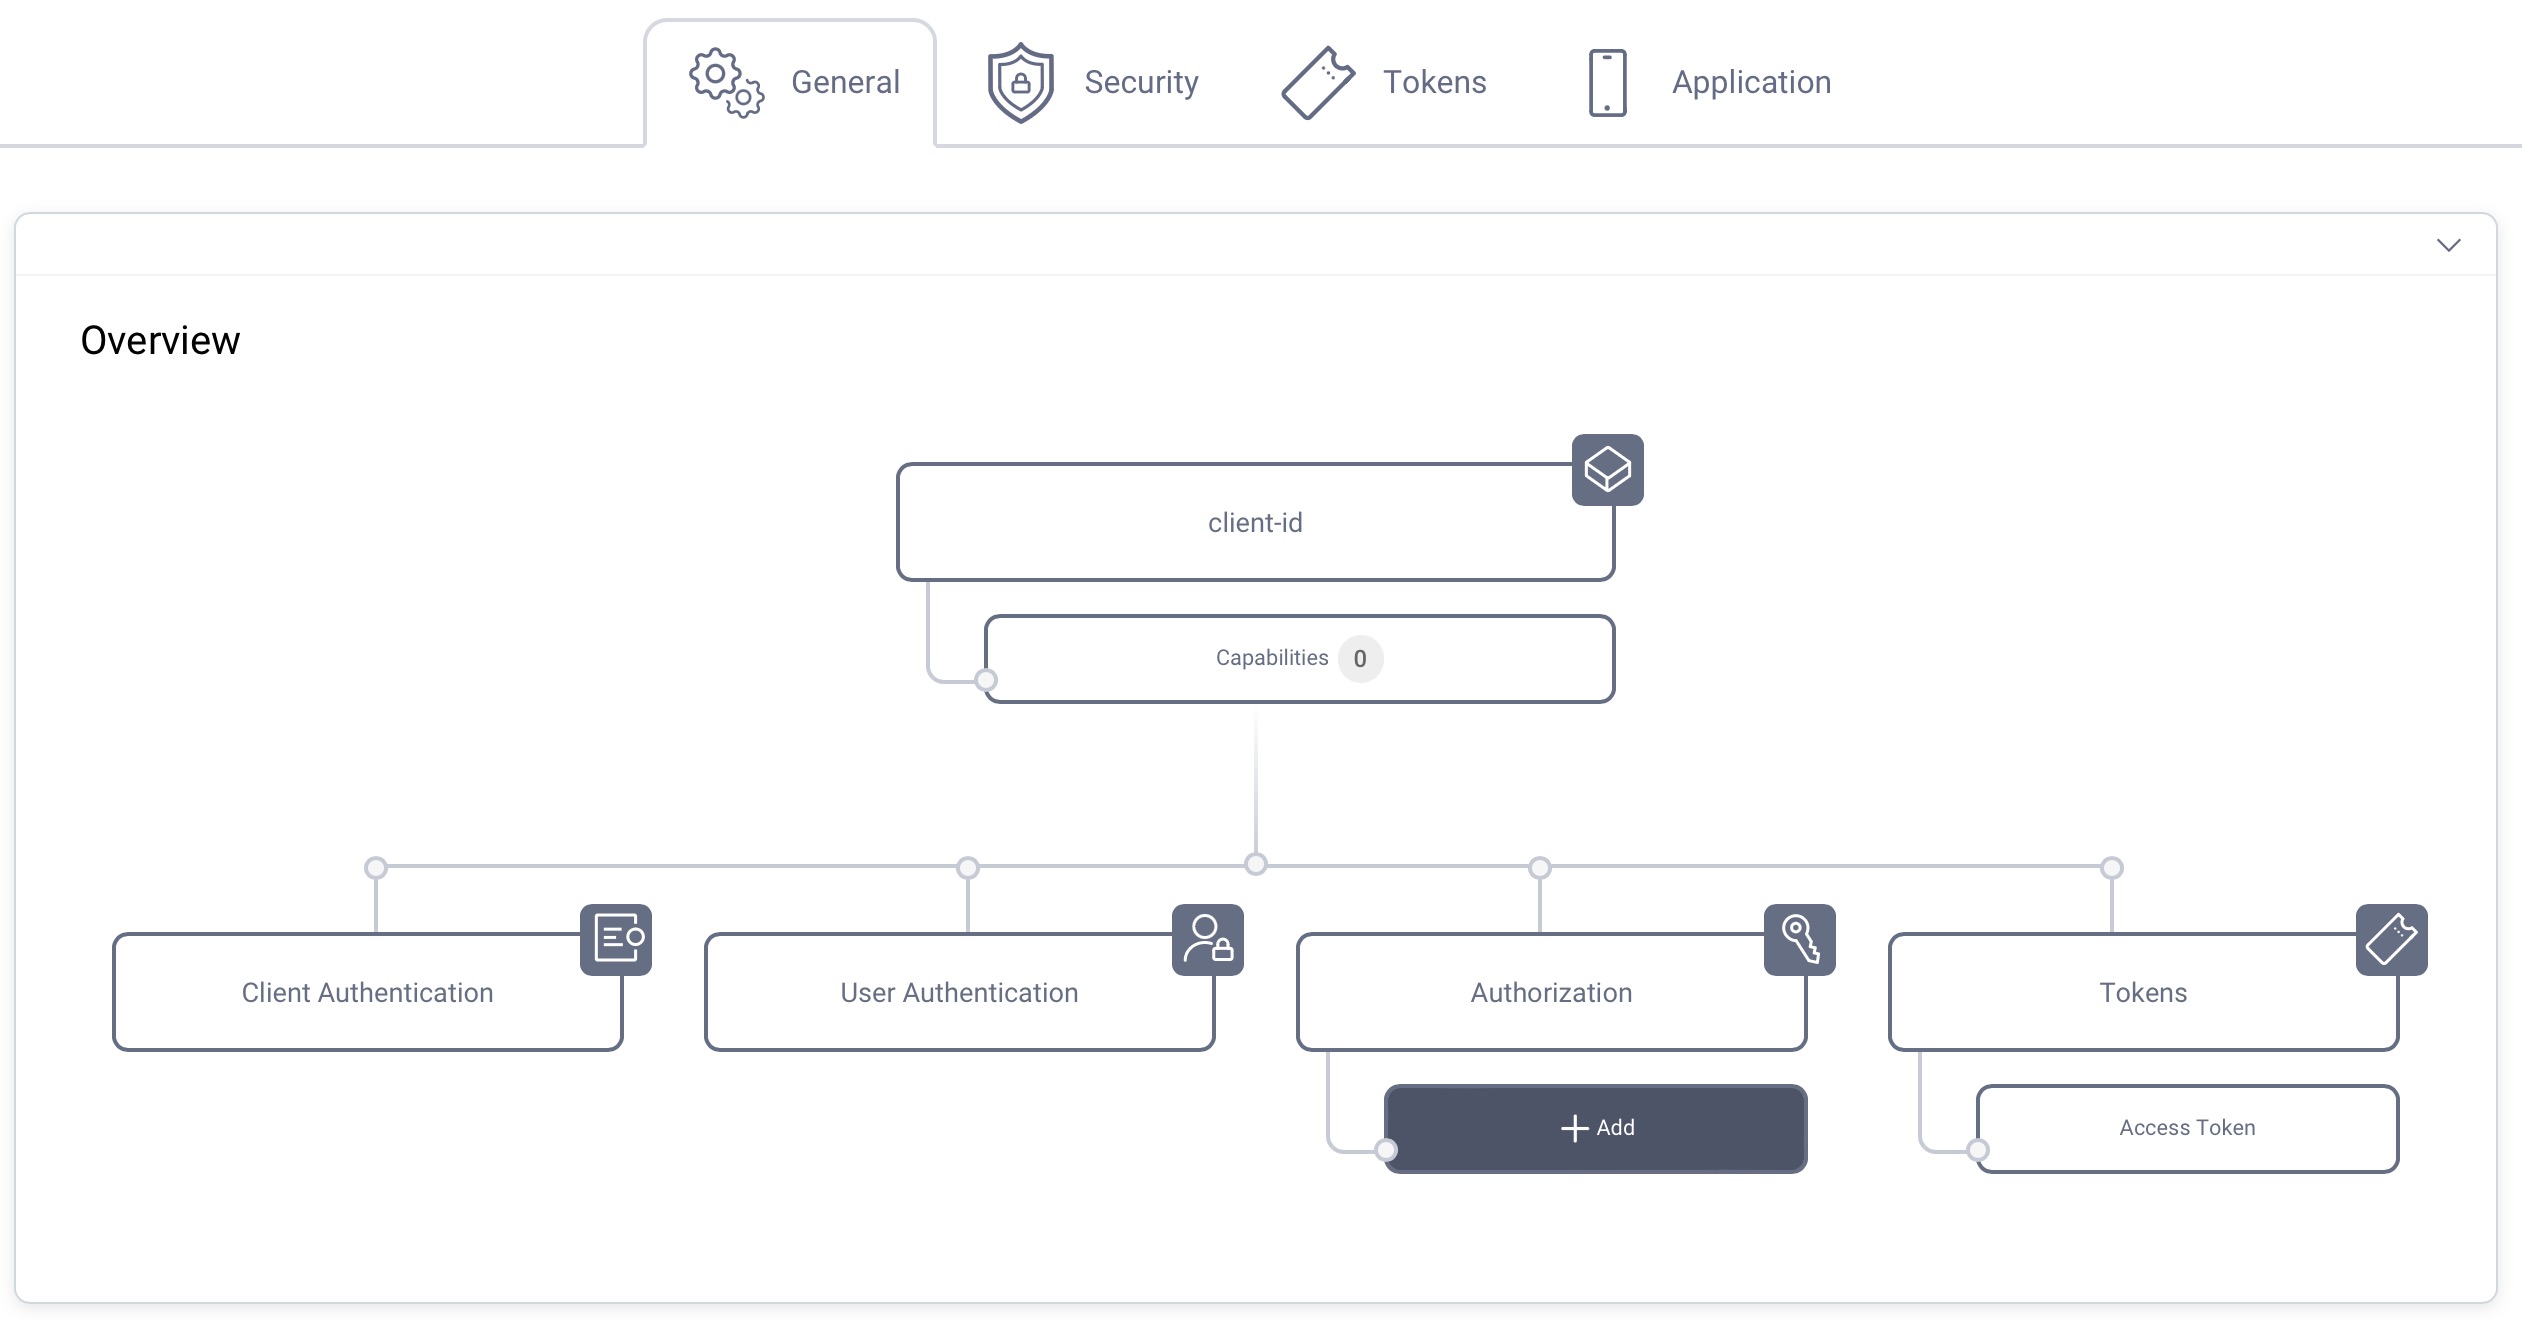
Capabilities
In the Overview panel click on the Capabilities box to add a new capability.
Select both the Code Flow and Implicit Flow capabilities and click Next.
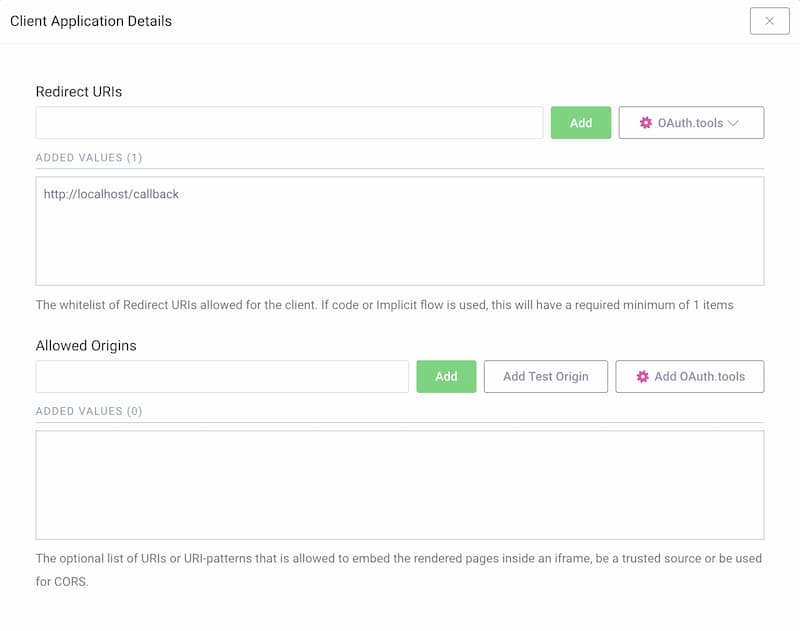
Redirect URL
If you don't know what you will use for the redirect URI, just enter http://localhost/callback for now. The value can be changed later.
This tutorial shows how to manually run the flow, so localhost is fine. If you plan to use OAuth Tools for testing purposes, add the appropriate redirect URIs from the OAuth.tools dropdown menu.
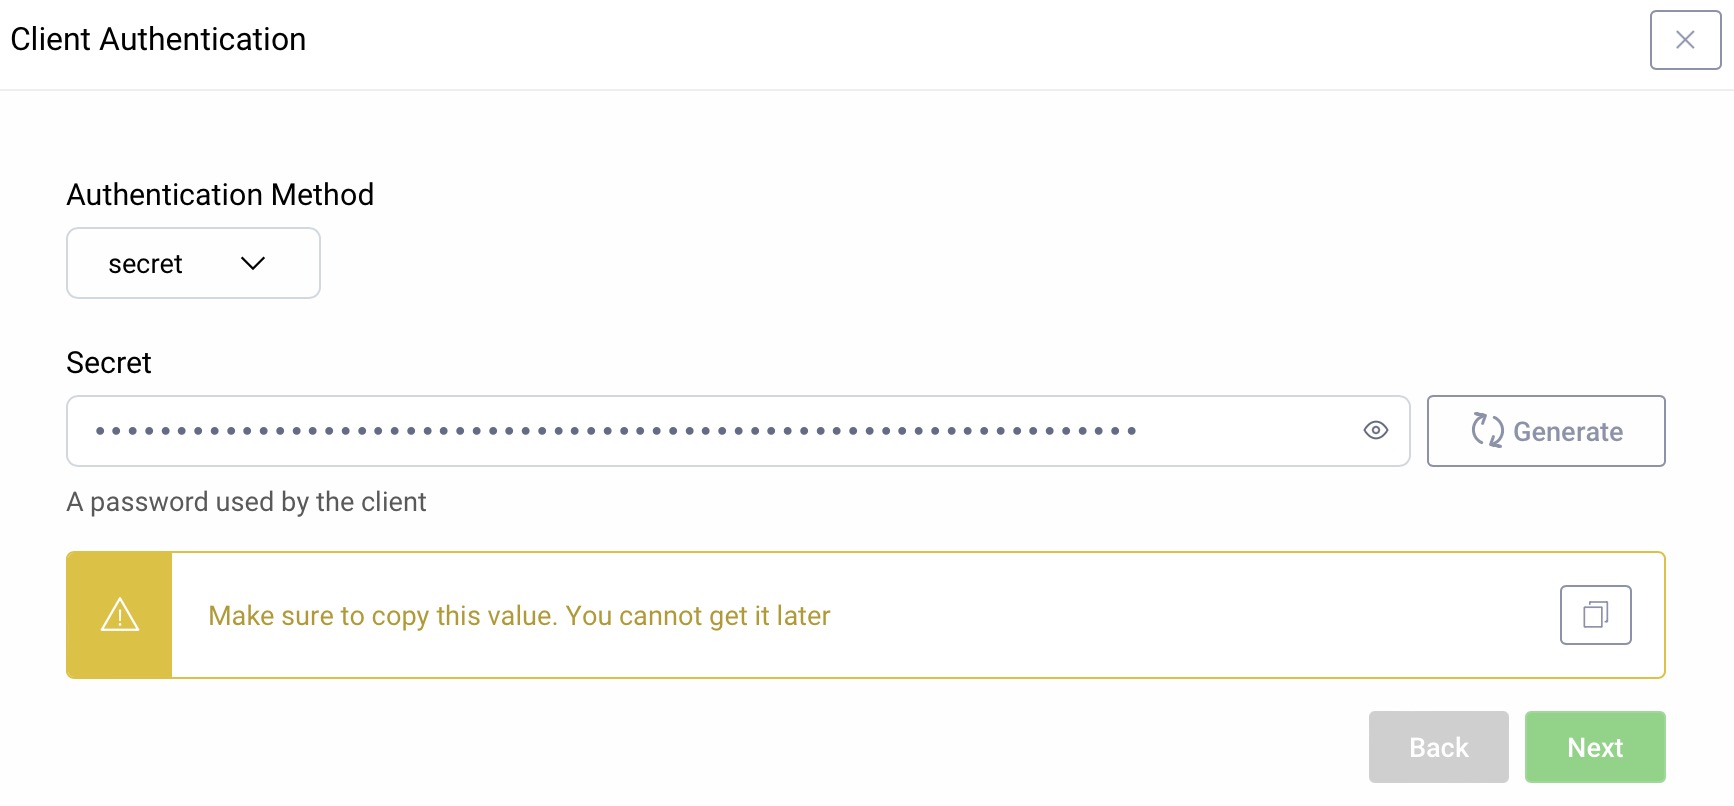
Client Authentication
For client authentication select secret and enter or generate a secret value. Make sure to remember the value since it cannot be retrieved later, though you can reset it if required.
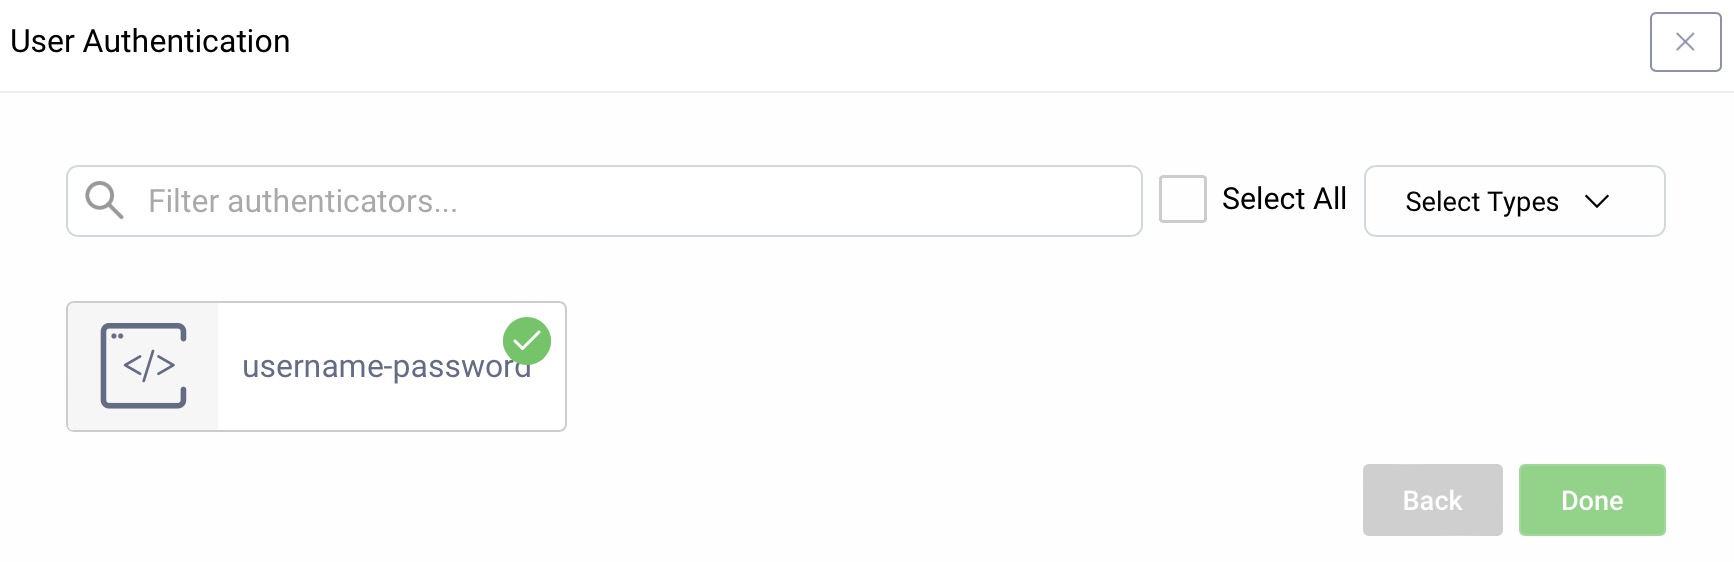
User Authentication
For user authentication select the authenticator created in the authenticator tutorial.
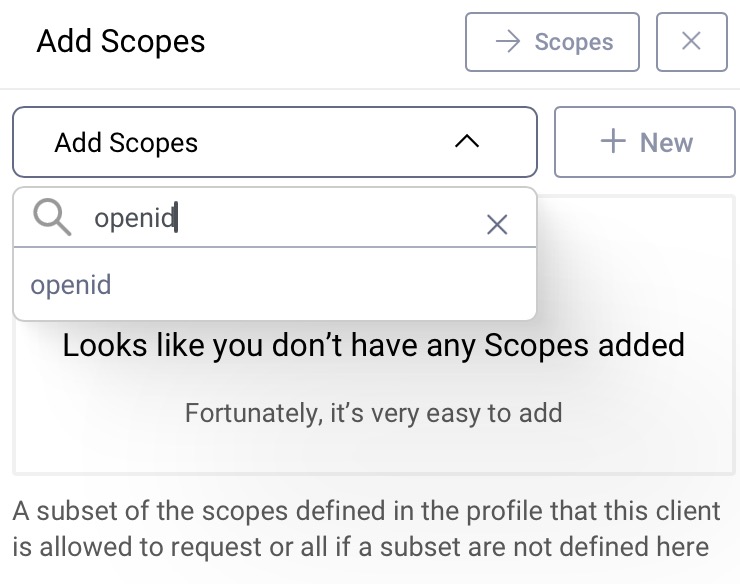
Add the openid Scope
In the Overview panel locate the Authorization box and click on Scopes:
Select openid from the list of scopes in the dropdown menu to add that scope to the client. The client can then run an OpenID Connect code flow and receive an ID token with information about how and when the user authenticated.
Commit
Make sure to remember to commit the changes in the Changes -> Commit menu.
Requesting an Authorization Code and ID Token
With the default configuration from the setup wizard, the server's authorization endpoint is at https://localhost:8443/oauth/v2/oauth-authorize.
If you are not using that configuration, determine the URL of your authorization endpoint, and adjust the following requests accordingly. To use the hybrid flow, an app would create a URL to this endpoint, and redirect the user to it. The URL looks like this:
https://localhost:8443/oauth/v2/oauth-authorize?client_id=www&response_type=code%20id_token&redirect_uri=https://localhost/callback&scope=openid&nonce=538B0D2A-545A-4113-ACD7-A2C3D315C607
As it is an OpenID request the redirect_uri and nonce parameters are required. You also need to ask for at least the
openid scope in the request.
If configured correctly, then you should be presented with a login form. If this is a first use and no accounts have been created yet, you can click Create Account, and register a new account.
After logging in, the browser is redirected to the redirect URI of the client application. A fragment will
be added to the URI containing the respective parameters, requested by the response_type, so in this example: code
and id_token. A sample response will look like this:
https://localhost/callback#code=YJBtNPyndBUH7ddx5AsF9HAnTgYtnV9l&id_token=eyJraWQiOiItMz...I0ykCw&iss=https%3A%2F%2Flocalhost%3A8443%2Foauth%2Fv2%2Foauth-anonymous
The ID token is ready to be validated, decoded and used by the client, while the code can further be exchanged for an access token, exactly like it would have been done in the authorization code flow.
Redeeming the Code
With the code in hand, the client app can redeem it for an access token and possibly other tokens -- like a refresh token and an ID token. To do this, the client app must make an HTTP POST request to the token endpoint of the Authorization Server. The body of this request must include the following:
- A
grant_typeparameter with a value ofauthorization_code. - A
codeparameter where the value is the authorization code plucked off of the callback request. - A
redirect_uriparameter with the value used in the request to the authorization endpoint.
All of these parameters must be form URL encoded according to the specification. JSON is not supported.
The call is authenticated which means the client must prove its identity by authenticating. There are various ways that this can be done, but the most common is to use the client ID together with a secret. The ID must be the same one that was used in the request to the authorization endpoint of the Authorization Server. The ID and secret can be sent in either of two ways:
- In the form-URL-encoded request body together with the other parameters. In this case, the parameters
client_idandclient_secretshould be used. - In an
Authorizationrequest header using the HTTP basic mechanism.
If the client includes its credentials in both of these locations, they must match. Otherwise, the Curity Identity Server will reject the call. A sample HTTP request is shown in the following listing (which includes line breaks for readability):
POST /oauth/v2/oauth-token HTTP/1.1Host: localhost:8443Content-Type: application/x-www-form-urlencodedgrant_type=authorization_code&code=xPwTedMCpix4I14rYlrlkXWYnBOxEv4G&client_id=www&client_secret=the_secret&redirect_uri=https%3A%2F%2Flocalhost%2Fcallback
The response is formatted in JSON. If things go well, it will contain an access token and an ID token, as the openid scope was
used in the authorization request. If so configured, the response will also include a refresh token:
{"access_token": "7efda4da-e316-452c-88a6-4cd2482a6f00","refresh_token": "d392c88c-5080-451b-a551-c5119e98195c","id_token": "eyJraWQiOiItMzgwNzQ4MTIiLCJ4NXQiOiJNUi1wR1RhODY2UmRaTGpONlZ3cmZheTkwN2ciLCJhbGciOiJSUzI1NiJ9.eyJhdF9oYXNoIjoiNEt1SXFOUmFsWWFlZUFYZnlSM21TdyIsImFjciI6InVybjpzZTpjdXJpdHk6YXV0aGVudGljYXRpb246aHRtbC1mb3JtOmh0bWwxIiwiYXpwIjoid3d3IiwiYXV0aF90aW1lIjoxNTIwMzIxOTEyLCJleHAiOjE1MjAzMjYzNzQsIm5iZiI6MTUyMDMyMjc3NCwianRpIjoiZmI2MGZiNDYtNGYwZS00NmI2LTkyNzQtYzJlZDBhMzE0MDU2IiwiaXNzIjoiaHR0cHM6Ly9zcHJ1Y2U6ODQ0My9-IiwiYXVkIjoid3d3Iiwic3ViIjoiam9obmRvZSIsImlhdCI6MTUyMDMyMjc3NCwicHVycG9zZSI6ImlkIn0.D_vHKt1rRwqIXX5VumzFkweiTKWykx7X6Wv7LLYSgAgNoq67ews6PoLlWTnviMNSYXhPV4xpsEqt4b-lMdG53I8g_tslrxVOI3FOy5mysZIub74wkkE0J6Qgba3s8DlbWhj9h4zIO3MNkhfdURJ2PJ6GY6kwc_8Eril0ilNZ8TU_puT8bQHJ_QWxghY3XpeQHtCyzuVDgVv6q7gfcGoy1JxZaLoXNSh02ZIpp7thVrgEAWAiWo7v46HJFiBNpyPnJfzDRwbTIdPFMEKoHOLjUCczsii_4akCb97IVPz5I3bRWASTyig7P_Q0646cNHsHZM-pan7cl5bYb42JI0ykCw","scope": "openid","token_type": "bearer","expires_in": 299}
The ID token is intended for the client app whereas the access token is for the API and the refresh token is to be used with the Authorization Server. For more details about how to validate an ID token see Validating an ID Token.
Testing
Testing the code flow can be done using a browser to begin with and then some HTTP client, like curl or Postman to
redeem the authorization code. This is a very helpful way to see exactly what is going on, but it can also be challenging.
We suggest to use the online tool OAuth Tools which is a powerful tool to explore OAuth and OpenID Connect.
Feel free to explore the Code Examples for client implementations to test with.
Contact
If you have questions on anything in this tutorial, don't hesitate to use the feedback button below or contact us.
Customer Stories
Learn how organizations run identity and API security at scale.
Read customer storiesWas this helpful?