Issue a Verifiable Credential
On this page
The Curity Identity Server can issue verifiable credentials using OpenID for Verifiable Credential Issuance (draft 11). Verifiable credentials hold, similar to an ID token, attested claims about a user, the so-called "subject claims" together with some metadata such as issuance time. ID tokens are always JWTs whereas credentials can be presented using different formats including but not limited to JWTs. The credentials issued by the Curity Identity Server are currently always encoded as JWTs and bound to the user's Decentralized Identifier (DID).
This tutorial shows how to configure the Curity Identity Server to issue a verifiable credential as a JWT. It uses an example, the "registration certificate", which contains the name and address of the user. Users are identified with the help of a DID using the DID method did:key. If you are new to the concept of verifiable credentials, have a look at verifiable credentials in action, showcasing real-world scenarios and benefits.
Prerequisites
Make sure you have the following prerequisites in place before you continue with the tutorial:
- Curity Identity Server v8.2 or later
- A basic configuration and an authenticator according to the instructions in the Getting Started Track.
- Admin UI in Expert mode
- Verifiable Credential Issuance enabled
Verifiable Credential Issuance is an experimental feature introduced in the Curity Identity Server version 8.2. By default, the feature is disabled. You need to enable it explicitly via the system property se.curity.verifiable-credentials.enable.
Enable Verifiable Credential Issuance
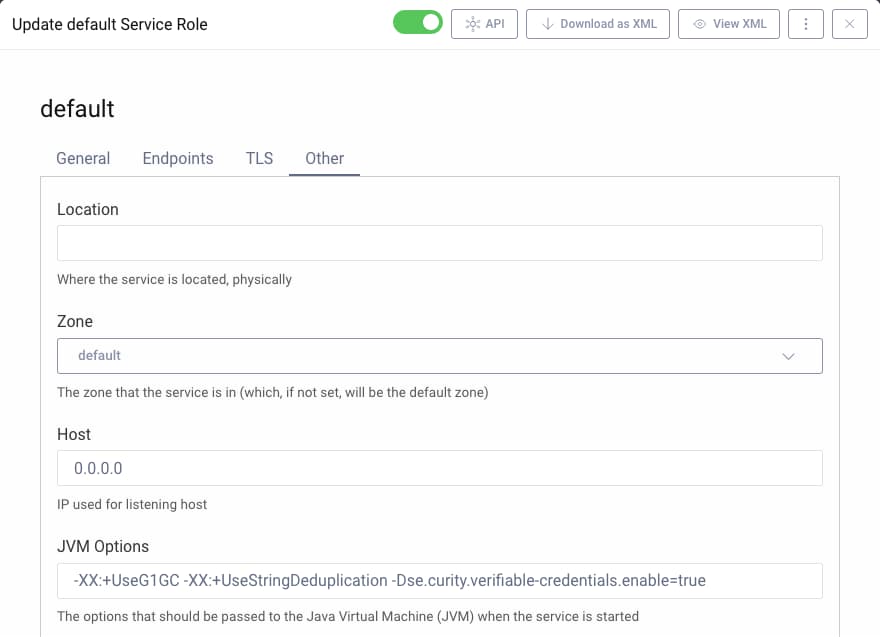
You have to update the JVM options for the corresponding service role and set se.curity.verifiable-credentials.enable to true. Use one of the options below for that purpose.
In the Admin UI, ensure you use the Expert mode.
- In the System tab navigate to Deployment.
- Select an appropriate service role, e.g.
Default. - Select the Other tab.
- In JVM Options add the system property
-Dse.curity.verifiable-credentials.enable=true. - Commit the changes.
- Restart the server for the changes to take effect.
You may copy the system property from the code snippet.
-Dse.curity.verifiable-credentials.enable=true
Create a Credential Issuer
Verifiable credentials contain a proof of the credential issuer to assert the claims about a user (subject). When using JWTs for verifiable credentials, the JWT signature serves as the proof. Therefore, start with setting up a signing key that the Curity Identity Server should use for the proof, i.e. signature, in the verifiable credential JWT.
Create a Credential Issuer Key
- In the Facilities menu, navigate to Key and Cryptography → Signing → Signing Keys.
- Click on the + symbol to create a new signing key.
- Name the key
credential_issuer_key.
Verified credentials are often used together with decentralized identifiers (DIDs). If the credential issuer key is part of a DID document, you should enter the key's DID URL as an external ID. For the purpose of this tutorial, use an example DID URL. Note that the Curity Identity Server does not verify the URL.
- Enter
did:example:1234xyz#key-1for External ID
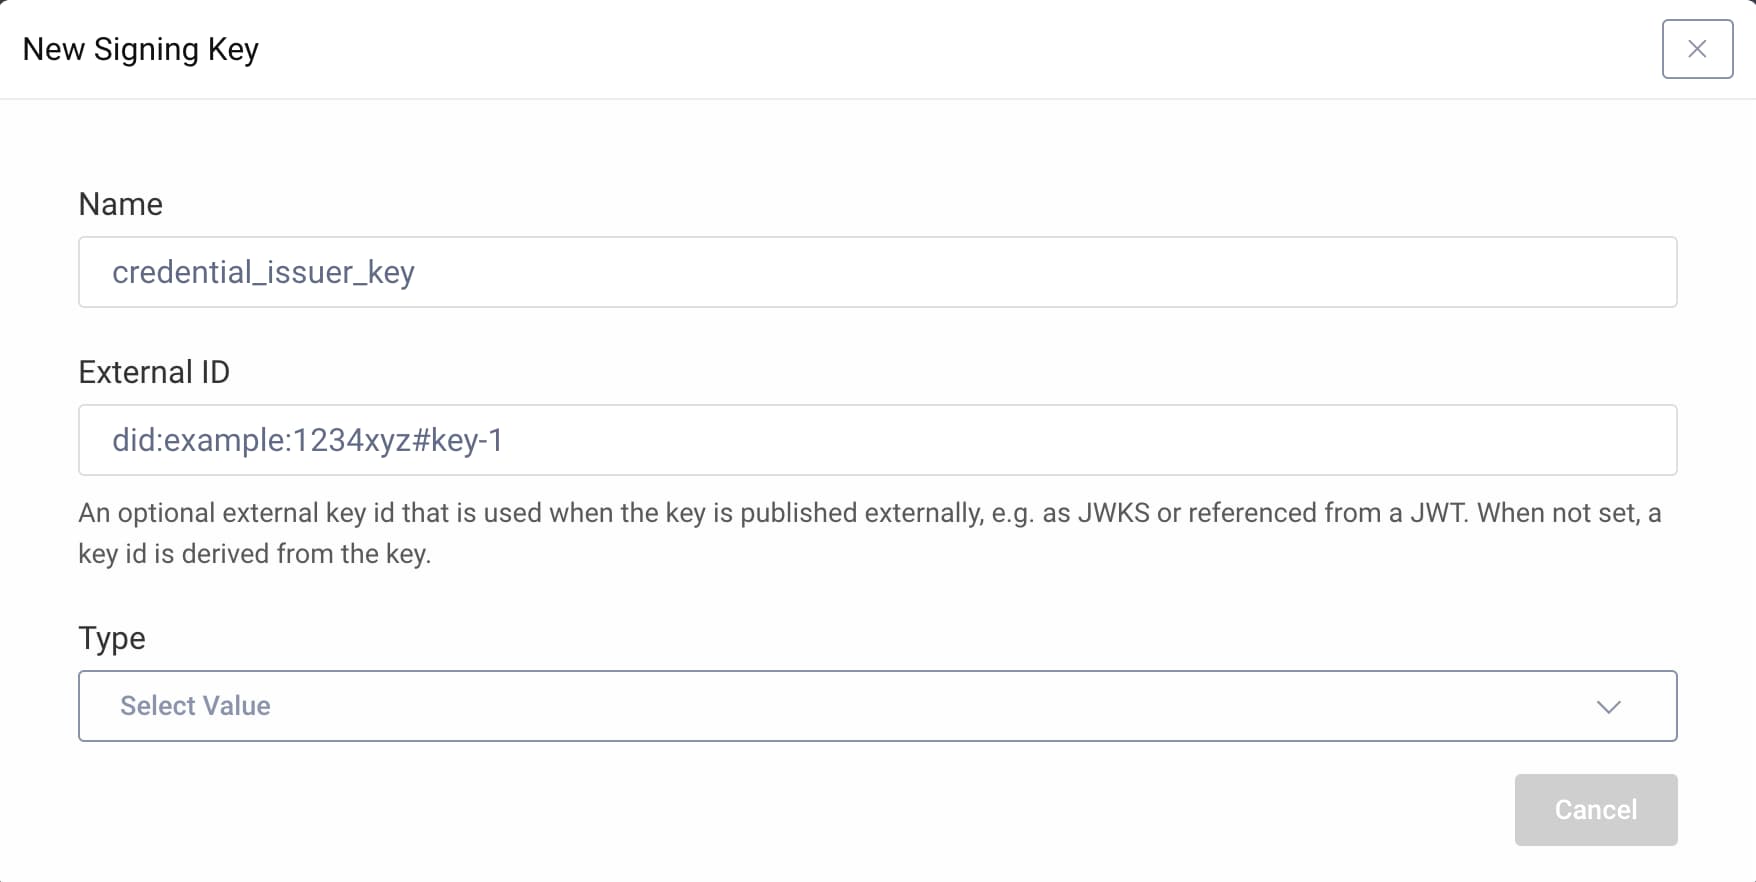
- Select
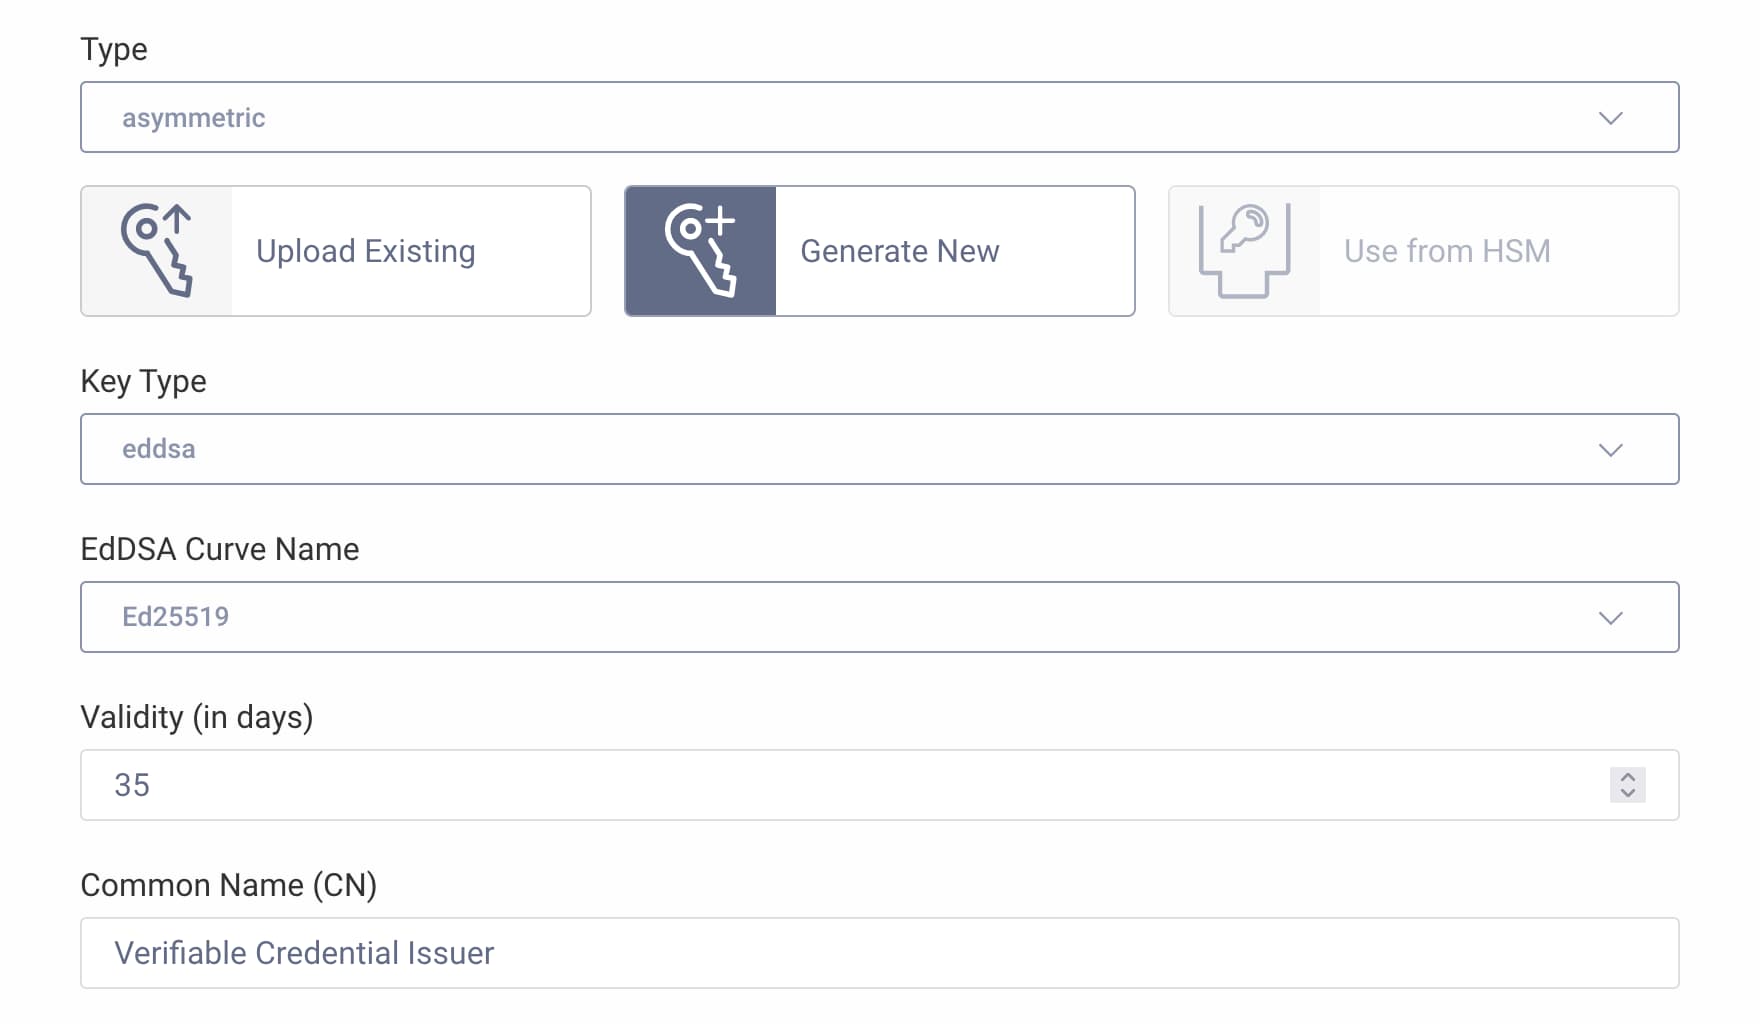
asymmetricas the type from the dropdown menu. - Generate a new key.
- Select
eddsaas the key type. - Choose
Ed25519as the name of the EdDSA curve. - Enter
35days as the validity time. - Enter some value for the Common Name (CN), e.g.
Verifiable Credential Issuer.
- Select
- Click Create & Commit.
Create a Token Issuer
As mentioned above, verifiable credentials issued by the Curity Identity Server are encoded as JWTs, therefore a credential issuer is a specialized token issuer. Create a new token issuer for issuing credentials. Use the signing key from the previous step:
- Navigate to Profiles → Token Service → Token Issuers.
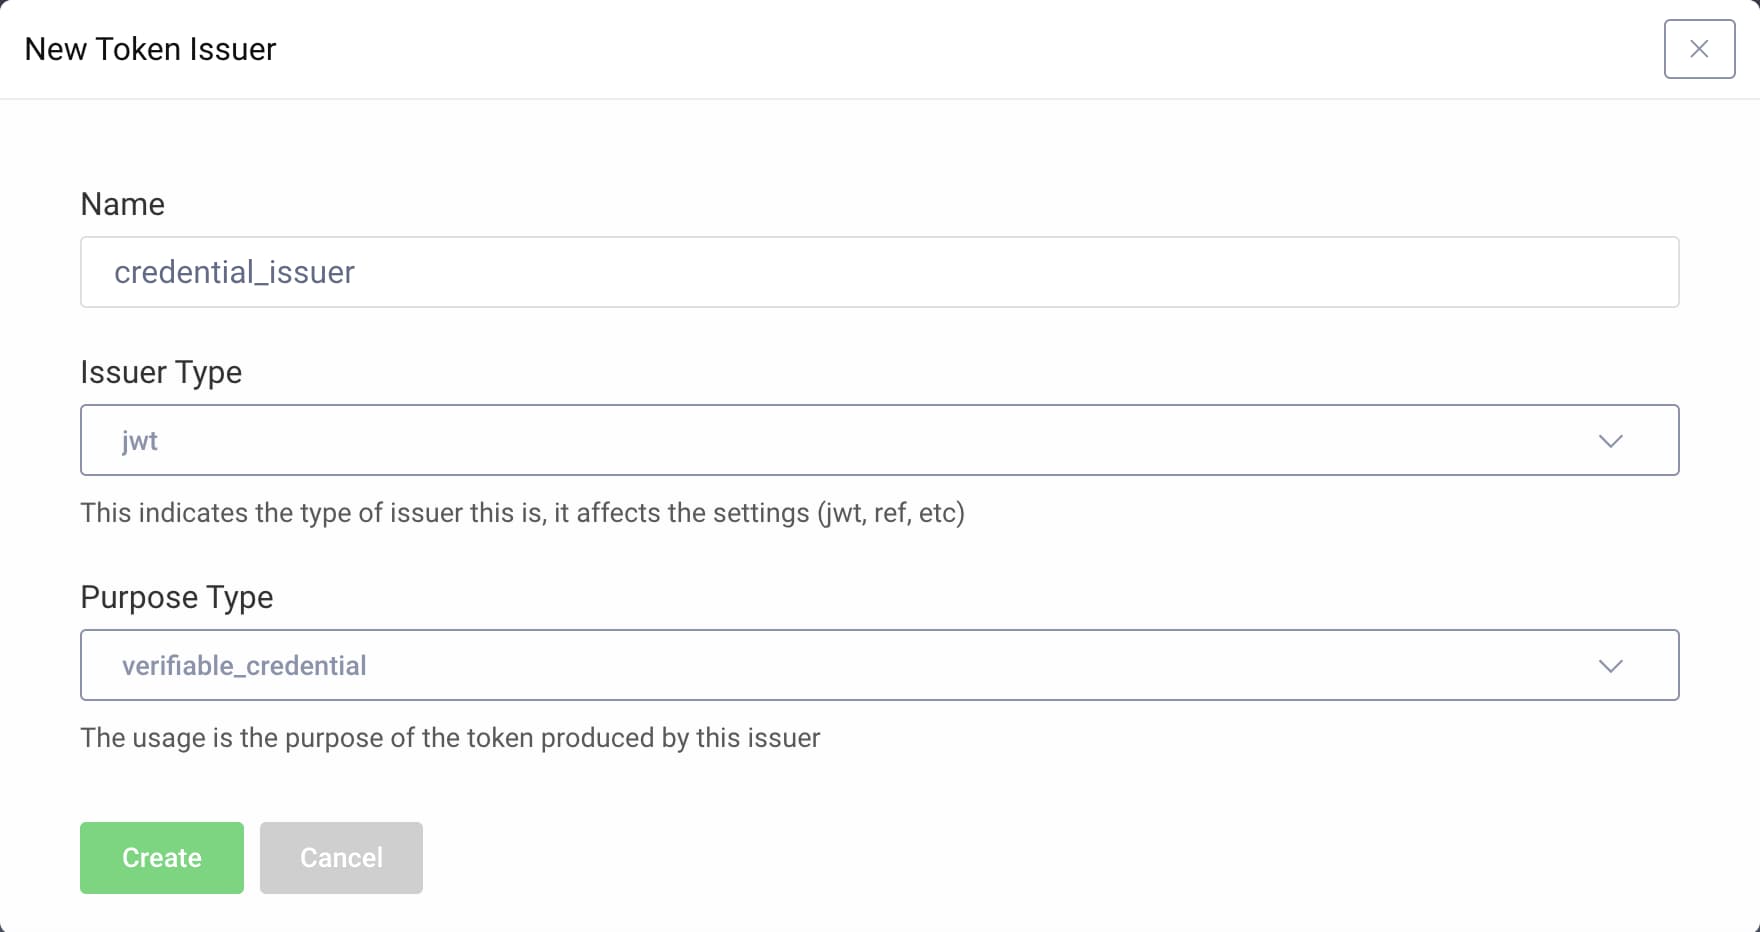
- Click the button + New Token Issuer to create a new custom token issuer.
- Enter
credential_issueras the name. - Select
jwtfor the issuer type from the dropdown menu. - Select
verifiable_credentialas the purpose. - Click Create.
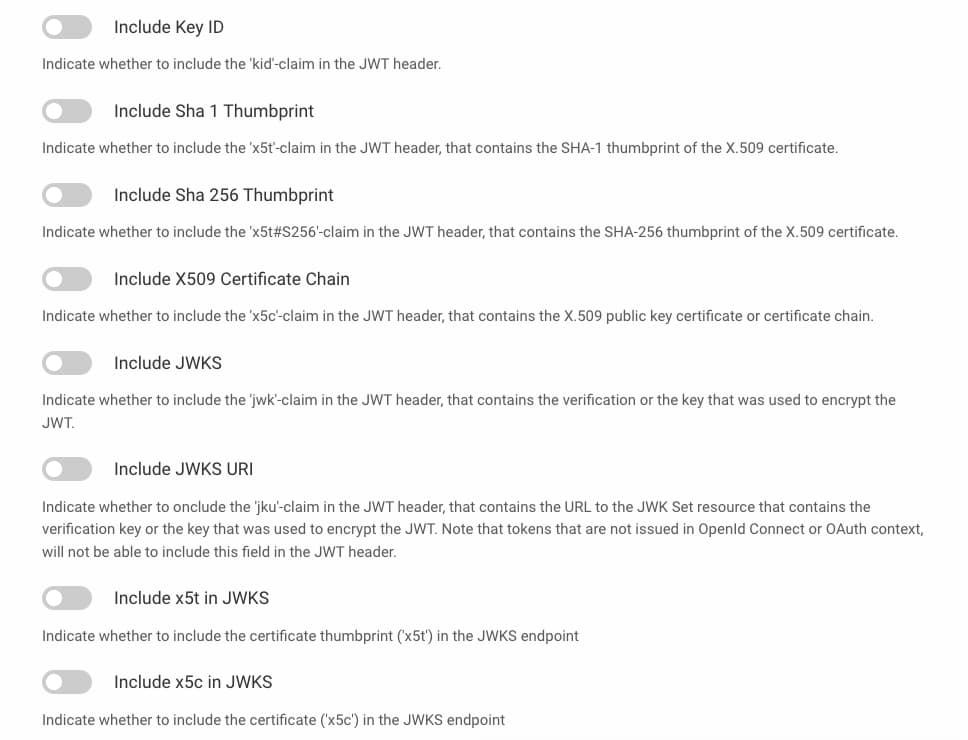
- In the editor, disable any claims in the JWT header.
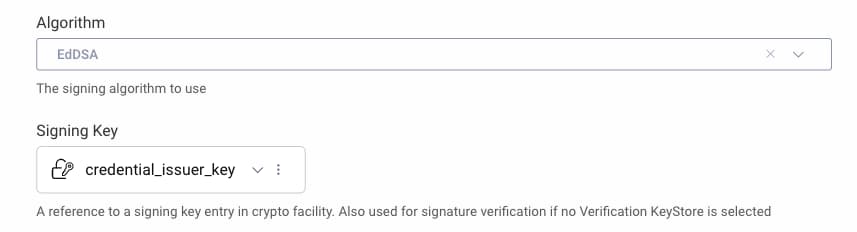
- Select
credential_issuer_keyfrom the list of signing keys. - As this key is an EdDSA key, change the signing algorithm to
EdDSA.
Commit the changes:
- In the Changes menu, select Commit.
- Enter
Create Credential Issuer. - Confirm commit.
Configure a Verifiable Credential
A credential consists of a type and representation, the template. The credential type defines which claims a credential may or must contain, that is the data model or schema. The verifiable credential template adds then for example a name, a description and logo to the type that the wallet may use when presenting the credential to the user. It also defines the validity time (time to live) of the credential, its issuer and which (DID) methods users may utilize to prove that they are the controllers of a DID. The verifiable credential is then bound to that DID.
- Navigate to Profiles → Token Service → Verifiable Credentials.
- Enable to Expose Metadata.
Checking the credential issuer metadata helps to understand and verify the settings.
Configure the Credential Type
- Under W3C Types click + New type
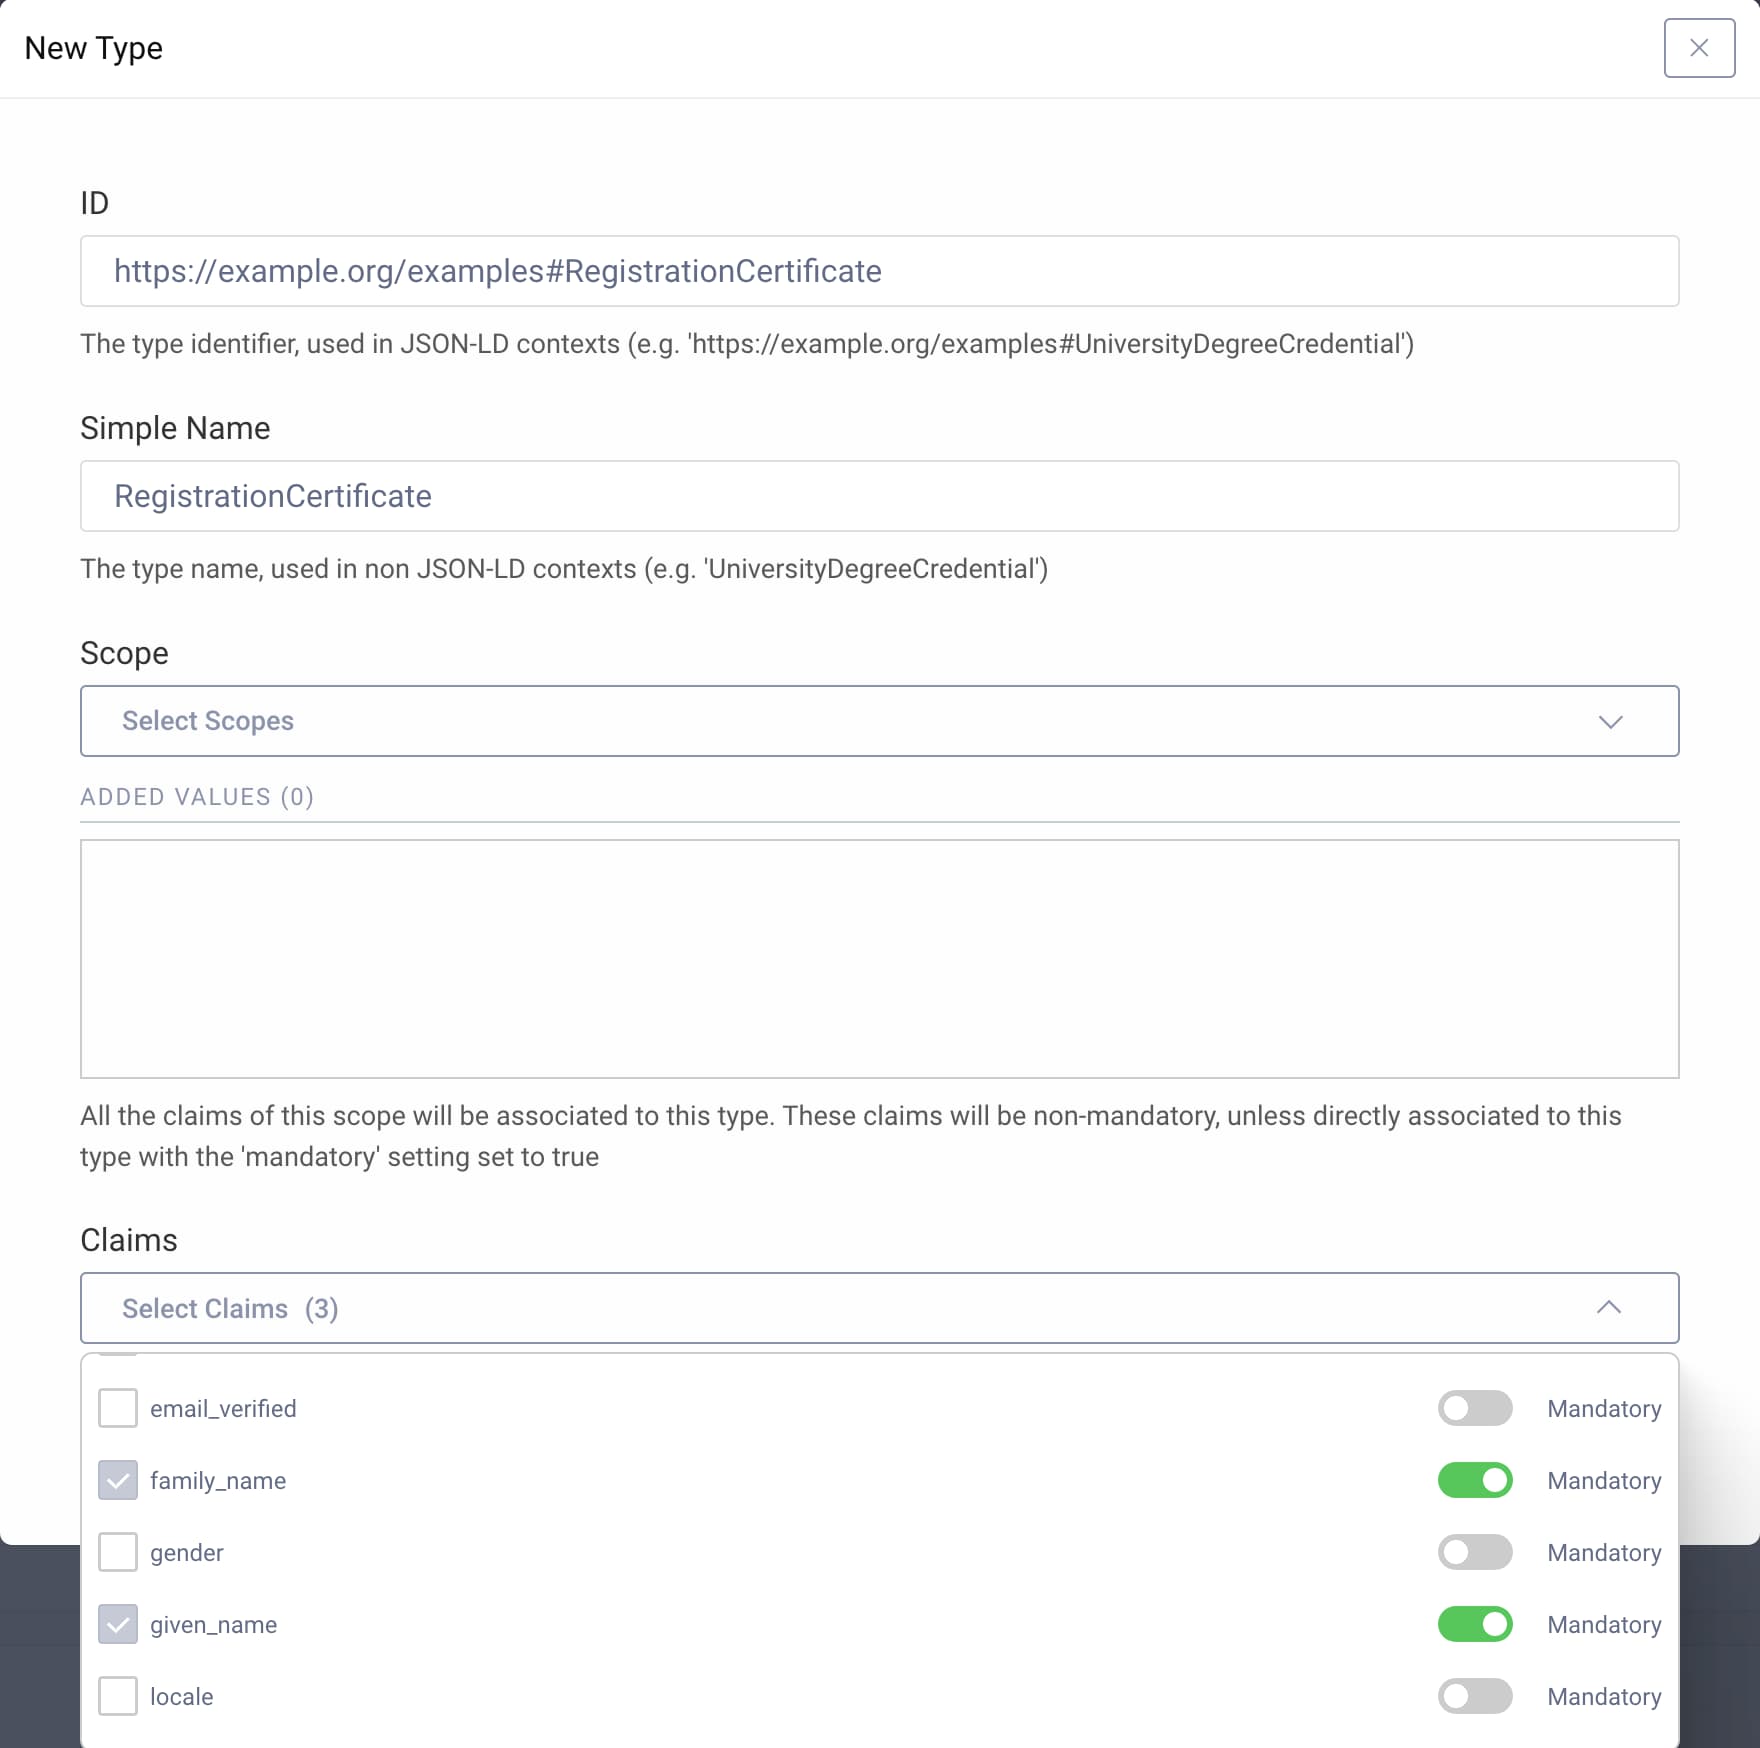
The ID is a URI pointing to a machine-readable definition of the (data) type of the verifiable credential. For the purpose of this tutorial, use an example:
- Enter
https://example.org/examples#RegistrationCertificatefor the id. - Enter
RegistrationCertificateas the simple name for the type. - For the Claims select
addressgiven_namefamily_name
- Mark all selected claims as Mandatory.
- Click Create to create the credential type.
Mandatory claims are added by default to a verifiable credential of that type. Requesting optional claims is out of scope of this tutorial. Refer to the product documentation for guidance.
Configure the Credential Template
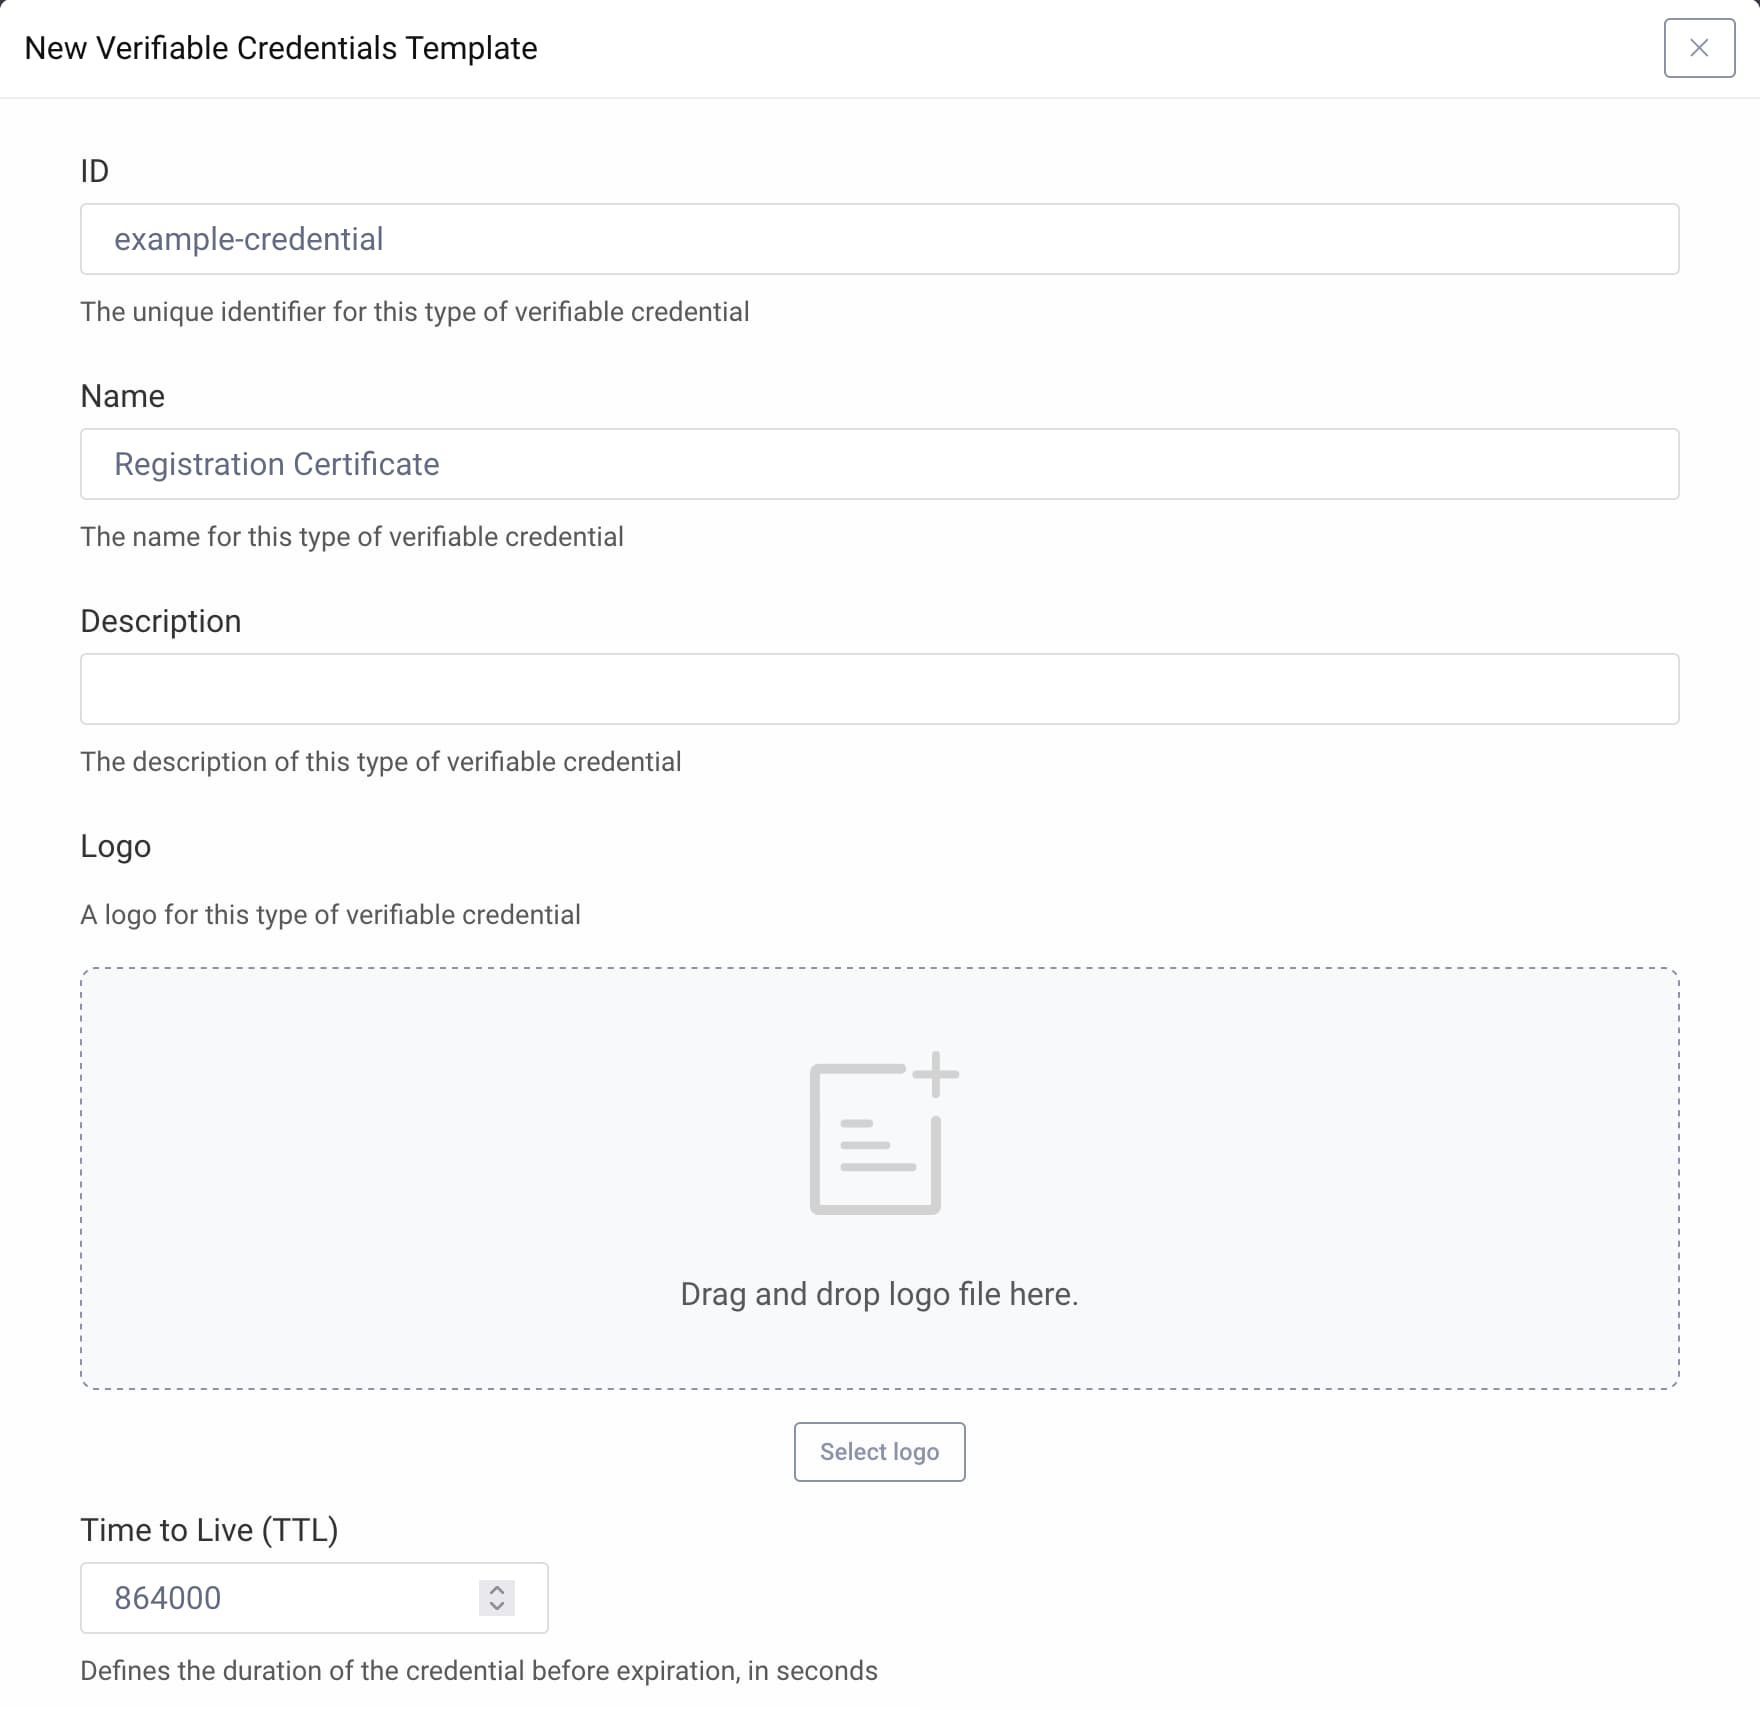
- Under Verifiable Credentials Template click + New template.
- Enter an identifier for the template:
example-credential - Enter a human-readable name:
Registration Certificate - Provide the number of seconds that the credential is going to be valid:
864000(10 days)
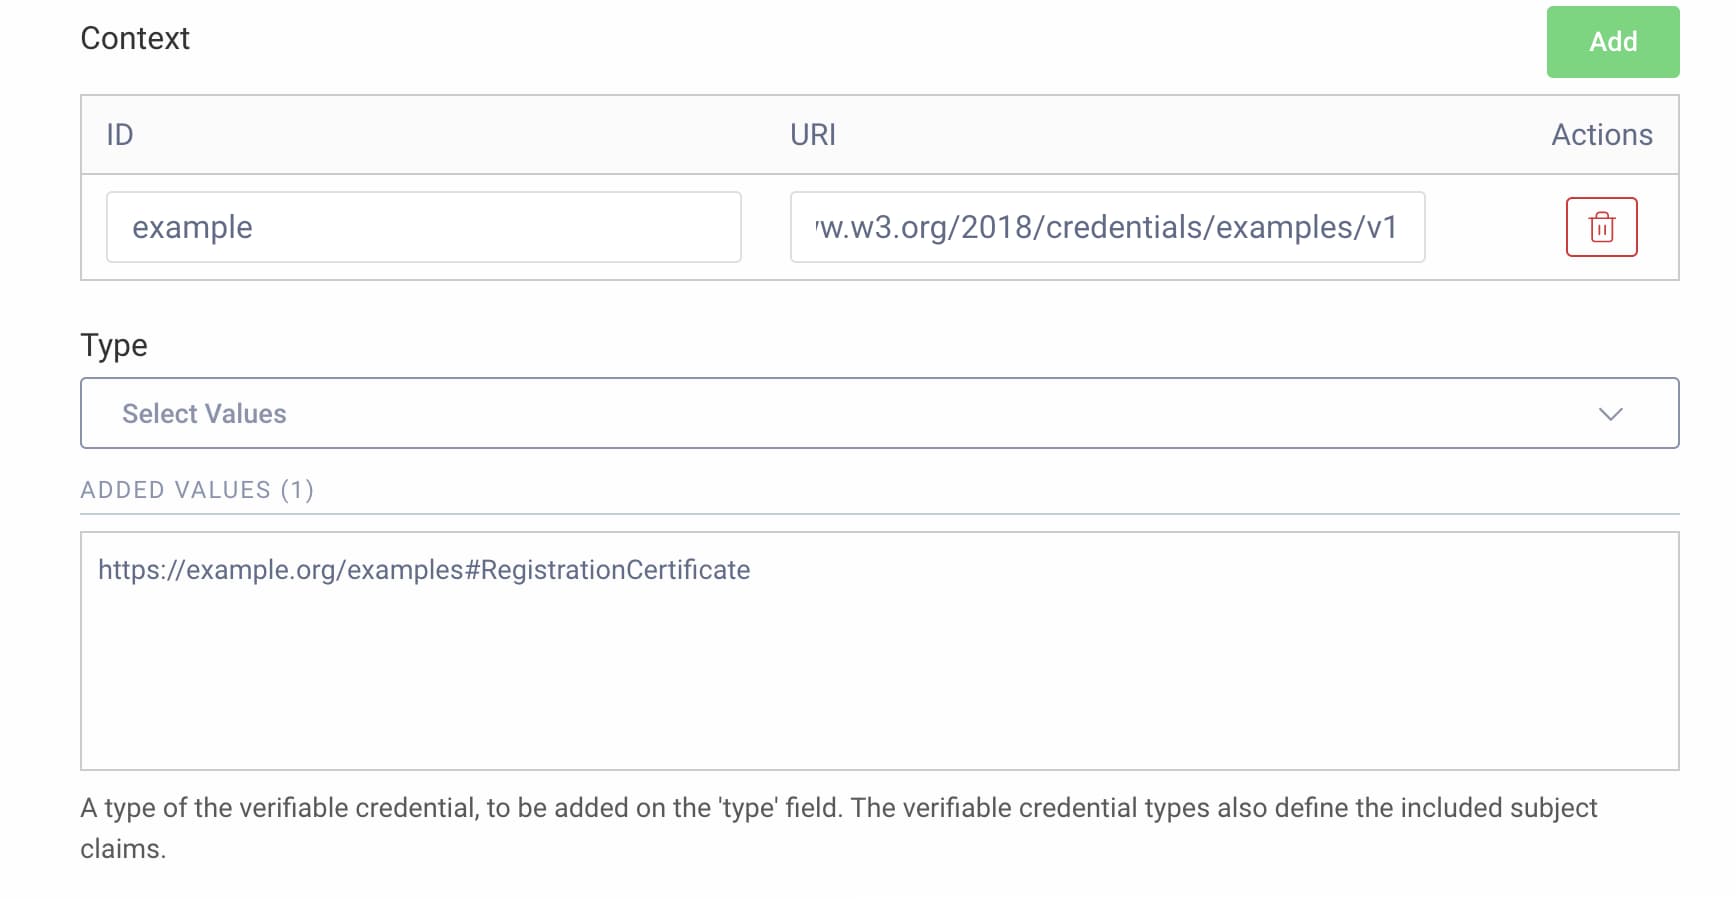
- Under Context click Add.
- Enter
exampleas the ID of the context. - Enter
https://www.w3.org/2018/credentials/examples/v1as the URI. This indicates that the created credential is just an example. - Select
https://example.org/examples#RegistrationCertificateas the type.
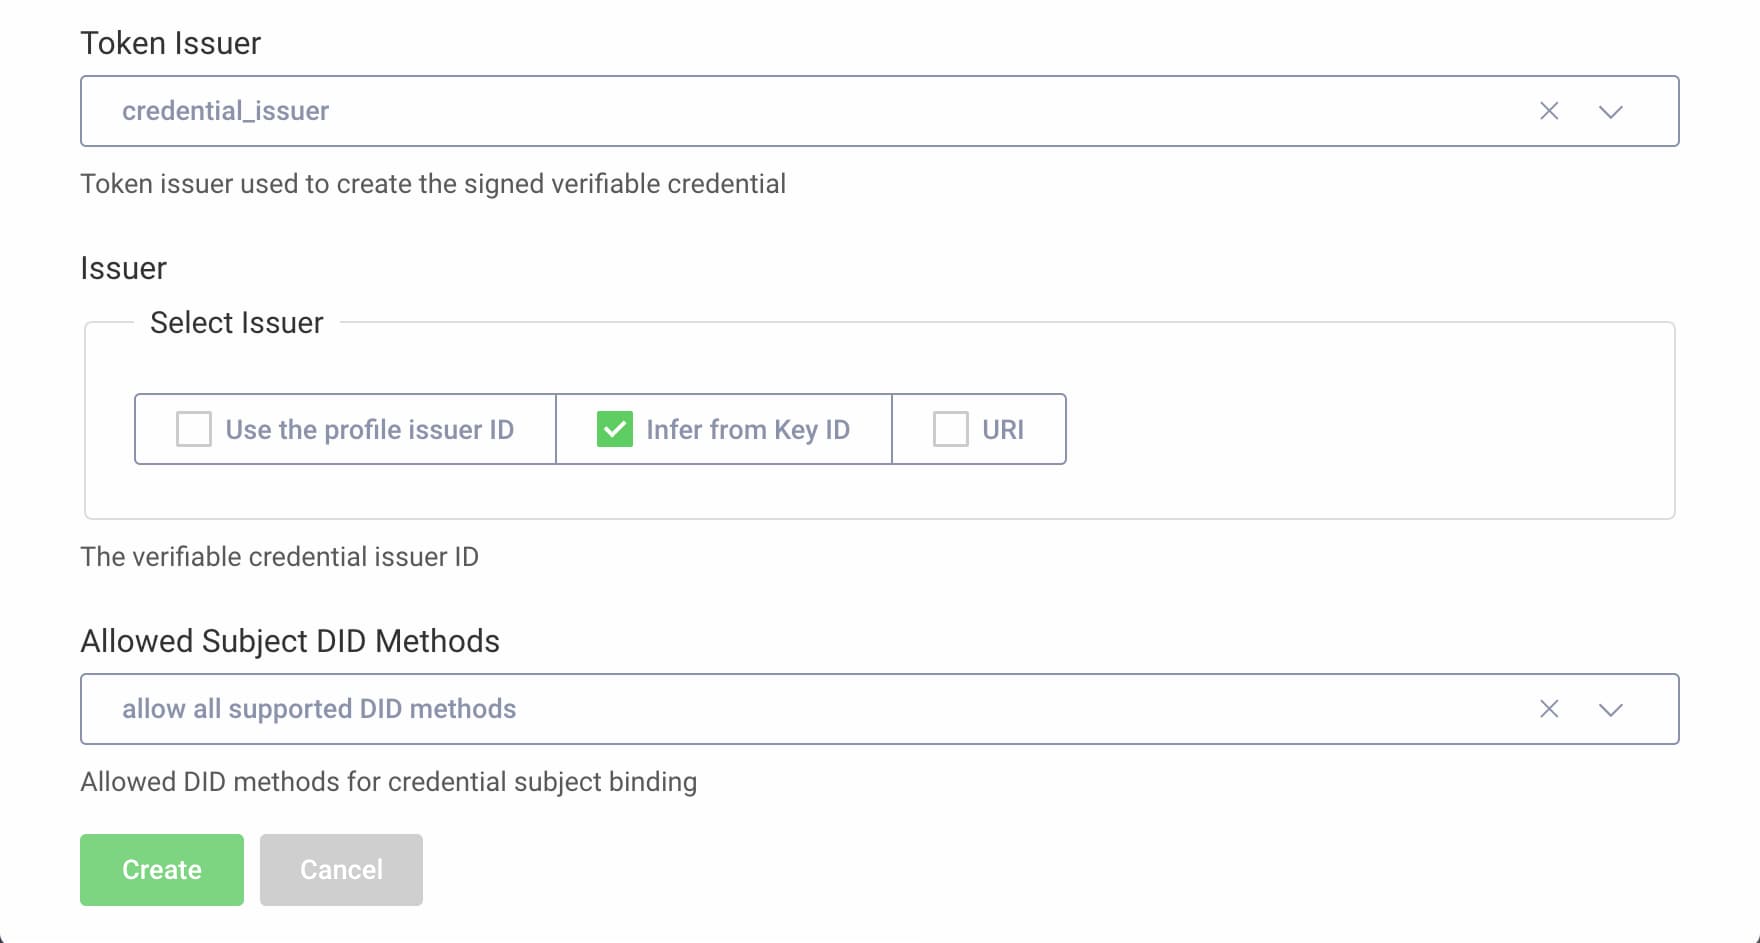
- Select
credential_issueras the token issuer. - Enable Infer from Key ID as the issuer. This specifies that the issuer of the verifiable credential is the external ID of the signing key of the token issuer, that is the DID
did:example:1234xyz#key-1. - Select
allow all supported DID methodsfor the allowed subject DID methods, that is DID methods the user may use. - Click Create.
Commit the changes:
- In the Changes menu, select Commit.
- Enter
Configure registration certificate credential example. - Confirm commit.
Add a Credential Endpoint
Credentials are issued using a dedicated endpoint, the Credential Endpoint. To add this endpoint do as follows:
- Navigate to Profiles → Token Service → Endpoints.
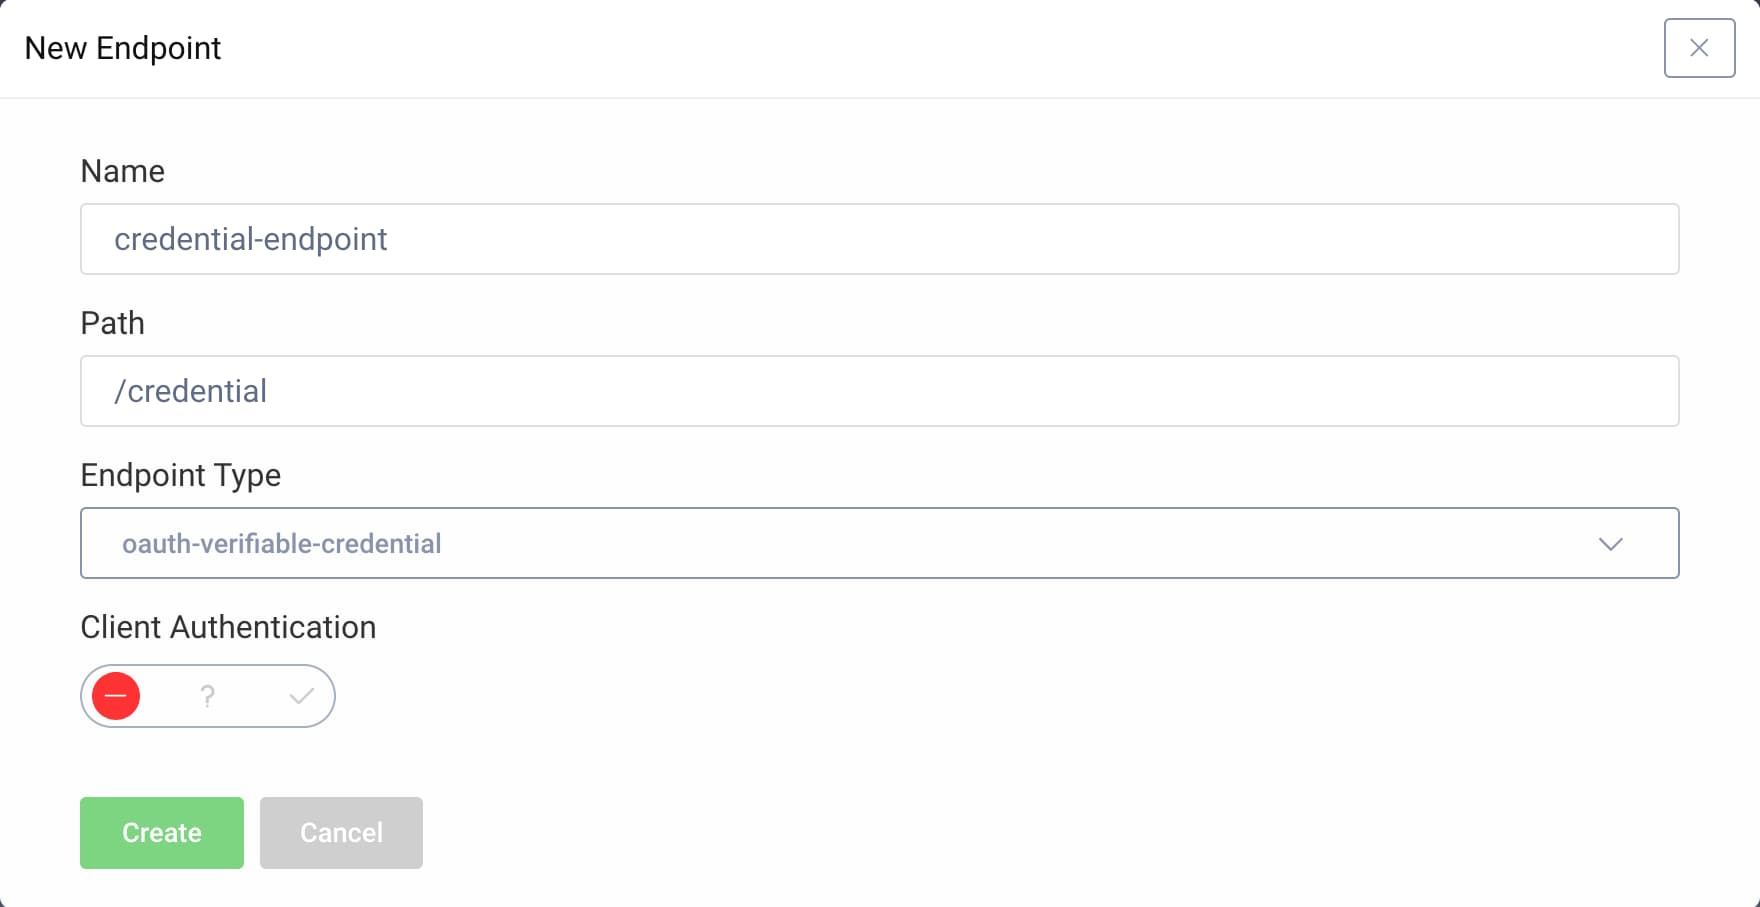
- Click + New Endpoint.
- Name the endpoint
credential-endpoint. - Enter
/credentialfor the path. - Select
oauth-verifiable-credentialas the endpoint type. - Click Create to create the endpoint.
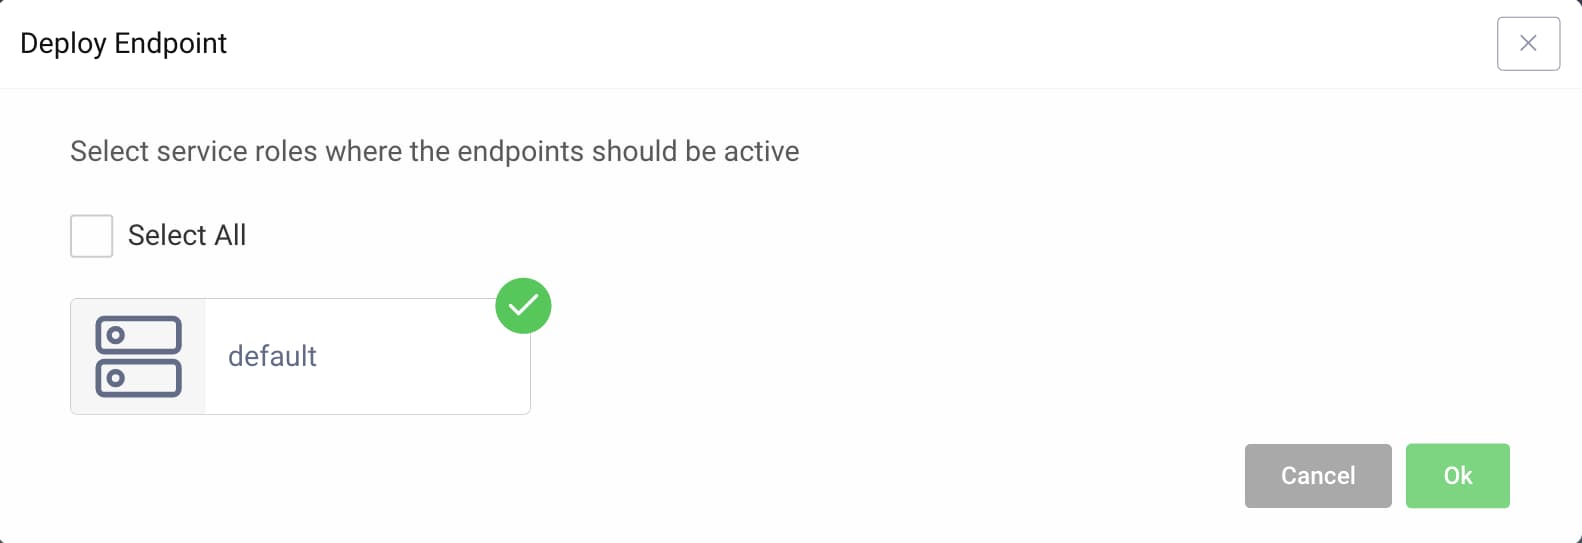
- Click on the Not Deployed warning in the column called "Running On".
- Choose the
defaultservice role. - Confirm the choice by clicking OK.
- Commit the changes via the Changes menu.
Study the Credential Issuer Metadata
At this point you have configured all the relevant settings for verifiable credential issuance:
- A supported verifiable credential
- A set of (mandatory) subject claims
- The credential endpoint from where clients can request credentials
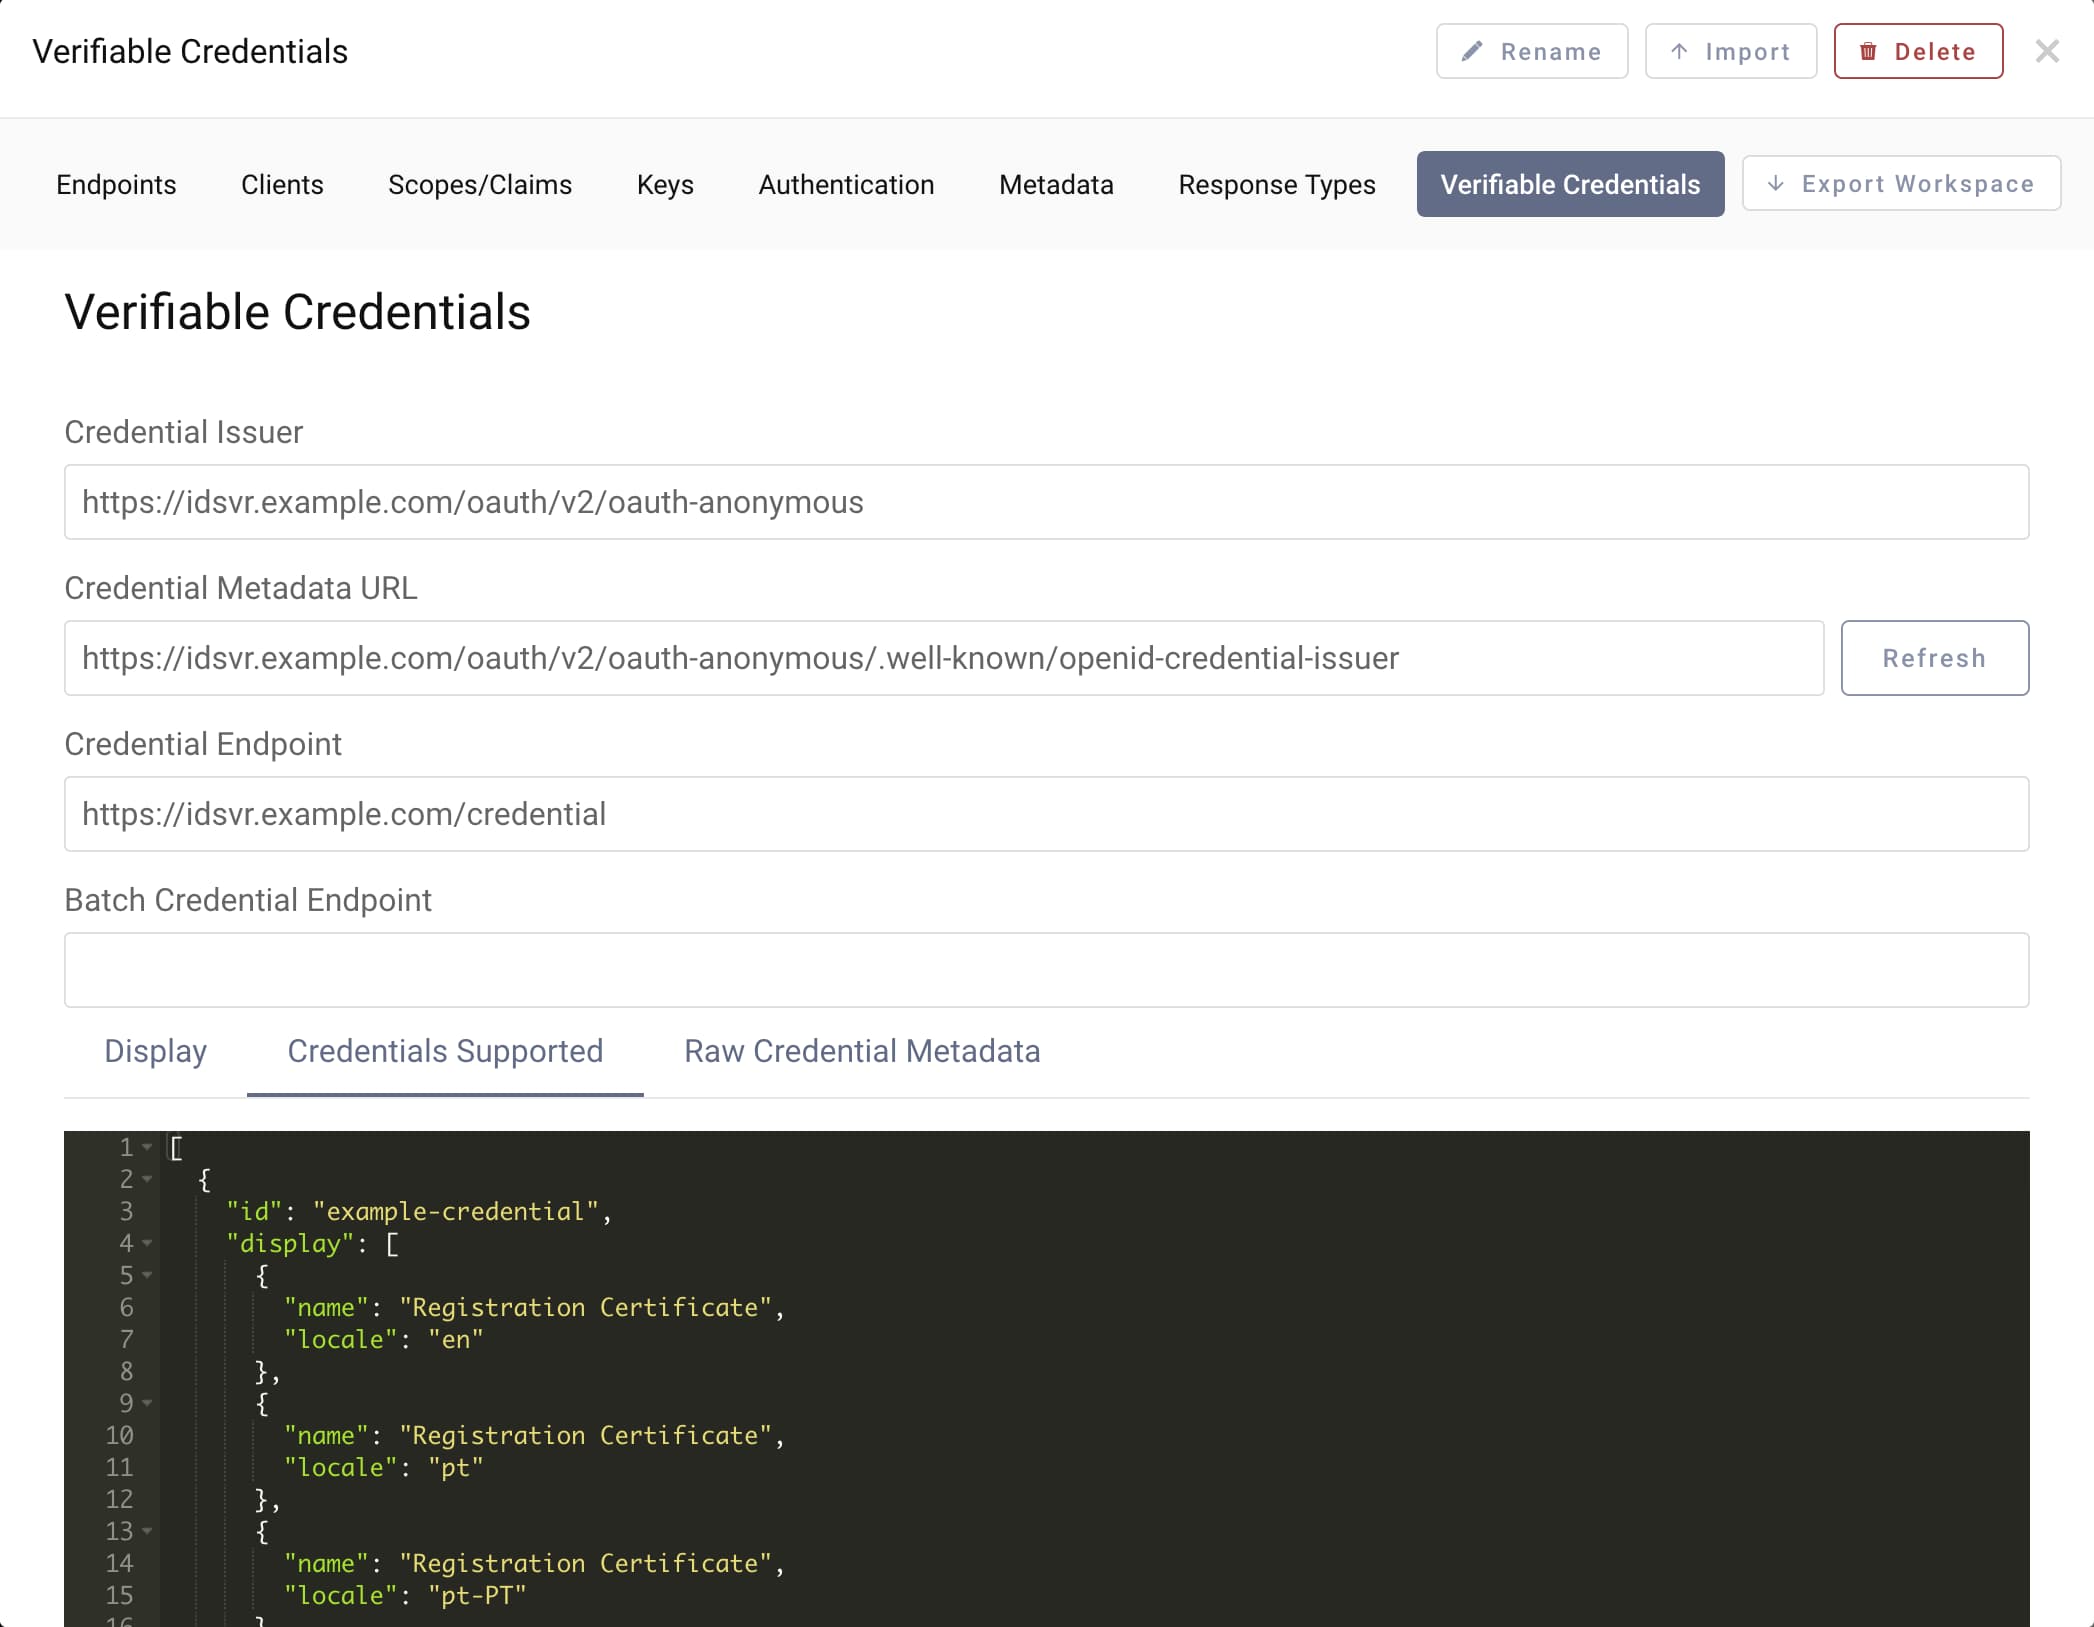
Enter https://idsvr.example.com/oauth/v2/oauth-anonymous/.well-known/openid-credential-issuer in the address list of your browser, where https://idsvr.example.com is the base URL of the Curity Identity Server and /oauth/v2/oauth-anonymous is the path of the anonymous endpoint. Then study the credential issuer metadata:
{"credentials_supported": [{"id": "example-credential","display": [{"name": "Registration Certificate", "locale": "en"}, ...],"format": "jwt_vc_json","types": ["VerifiableCredential", "RegistrationCertificate"],"cryptographic_binding_methods_supported": ["did:ebsi", "did:key"],"credentialSubject":{"address": {"mandatory": true, "display": [{"name": "Address", "locale": "en"}, ...]},"family_name": {"mandatory": true, "display": [{"name": "Last Name", "locale":"en"}, ...]},"given_name": {"mandatory": true, "display": [{"name": "First Name", "locale":"en"}, ...]}}}],"display": [{"name": "Curity Identity Server Verifiable Credential Issuer", "locale": "en"}, ...],"authorization_server": "https://idsvr.example.com/oauth/v2/oauth-anonymous","credential_issuer": "https://idsvr.example.com/oauth/v2/oauth-anonymous","credential_endpoint": "https://idsvr.example.com/credential"}
The Curity Identity Server automatically adds localized names for the credential, the subject claims and the credential issuer (abbreviated in the output above for readability). A client, that is a wallet, can use the credential issuer metadata for retrieving information and data required for the integration such as the format, list of supported credentials and the credential endpoint.
Enable a Client to Request Verifiable Credentials
The Curity Identity Server uses the scope openid_credential to authorize clients to request a verifiable credential. Only clients that are allowed to use this scope may request verifiable credentials. Therefore, configure the openid_credential scope.
- Navigate to Profiles → Token Service → Scopes.
- Click the +New button to create a new scope.
- Call the new scope
openid_credential. - Click the Create button.
Then, allow a client to request the claims inside the verifiable credential. For that, configure another scope:
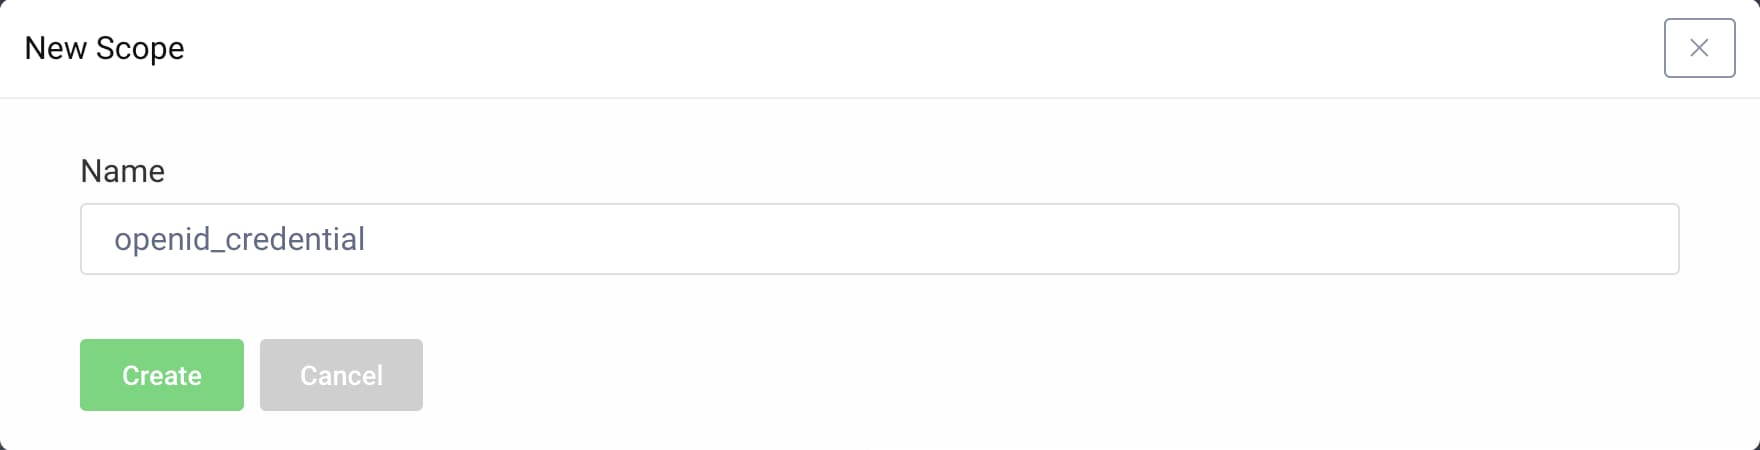
- Click the +New button again to create another new scope.
- Call the new scope
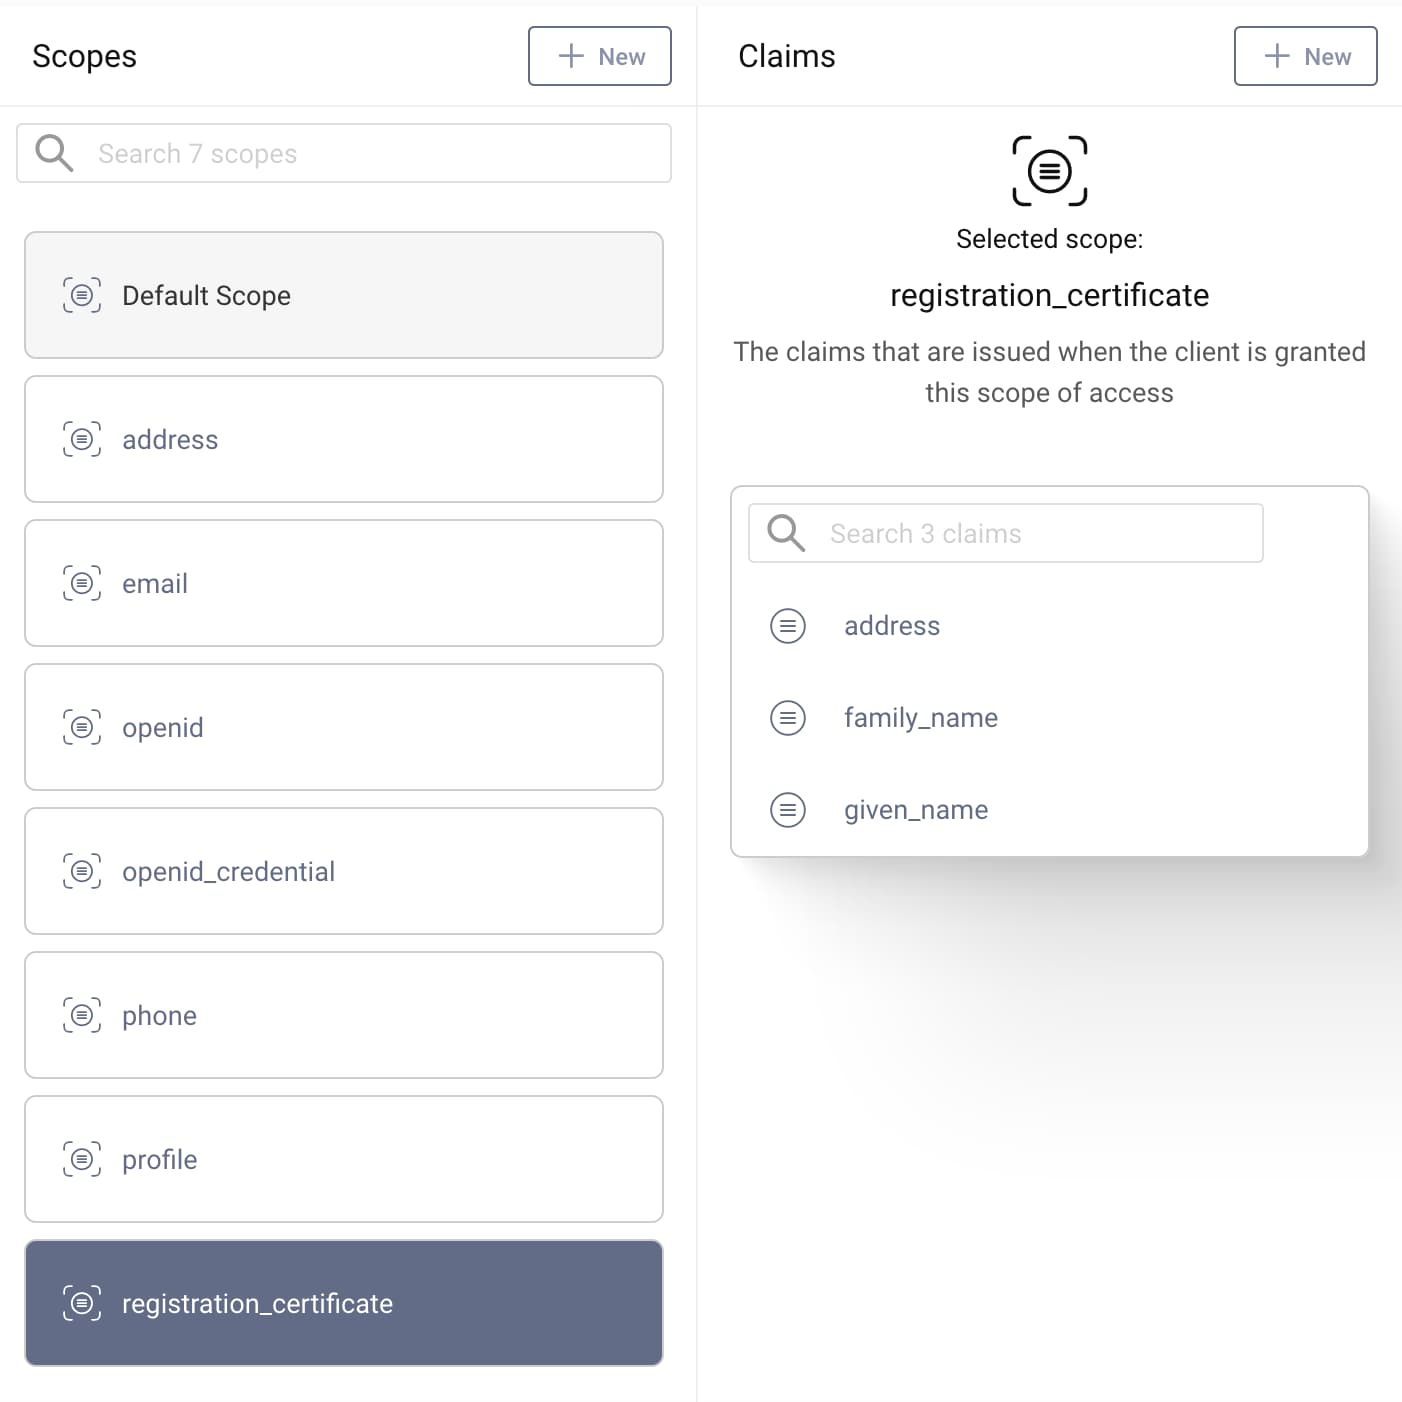
registration_certificate. - Add the claims from the verifiable credential type to the scope. Click Add claims to scope and select the following scopes:
addressfamily_namegiven_name
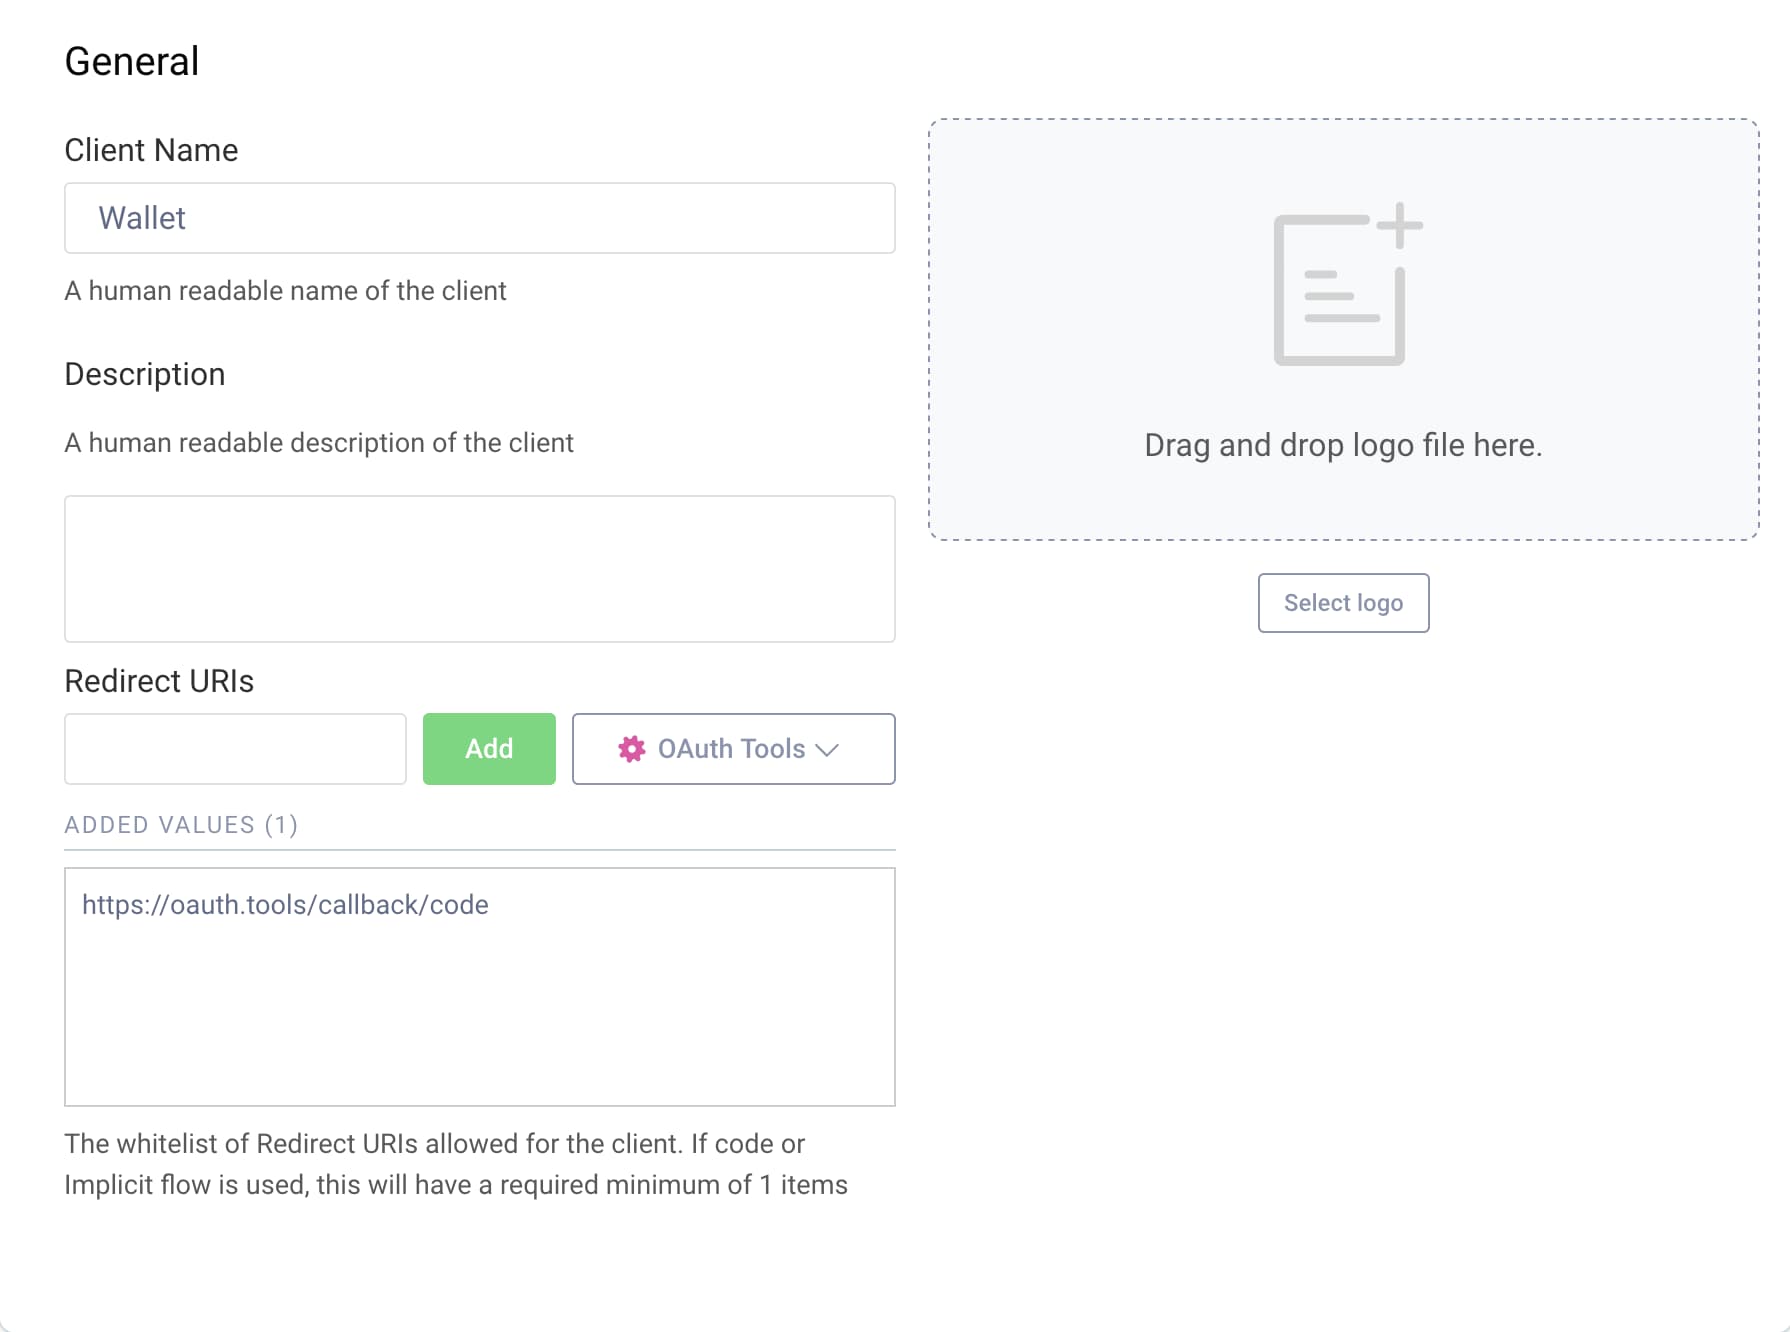
- Go to Clients in the left-side menu.
- Create a new client analogue to the instructions from Getting Started Track.
- Call the client
wallet. - Use the callback URI for OAuth Tools.
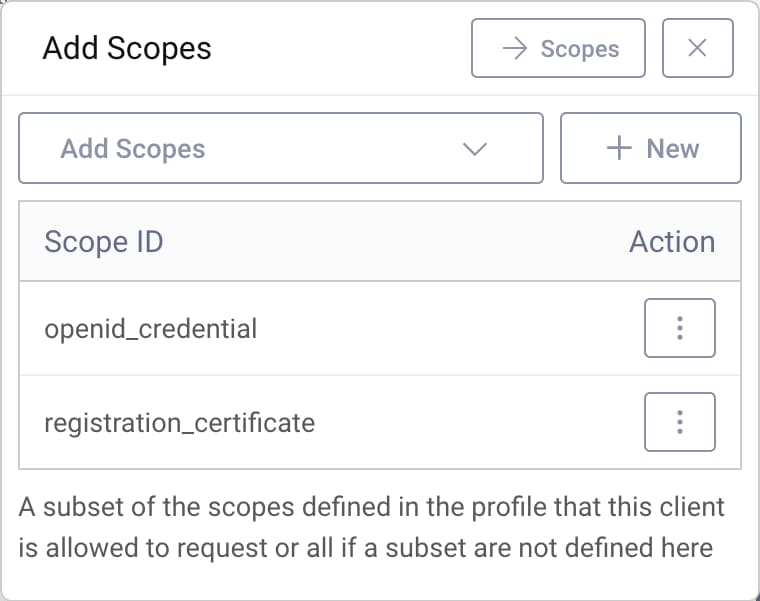
- Add the scopes
openid_credentialandregistration_certificate.
- Call the client
- Commit the changes via the Changes menu.
Issue a Verifiable Credential
Navigate to OAuth Tools. Configure it following the test instructions. Use the client wallet and the scopes openid_credential and registration_certificate for the Code Flow.
Then, load the Verifiable Credentials metadata.
- Open the workspace settings
- Select the Verifiable Credentials tab.
- Add
<base-url>/oauth/v2/oauth-anonymous/in the field for the credential issuer. - Click Discover.
- Close the window.
Next, create a verifiable credential issuance flow.
- Click the + symbol to start a new flow.
- Select
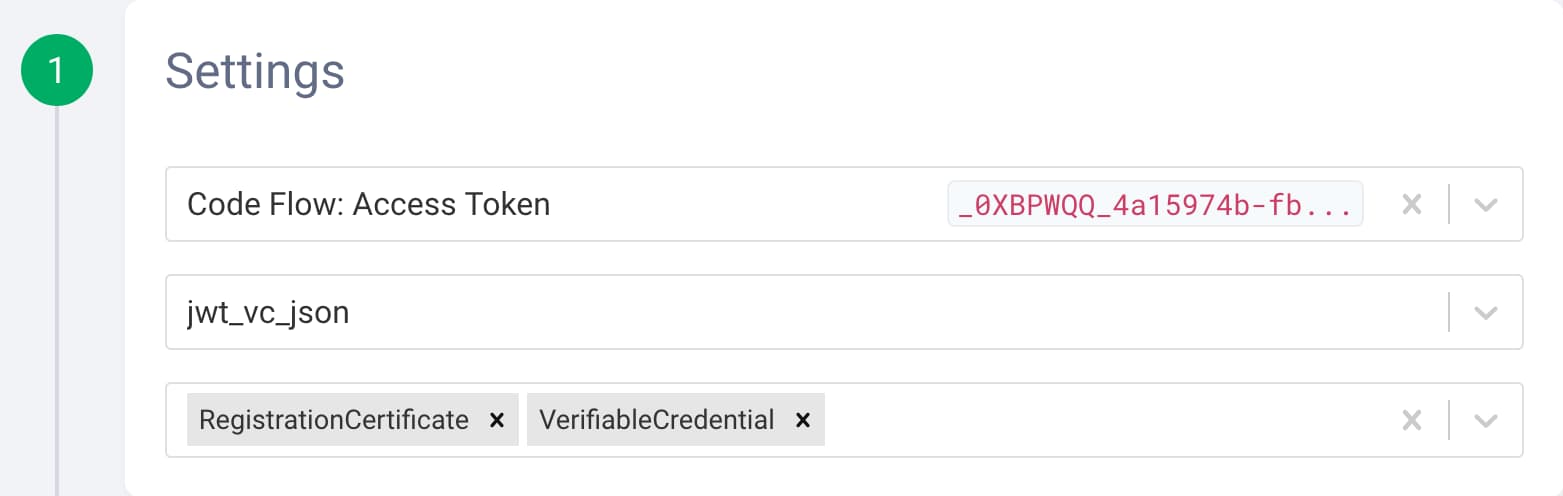
VCIfor verifiable credential issuance. - Select the access token from the Code Flow from above.
- Select
jwt_vc_jsonas the format. - Choose
RegistrationCertificateandVerifiableCredentialfrom the list of credential types.
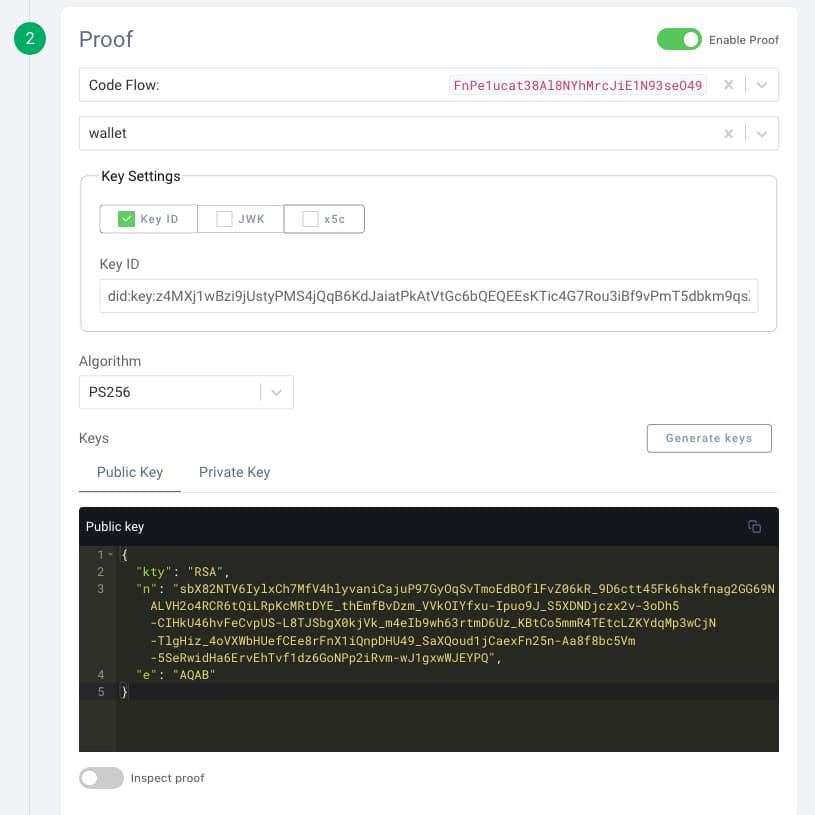
- Enable to include a subject proof in the request by turning on Enable Proof.
- Select the c_nonce from the Code Flow (same as the token)
- Select
walletas the client. - Enable Key ID from the key settings.
Now, use a supported DID method for the user. You can, for example, refer to the test vectors for did:key and copy the fields of the RSA key:
- Use the value of the
idof theverificationMethodas the Key ID. - Make sure to copy and save the value of the public key
publicKeyJwkin the input field for the Public Key. - Repeat for the private key
privateKeyJwk. - Choose
PS256for the Algorithm.
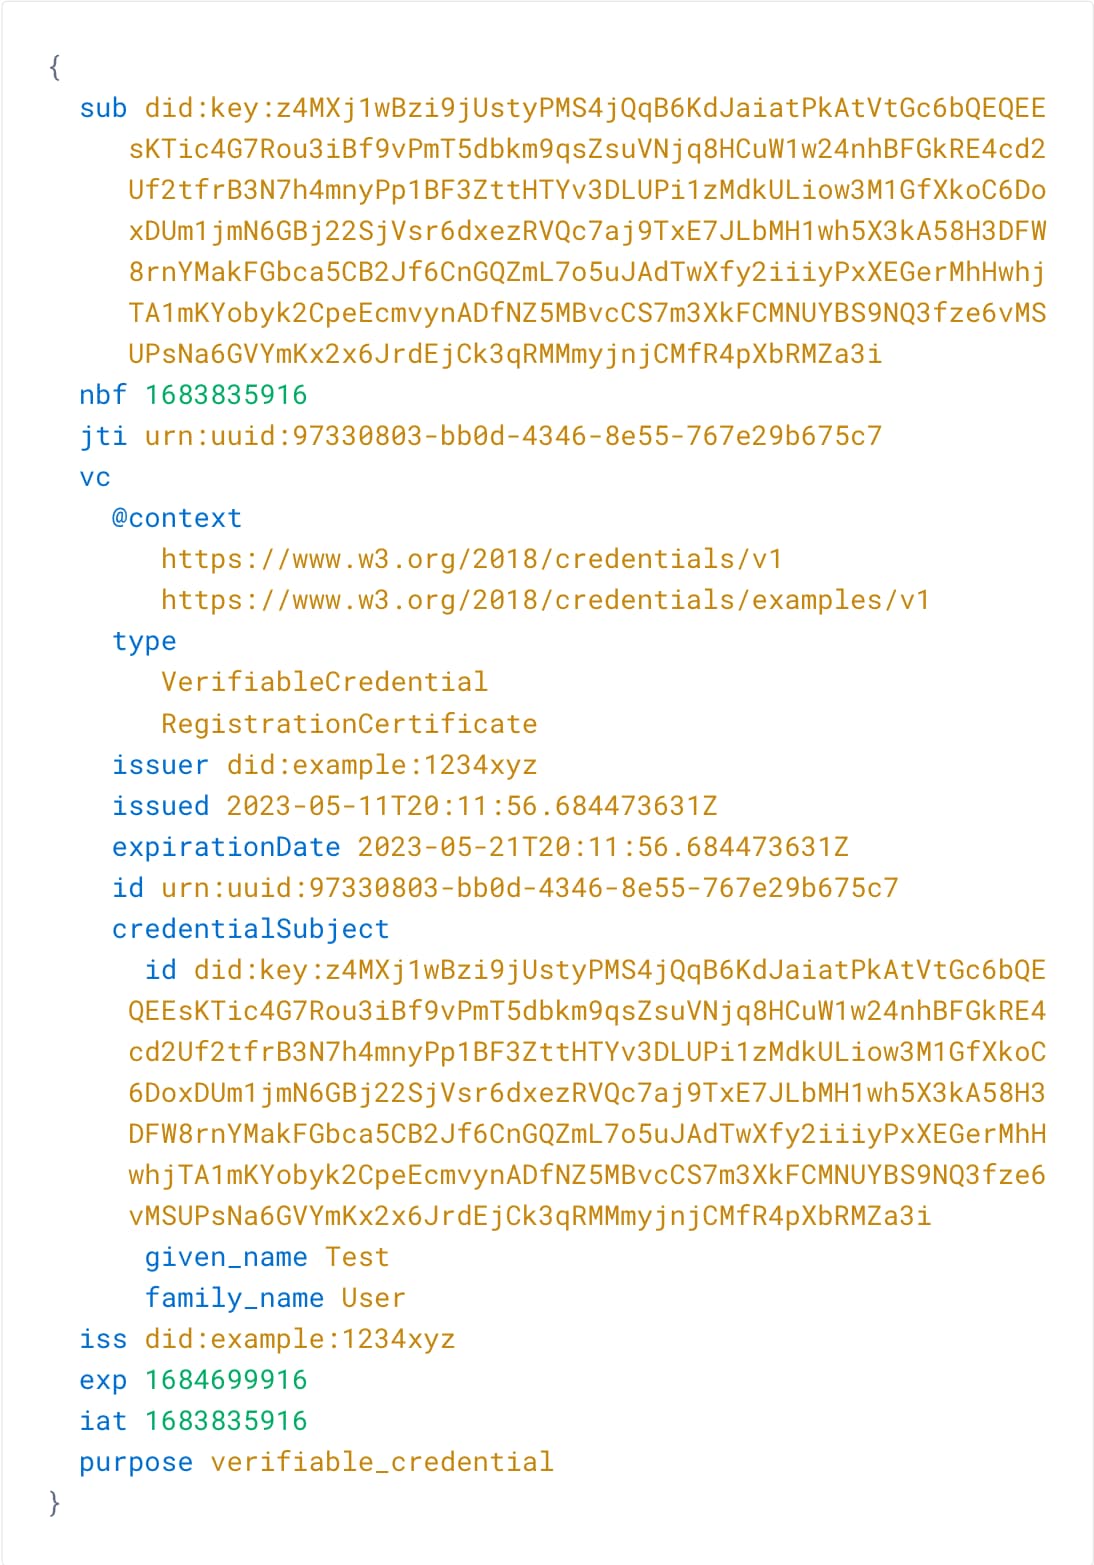
Finally, click Run. The credential appears on the right-hand side of the window. You can decode the JWT and inspect the details.
- Check the
typeclaim which includes theRegistrationCertificate. - Also note, that the context includes
https://www.w3.org/2018/credentials/examples/v1which means that the credential just serves as an example. - Study the
credentialSubjectclaim. Theidcontains the same value as the Key ID used in OAuth Tools. - Compare the
issandissuerclaim. The former is the issuer of the JWT and the latter the issuer of the verified credential (vc). They must be the same and according to the configuration hold the DID of the signature key, that is the example DIDdid:example:1234xyz. - The
expirationDateandexpclaim are 10 days from the issuing date.
After a wallet receives a credential, it safely stores it on the device next on the user's key (DID). It can then present the verifiable credential to relying parties when requested.
Conclusion
Verifiable credentials are claims about a subject (user) made by an issuer. In that sense they are similar to an ID token, however verifiable credentials can have different formats, types and encoding, and they are bound to a user. The Curity Identity Server supports the OpenID 4 VCI draft specification. The issued verifiable credentials conform to the W3C data model and are encoded as JWTs. Selected DID methods serve for the user binding. You can find the complete documentation for verifiable credential issuance in the product documentation.
Customer Stories
Learn how organizations run identity and API security at scale.
Read customer storiesWas this helpful?