Using the Dynamic Authenticator
On this page
In the Curity Identity Server authenticators represent the methods that are used to assert information about a user logging in to the system. They can be chained together and accompanied by Actions to form complex authentication flows. Normally, all the configuration required by an authenticator to do its job is contained in the Curity Identity Server and managed through the admin UI, configuration CLI or the RESTCONF API. However, there are setups where the Curity Identity Server is federated with numerous external providers to perform authentication. When the number of such federations grow, it might become cumbersome to manage all the settings directly in the Curity Identity Server. If the federation involves dozens or even a couple-hundred of providers, then it is simpler to use a Dynamic Authenticator instead of configuring every integration separately.
The Dynamic Authenticator
The Dynamic Authenticator is an authenticator that is capable of reading configuration from a remote source and to delegate the actual authentication to another authenticator (using the configuration read from the remote). This other authenticator is called the delegate authenticator. Have a look at the diagram below.

The Dynamic Authenticator itself is configured with the type of the delegate authenticator. It knows upfront that it will be delegating authentication to instances of e.g., an OIDC authenticator. The instance of the Dynamic Authenticator will always delegate to the given type of authenticator.
Supported authenticators and data sources
Have a look at the Dynamic Authenticator's documentation to check which authenticators and data sources are currently supported by the Dynamic Authenticator.
The Dynamic Authenticator requires some input, the federation ID, to determine the concrete federation (i.e. delegate authenticator) that should be used in the current authentication flow.
For example, use the domain of the user’s email address to resolve the federation ID. Add the value to the subject attribute dynamic-authenticator-federation-id.
This is the attribute that the Dynamic Authenticator reads and uses to load the configuration for the delegate authenticator.
The Dynamic Authenticator then calls the external source to get the configuration for the instance of the delegate authenticator.
The external source is called with the value of the federation ID attribute and the authenticator type.
The external source responds with a JSON representation of the configuration required for the delegate authenticator. For example, for the oidc type of delegation, the external source should return fields like configuration-url, client-id, http-client, etc.
To learn what fields should be returned by the external service have a look at an instance of the delegate authenticator. For example, for the oidc authenticator check the documentation of the OIDC Authenticator, for SAML check SAML Authenticator v2, or create the authenticator in the admin UI to see what options are supported, then view the configuration's XML to see the names of the configuration fields.
Once the Dynamic Authenticator gets the configuration, the Curity Identity Server (technically the current runtime node) caches it and creates an instance of the described authenticator that it delegates the authentication to. After the delegate authenticator finishes authentication, the Dynamic Authenticator resumes the authentication flow with any actions.
Externally provided configuration is not statically verified
The configuration that comes from the external source is not statically verified. This means that you must take care to properly set any references in that external configuration. E.g., if the external configuration returns an identifier of an HTTP client, you must ensure that the given client exists in the system. Otherwise, runtime errors will occur and users will not be able to authenticate using the misconfigured provider.
The Delegate Authenticator
The Dynamic Authenticator can be used to dynamically federate with many external OpenID Connect Providers. In this case it dynamically loads an instance of the OIDC Authenticator based on some external configuration. The required configuration parameters are summarized below:
| Configuration option | Description |
|---|---|
configuration-url | The URL of the OIDC metadata endpoint. E.g., https://idsvr.example.com/oauth/.well-known/openid-configuration |
client-id and client-secret | The ID and secret of the client configured in the external provider. |
http-client | The ID of the HTTP client that will be used to call the external provider, e.g., to get the metadata or exchange the authorization code for tokens. |
Properly Secure Client Secrets
The configuration API returns the client secret in plain text to the Curity Identity Server. So you should take proper care when storing those secrets. Either restrict access to the configuration API and its database, or consider to encrypt those secrets.
The authenticator also accepts other options, that are not mandatory, for example:
- If
use-subject-for-login-hintis set to true, then the OIDC Provider will get a login hint that contains the current subject attribute. (The value of the subject attribute at the time when the Dynamic Authenticator is called in the authentication flow.) - The
scopeattribute can contain a space-separated list of scopes that should be requested from the OIDC Provider.
The response from the configuration API may look similar to this:
{"configuration-url": "https://idsvr.example.com/oauth/.well-known/openid-configuration","client-id": "federation-client","client-secret": "Password1","http-client": "https-client","scope": "openid profile","use-subject-for-login-hint": true}
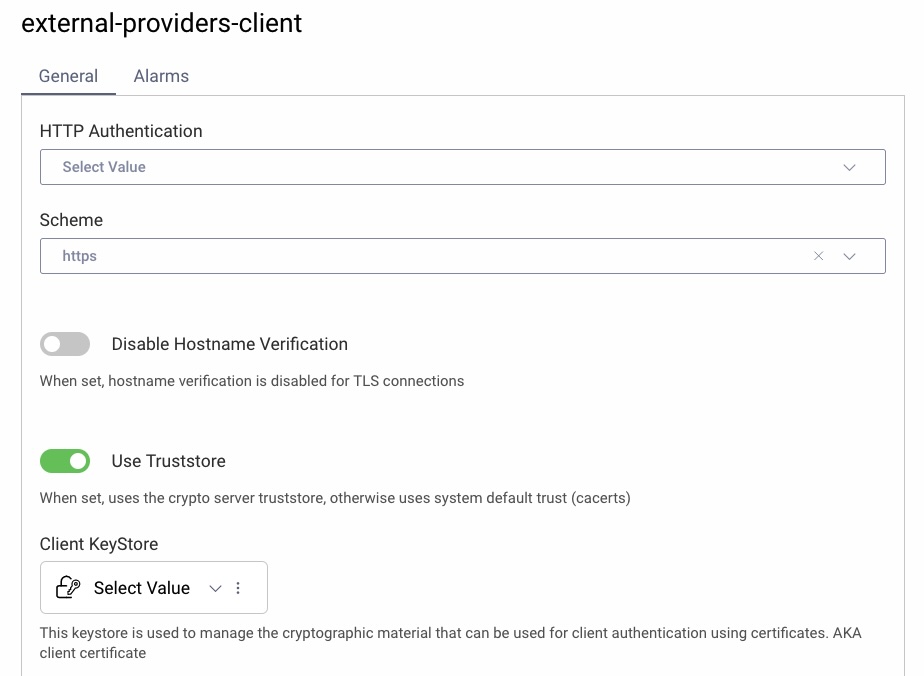
Make sure that the HTTP client with the ID referenced in the configuration exists in the Facilities → HTTP Clients section of the Curity Identity Server's configuration. It is best to use just a few clients for all the federated providers as creating a client for every provider will complicate management of the dynamic authentication. Very often you will need only one HTTP Client, unless some of your providers have different timeout settings. You will also need separate clients if you have a few high-security providers, that require mutual TLS to connect.
As the Curity Identity Server makes direct HTTP calls to the external providers, the providers' certificates must be trusted by the Curity Identity Server. Make sure that the HTTP client is configured to use trust stores and that your providers' certificates are added to the Curity Identity Server's configuration in Facilities → Keys and Cryptography → Trust Anchors → Server Trust Stores.
Trusted Certificates
As there are potentially a lot of providers used by the Dynamic Authenticator, it is best to add certificates of issuers (Certificate Authorities), not the providers' server certificates, so that one entry can establish trust for numerous entities.
Redirect URI for the Federated Provider
When registering a client at the Federated Provider you will need to provide a redirect URI to the Curity Identity Server. This URI is based on your Curity Identity Server's base URL, the authentication endpoint settings and the authenticator's name. It has the following form:
$BASE_URL/$AUTHENTICATION_ENDPOINT/$AUTHENTICATOR_NAME/callback
For example:
https://idsvr.example.com/authn/authentication/dynamic1/callback
The path for the $AUTHENTICATION_ENDPOINT is set in Profiles → Authentication Service → Endpoints.
Configuring the Dynamic Authenticator
Follow these steps to configure a Dynamic Authenticator in the Curity Identity Server.
- Go to Profiles → Authentication Profile → Authenticators and click on + New Authenticator.
- Enter a suitable name and select the Dynamic type.

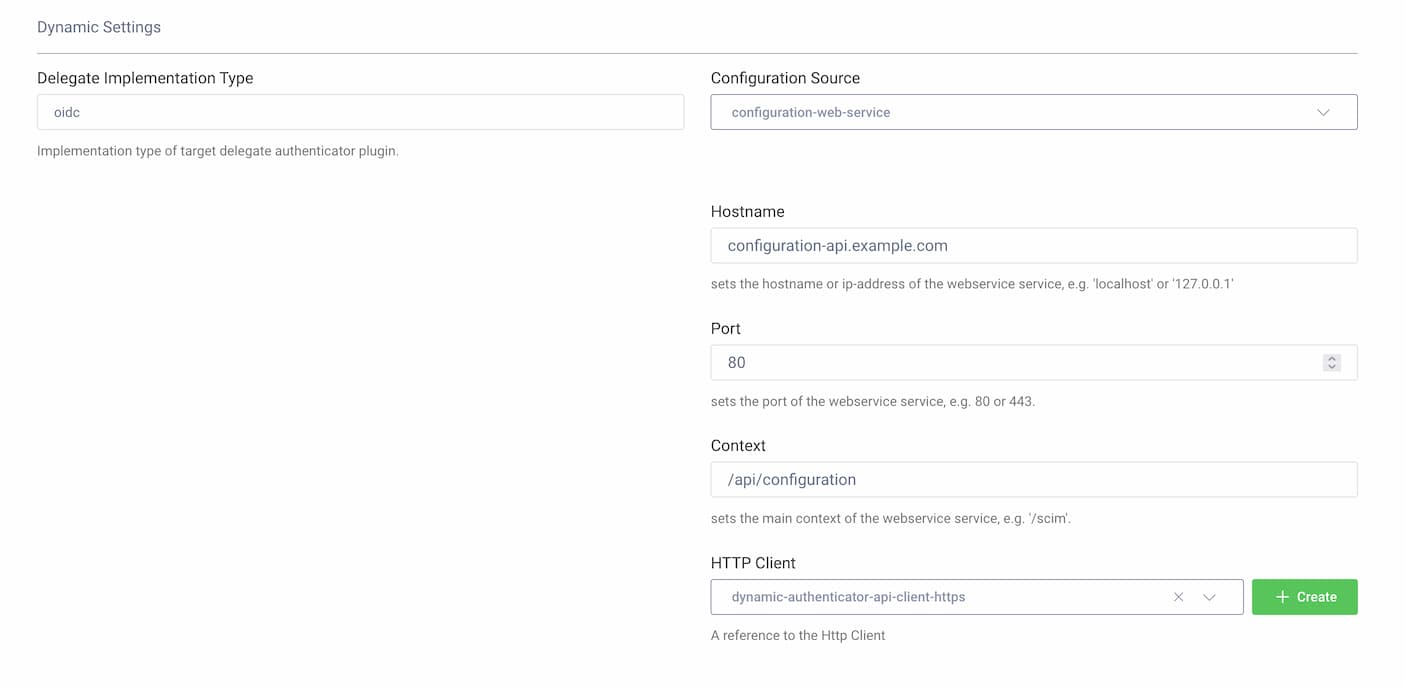
- Choose the Delegate Implementation Type, e.g.,
oidc - Select the type of Configuration Source:
The configuration for delegate authenticators will be read from a web service using an HTTP request. The API should accept the GET method with two query parameters and respond with a JSON response. The parameters are:
fid— the federated provider's IDimp— the implementation type of the delegate authenticator (e.g.,oidc)
Fill the configuration fields:
- Hostname — the host of the configuration API
- Port — the port of the configuration API
- Context — the path to the configuration endpoint
- HTTP Client — the HTTP client that will be used to call the API. The client can be configured to use authentication, e.g., Basic Authentication or mutual TLS
- Commit changes.
Federation ID Prerequisite
The Dynamic Authenticator must choose which federated provider should be used in the concrete authentication flow. This decision is based on the incoming subject attribute dynamic-authenticator-federation-id. This attribute should contain the ID of the federation that will be used in the authentication flow. The value default is used if no attribute is provided to the Dynamic Authenticator.
One way of setting this attribute is to have a prerequisite username authenticator that collects the user's login, then extracts the domain part of the login using a script transformer action. This solution is implemented in the demo described below.
Example Implementation
The Dynamic Authenticator Demo contains resources that allow you to quickly start up an instance of the Curity Identity Server with the Dynamic Authenticator configured. This instance is named login.example.com. The demo also spins up an API that serves the configuration and several additional instances of the Curity Identity Server that serve as external OIDC (provider1.example.com and provider2.example.com) or SAML providers (provider3.example.com and provider4.example.com) for demonstration purposes.
The providers are configured with custom SSL certificates signed by the same CA (self-signed). The CA certificate is then added to the main instance's trust store so that communication can be established between all parties.
The setup and configuration of external providers are out of scope of this tutorial. The external providers are expected to be already in place and maintained by different parties using any products that support SAML or OpenID Connect. When setting up the Dynamic Authenticator just request the configuration parameters from the external providers that are required for integration, including the CA certificate. You have to add the CA certificate that issued the external server's certificates to the trust store of the Curity Identity Server instance in any case.
Prerequisites
To run the demo you need the following tools installed on your machine:
- Docker desktop
- openssl
- curl
You also need a license for the Curity Identity Server. If you don't have one you can get a trial license from the Curity Developer portal.
Authentication Flow
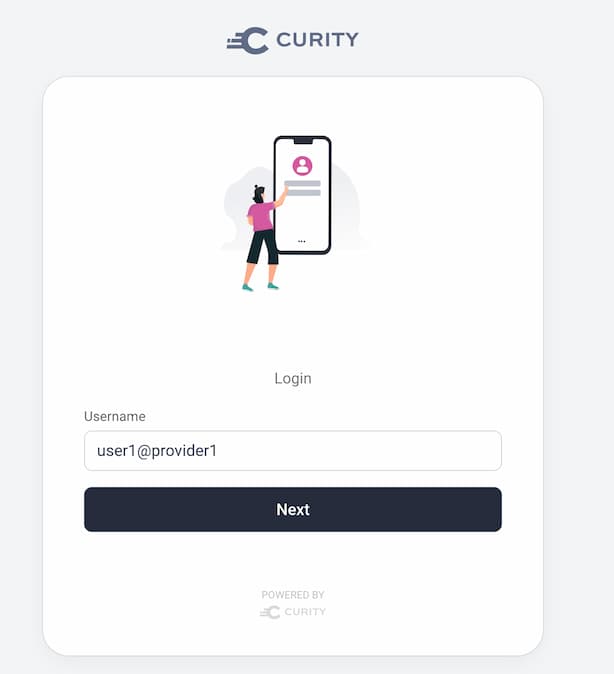
As mentioned above, the Dynamic Authenticator reads the subject attribute dynamic-authenticator-federation-id to retrieve the configuration parameters of the external provider. In this example, the user is first prompted to enter a username in the form of username@providerX where providerX is the ID of the provider and federation. Then, a script runs to retrieve the federation ID from the subject. Study the code of the script action:
function result(context) {var attributes = context.attributeMap;var sub = attributes.subject;var indexOfAt = sub.indexOf('@');// federationId which will be sent to the external configuration sourcevar federationId = indexOfAt >= 0 ? sub.substring(indexOfAt + 1) : 'default';// remove federation ID from subject namevar subject = indexOfAt >= 0 ? sub.substring(0, indexOfAt) : sub;// the dynamic authenticator will look at this attribute for the federation ID,// or use 'default' if it's not found.attributes['dynamic-authenticator-federation-id'] = federationId;attributes.subject = subject;return attributes;}
Depending on which provider the user intends to log in at, the workflow first chooses a Dynamic Authenticator that supports either OIDC or SAML, and then loads the configuration for the external provider dynamically based on the federation ID. The user is requested to log in at the external provider that returns the authentication result to the Curity Identity Server which then logs the user in.
Run the Demo
To start the demo, follow these steps:
- Copy the license JSON file to the
idsvrfolder. - Add the following line to your
/etc/hostsfile:
127.0.0.1 login.example.com provider1.example.com provider2.example.com provider3.example.com provider4.example.com
- Run the
./deploy.shscript. The script will create necessary certificates and will start all the containers required by the demo.
Once you're done with the test, run the ./teardown.sh script to free all resources.
Testing the Solution
You can log in to the main instance of the Curity Identity Server, by starting an OAuth flow for the client dynamic-authenticator-demo. For example, enter the following URL in your browser:
https://login.example.com:8443/oauth/v2/oauth-authorize?client_id=dynamic-authenticator-demo&response_type=code&scope=openid&redirect_uri=http://localhost
OAuth Tools
You can use OAuth Tools to perform OAuth flows, but you will
need to expose the main instance of the Curity Identity Server to the internet. Here is
a tutorial that shows how to expose a local instance using a free tool called ngrok.
You will see the username authenticator screen. Type one of the following to be redirected to the corresponding provider.
user1@provider1user2@provider2user3@provider3user4@provider4
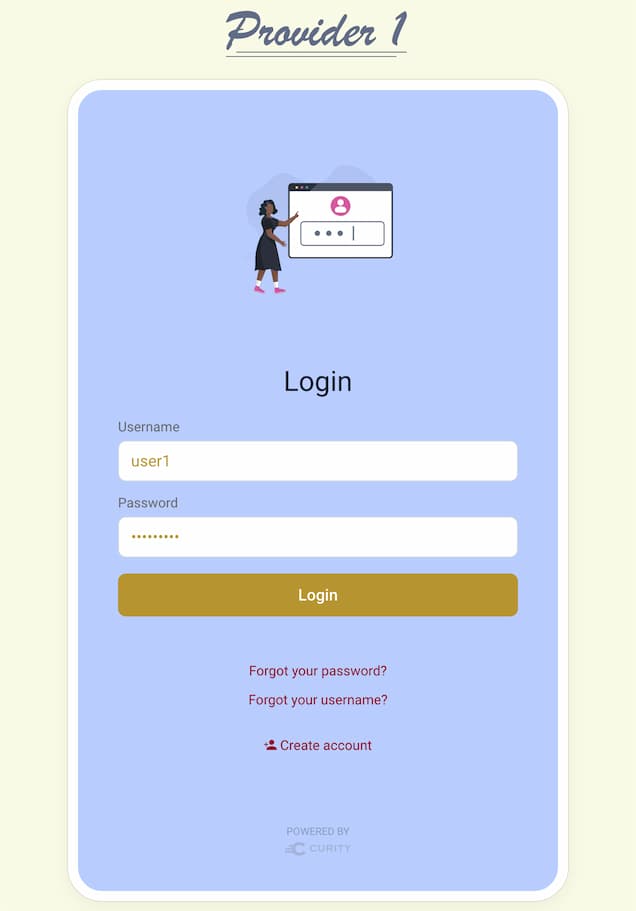
The authentication flow forwards the authentication request to the corresponding external provider. Use the following credentials to log in at the different providers:
| Provider | Username | Password |
|---|---|---|
| provider1 | user1 | Password1 |
| provider2 | user2 | Password1 |
| provider3 | user3 | Password1 |
| provider4 | user4 | Password1 |
Adjust Providers' Theme with the Look And Feel Editor
The Look And Feel editor provides a way of changing the theme of the login forms without the need of editing CSS files and templates. You can use it to quickly change the login screens look.
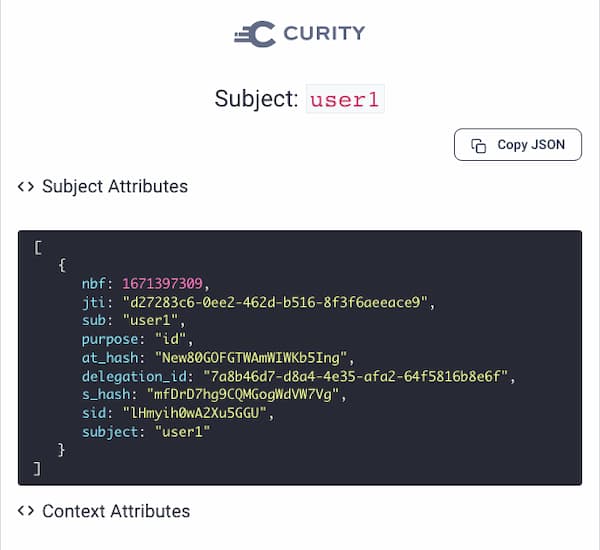
After logging in with a provider you will see the Debug Attribute Action screen, where you can study the attributes collected from the respective provider.
Note that even though userX@providerX was first used as the subject, the final subject is the one obtained from the provider.
Demo Recording
For a visual example of the demo environment check out the recording below.

Conclusion
The Dynamic Authenticator provides a great way for managing a situation where the Curity Identity Server needs to federate with numerous external Identity Providers. If you federate with a couple dozen or hundreds of Identity Providers then it will be much more efficient to use the Dynamic Authenticator, instead of having to configure all the federations as separate authenticators directly in the Curity Identity Server's configuration. Read more on the Dynamic Authenticator in the product documentation.
Customer Stories
Learn how organizations run identity and API security at scale.
Read customer storiesWas this helpful?