Running the DevOps Dashboard
On this page
The DevOps Dashboard Overview explains the role of the dashboard, where employees from multiple teams in an organization can be granted controlled access to administer identity resources such as OAuth clients, API permissions, and customer user accounts.
The dashboard is a built-in GraphQL client. To enable different privileges per type of user it must be issued an access token containing a groups claim. This tutorial explains the technical setup required. The same techniques can then be used within an organization's own applications, which can also act as GraphQL clients. This tutorial provides a step by step explanation of how to enable and securely configure the DevOps dashboard.
Quick Start
At the end of the tutorial a fast example deployment is provided, which can be run from a development computer.
Prerequisites
The Curity Identity Server does not enable the DevOps Dashboard by default. To do so, first ensure that you have an enterprise (or trial) license file, with access to the dashboard feature and at least 3 user groups. Currently, you must also use a JDBC data source for the Curity Identity Server, to expose data via GraphQL.
Enable the DevOps Dashboard
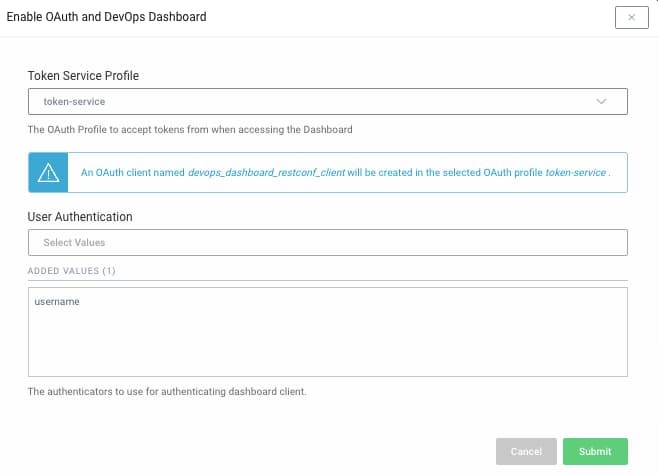
The DevOps dashboard is activated by running the Admin UI and navigating to System → Admin Service. The RESTCONF API must be enabled, and also the DevOps Dashboard option. The following prompt is then presented, where the token service and dashboard authenticator are configured. The example deployment uses a simple username authenticator, as shown here.
Once the dashboard is activated, a new entry for dashboard logins is available in the top level menu:
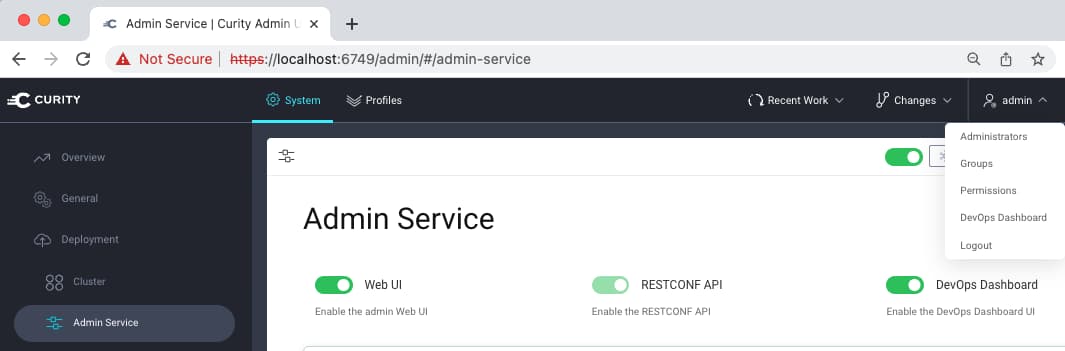
This results in two administrative URLs for the Curity Identity Server. Also ensure that the Admin UI and runtime nodes use the same HTTP or HTTPS scheme, which is required for dashboard logins to work.
| Component | Example URL |
|---|---|
| Admin UI | https://localhost:6749/admin |
| DevOps Dashboard | https://localhost:6749/admin/dashboard |
| Runtime Nodes | https://localhost:8443 |
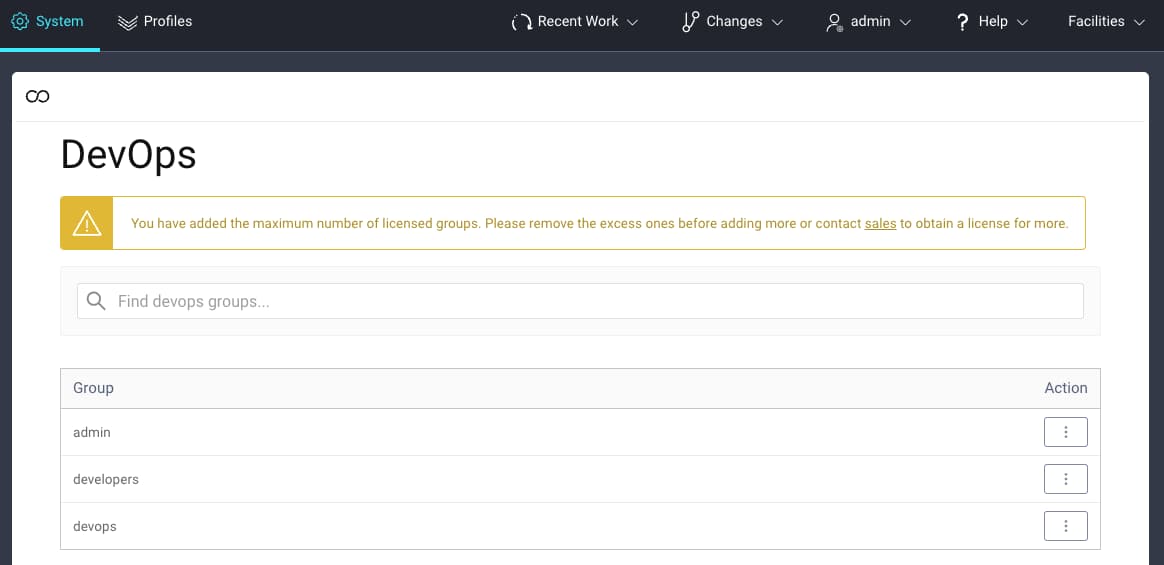
Create Employee Groups
Under System → Administrators → DevOps, the example deployment uses three dashboard groups. Each of these can be edited so that different types of employee can be given the desired level of dashboard access:
Assign Dashboard Group Permissions
The example deployment grants the devops group full dashboard permissions, whereas the developers group only has the following restricted permissions. The Curity Identity Server enforces these permissions based on the access token it receives from the dashboard.

Issue Dashboard Access Tokens
In order for different access levels per group to work, the user's group must be issued to an access token in a groups claim, as shown here. This claim must be added to the built-in scope that the dashboard uses, named openid urn:se:curity:scopes:admin:api:
{"sub": "janedoe","purpose": "access_token","iss": "https://localhost:8443/oauth/v2/oauth-anonymous","active": true,"groups": [{"type": "","value": "developers","primary": true}],"token_type": "bearer","client_id": "devops_dashboard_restconf_client","aud": ["urn:se:curity:audiences:admin:api","devops_dashboard_restconf_client"],"nbf": 1671185832,"scope": "openid urn:se:curity:scopes:admin:api","exp": 1671186132,"delegationId": "acbb74b4-7d7c-4723-9f4e-eb1af497b950","iat": 1671185832}
To understand how to issue the groups claim, see the Groups Authorization Manager tutorial. The instructions there work in the same way when using non-dashboard GraphQL clients. In the event of problems issuing access tokens correctly, see the troubleshooting notes that accompany the example deployment.
Enable User and Client Endpoints
Once dashboard employee logins are enabled, next ensure that the GraphQL endpoints needed for the dashboard's operations are enabled. The following resources explain how to do so, and how these endpoints are called by clients:
Run the Example Deployment
A fast example setup is also provided, which can be quickly run on a development computer. To simplify the technical setup on development computers, this uses plain HTTP endpoints, whereas deployed systems would instead use HTTPS. Clone the GitHub repository at the top of this page, then copy a license.json file to the root folder and run the deployment script:
./deploy.sh
Next, login to the Admin UI with the following details, to view configuration settings:
- URL:
http://localhost:6749/admin - Admin UI credentials:
admin / Password1
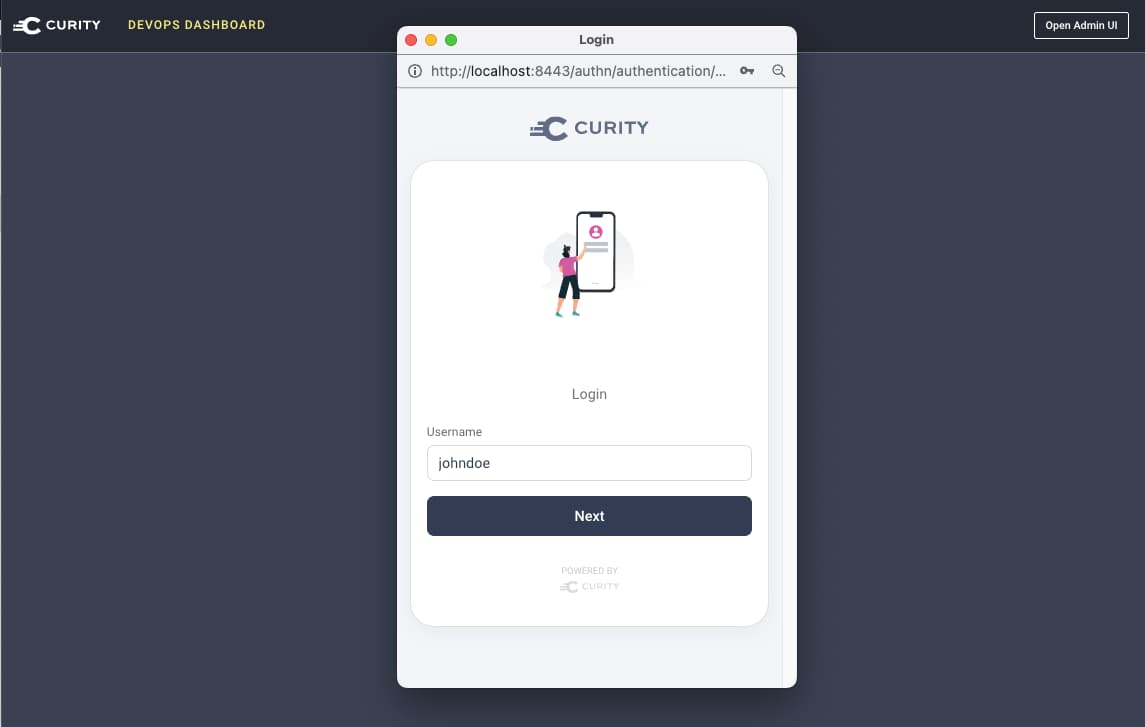
You can login to the DevOps dashboard by navigating to the following URL, then entering one of the usernames when prompted. A popup window is used for the dashboard login, so ensure that browsers allow popups for the domain of the Curity Identity Server.
- URL:
http://localhost:6749/admin/dashboard - DevOps username:
johndoe - Developer username:
janedoe
The example deployment uses a username authenticator for employee users, with no real authentication. In a real-world setup, an authenticator for employees would be configured here. This is discussed further in the groups authorization manager tutorial.
In the example deployment there are two employee groups, described below:
| Group | Permissions |
|---|---|
| devops | Full permissions, including listing, editing and creating customer user accounts |
| developers | Permissions to edit OAuth clients, edit API scopes and claims, and view alarms |
After login, the DevOps user can administer customer user accounts whereas the developer cannot. There are two pre-shipped users, named bob and alice, who would typically login to the organization's user facing apps:

Conclusion
This tutorial showed how to get up and running with the DevOps dashboard, starting from a default docker deployment of the Curity Identity Server. The dashboard provides a productive and secure way for employees to manage OAuth settings and to administer users with access to the organization's web and mobile apps.
Customer Stories
Learn how organizations run identity and API security at scale.
Read customer storiesWas this helpful?