Multi-Region Dynamic User Routing
On this page
Intro
The Dynamic User Routing article describes a design pattern for routing OAuth requests for end-users to their home region within a global IAM deployment. This tutorial and video shows how to get an end-to-end solution working.
Get the Code
First, clone the GitHub repository at the top of this page, which provides some resources that provide an example end-to-end docker based deployment.
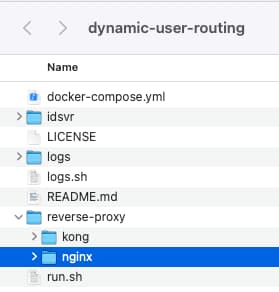
Understand Components
The example deployment uses the following components within a docker compose network. The Curity Identity Server will be exposed to the host computer via a reverse proxy, at a base URL of http://localhost:80:
Install Prerequisites
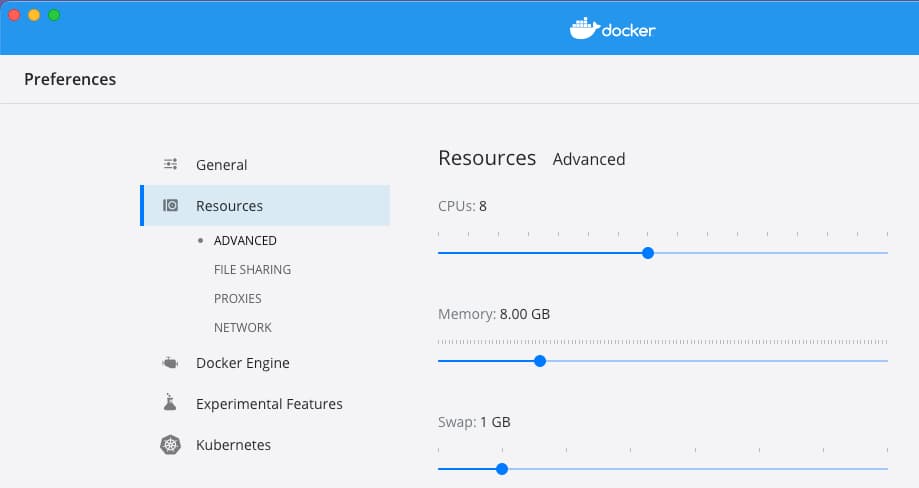
Install Docker Desktop
First, ensure that Docker Desktop is installed and configured with 8GB or more of RAM, so that the cluster has sufficient resources to run all components:
Install ngrok
OAuth Tools will be used as a test client, and in order for it to connect to http://localhost:80, an ngrok tunnel will be used. If you don't have ngrok installed, see the setup tutorial.
Provide a License File
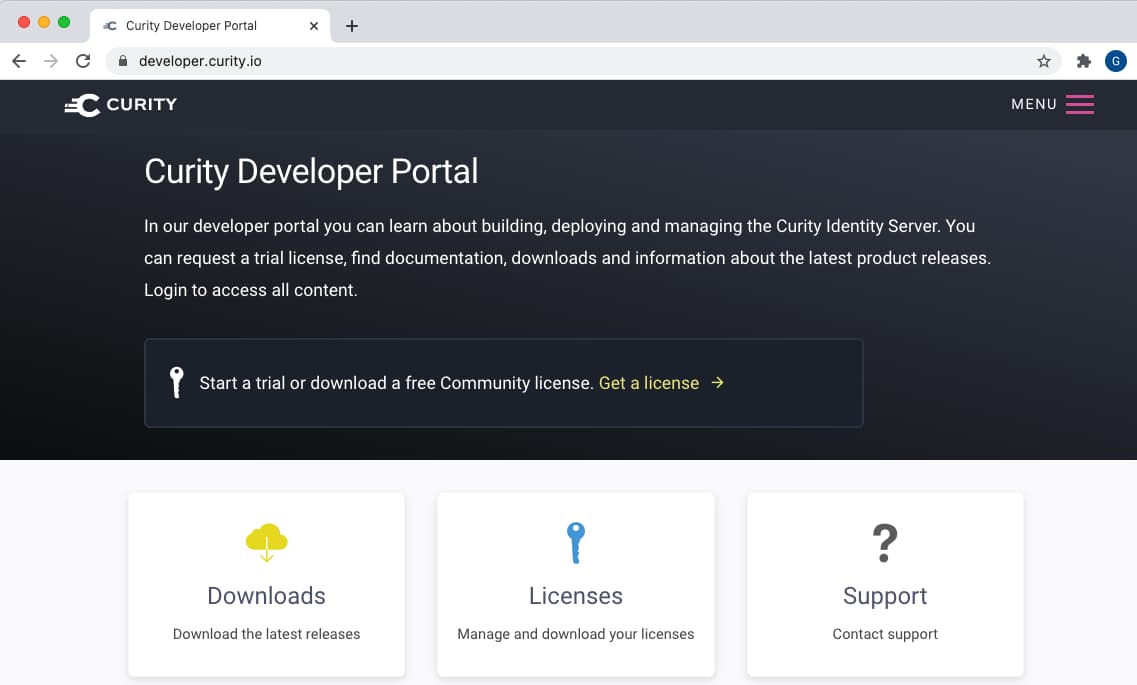
Obtain a license for the Curity Identity Server, by signing up on the Developer Portal if needed. The license.json file then must be copied into the idsvr folder of the repository.
Run the System
View the Docker Compose File
The Docker Compose file runs either an NGINX or Kong reverse proxy, in front of some clustered instances of the Curity Identity Server:
version: '3.8'services:nginx:build:context: .dockerfile: ./reverse-proxy/nginx/Dockerfileimage: custom_openresty:1.21.4.1-bionichostname: internal-nginxports:- 80:80volumes:- ./reverse-proxy/nginx/nginx.conf:/usr/local/openresty/nginx/conf/nginx.confprofiles:- nginxdepends_on:- curity_eu- curity_uscurity_eu:image: curity.azurecr.io/curity/idsvr:latesthostname: internal-curity-euvolumes:- ./idsvr/license.json:/opt/idsvr/etc/init/license/license.json- ./idsvr/cluster-configuration.xml:/opt/idsvr/etc/init/cluster-configuration.xml- ./idsvr/config-backup.xml:/opt/idsvr/etc/init/config.xmlenvironment:- SERVICE_ROLE=Europe- SERVICE_NAME=Europe1- BASE_URL=${BASE_URL}depends_on:- curity_admin- data_eu
Run All Containers
Deploy the system with one of the following commands, depending on your reverse proxy preference:
| Reverse Proxy | Command |
|---|---|
| NGINX OpenResty | ./run.sh nginx |
| Kong Open Source | ./run.sh kong |
The script will generate an internet URL that points to http://localhost:80 and prompt you to copy it:
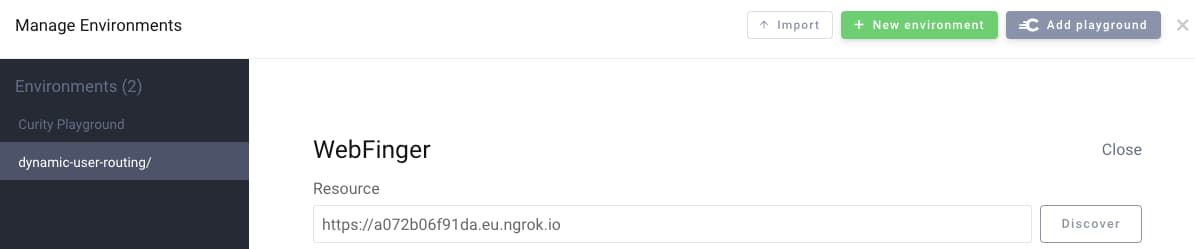
*** Copy this URL, then press enter to start OAuth Tools and deploy the Docker system ****** Wait for the Docker system to come up, select use Webfinger in OAuth Tools, then paste this URL as the resource ***https://a072b06f91da.eu.ngrok.io
After pressing the enter key to proceed, all containers will start deploying. In addition, OAuth Tools will be opened in a browser window for testing. Once the Docker system is initialized, select Use Webfinger in OAuth Tools and copy in the ngrok URL, to create an environment for testing:
Access the System
You can then access the system using URLs of the following form:
| Component | URL | Description |
|---|---|---|
| Admin UI | https://localhost:6749/admin | Sign in as user admin with Password1 to view the Identity Server configuration |
| Exposed OAuth Endpoints | https://a072b06f91da.eu.ngrok.io/oauth/v2/oauth-anonymous/.well-known/openid-configuration | The OAuth endpoints that will be used when OAuth Tools is used as a client |
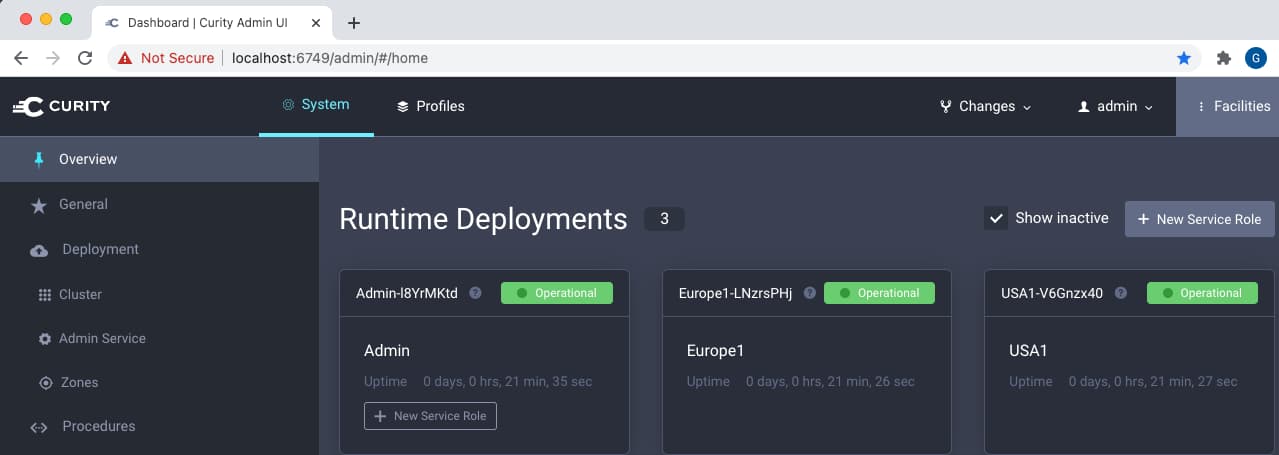
The system represents a basic global cluster, with an admin node, a European runtime node, and an American runtime node:
Query User Account Data
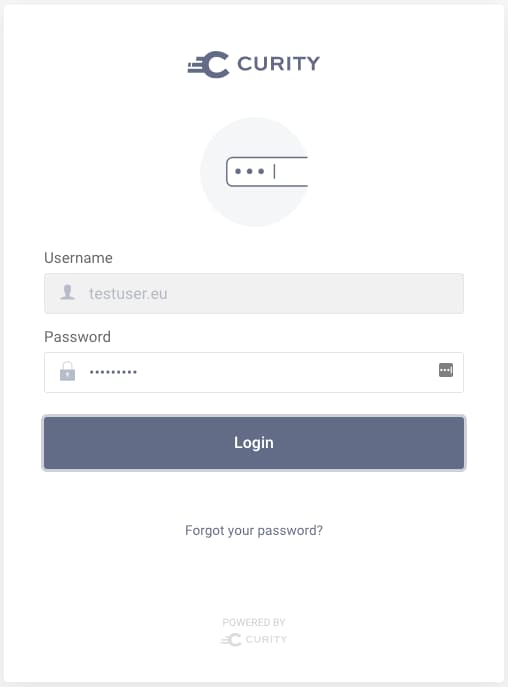
A user called testuser.eu exists in the European database, and a user called testuser.us exists in the US database. Users can be queried by first remoting to a database container:
export USERDATA_EU_CONTAINER_ID=$(docker container ls | grep data_eu | awk '{print $1}')docker exec -it $USERDATA_EU_CONTAINER_ID bash
Next, connect to the database:
export PGPASSWORD=Password1 && psql -p 5432 -d idsvr -U postgres
Next, query user accounts via the following command:
select username, email from accounts;
Each user only exists in one database. If users were routed to the wrong data source, they would experience a login error. The reverse proxy will prevent this from ever happening, due to its reliable routing:
username | email-------------+--------------testuser.eu | test.user@eu
Test Logins
Use a Test Client
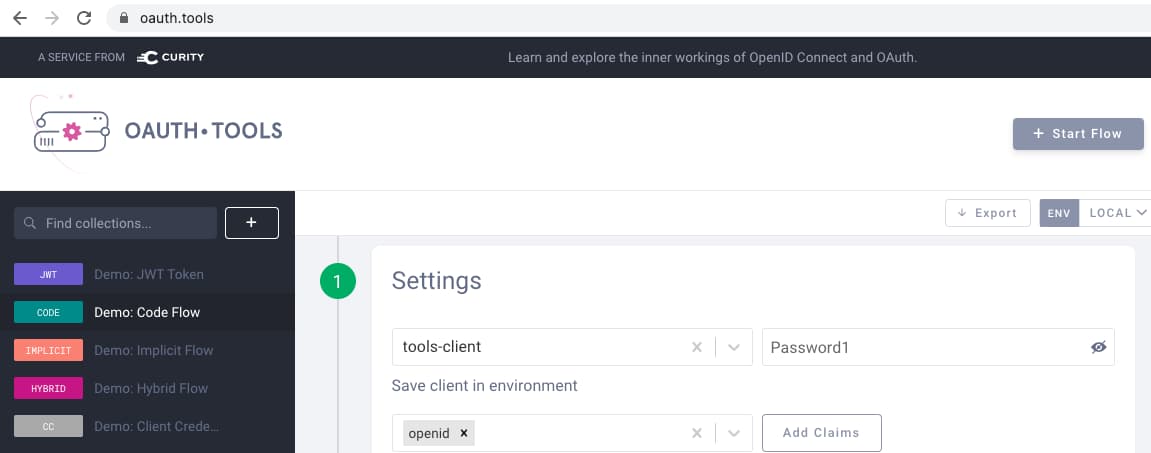
In OAuth Tools run a code flow with the following settings, to match those supplied in the configuration of the Curity Identity Server instances:
Run Logins as EU and US Test Users
In the early stages of authentication, the user has not yet been identified. Therefore, requests are routed to the default region. In the example setup, this region is the European instance. Credentials are then collected in two stages, starting with a Username Authenticator:
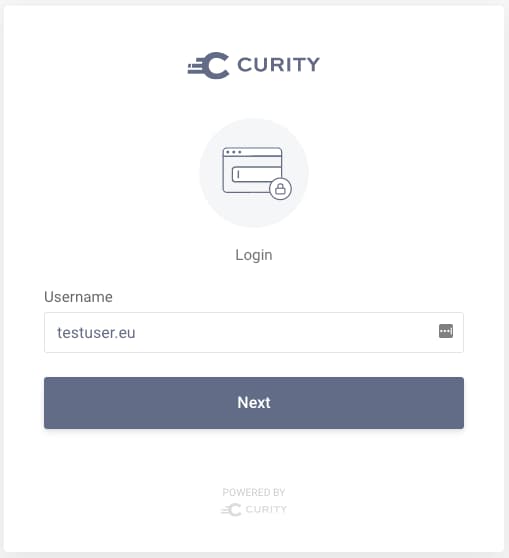
Once identified, the authentication workflow continues in the user's home region so that the user can sign in reliably. Note also that the Username Password Authenticator is being used in Password Only mode, and its user name field is automatically populated from the previous screen:
For the American user, a zone transfer action occurs when the username is submitted. This ensures that credentials are verified against the US data source.
View Logs
During processing, info-level log statements are output by the reverse proxy, when a zone is detected in either an HTTP Only cookie or a wrapped token:
*** Found zone 'eu' in cookie, client: 172.19.0.1, server: , request: "POST /authn/authentication/UserName-Password HTTP/1.1"*** Found zone 'eu' in wrapped token, client: 172.19.0.1, server: , request: "POST /oauth/v2/oauth-token HTTP/1.1"*** Found zone 'eu' in cookie, client: 172.19.0.1, server: , request: "POST /authn/authentication/UserName HTTP/1.1"*** Found zone 'us' in cookie, client: 172.19.0.1, server: , request: "POST /authn/authentication/UserName-Password HTTP/1.1"*** Found zone 'us' in wrapped token, client: 172.19.0.1, server: , request: "POST /oauth/v2/oauth-token HTTP/1.1"
View Wrapped Tokens
In OAuth Tools, view authorization codes, access tokens and refresh tokens, which all now use a JWT format and contain a zone value. Note that this is a confidential JWT payload, which does not reveal any sensitive user information:
{iss: http://curity-demo.ngrok.io/oauth/v2/oauth-anonymousazp: tools-clientjti: P$cb4d89ce-0e78-449e-b59e-58d9afd79184iat: 1623230431exp: 1623230731zone: us}
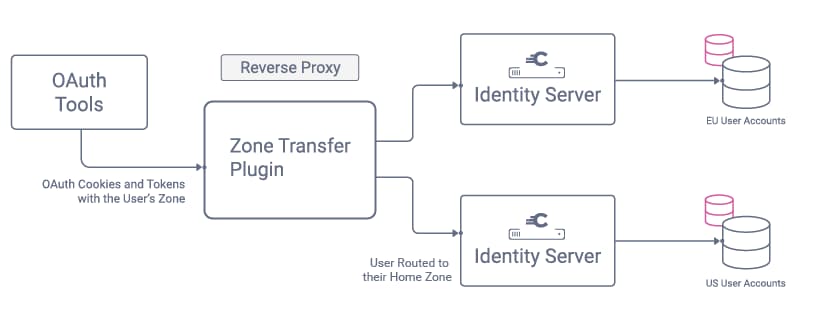
Reverse Proxy Routing
The reverse proxy's role is to read the zone from HTTP Only cookies received in front channel requests, or from wrapped tokens received in back channel requests. In both cases, the reverse proxy selects the host address from a map at runtime, which in the example setup looks like this:
| Zone Value | Mapped Host Address |
|---|---|
| unknown | http://internal-curity-eu:8443 |
| eu | http://internal-curity-eu:8443 |
| us | http://internal-curity-us:8443 |
This type of routing is possible in any reverse proxy or API gateway with good support for content-based routing. It requires a small amount of code via a simple plugin.
---- Try to read the zone value from an OAuth request--function _M.get_zone_value(config)if not verify_options(config) thenreturn nilendlocal method = string.lower(ngx.var.request_method)if method == 'options' or method == 'head' thenreturn nilend-- First try to find a value in the zone cookielocal zone = get_zone_from_cookie(config.cookie_name)-- Otherwise, for POST messages look in the form bodyif zone == nil and method == 'post' thenzone = get_zone_from_form(config.claim_name)endreturn zoneend
Identity Server Configuration
System Zones
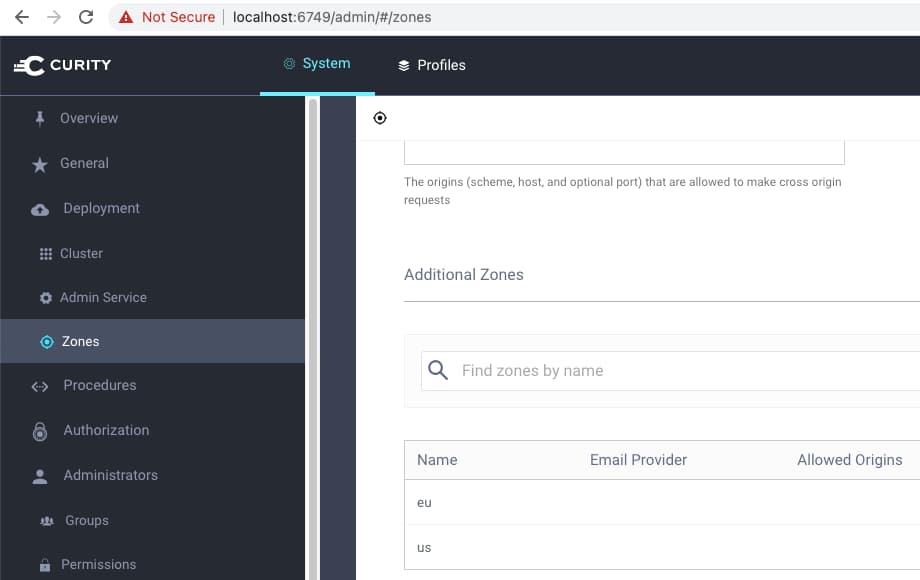
Login to the Admin UI and first navigate to System --> Zones to see that two zones are configured:
Service Roles
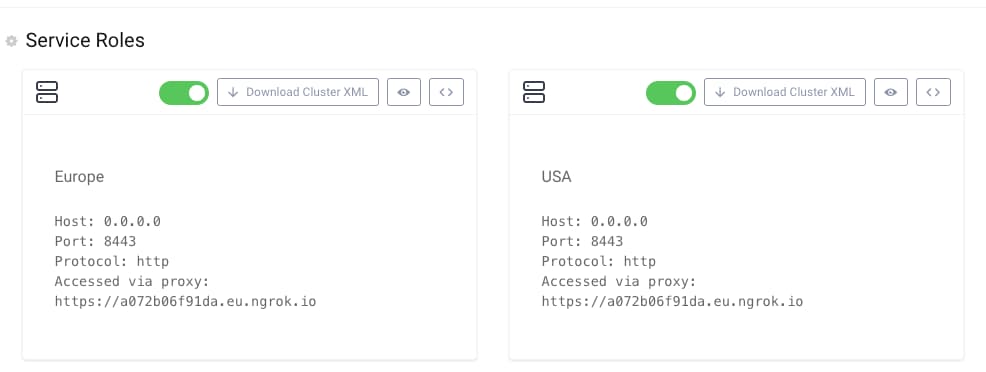
Navigate to System --> Deployment, where distinct service roles exist for each zone, and the corresponding zone value is configured under advanced properties of each service role:
Data Separation
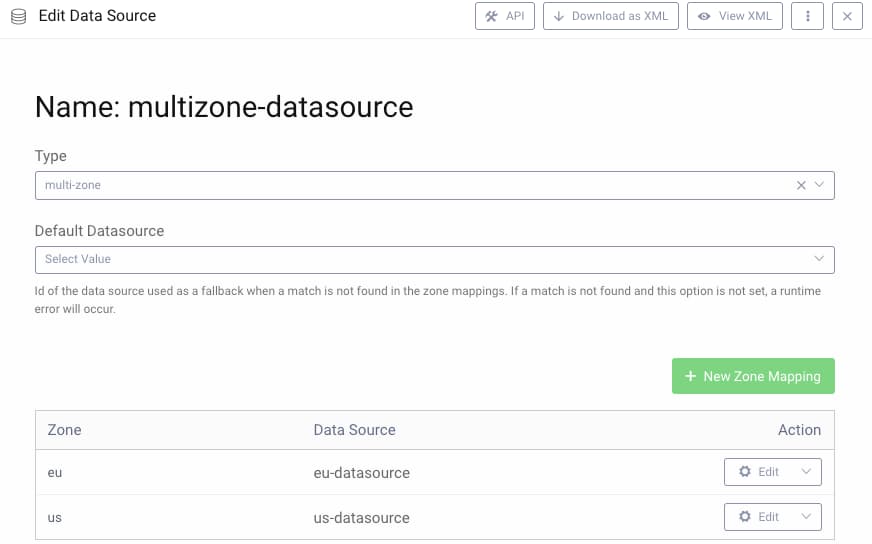
Navigate to Facilities --> Data Sources, where a multi-zone data source is used to map zones to individual PostgreSQL JDBC data sources:
Enabling Wrapped Tokens
Navigate to Profiles --> Token Service --> Token Issuers, to see that the system is configured to use wrapped opaque tokens:

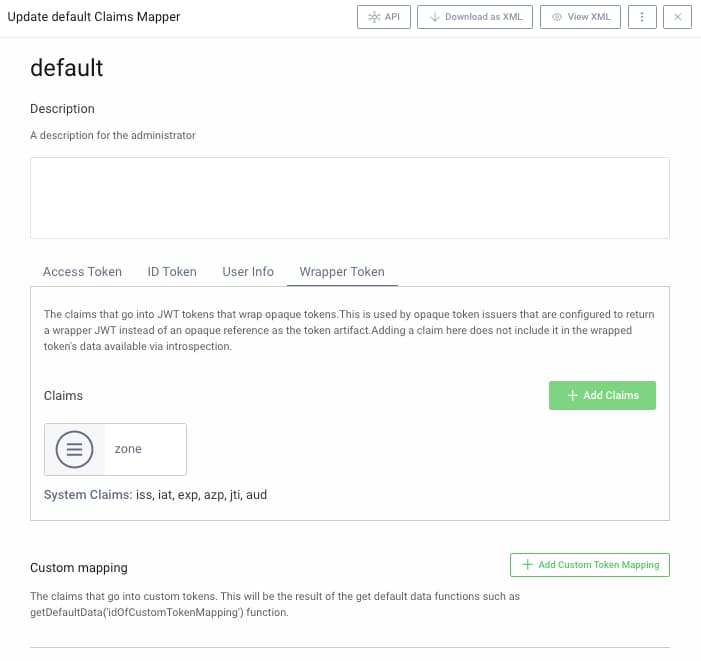
Configuring the Zone Claim
Navigate to Profiles --> Token Service --> Scopes --> Claims Mappers, where a zone claim is configured to be issued in wrapped tokens. In the example deployment, this is issued within the openid scope. The value of this claim is set by the System Claims Provider, which writes the fixed value of the service role to wrapper tokens:
Authentication Actions
The tools-client used for testing references a Username Password authenticator that uses a Username Authenticator as a prerequisite:
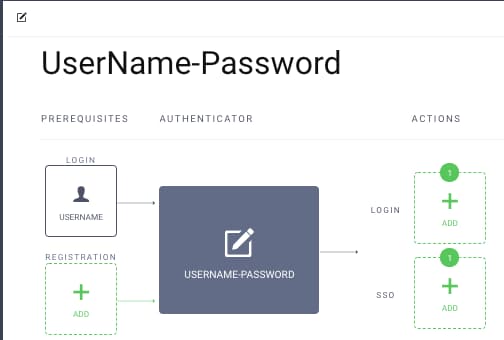
The Username authenticator uses two important authentication actions to manage zones, to set the zone value for a user, and to perform a zone transfer:
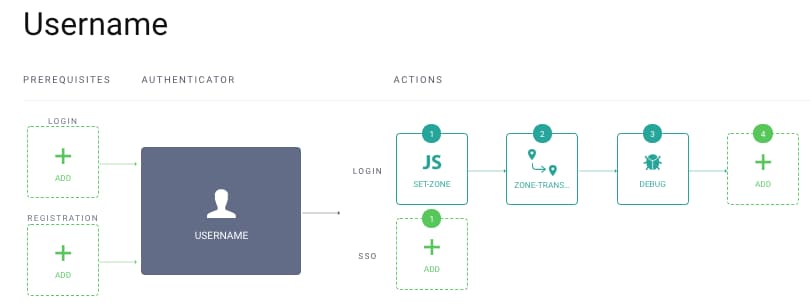
Set Zone Action
Some logic needs to be provided to associate users to zones. This is done in a script transformer action, which could be implemented in various ways. The example uses a simple option of determining the zone based on a suffix in the user ID, which could be a valid technique when using email-based identifiers.
function result(transformationContext) {var attributes = transformationContext.attributeMap;if (attributes.subject.endsWith('.eu')) {attributes.zone = 'eu';} else {attributes.zone = 'us';}return attributes;}
A more real-world implementation might instead perform a lookup on a globally replicated data source. This would be a simple map of user IDs to zones and would contain no personally identifiable information.
Zone Transfer Action
The job of the zone transfer action is simply to write a zone cookie, then trigger a redirect to the next stage of authentication processing. This mechanism allows the reverse proxy to read the cookie and re-route the next stage to a server with access to data for the user's region.
Video Tutorial
The below video provides an interactive walkthrough of the details described in this article, which you can watch to see the solution in action:

Conclusion
Dynamic User Routing with the Curity Identity Server can be implemented fairly easily in reverse proxies and API gateways. This extra layer provides a level of reliability that can be difficult to achieve via infrastructure alone. With this foundation in place, and with wrapped access tokens sent to your APIs, the reverse proxy routing could be easily extended to also perform dynamic routing of API requests. This would enable you to separate your own business data by region, when required.
Customer Stories
Learn how organizations run identity and API security at scale.
Read customer storiesWas this helpful?