Microsoft Azure API Management
On this page
This how-to describes how to set up an Azure API Management instance to act as a proxy between a mobile or web app and an API and how to integrate it with the Curity Identity Server leveraging the Phantom Token approach.
Introduction

- The Mobile or Web application requests an access token (AT) from the Curity Identity Server.
- The Curity Identity Server responds with the access token.
- The application requests access to the remote resource (e.g. API A)
- The API proxy intercepts the request and extracts the access token from the authorization header. It checks its cache to identify if this access token was already found active previously.
- In case the access token was not verified earlier, it sends a request to the introspection endpoint.
- The Curity Identity Server replies to this request according to RFC 7662.
- There are two possible outcomes depending on if the token is active or not:
7a. When the access token is not active, the API proxy replies to the application with status code401 Unauthorized
7b. When the access token is active the API proxy forwards the request to the API, after it replaces the access token with the JWT which was in the body of the introspection endpoint’s reply (6). - After validating the JWT token using the Curity Identity Server's public key, the API has access to information about the user and handles the request and responds accordingly.
- The API proxy forwards the API’s response back to the application.
Note
This is a simple flow, where some error cases are not considered. For example if, the original request (3) does not have an authorization header, the API proxy has to reply with 401 Unauthorized. Moreover, the API must respond accordingly when receiving an invalid or expired JWT.
Setting up the Environment
You must have at least two OAuth apps enabled to follow the flow from the Introduction. One which the Mobile or Web app will use to receive an access token and one which the API proxy, in this case Azure API Management, will use for introspection.
Introspection Procedure
Configure the Curity Identity Server to return a signed JWT the introspection response. You can read about this approach in detail in the article Introspection and Phantom Tokens.
application/jwt header
Alternatively you can use the application/jwt approach from the Introspect With Application/JWT as Accept Header section.
In the Curity Identity Server admin portal, go to System → Procedures from the menu on the left. Add a new Token Procedure and configure it to include the JWT access token in the introspection response.

This code is an example of an introspection procedure that returns a JWT:
/*** @param {se.curity.identityserver.procedures.context.IntrospectionTokenProcedureContext} context*/function result(context) {var responseData = {active: context.presentedToken.active};if (context.presentedToken.active) {appendObjectTo(context.presentedToken.data, responseData);responseData.token_type = context.presentedToken.type;responseData.client_id = context.presentedToken.delegation.clientId;responseData.expired_scope = context.presentedToken.expiredScopes;var defaultAtJwtIssuer = context.getDefaultAccessTokenJwtIssuer();responseData.phantom_token = defaultAtJwtIssuer.issue(context.presentedToken.data,context.delegation);}return responseData;}
Creating an OAuth Client for Introspection
Create an OAuth client and enable the Introspection capability and set a Secret for authentication.
- Navigate to System → Token Service → Client Settings. Make sure that Introspection is enabled.
- Crate a client by navigating to System → Token Service → Clients and click + New Client
- Give the client an ID (i.e. introspection-client) and make it a Regular Client
- Click Capabilities and select Introspection, click Next
- Select Secret from the Authentication Method drop-down list.
- Enter a Secret (you need this secret later when creating the policy for Azure API Management)
- Click Next and commit the changes

Enabling the Introspection Endpoint
In the same Token Service profile, select Endpoints from the menu on the left and add an endpoint of type oauth-introspect if it doesn't already exist. Make sure that the Introspect procedure uses the newly created procedure, introspect-procedure in the example.

Setting up Microsoft Azure API Management
After creating an Azure account, log in to the portal and create a service instance of Azure API Management.
Now import or create an API. As soon as the instance has started, you can configure your APIs in the API Management service for the service instance you just created. Click APIs from the menu and add or import your API. The Echo API is created when you create the API Management instance.

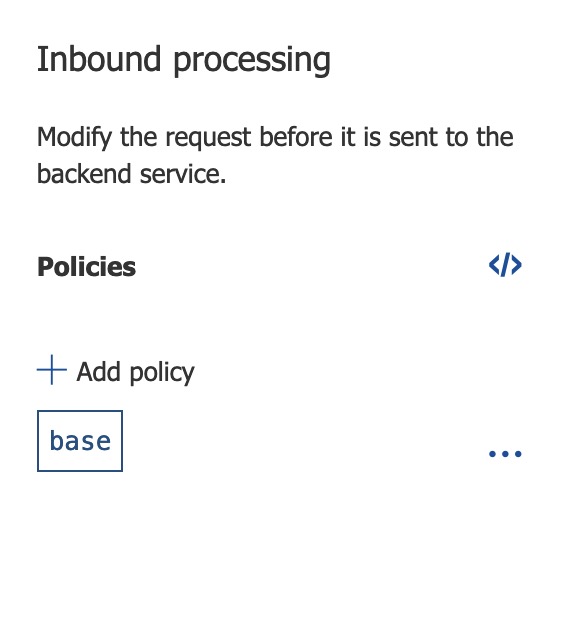
Click Add policy to add a policy to the Inbound processing stage of the API. Depending on other requirements the policy can also be added to the Outbound processing stage.
Configure a policy that checks for an authorization header, introspects the access token and forwards the request to the API. As part of this process replace the access token with a JWT received from the Curity Identity Server during the introspection call.
API Policy
This section is based on the Send-Request Microsoft API Management policy guide. The policy described below does not reply with a 401 Unauthorized only when the token is not active (according to RFC 7662). It also does so when the authorization header is missing. Moreover, it caches the association of the access token with the JWT received from the introspection response.
Extracting the Token
First the policy extracts the token from the authorization header and saves it in the context variable token.
Extract access token from authorization header:
<set-variable name="token" value="@(context.Request.Headers.GetValueOrDefault("Authorization","scheme param").Split("").Last())" />
Lookup Cache for Existing Key
Next the policy performs a lookup in the cache to fetch a cached introspection response, if it exists.
Lookup cache for AT-JWT association:
<cache-lookup-value key="@((string)context.Variables["token"])" variable-name="introspectToken" />
Key was Cached in Previous Request
If a cached response exists, the policy replaces the access token in the incoming request and forwards the request to the API with the JWT access token in the authorization header. The cached responses are always for active tokens, so they should contain the JWT in their body.
Forward the request while replacing AT with JWT:
<set-header name="Authorization" exists-action="override"><value>@($"Bearer {((IResponse)context.Variables["introspectToken"]).Body.As<JObject>()["jwt"]}")</value></set-header>
Make the Validation Request
If no cache result is available, the policy needs to call the introspection endpoint to validate the incoming token and to obtain the JWT.. In line 5 of the following code snippet, the value Y2xpZW5kX2lkOmNsaWVudF9zZWNyZXQ= is a base64 encoding of client_id:client_secret, of the introspection client.
Send a request to the introspection endpoint, when a previous response is not cached:
<send-request mode="new" response-variable-name="tokenstate" timeout="20" ignore-error="true"><set-url>https://login.example.com/oauth/v2/oauth-introspect</set-url><set-method>POST</set-method><set-header name="Authorization" exists-action="override"><value>Basic Y2xpZW5kX2lkOmNsaWVudF9zZWNyZXQ=</value></set-header><set-header name="Content-Type" exists-action="override"><value>application/x-www-form-urlencoded</value></set-header><set-body>@($"token={(string)context.Variables["token"]}")</set-body></send-request>
Store the Response
The following snippet caches the introspection response, using the access token as a key. It derives the duration of the cache from the Cache-control header of the response.
Cache the response from introspection endpoint:
<cache-store-value key="@((string)context.Variables["token"])"value="@(((IResponse)context.Variables["tokenstate"]))"duration="@{var header = ((IResponse)context.Variables["tokenstate"]).Headers.GetValueOrDefault("Cache-Control","");var maxAge = Regex.Match(header, @"max-age=(?<maxAge>\d+)").Groups["maxAge"]?.Value;return (!string.IsNullOrEmpty(maxAge))?int.Parse(maxAge):300;}" />
Check the Response
The policy parses the introspection response (by accessing the cached value). According to the active status the policy will either respond with 401 Unauthorized or forward the request to the API after replacing the access token with the JWT from the introspection response.
Continue or block the request according to the introspection status:
<choose><!--Check active property in response --><when condition="@((bool)((IResponse)context.Variables["introspectToken"]).Body.As<JObject>()["active"] == false)"><!--Return 401 Unauthorized with http-problem payload --><return-response response-variable-name="responseVariableName"><set-status code="401" reason="Unauthorized" /><set-header name="WWW-Authenticate" exists-action="override"><value>Bearer, error="invalid_token"</value></set-header></return-response></when><otherwise><!-- Response contains active=true, replace AT with JWT --><cache-lookup-value key="@((string)context.Variables["token"])" variable-name="introspectToken" /><set-header name="Authorization" exists-action="override"><value>@($"Bearer {((IResponse)context.Variables["introspectToken"]).Body.As<JObject>()["jwt"]}")</value></set-header></otherwise></choose>
Note
You can find the complete policy in Appendix A: – Require OAuth Token Policy
Introspect With Application/JWT as Accept Header
The Curity Identity Server can also respond to requests in the introspection endpoint with the Accept: application/jwt header. When introspecting a valid access token, the Curity Identity Server responds with 200 OK and the JWT in the body of the response. An expired or invalid access token, causes the Curity Identity Server to respond with 204 No Content. This means that the gateway doesn’t need to parse the JSON (as when using normal introspection), making the proxying even faster. Appendix B: – Application/JWT Policy contains a policy fragment that uses application/jwt, and that takes the status codes from the Curity Identity Server in to consideration so that the gateway responds accordingly.
Introspection request using application/jwt as accept header:
<set-header name="Accept" exists-action="override"><value>application/jwt</value></set-header>
Handle introspection response and different status codes:
<choose><!-- When Curity responds with 200, token is valid and JWT is in the response body --><when condition="@((bool)(((IResponse)context.Variables["introspectToken"]).StatusCode == 200))"><cache-lookup-value key="@((string)context.Variables["token"])" variable-name="introspectToken" /><set-header name="Authorization" exists-action="override"><value>@($"Bearer {((IResponse)context.Variables["introspectToken"]).Body.As<string>()}")</value></set-header></when><!-- When Curity responds with 204, the token is not active --><when condition="@((bool)(((IResponse)context.Variables["introspectToken"]).StatusCode == 204))"><return-response response-variable-name="responseVariableName"><set-status code="401" reason="Unauthorized" /><set-header name="WWW-Authenticate" exists-action="override"><value>Bearer, error="invalid_token"</value></set-header></return-response></when><!-- When Curity responds with 503, return 503 --><when condition="@((bool)(((IResponse)context.Variables["introspectToken"]).StatusCode == 503))"><return-response response-variable-name="responseVariableName"><set-status code="503" /></return-response></when><!-- When Curity responds with 401, 403, 404,500-502, 504-599, return 502 --><when condition="@((bool)(((IResponse)context.Variables["introspectToken"]).StatusCode >= 500) ||(bool)(((IResponse)context.Variables["introspectToken"]).StatusCode == 401) ||(bool)(((IResponse)context.Variables["introspectToken"]).StatusCode == 403) ||(bool)(((IResponse)context.Variables["introspectToken"]).StatusCode == 204))"><return-response response-variable-name="responseVariableName"><set-status code="502" /></return-response></when><otherwise><!-- Curity responds with other response codes, return 500 --><return-response response-variable-name="responseVariableName"><set-status code="500" /></return-response></otherwise></choose>
Testing Your Integration
Azure API Management allows for an easy way to test your APIs using the Azure Portal. The Azure Portal can act as a Web application, making calls to your API, making it easy to trace and debug your API calls.
- Navigate to your API that the policy applies to. Make sure the API has at least one Operation that you can use to test.
- In the top menu click Test and choose one of the Operations.
- First try to send a request. By default the request does not contain an access token in the Authorization header and the response of the test should be
401 Unauthorized. - Use for example OAuth Tools to obtain an access token from your Curity Identity Server instance.
- Add the access token to a header in the test by clicking + Add header. The name of the header needs to be
Authorization. Paste the access token that you obtained in step 4 in to the Value field. - Send the request again. The response should be
200 OK. If you use the Echo API you can also see that the authorization header that it echoes back contains the JWT and not the opaque access token from the original request.
Example request using the provided Echo API:
GET https://curity-pme-api.azure-api.net/echo/resource-cached?param1=sample HTTP/1.1Host: curity-pme-api.azure-api.netAuthorization: _0XBPWQQ_cf756dc2-ab1c-4c85-9178-c69d303bb17d
The body of the response will be something like the following, with the Authorization header containing the JWT.
Body of a successful response (truncated for readability):
HTTP/1.1 200 OKaccept: */*accept-encoding: gzip,deflate,br,zstdaccept-language: en-US,en; q=0.5authorization: Bearer eyJraWQiOiItNTg5NTg2NTA3IiwieDV0Ijo...OcYMRDZ8xuCoBwreferer: https://apimanagement.hosting.portal.azure.net/
An unauthorized request will return the following:
HTTP/1.1 401 Unauthorizedcontent-length: 0date: Wed, 06 Nov 2024 22:31:17 GMTvary: Originwww-authenticate: Bearer, error="invalid_token"
Appendix
<policies><inbound><!-- Extract Token from authorization header parameter --><set-variable name="token" value="@(context.Request.Headers.GetValueOrDefault("Authorization","scheme param").Split(' ').Last())" /><!-- Check if the token variable is empty or null and return 401 Unauthorized if that is the case --><choose><when condition="@(System.String.IsNullOrEmpty((string)context.Variables["token"]))"><return-response response-variable-name="responseVariableName"><set-status code="401" reason="Unauthorized" /><set-header name="WWW-Authenticate" exists-action="override"><value>Bearer, error="invalid_token"</value></set-header></return-response></when></choose><!-- Check if there is a previous value in the cache for this token --><cache-lookup-value key="@((string)context.Variables["token"])" variable-name="introspectToken" /><choose><!-- If we don’t find it in the cache, make a request for it and store it --><when condition="@(!context.Variables.ContainsKey("introspectToken"))"><!--Send request to Token Server to validate token (see RFC 7662) --><send-request mode="new" response-variable-name="tokenstate" timeout="20" ignore-error="true"><set-url>https://login.example.com/oauth/v2/oauth-introspect</set-url><set-method>POST</set-method><set-header name="Authorization" exists-action="override"><value>Basic Y2xpZW5kX2lkOmNsaWVudF9zZWNyZXQ=</value></set-header><set-header name="Content-Type" exists-action="override"><value>application/x-www-form-urlencoded</value></set-header><set-body>@($"token={(string)context.Variables["token"]}")</set-body></send-request><!-- cache the response of the Token Server with the AT as the key --><cache-store-value key="@((string)context.Variables["token"])" value="@(((IResponse)context.Variables["tokenstate"]))" duration="@{var header = ((IResponse)context.Variables["tokenstate"]).Headers.GetValueOrDefault("Cache-Control","");var maxAge = Regex.Match(header, @"max-age=(?<maxAge>\d+)").Groups["maxAge"]?.Value;return (!string.IsNullOrEmpty(maxAge))?int.Parse(maxAge):300;}" /></when></choose><!-- Query the cache for a value with key AT and store the data in a context variable "introspectToken" --><cache-lookup-value key="@((string)context.Variables["token"])" variable-name="introspectToken" /><choose><!--Check active property in response --><when condition="@((bool)((IResponse)context.Variables["introspectToken"]).Body.As<JObject>()["active"] == false)"><!-- active is equal to false, return 401 Unauthorized --><return-response response-variable-name="responseVariableName"><set-status code="401" reason="Unauthorized" /><set-header name="WWW-Authenticate" exists-action="override"><value>Bearer, error="invalid_token"</value></set-header></return-response></when><otherwise><!-- Response contains active=true replace AT with JWT--><cache-lookup-value key="@((string)context.Variables["token"])" variable-name="introspectToken" /><set-header name="Authorization" exists-action="override"><value>@($"Bearer {((IResponse)context.Variables["introspectToken"]).Body.As<JObject>()["jwt"]}")</value></set-header></otherwise></choose><base /></inbound><backend><base /></backend><outbound><base /></outbound></policies>
Customer Stories
Learn how organizations run identity and API security at scale.
Read customer storiesWas this helpful?