Configuring Proof Key for Code Exchange
On this page
This tutorial explains how to use Proof Key for Code Exchange (PKCE) with a code flow client. To learn how PKCE works read Understanding Proof Key for Code Exchange.
In short we will add an extra parameter that will protect the authorization redirect from beeing hijacked and the authorization code from being stolen.
Pre-requisites
This tutorial builds on the configuration setup described in the steps First Configuration and Configure an Authenticator under the menu Getting Started. If you have not gone through those steps yet, you can visit the guides by clicking on the links.
You may run this tutorial on a custom setup also, but keep in mind that names and URLs may be different, as well as the capabilities configured in the profiles.
You will also need a client that can provide access tokens and refresh tokens. If you follow the code flow tutorial, you will have obtained both.
Implementing PKCE in Curity
Using PKCE in Curity is very simple. It is automatically enabled for any client that has the code flow enabled.
While it is not possible to disable PKCE (thus making that client less secure), it is possible to require it (making it more secure).
Setup in Curity
Visit the Profiles screen and click the Token Service.
Click the Clients page and select a client to work with.
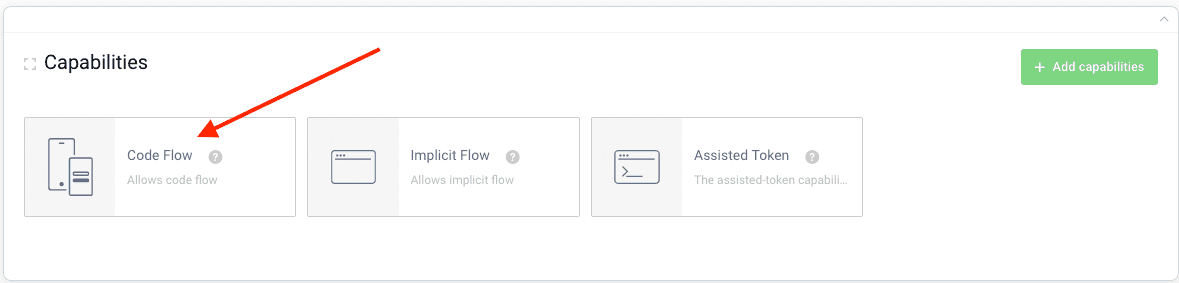
Code Flow Capability
To setup required PKCE for a client it needs to have the code flow enabled:
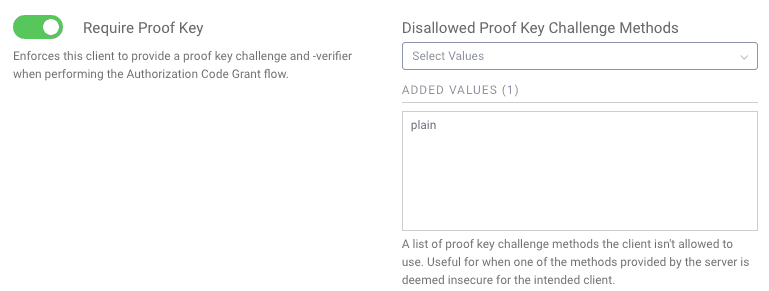
Toggle Require PKCE
- Navigate to the
Securitysection of a client for which you would like to require PKCE. - Expand the
Advanced Security Settingssection. - Toggle on
Require Proof Key. - Optionally and recommended, disallow the client from using the
plainproof key challenge method.
Aside from this, there is nothing more to configure in Curity. Setting up PKCE is that easy :-)
Making requests
To make a PKCE request with the www client that was setup in earlier examples, we need a random proof-key and a verifier. The pseudo code in the Proof Key Overview explains how to obtain these. It's important that they are random for each request.
Here's an example:
- Code:
lszjpzkvqqxuiccquvorhgnxhdmiaholczxqcckotnqkgprymuwhwwutetfd - Hashed Code (s256):
ps-K7a0ngt1HwZ7N9bK6XyUUJWpcUAkTfetTuZA2qak=
We send the Hashed Code in the authorize request, and the Code in the token request to verify the Hashed Code.
So the first part of the code flow needs to include the code_challenge and the code_challenge_method=S256 :
https://localhost:8443/oauth/v2/oauth-authorize?response_type=code&client_id=www&code_challenge=ps-K7a0ngt1HwZ7N9bK6XyUUJWpcUAkTfetTuZA2qak=&code_challenge_method=S256
This will now require the backend call to provide the code_verifier or an error will be returned
curl -X POST \https://localhost:8443/oauth/v2/oauth-token \-H 'Content-Type: application/x-www-form-urlencoded' \-d 'grant_type=authorization_code&client_id=www&client_secret=THE_SECRET&code=sE7mpQHlr3Dv19ZNWeO7RnzPOL5lJTEt&code_verifier=lszjpzkvqqxuiccquvorhgnxhdmiaholczxqcckotnqkgprymuwhwwutetfd'
If the wrong verifier is sent, or the verifier is omitted, no tokens will be issued.
Customer Stories
Learn how organizations run identity and API security at scale.
Read customer storiesWas this helpful?