Custom DCR Request Validation
On this page
This tutorial provides instructions for how to configure the Curity Identity Server to adapt the Dynamic Client Registration process in order to comply with rules and regulations. Although the examples used throughout this tutorial are based on the requirements defined in the Open Banking Brazil Dynamic Client Registration Profile the following steps are relevant and can be adapted for other regulations:
- How to create a pre-processing procedure
- How to configure DCR with Mutual TLS client authentication and the pre-processing procedure
Before getting started make sure you are familiar with the Dynamic Client Registration protocol by reading Dynamic Client Registration Explained and Using Dynamic Client Registration.
Overview
The Open Banking Brazil (AKA Open Banking Brazil or OBB) ecosystem provides a central repository, the directory for accredited and trusted clients as well as authorization servers. Registered clients can then retrieve a signed software statement from the directory, aka the software statement assertion (SSA), a signed JWT. In accordance with the Open Banking Brazil Dynamic Client Registration Profile the client includes this token in the Dynamic Client Registration request and authenticates using Mutual TLS. The Authorization Server is obliged to verify the software statement assertion according to the specification.

Some requirements such as the one for Mutual TLS client authentication can be solved by configuring the Curity Identity Server accordingly. However, the requirements related to the software statement imply an adaption of the DCR request processing. The Curity Identity Server version 6.5 and later supports pre-processing procedures for DCR endpoints. These procedures can be used to validate and manipulate incoming DCR requests and thus help to comply with a great variety of requirements of different regulations.
For this tutorial have a look at the specifications for Open Banking Brazil. In particular study the Open Banking Brazil Financial-grade API Dynamic Client Registration Profile 1.0 to get a full picture of the requirements.
Get the Code
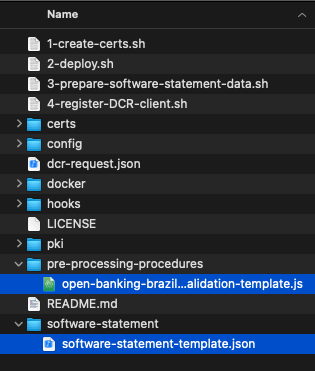
The samples provided in this tutorial are just short excerpts of a pre-processing procedure that validates the incoming DCR request and software statement assertion. A complete end-to-end solution that shows how to configure OBB-compliant DCR using the Curity Identity Server and that demonstrate its support for custom pre-processing can be found in the repository Example DCR Request Validation on GitHub. The repository contains some helper scripts and in particular templates for the pre-processing procedure as well as the DCR request.
Getting Started
When developing a new procedure call context.describe() to get a description of the members and methods available.
Pre-requisites
This tutorial builds on the configuration setup described in the steps First Configuration and Configure an Authenticator under the menu Getting Started. If you have not gone through those steps yet, you can visit the guides by clicking on the links.
You may run this tutorial on a custom setup also, but keep in mind that names and URLs may be different, as well as the capabilities configured in the profiles.
Open Banking Brazil uses a public key infrastructure for trust management. Make sure the following certificates or public keys are available:
- A trusted issuer certificate that the Curity Identity Server will use for validating the client certificate presented during the DCR request
- A certificate or public key of the authority issuing the software statement assertion; This key is used for validating the signature of the software statement assertion in the DCR request.
Write a Pre-processing Procedure for Custom DCR Request Validation
Pre-processing procedures are scripts written in JavaScript just like any other procedure in the Curity Identity Server. Create the script for this tutorial outside the Curity Identity Server. Use then either the Admin UI or the CLI to configure the procedure.
Read Software Statement
The software statement assertion is a signed JWT that is included in the software_statement parameter of the DCR request. The method context.getRegistrationData() returns a map of all the parameters included in the body of the DCR request. Just use the attribute name to access the data. For example use the following code to read the software statement assertion from the incoming DCR request.
// Load attributes from requestvar registrationData = context.getRegistrationData();var softwareStatement = registrationData.software_statement;
Validate the signature of the software statement assertion.
The method context.validateSignatureAndExtractClaims(keystoreId, jwtTokenString, constraintsMap) validates the signature of the given JWT using the referenced keystore. If the signature is valid, it returns the claims of the JWT and an empty result otherwise. Only PS256 is a valid signature algorithm according to the OBB specification. The constraintsMap provides constraints for the validation, e.g. which signature algorithms to accept. The following example assumes that the signature verification key is called ssa_issuer.
// Shall validate that the request contains software_statement JWT signed using the PS256 algorithim issued by the Open Banking Brazil directory of participants;var ssa = context.validateSignatureAndExtractClaims("ssa_issuer", softwareStatement, { acceptedAlgorithms: ["PS256"] });
Validate Claims
If the signature validation passes, the result contains the claims of the software statement. You can now use the claims from the software statement and compare them with attributes included in the DCR request. If there is a validation error, throw an exception with the help of the exceptionFactory.
// Shall require and validate that the jwks_uri matches the software_jwks_uri provided in the software statement;var jwksUri = registrationData.jwks_uri;if (!jwksUri) {throw exceptionFactory.badRequestException("jwks_uri is missing.");}if (jwksUri != ssa.software_jwks_uri) {throw exceptionFactory.badRequestException("jwks_uri does not match the value provided in the software statement assertion.");}
Populate Values
You can manipulate the incomding DCR request in the pre-processing procedure. Just return a map of attributes. If the attribute exists in the original request data, it will be replaced by the value returned from the pre-processing procedure.
// Shall populate defaults from values within the software statement assertion where possible;// Overwrites existing and add missing attributes to DCR requestvar attributes = {client_name: ssa.software_client_name,client_uri: ssa.software_client_uri,jwks_uri: ssa.software_jwks_uri,logo_uri: ssa.software_logo_uri,policy_uri: ssa.software_policy_uri,tos_uri: ssa.software_tos_uri,software_id: ssa.software_id,software_version: ssa.software_version}return attributes;
Setup in Curity Identity Server
This section shows how to configure DCR in an OBB compliant manner. The steps include the configuration of a client truststore that is the trusted issuer of the client certificate and a signature verification key that is the key signing the software statement assertion. You will also learn how to activate the pre-processing procedure on the DCR endpoint.
Add Public Keys and Certificates
Start with configuring the client trust store.
- Open Facilities menu.
- Navigate to Keys and Cryptography → Trust Anchors → Client Trust Stores and click the + button next to it.
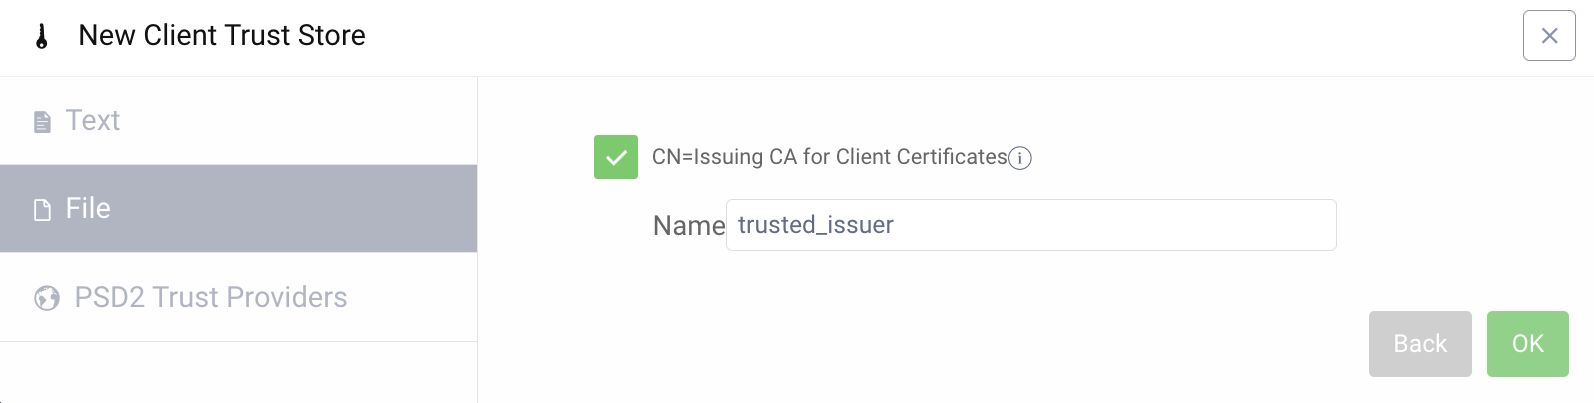
- Choose File, click on Select File and navigate to the trusted issuer certificate.
- Click Next to continue and verify the certificate subject.
- Enter
trusted_issueras the name. You will need this name when configuring Mutual TLS for DCR.
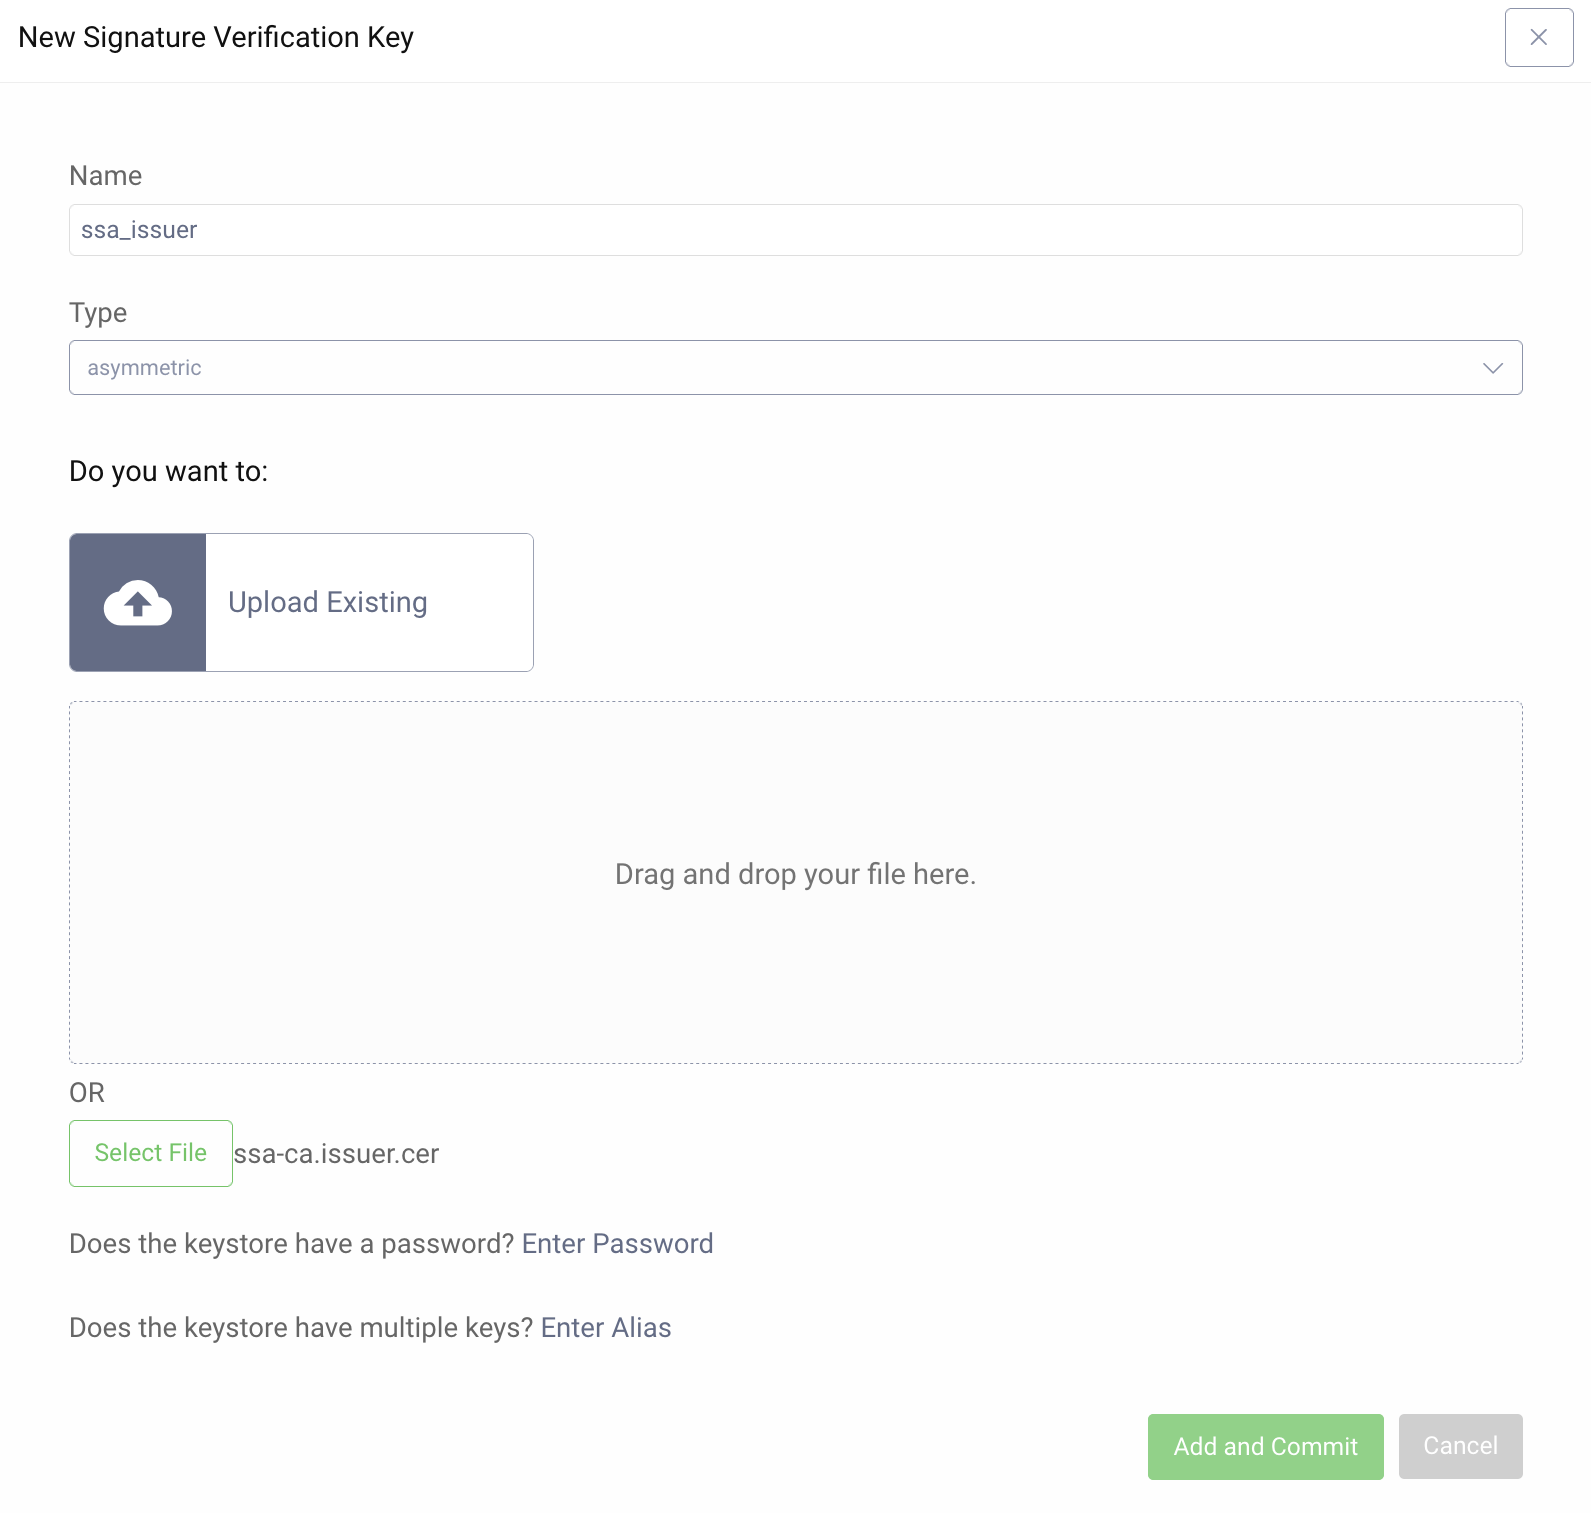
Continue with adding the signature verification key for the software statement assertion.
- Open Facilities menu again.
- Under Keys and Cryptography → Signing click on + next to Signature Verification Keys.
- Enter
ssa_issueras the name. This is the name that is used in the pre-processing procedure when validating the software statement. - Select
asymmetricin the drop-down menu for the type. - Then click on Upload Existing and Select File.
- Navigate to the file containing the certificate or public key of the authority signing the software statement.
- Upload and create the signature verification key by clicking Add and Commit.
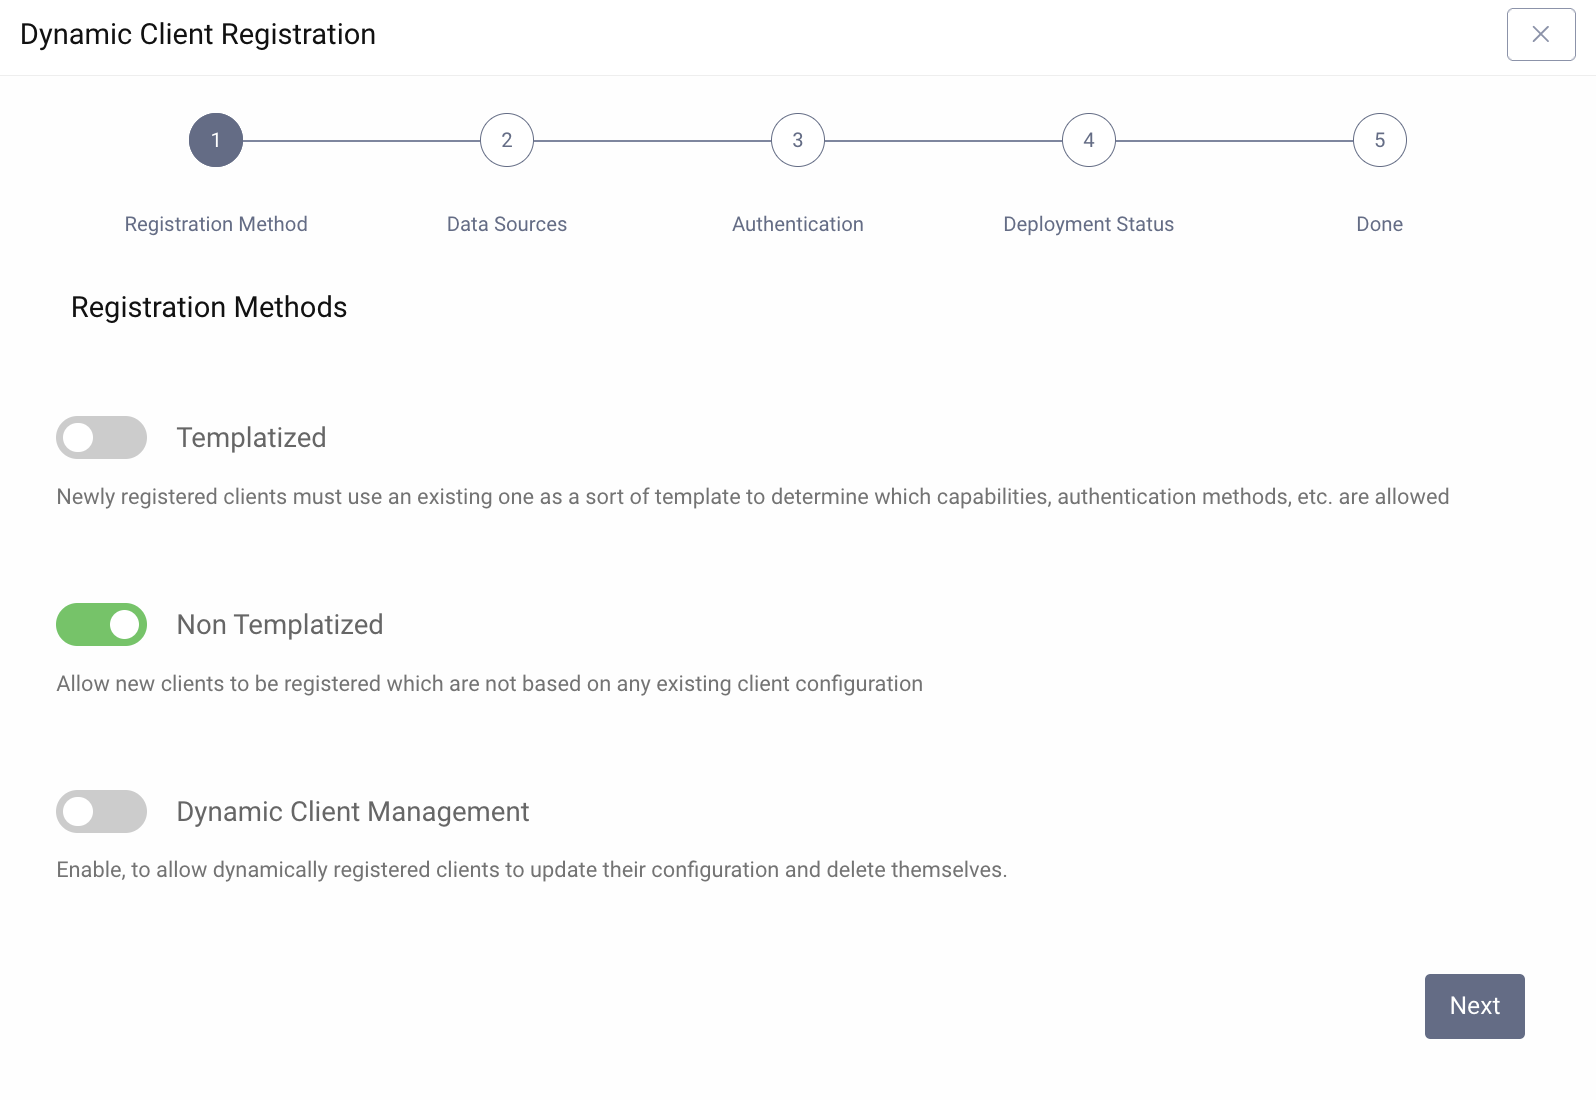
Enable Dynamic Client Registration
- Visit the Profiles screen and click the Token Service.
- In the menu on the left side, go to Dynamic Registration.
- Click on Enable DCR.
- In the wizard toggle on Non Templatized. Disable the rest for keeping the configuration simple.
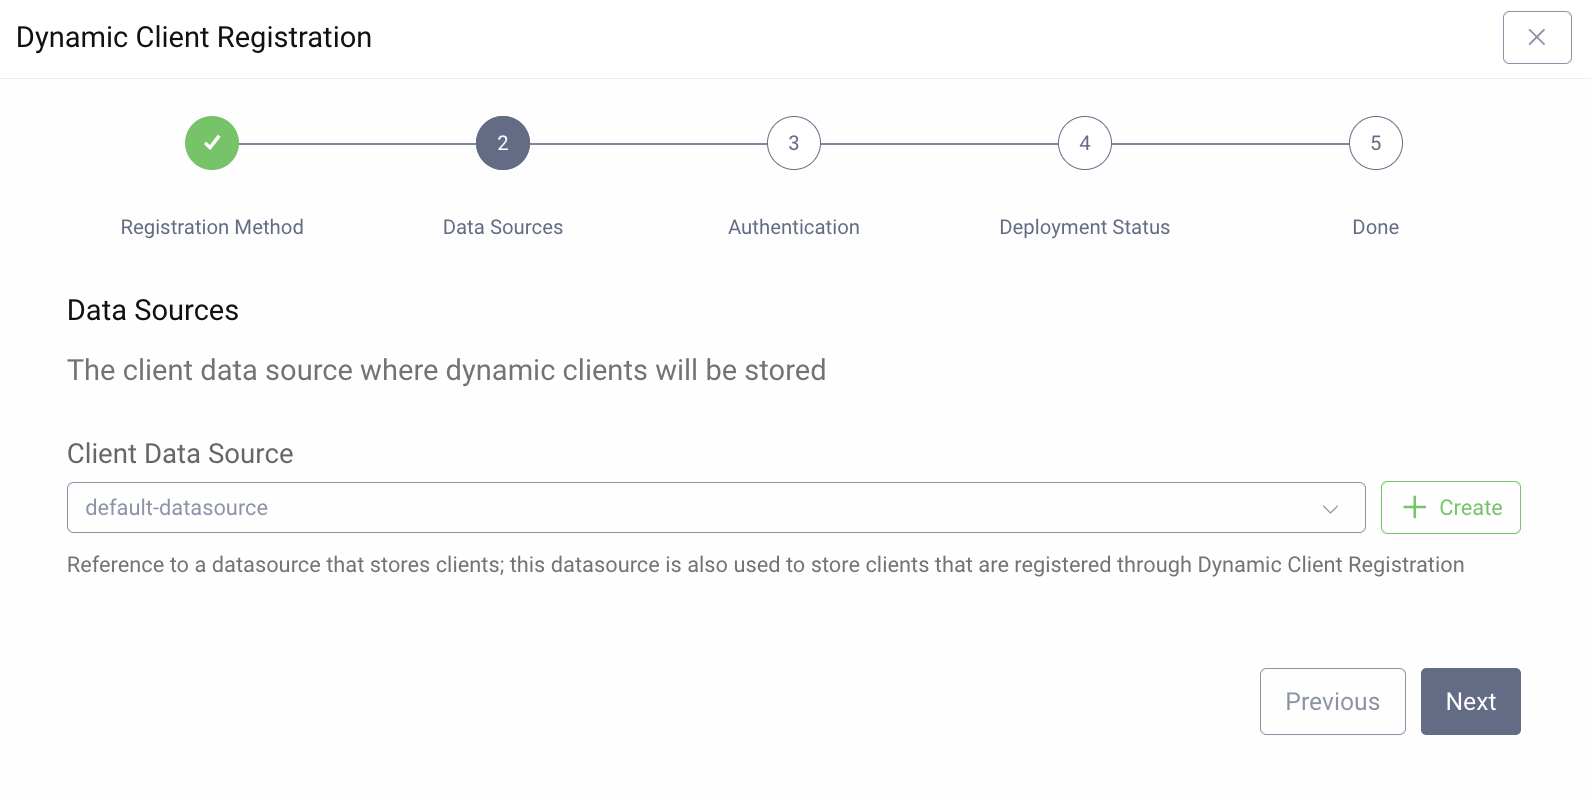
Select the token-datasource or default-datasource as the Client Data Source depending on what was set up as part of the First Configuration.
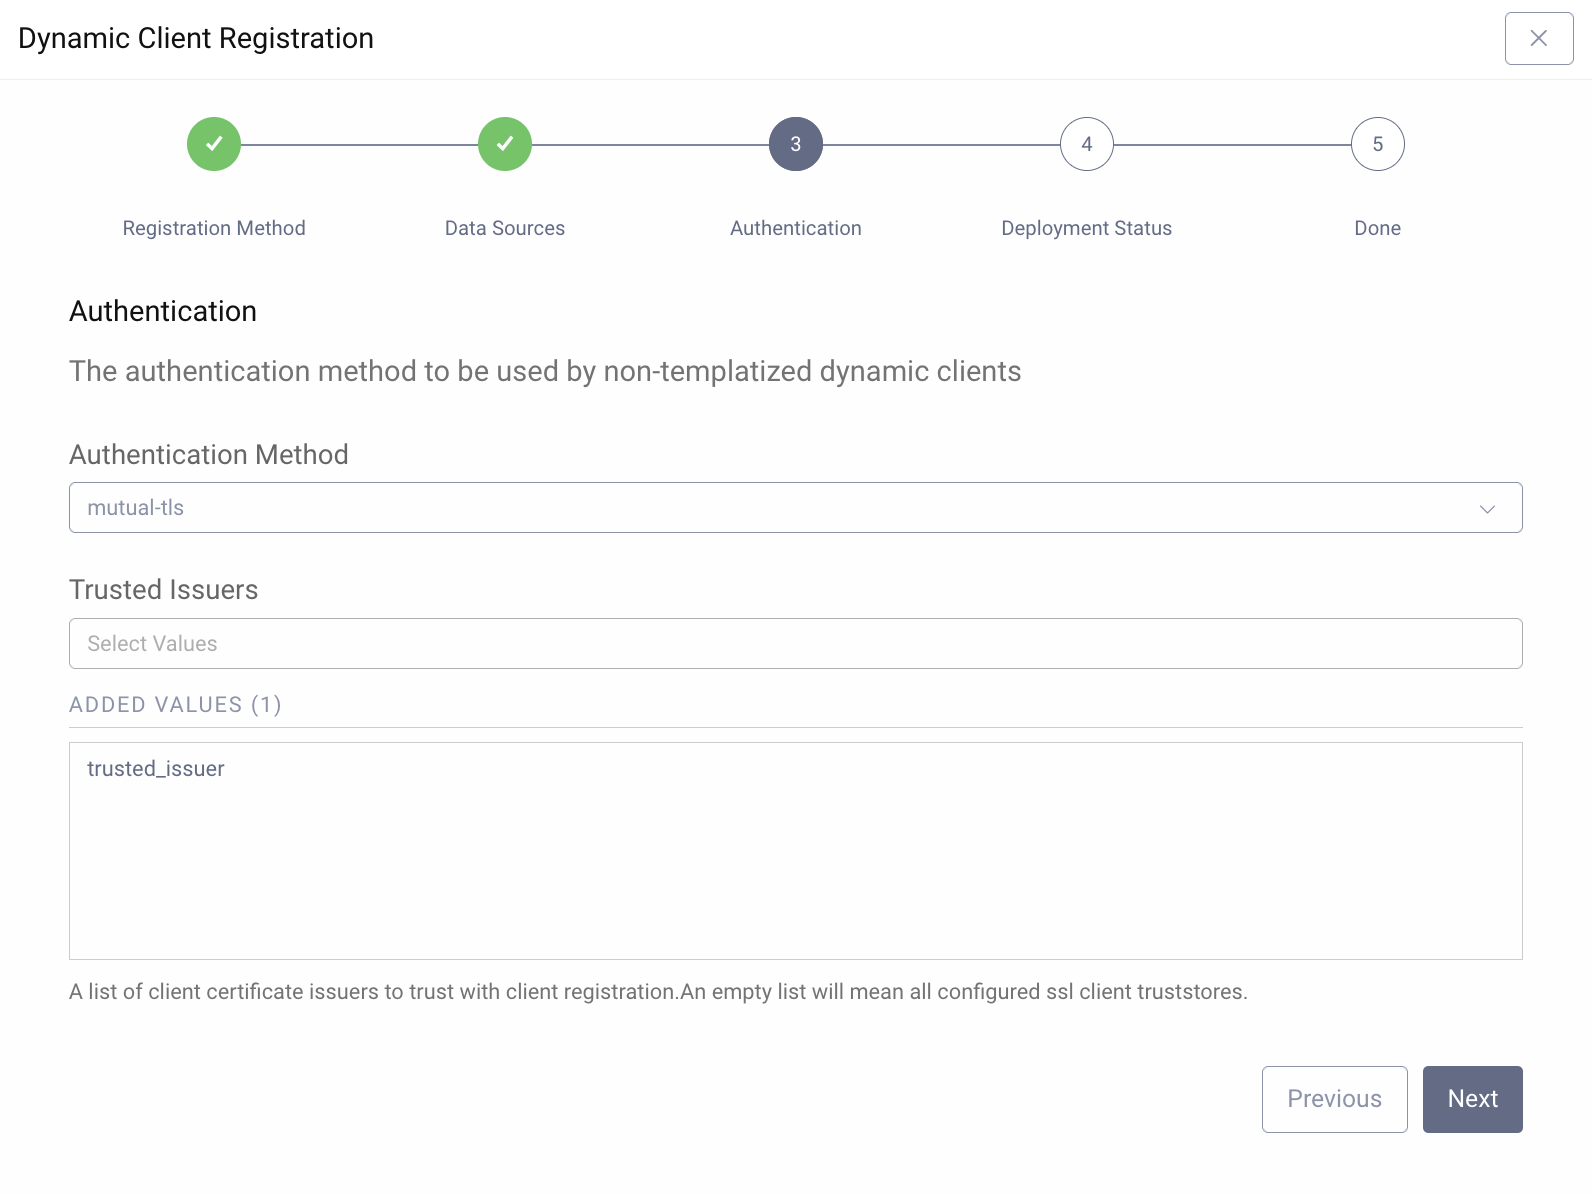
In the next step define how the client authenticates when registering a new client. Open Banking Brazil uses M utual TLS client authentication.
- Choose
mutual-tls. - Select
trusted_issuerfrom the list of available trusted issuers.
Deploy the profile on all nodes.
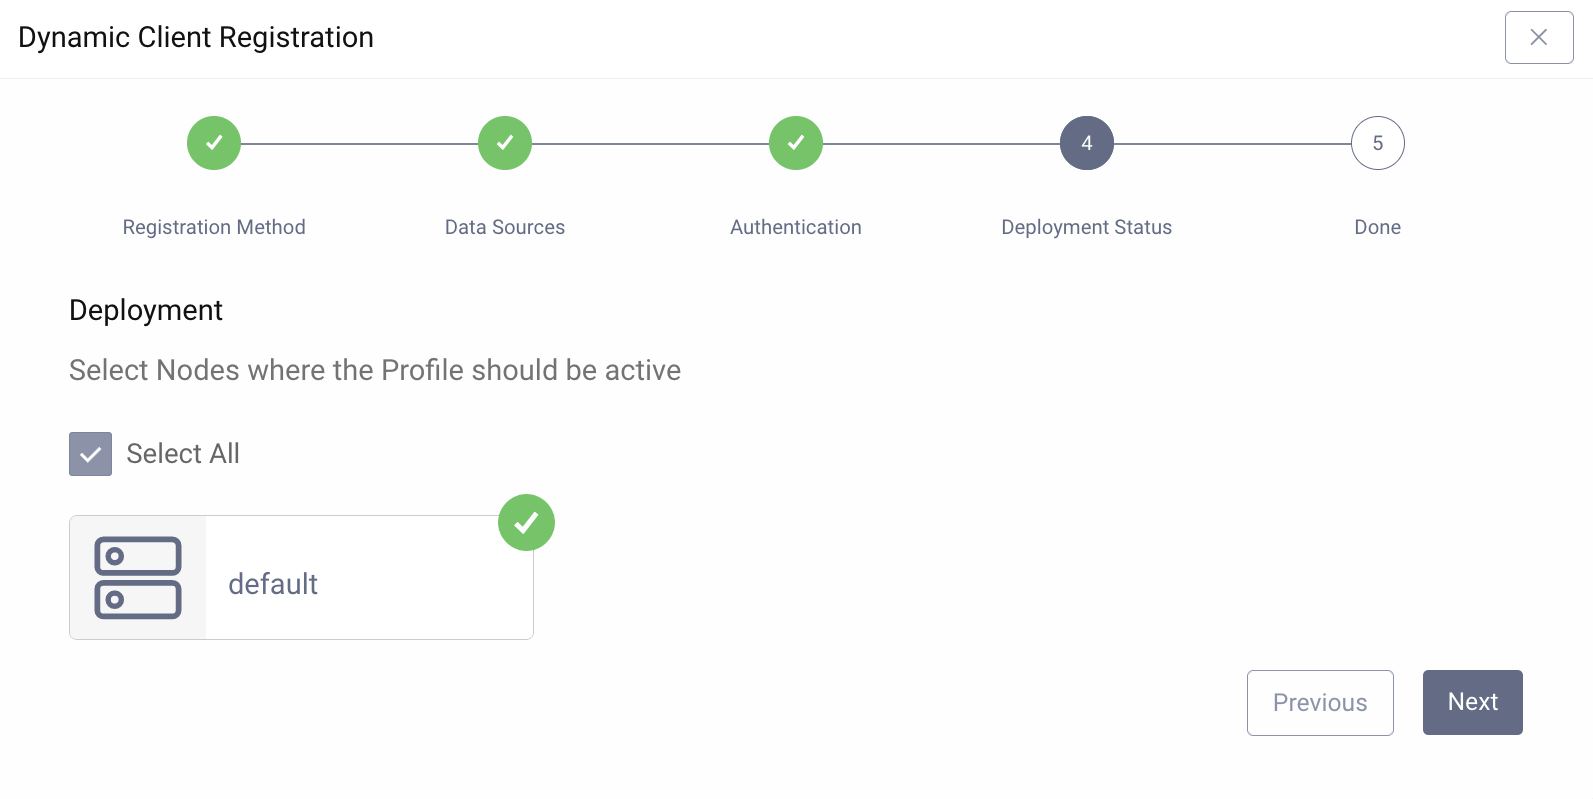
Click Next. Commit the changes and close the wizard in the last step.
Configure Mutual TLS Client Authentication
Clients operating in the Open Banking Brazil ecosystem must use either mutual-tls, client_secret_jwt or private_key_jwt. Configure the client authentication methods accordingly.
- Visit the Profiles screen and click the Token Service.
- In the menu on the left side, open Client Settings.
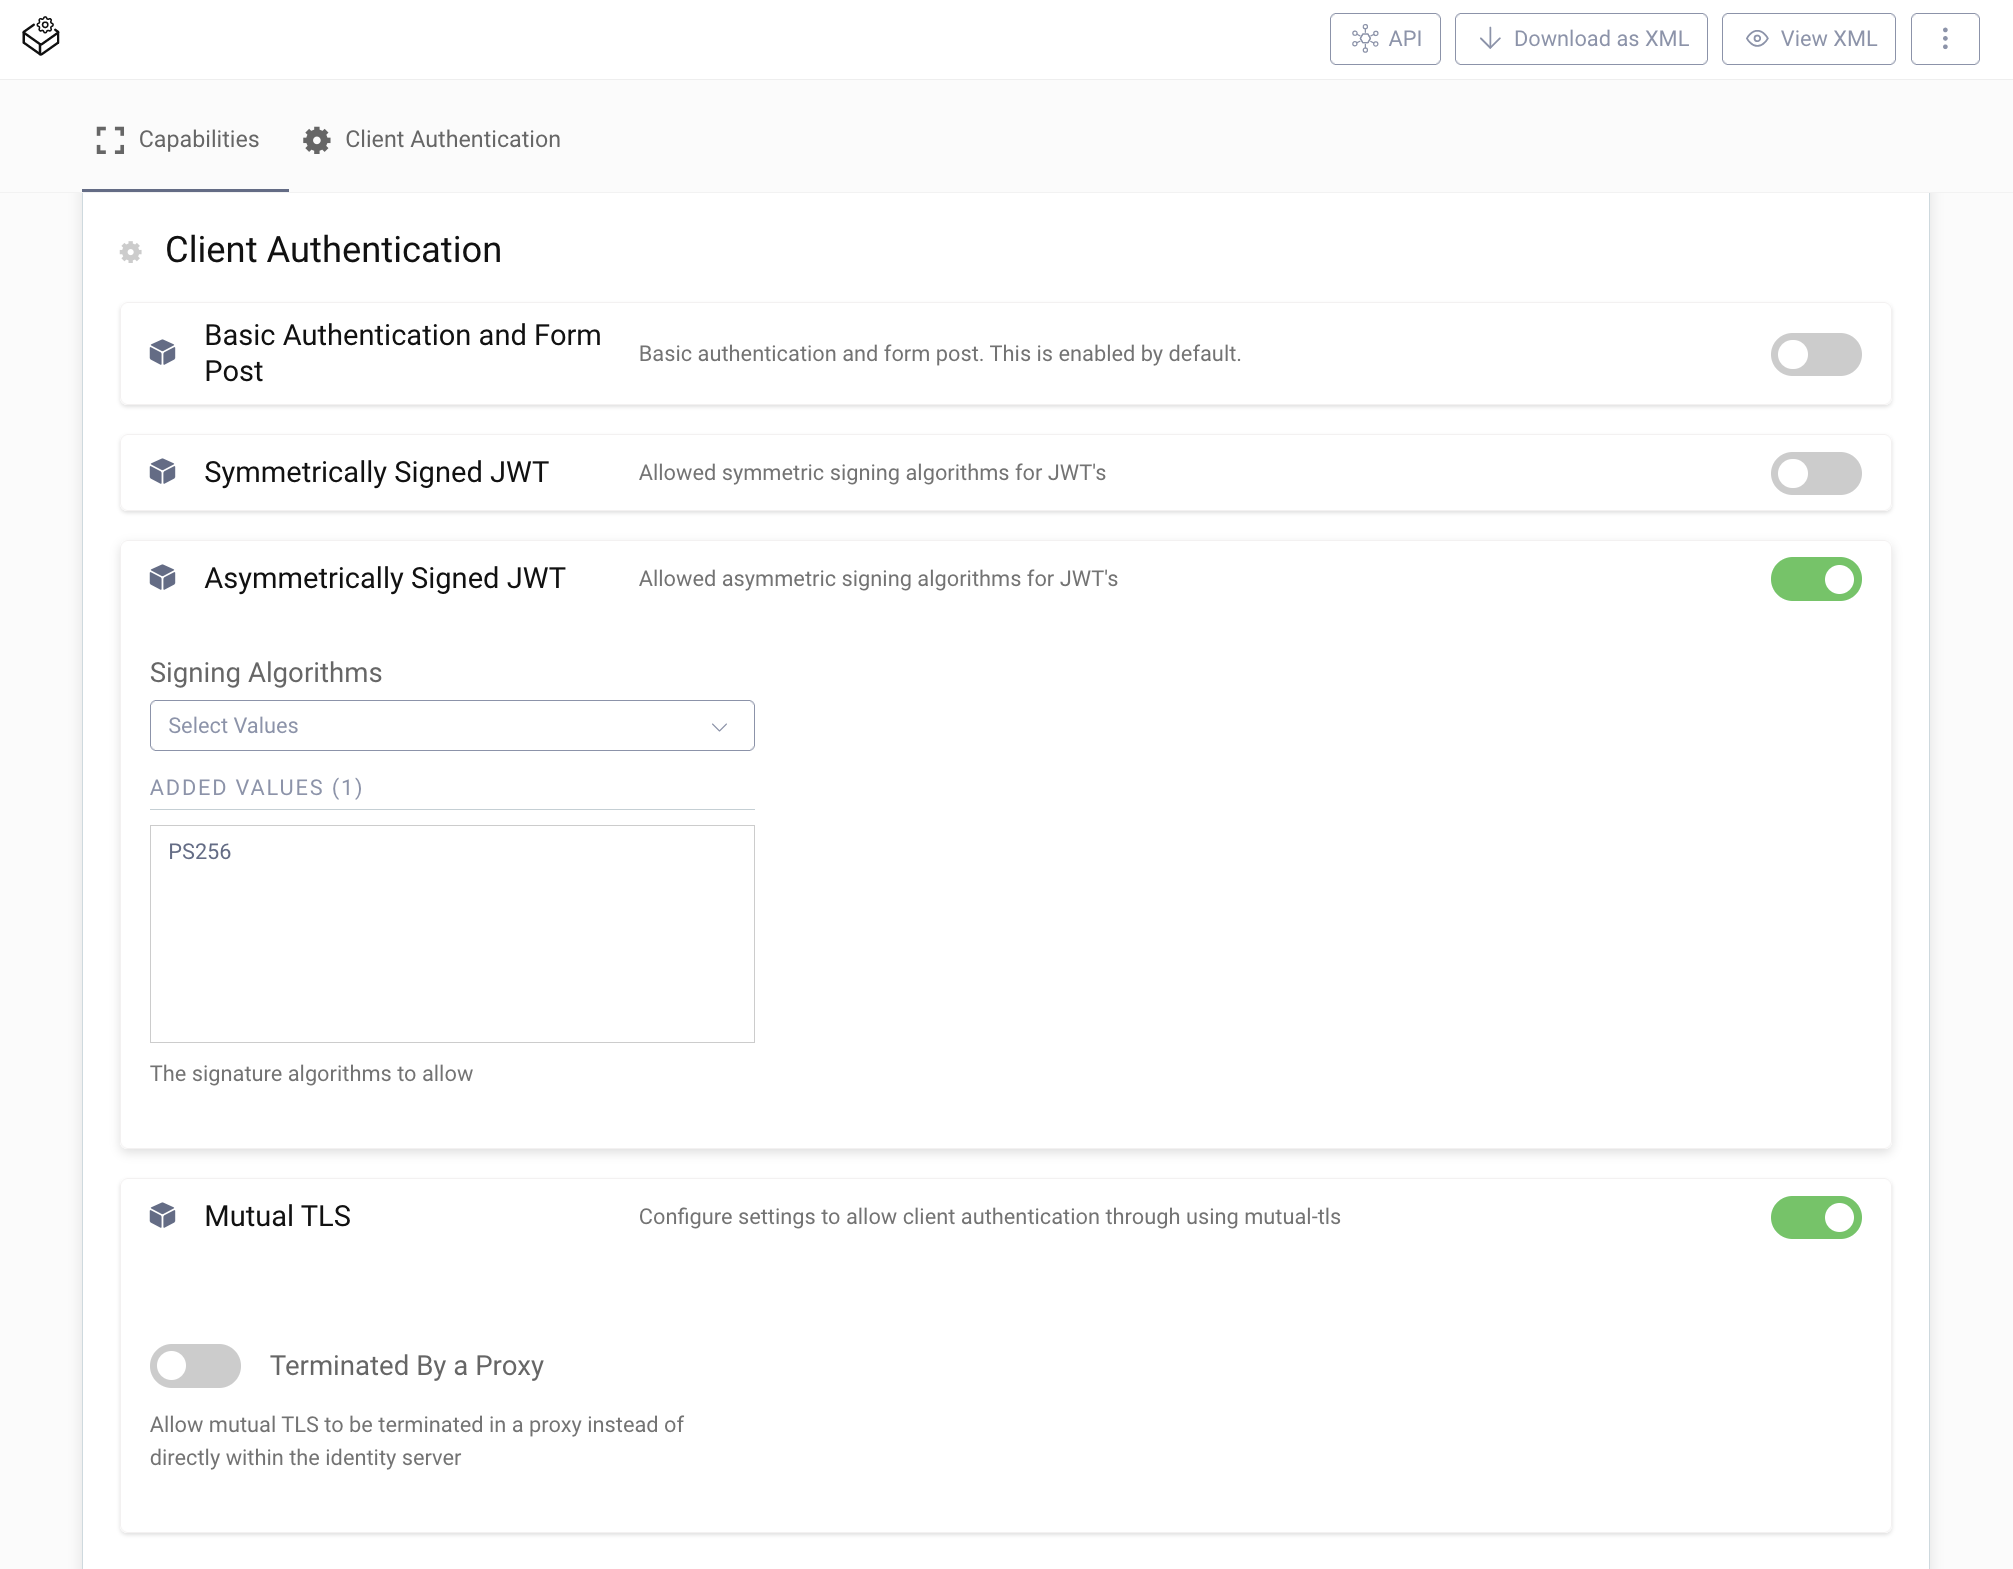
- Go to Client Authentication.
- Disable Basic Authentication and Form Post.
- Enable Asymmetrically Signed JWT.
- In the list for Signing Algorithms select
PS256. - Enable Mutual TLS
Commit the changes. Enable Mutual TLS client authentication for DCR.
- Visit the Profiles screen and click the Token Service.
- In the menu on the left side, go to Dynamic Registration.
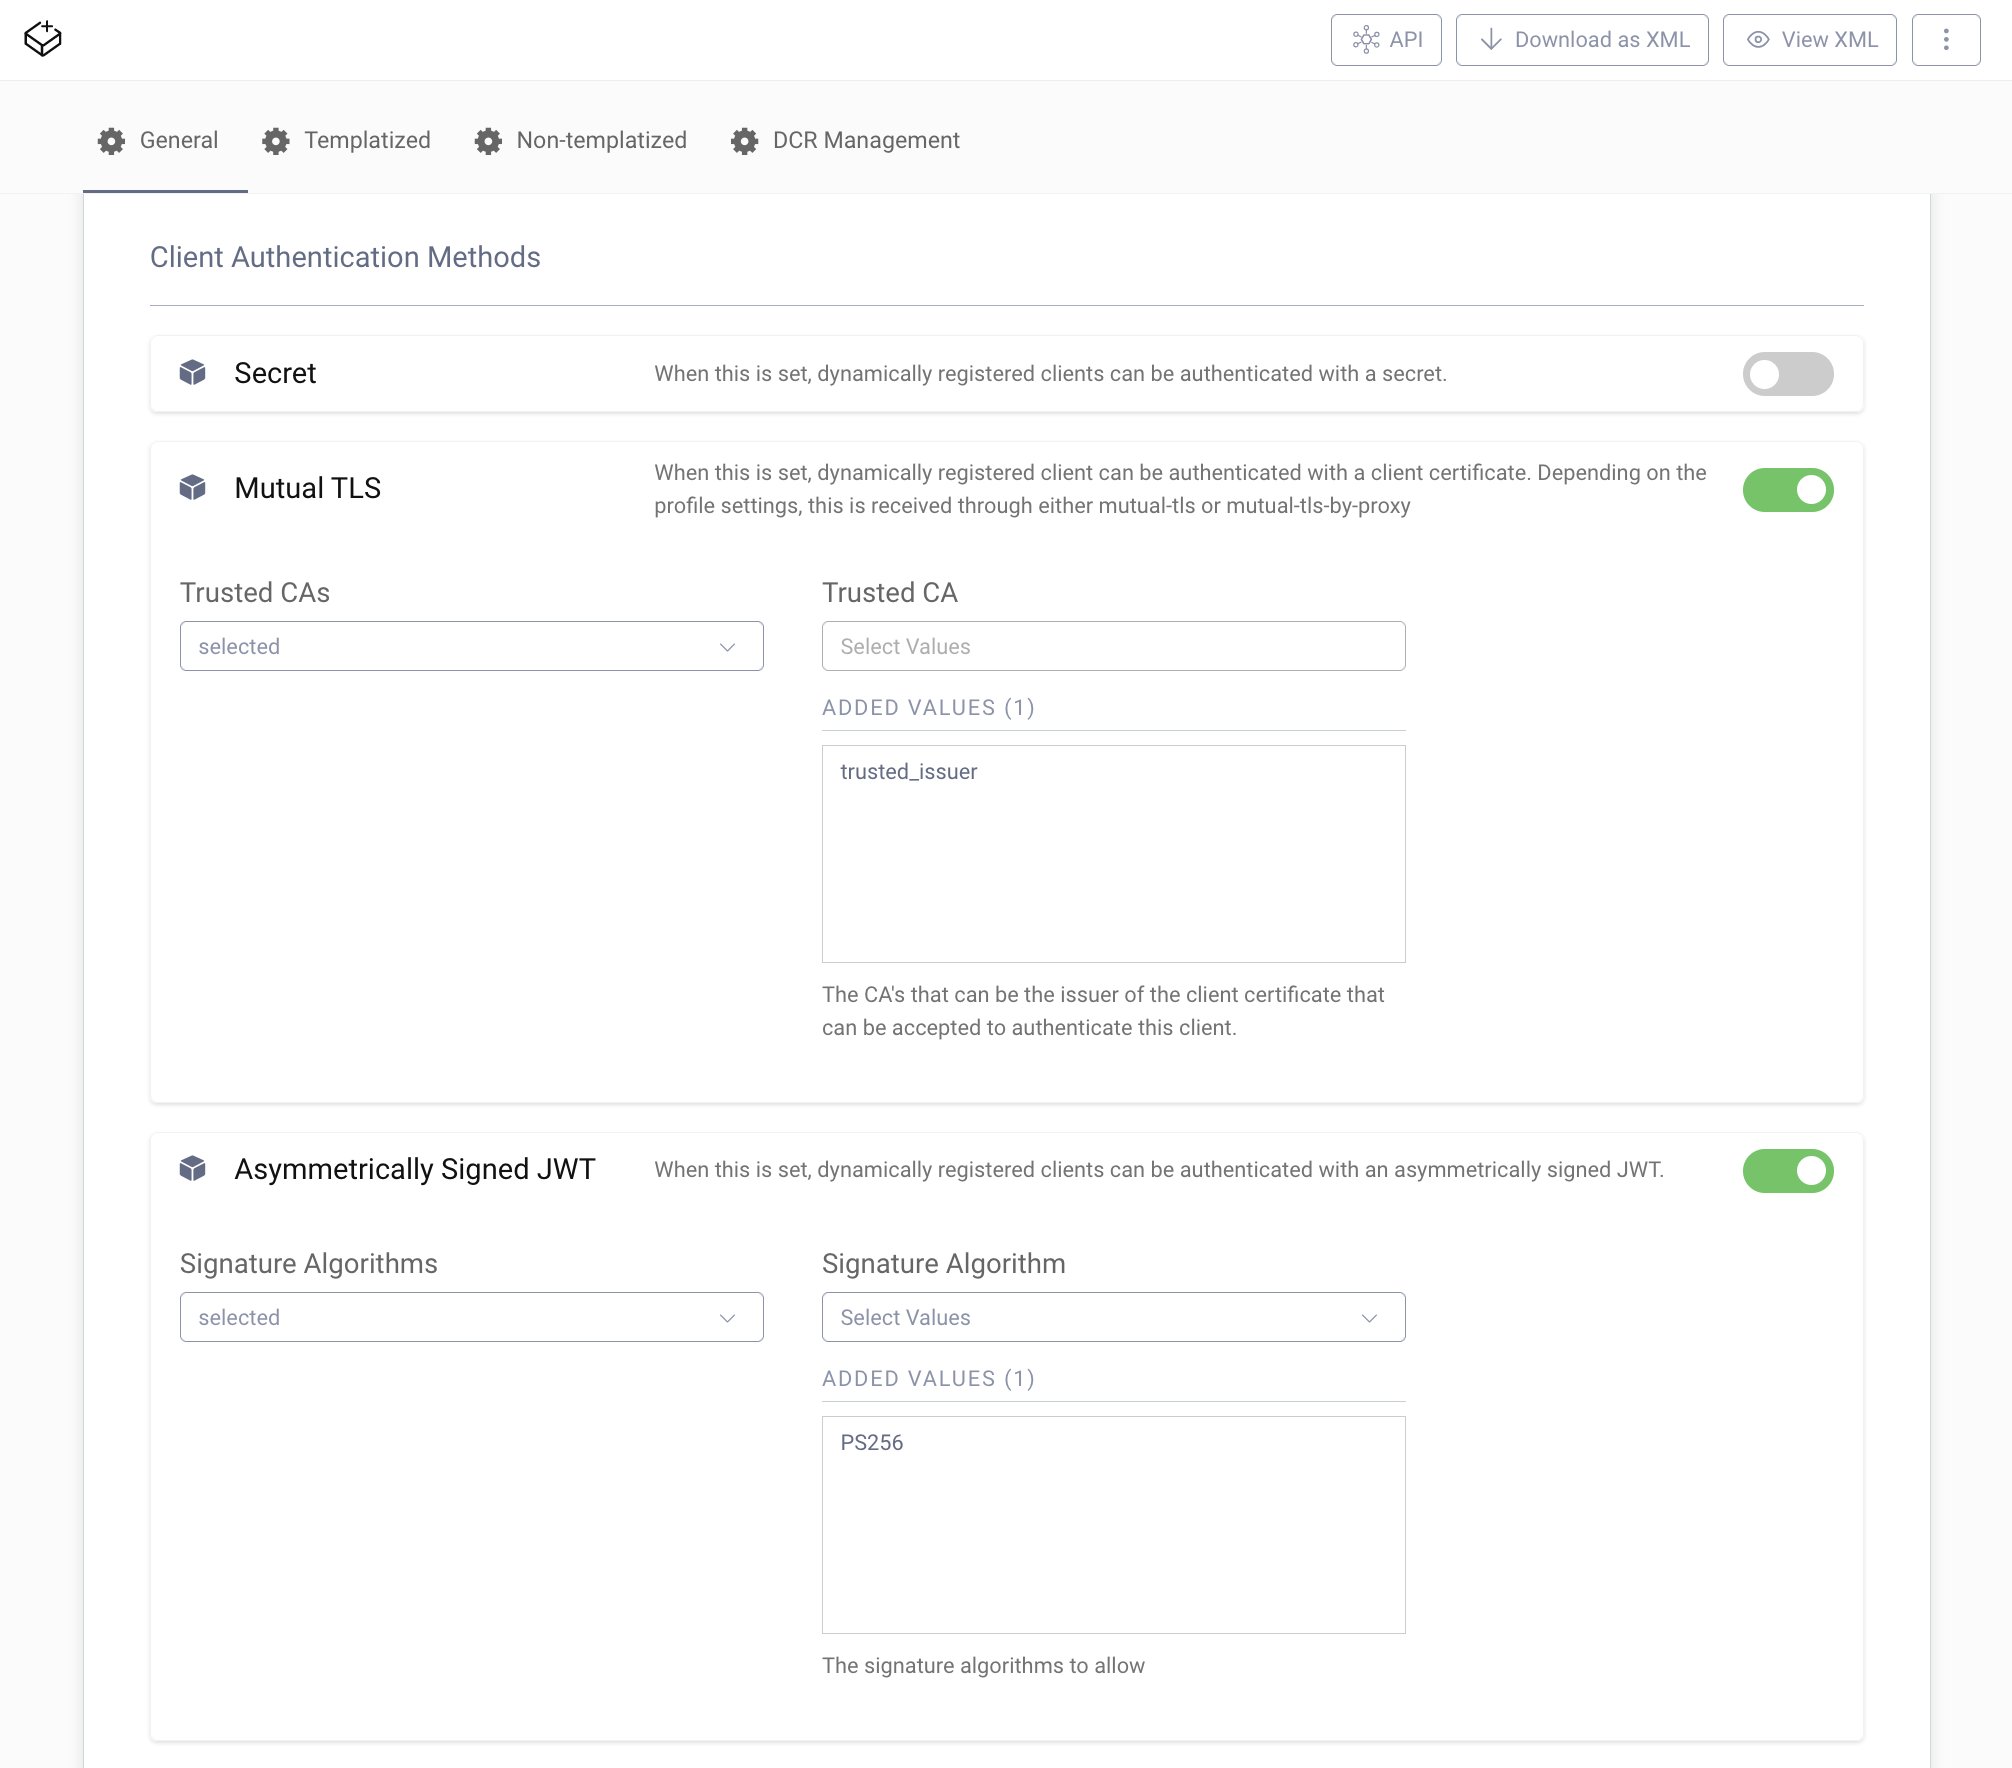
- Scroll down to Client Authentication Methods for non-templatized clients.
- Disable Secret.
- Enable Mutual TLS.
- In the list of Trusted CAs choose
selected. - Add
trusted_issueras a Trusted CA. - Enable Asymmetrically Signed JWT.
- Choose
selectedfor Signature Algorithms. - Add
PS256as an accepted Signature Algorithm.
In the last step configure client authentication on the DCR endpoint.
- Visit the Profiles screen and click on the Token Service.
- In the menu on the left side, go to Endpoints.
- Allow client authentication on the DCR endpoint
token-service-dynamic-client-registration. - Commit the changes.

Configure the Pre-processing Procedure
This step explains how to create and apply the pre-processing procedure.
- Visit the System screen.
- In the menu on the left side, go to Procedures.
- Filter for Pre-Processing.
- Click on +New to create a new pre-processing procedure.
- Name the new procedure
dcr-validation. Make sure the type ispre-processing-procedure. - Click Create.
The newly created pre-processing procedure contains some example code. Replace the example with the appropriate code as outlined above in Write a Pre-processing Procedure for custom DCR Request Validation and save the procedure.

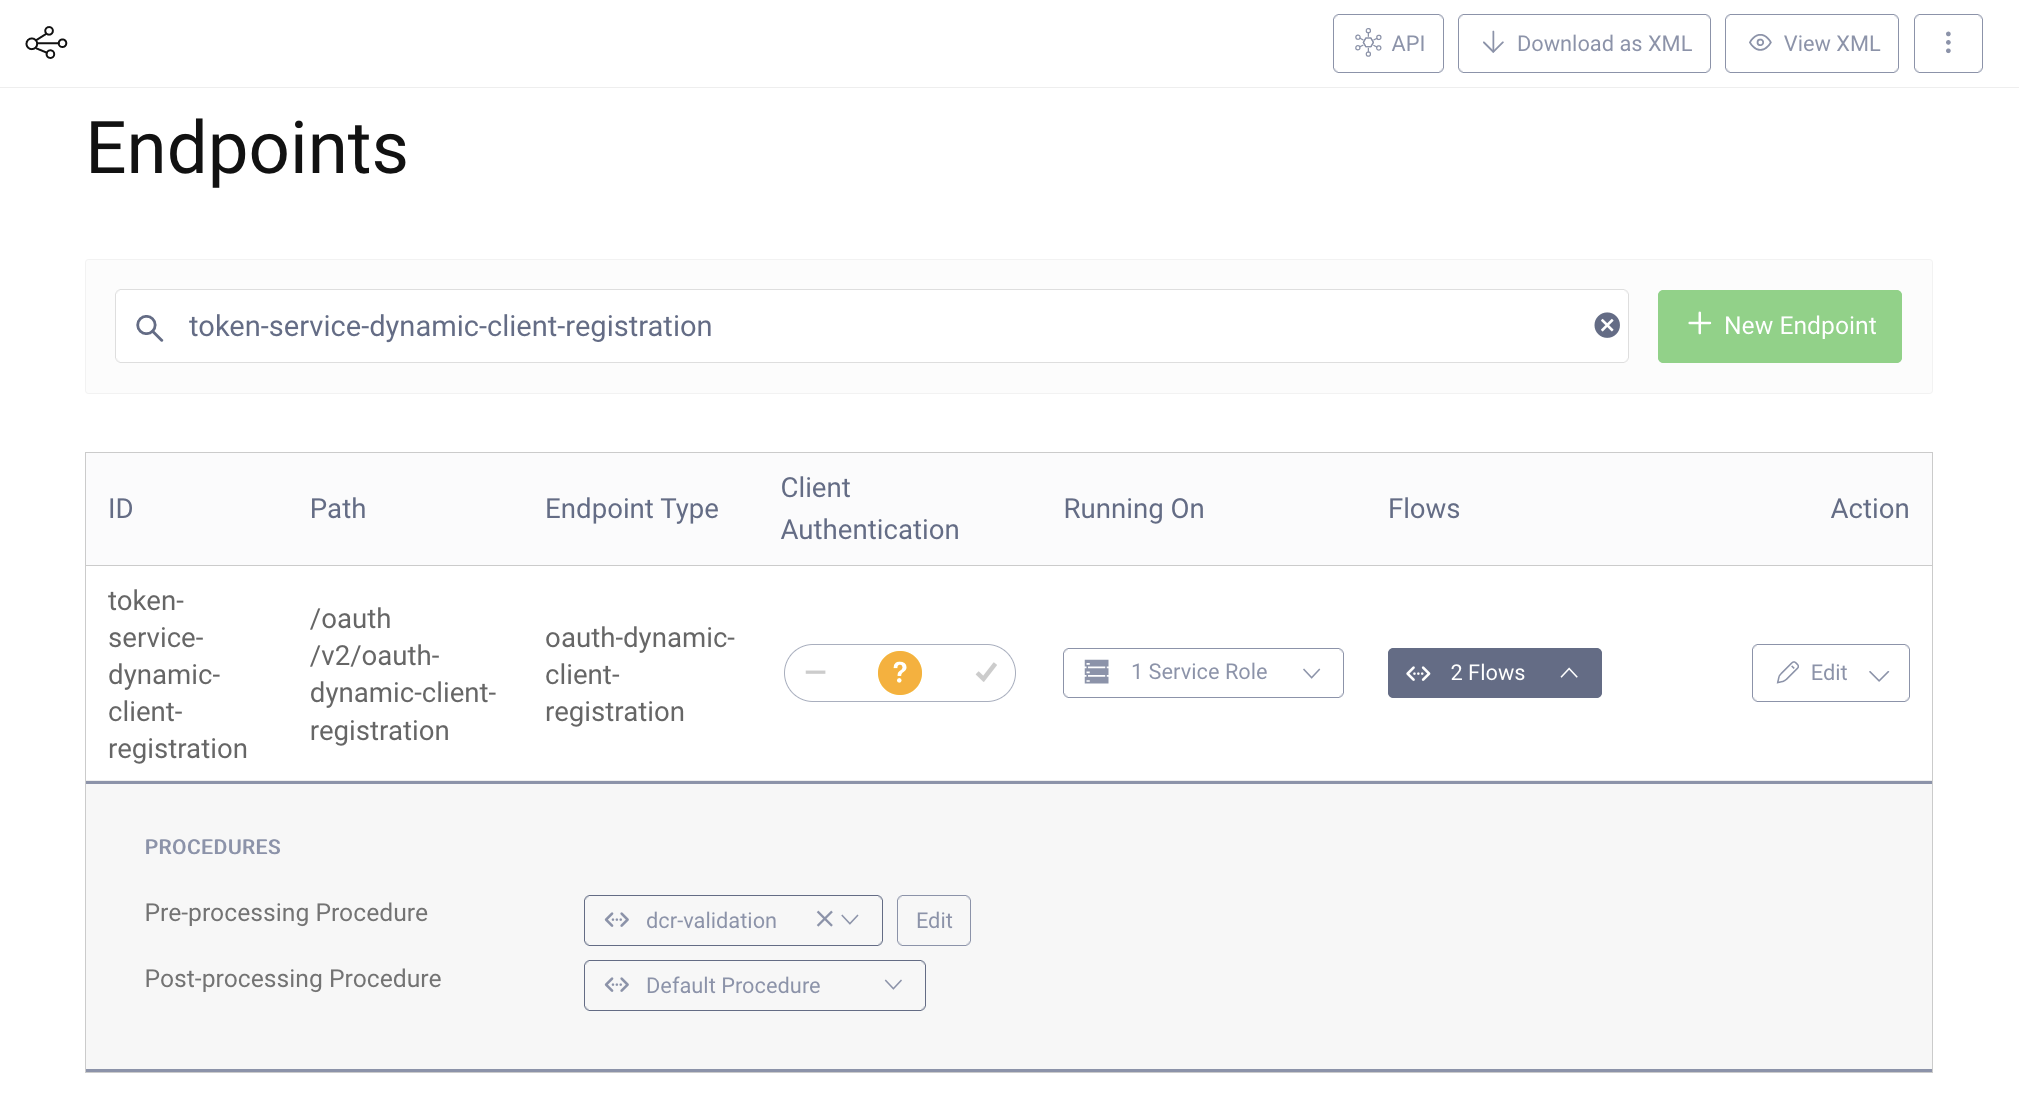
Now apply the procedure to the DCR endpoint.
- Visit the Profiles screen and click on Token Service.
- In the menu on the left side, go to Endpoints.
- Search for
token-service-dynamic-client-registration. - Expand the Flows.
- Click on Edit for the pre-processing procedure.
- Select
dcr-validationfrom the list. - Commit the changes.
The system is now ready. You can test the setup.
Testing
First, make sure you have all the pre-requisites in place for testing that are:
- The certificate chain for the server certificate presented by the Curity Identity Server; If a self-signed certificate is used, then the chain will contain only that certificate.
- Software statement signed by the
ssa_issuer - Private key and client certificate signed by the
trusted_issuer - Uri for the client's public keys (
jwks_uri)
Use curl to send a DCR request. The following command assumes that the client certificate and key reside inside a PKCS12 keystore that is protected with the password Password1. The data for the request is loaded from the file dcr-request.json.
curl --cert client.p12:Password1 --cert-type P12 \--cacert server-ca.trustchain.pem \https://localhost:8443/oauth/v2/oauth-dynamic-client-registration \-v -d @dcr-request.json
The following is an example of a DCR request. Note, some values are truncated for the sake of readability.
{"token_endpoint_auth_method": "tls_client_auth","tls_client_auth_subject_dn": "serialNumber=00112233445566,jurisdictionCountryName=BR,CN=tpp.example.com,OU=368a900d-...","redirect_uris": ["https://tpp.example.com/cb"],"jwks_uri": "https://keystore.sandbox.directory.openbankingbrasil.org.br/[...]/application.jwks","software_statement":"eyJhbGciOiJQUzI1NiJ9.eyJzb2Z0d2FyZV9tb2RlIjoi..."}
tls_client_auth_subject_dn must match the subject field of the client certificate. jwks_uri points to the keys that the client has registered at the OBB directory. The software_statement contains a signed JWT that the client retrieved from the directory. This JWT is a statement of the directory asserting the client's registered fields.
For example, the software statement may include the following claims.
{"software_mode": "Live","software_redirect_uris": ["https://tpp.example.com/cb"],"software_statement_roles": [{"role": "DADOS","authorisation_domain": "Open Banking","status": "Active"},{"role": "PAGTO","authorisation_domain": "Open Banking","status": "Active"}],"software_client_name": "Curity Testing Client","org_status": "Active","software_client_id": "mryJ1lewJk8KY84RPJ8q","iss": "Open Banking Open Banking Brasil prod SSA issuer","iat" : 1632743132,"software_id": "f69c8291-3dab-425b-bdc0-a8cf54a5f3b0","software_client_uri": "https://tpp.example.com","software_logo_uri": "https://tpp.example.com/logo.png","org_id": "368a900d-89a3-4c59-a624-1387f1b541fb","org_number": "112233445566","software_environment": "production","software_version": "1.0","software_roles": ["DADOS","PAGTO"],"org_name": "Curity AB",...}
The data from the DCR request are validated against the claims in the software statement. For example, the values provided in redirect_uris but be a sublist the software_redirect_uris claim of the software statement.
If you have troubles with the pre-requisites, check out the Example DCR Request Validation on GitHub for a working setup.
Out of Scope
This tutorial and code referenced by it do not cover how to configure or comply to all requirements defined in the Open Banking Brazil Security Profile. For example, the tutorial does not explain how to configure the scopes defined in the profile or how to enable and require pushed authorization requests.
Conclusion
Some requirements defined in the Open Banking Brazil Dynamic Client Registration Profile need an adaption of the default DCR flow. With the help of pre-processing procedures DCR requests can be validated and adapted before the Curity Identity Server processes them.
Pre-processing procedures are scripts written in JavaScript. Being able to write your own code enables you to implement compliance not only with Open Banking Brazil but also other existing and future regulations. However, pre-processing procedures are only a piece of the puzzle in the implementation of the requirements and are normally a complement to other configuration settings. This is also the reason why this tutorial is not limited to the software statement validation alone but also includes steps required for setting up compliant client authentication methods and trusted certificates.
Customer Stories
Learn how organizations run identity and API security at scale.
Read customer storiesWas this helpful?