Implementing Role Based Security
On this page
When using OAuth security, the most complete option is to use claims for authorization. Roles are just one possible usage of claims, though remain a requirement for meeting many use cases. This tutorial shows how to issue role claims using the Curity Identity Server. The techniques explained can also be used to manage any other type of custom claim in addition to roles.
Configuring Scopes and Claims
Roles are enabled in OAuth secured APIs via scopes and claims. This tutorial will use an example scope called orders that includes the roles claim. When a user authenticates against a client application that uses the orders scope, the access token issued will then include the roles for the user.
To configure this behavior, get started with the token designer. First create the orders scope. Then add a new roles claim to the orders scope. Then drag the orders scope into the access token, ID token or User Info, to include its claims.

Role Data Sources
The role value could potentially come from multiple places, though this tutorial will show how to manage roles within the account data. See the links provided below for further details on the alternative options.
| Data Source | Behavior |
|---|---|
| Account Data | Roles are stored as an attribute against the user account |
| External Identity Provider | The roles are provided by an external identity provider (IDP) |
| Business Data | The roles are stored in an external database and retrieved via a database or API call, as described in implementing custom claims |
Assigning Roles to Users
The Curity Identity Server provides SCIM and GraphQL APIs for managing users. This gives you many options for setting roles against users in your preferred way. User account data is modeled on the SCIM user resource schema, so when using the built-in roles multi-valued attribute you must use an object for each role, with at least a value field. The following example provides valid SCIM request data for updating the built-in roles field:
{"schemas": ["urn:ietf:params:scim:schemas:core:2.0:User"],"userName": "janedoe","password": "Password1","name": {"givenName": "Jane","familyName": "Doe"},"emails": [{"value": "jane.doe@company.com","primary": true}],"roles": [{"value": "users"},{"value": "superusers","primary": true}],"active": true}
You can also use custom fields that are not defined in SCIM, and provide them in your preferred way, such as a plain string or string array. It is recommended to model your fields in terms of the standard schema though, unless you have a good reason.
You can then send the request payload to create the user. Use an authorization manager to enable secure access to SCIM endpoints. Then, when you retrieved an access token with a scope that allows SCIM privileges, run the following command:
curl -i -s -X POST http://localhost:8443/scim/admin/Users \-H "Authorization: Bearer $JWT_ACCESS_TOKEN" \-H "Accept: application/scim+json" \-H "Content-Type: application/scim+json" \-d @input.json
Populating Claims at Runtime
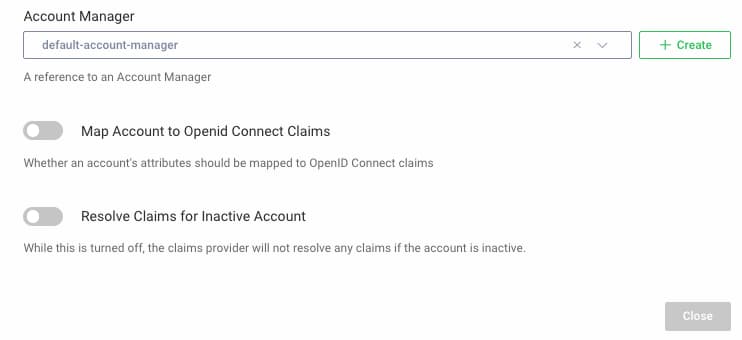
At the time of token issuance, you can specify how to load claims from the account data. Since roles is not a standard OpenID Connect claim, ensure that you are using an account manager claims provider that has the Map Account to OpenID Connect Claims option unchecked:
Next, edit the claim in the token designer window, select the claims value provider, and select the roles attribute:
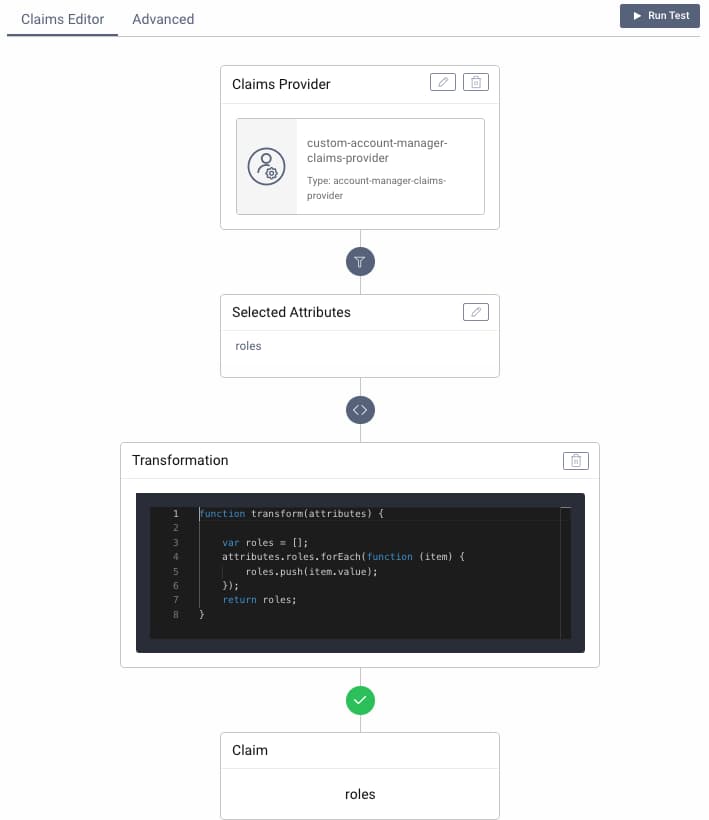
When the roles claim is issued, you may want to transform it from the SCIM format to one that is better suited for the client application. The following example translates the roles account data into a simple string array:
function transform(attributes) {var roles = [];attributes.roles.forEach(function(item) {roles.push(item.value);});return roles;}
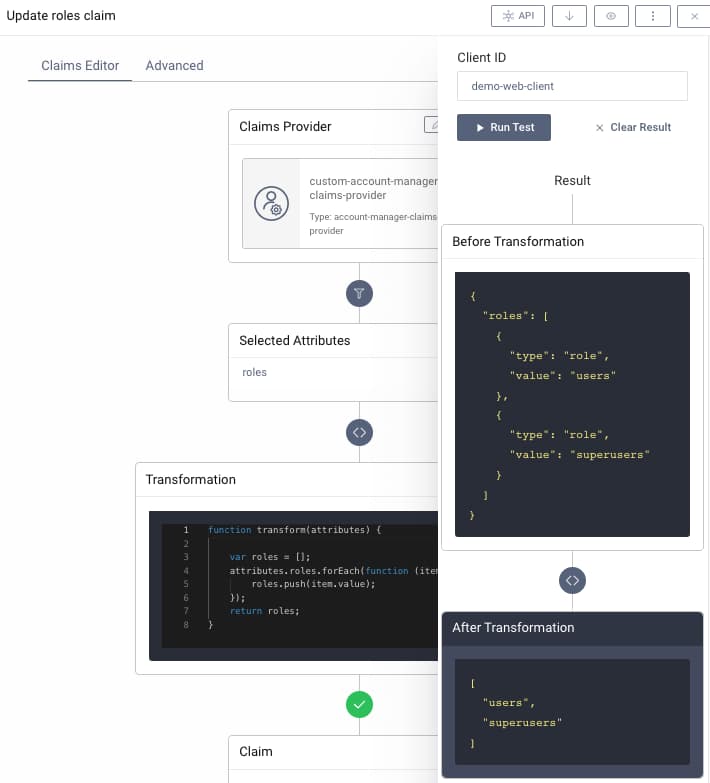
The claims value provider can then be quickly tested in the Admin UI, as explained in the working with claims tutorial. The various components give you complete control over claims issued.
Using Roles in Applications
Once you know how to assign roles to users and issue them as claims, you can apply roles to many use cases. A common example is API authorization, where a developer might implement role based security by applying an Authorize annotation. By controlling the behavior of role claims in the Curity Identity Server, you can ensure that your application code remains simple:
[ApiController][Route("[controller]")]public class OrdersController : ControllerBase{[Authorize(Roles = "superusers")][HttpDelete][Route("{id}")]public String Delete(string id){return $"Successfully deleted order: {id}";}}
Conclusion
The Curity Identity Server has powerful support for claims based authorization. When you need to use roles, it is straightforward to do so, regardless of your data source. You can then integrate role based authorization into your APIs, with only simple code.
Customer Stories
Learn how organizations run identity and API security at scale.
Read customer storiesWas this helpful?