Account Creation after Login
On this page
User accounts can be created in the Curity Identity Server in multiple ways. Many companies provide an option for users to register themselves, which is often done using the HTML Form authenticator. In other use cases, only administrator approved users may be allowed to sign in, and users might be created via backend SCIM or GraphQL API calls. This tutorial will describe a third use case, where user accounts already exist in an external system.
External Identity Providers
The Curity Identity Server is most commonly used in the authorization server role. When required it can then enable federated logins via many other systems, as described in Using External IDPs. After login, if a user does not already exist in the account data of the Curity Identity Server, a new user account should be created. This enables you to manage information about the user identity and extend this data over time.
Auto Create Account
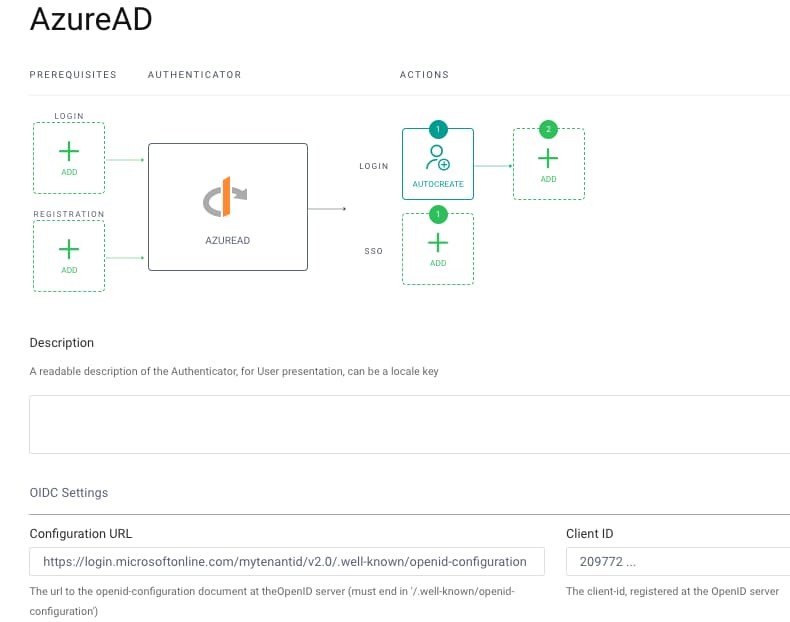
Consider a scenario where user accounts already exist in Microsoft Entra ID. In this case you need to configure an OpenID Connect authenticator, as described in Authenticate using Microsoft Entra ID, and supply these parameters:
AZURE_AD_METADATA_URL='https://login.microsoftonline.com/mytenantid/v2.0/.well-known/openid-configuration'AZURE_AD_CLIENT_ID='209772 ...'AZURE_AD_CLIENT_SECRET='Y1U8 ...'
To create the account in the Curity Identity Server, you need to use the Auto Create Account authentication action. This is simply added as a post-login action, though it is then important to understand the data behavior.
Example Deployment
You can use the GitHub repository linked at the top of this page to run a working setup and then understand the account data. By default the repo assumes that OAuth Tools is being used as a test client and that it is connecting to a local Docker based instance of the Curity Identity Server using ngrok. If you prefer, you can instead configure the same settings in your own deployed instance.
Prerequisites
After cloning the repo, copy a license file for the Curity Identity Server into its root folder. Also ensure that a Docker engine is installed on your local computer.
Deploy the System
Next run the following commands to deploy the Curity Identity Server, along with a PostgreSQL database that will store account data:
export USE_NGROK=trueexport AZURE_AD_METADATA_URL='https://login.microsoftonline.com/mytenantid/v2.0/.well-known/openid-configuration'AZURE_AD_CLIENT_ID='209772 ...'AZURE_AD_CLIENT_SECRET='Y1U8 ...'./deploy.sh./apply-use-case.sh ./config/3-configure-external-accounts.xml
Create a Test Setup
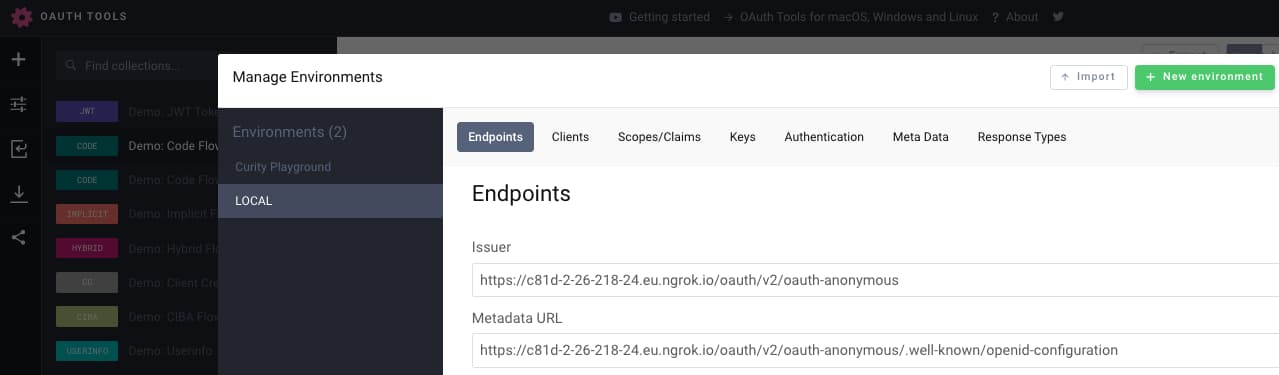
The script will then output an OpenID Connect metadata URL similar to this:
The OpenID Connect Metadata URL is at: https://4099-2-26-218-80.eu.ngrok.io/oauth/v2/oauth-anonymous/.well-known/openid-configuration
In OAuth Tools, create a new environment and paste this URL into the Metadata URL field:
You will then need to run a code flow in OAuth Tools with the following settings, to login with your Microsoft Entra ID credentials:
Client ID: demo-web-clientClient Secret: Password1Scope: openid
Query Account Data
The account data can be queried by first getting a shell to the PostgreSQL container:
CONTAINER_ID=$(docker ps | grep postgres | awk '{print $1}')docker exec -it $CONTAINER_ID bash
Next, connect to the SQL database:
export PGPASSWORD=Password1 && psql -p 5432 -d idsvr -U postgres
Finally, select account related data with these simple queries:
select * from accounts;select * from linked_accounts;
Account Data Storage
You will then see a single account record similar to this, and note that the username field is set to a technical user identifier from Microsoft Entra ID. The account data can be extended further in future, via additional actions to collect custom data and apply custom logic. To see how this works you can run the authentication actions example.
| account_id | username | |
|---|---|---|
| 0cee591a-461b-11ed-8779-0242c0a89002 | 8ZfGEBca1kUsQ1HoYbn ... | john.doe@company.com |
In the example deployment, Microsoft Entra ID is the primary authentication factor, and is configured with a local domain. This is a way of indicating that it is responsible for creating records in the accounts table. Only this authenticator should use the Auto Create Account action:

In future you may want to change the primary authentication factor, so that the same user can login in alternative ways, such as with Google credentials. In this case you will assign each new authentication method a foreign domain. After the correct configuration is done, this will result in a linked_accounts record being created, similar to the following. For a walkthrough on implementing this data outcome, see the Account Linking With Social Identity Providers tutorial.
| account_id | linked_account_id | linked_account_domain_name | linking_account_manager |
|---|---|---|---|
| a19b0254-4952-11ed-aac5-0242ac1a0003 | 102269322839797161925 | google-domain | default-account-manager |
Access tokens
Access tokens issued to clients will contain a subject claim as the user identifier. This can be provided in multiple ways, including using the username stored in the database. The example deployment is instead configured to use a Pairwise Pseudonymous Identifier (PPID) for the subject claim. Its value must remain the same regardless of the user's primary authenticator factor, so that a consistent identity is provided to your APIs:
{"jti": "78aefc27-bb45-455b-8cc8-16f4b825f0a9","delegationId": "ec57e21d-b0e9-4dee-a253-bafb8f3f1b63","exp": 1665661983,"nbf": 1665661683,"scope": "openid","iss": "https://c81d-2-26-218-24.eu.ngrok.io/oauth/v2/oauth-anonymous","sub": "35996a48baa64ac46614349b134e867276f199db5b392e42900142134a723e51","aud": "demo-web-client","iat": 1665661683,"purpose": "access_token"}
Conclusion
The Curity Identity Server can easily perform federated logins using external identity providers. You can then automatically create an account when a user first logs in, so that this becomes the main account for the user. Ensure that you also understand the data setup, where there is a single account record per user, which can be extended with custom attributes.
Customer Stories
Learn how organizations run identity and API security at scale.
Read customer storiesWas this helpful?