Implementing Custom Claims
On this page
Introducing the Custom Claims Flow
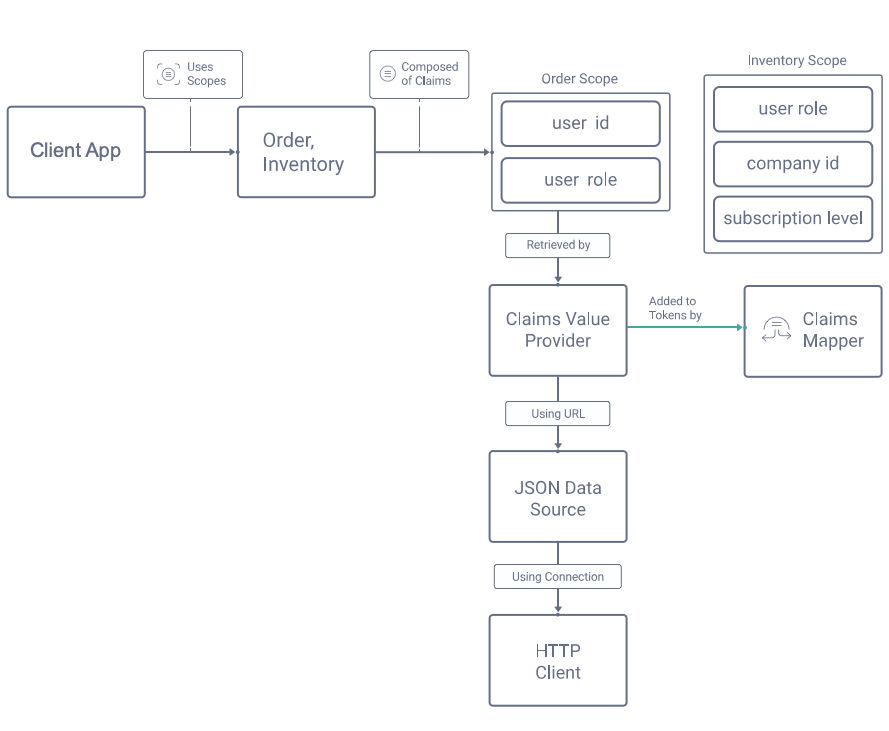
This tutorial and video show how to implement a use case where custom claims are included in access tokens. The custom claims will originate from domain specific data, and the setup will follow the design principles described in Claims Best Practices. The Curity Identity Server provides a toolbox for providing claims, consisting of a number of separate behaviors, which will be composed together as follows to meet the requirements for the example use case:
Design the Access Token Payload
This section will describe the design steps needed to include custom scopes and claims in access tokens. This enables your APIs to authorize requests by applying business rules, with only simple code.
Compose Scopes from Claims
First design scopes and claims that you want to include in access tokens, based on how you want to authorize access to business resources later. The example use case includes the following custom scopes and claims:
| Scope | Claims Contained |
|---|---|
| order | user_id, user_role |
| inventory | user_role, company_id, subscription_level |
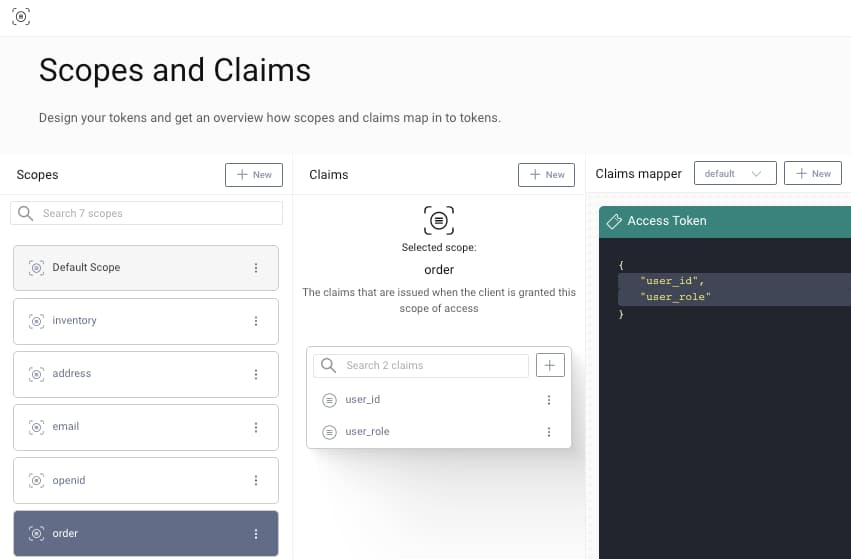
The Curity Identity Server allows you to compose claims into scopes, then use a Claims Mapper to say where the claims should be output. All of this is managed in one place in the Admin UI, using the Token Designer window. The below order scope contains claims that allows an API to restrict normal users to their own orders, while granting administrators access to all orders:
The inventory scope has claims the API can use to grant access to different items by business partner, and to allow users with higher subscription levels to purchase additional items. Both scopes are dragged into the access token pane, to ensure that clients who use both scopes are issued access tokens that contain the claims within those scopes:
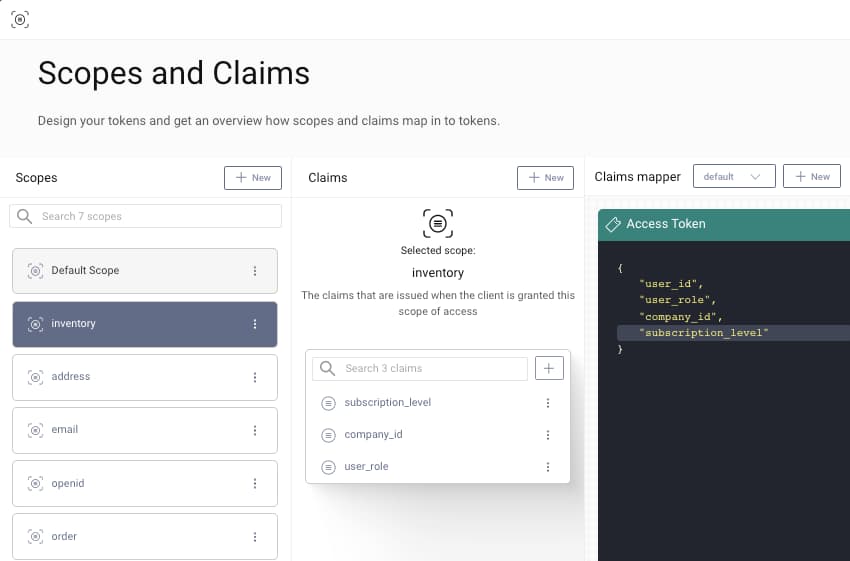
It is common to include certain claims, such as the user_role above, in multiple scopes, in a similar way to how the OpenID Connect built in email claim may be included in both email and profile scopes.
Design a Custom Claims API Endpoint
To provide custom claims to be included in access tokens, one option is to make a simple REST endpoint available in an API. The Authorization Server will call this endpoint at the time of token issuance. In this example the API URL for providing custom claims has the following form, and receives the subject claim in a GET request:
https://localhost:3000/api/users/556c8ae33f8c0ffdd94a/claims
The endpoint will look up the user details and return a payload containing custom claims. These claims will then be issued, then included later in access tokens sent to APIs, where they will become part of the API's Claims Principal:
{"user_id": 123,"user_role": "customer","subscription_level": "gold","company_id": 0}
The above claims are simple strings and integers, but the claim returned can also be a JSON array or object. The Curity Identity Server will then write the same claims format to the tokens it issues.
Handle Claims Requests for New Users
If a subject claim is received that is not recognized by the API, you can implement any logic you want, though the following two options are perhaps the most common:
- Assume this is an online customer who has just signed up, create a new user record with default permissions, and return its details
- Return a default payload with empty / null claims, so that the token issued can be rejected when sent to APIs later
Implement Scopes and Claims
This section shows the main steps required to implement the example use case with the Curity Identity Server. The Admin UI is used to wire up claims and to provide them with runtime values based on the authenticated user's identity.
Visualize Claims
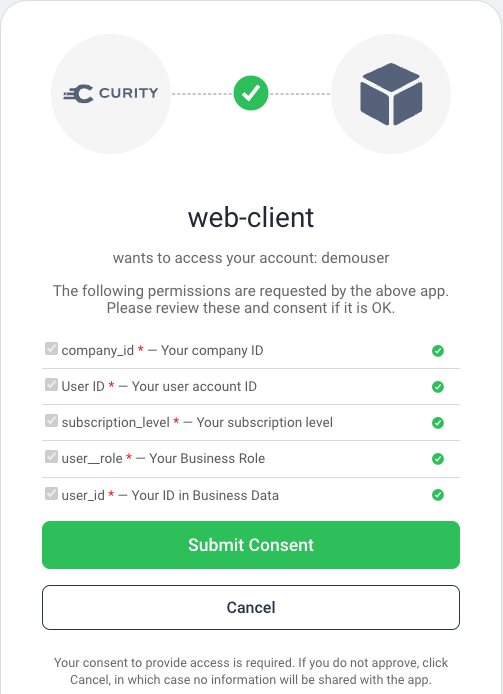
To view claims being issued to clients, it can be useful to temporarily activate the consent screen for the client. When a scope is composed of claims, the Curity Identity Server does not show the scope itself in the consent screen, and instead only shows the individual claims.
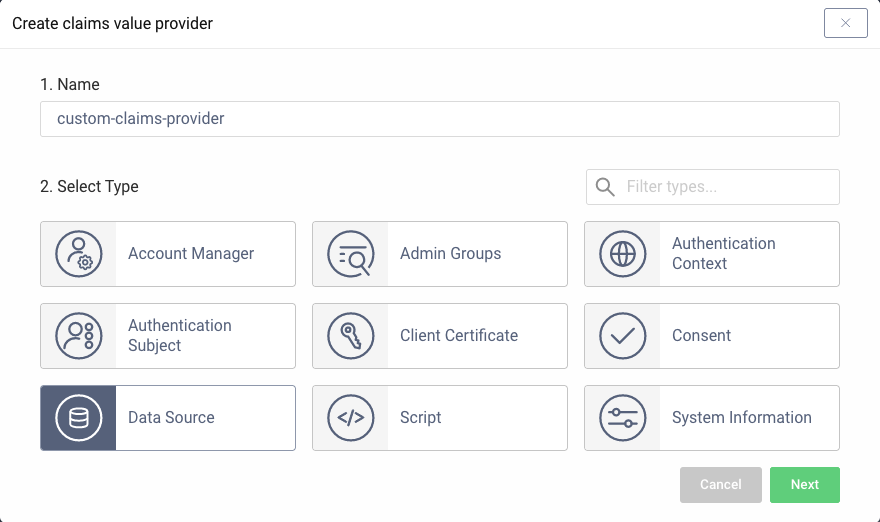
Create a Claims Value Provider
At runtime, claims need to be assigned values based on the user's identity, and this is managed by a Claims Value Provider. There are a number of options, including a scriptable version where you can implement arbitrary logic, but the simplest fit for our scenario is a JSON Data Source.
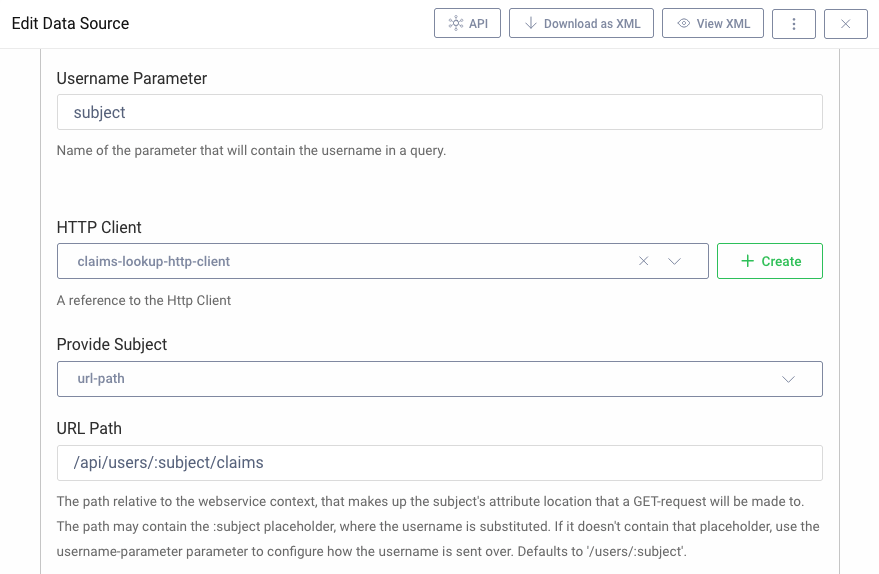
Create a Claims Data Source
A JSON data source is configured to point to the REST URL within the API that provides custom claims. The below screenshot configures the Curity Identity Server to include the OAuth subject claim in a URL path segment:
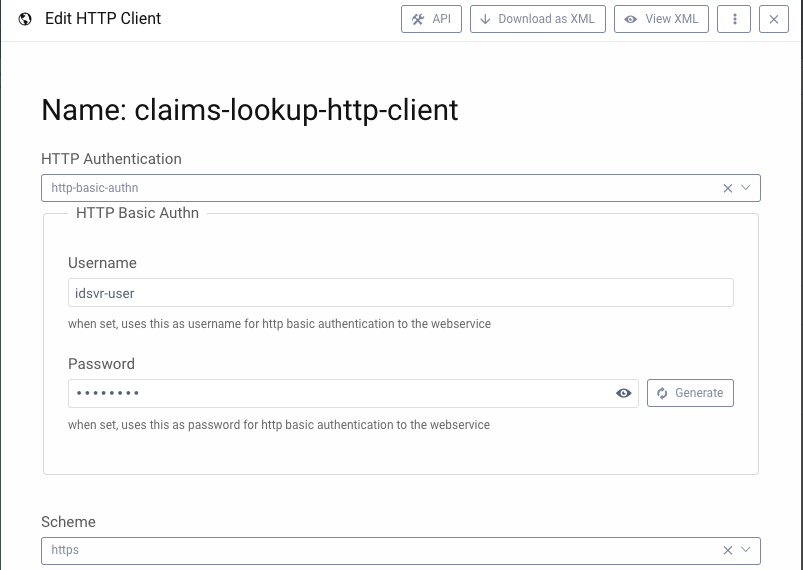
Create an HTTP Client
The JSON data source uses an HTTP Client to deal with the connectivity and security details of the outgoing connection. The below example uses Basic Authentication within the back end environment, though more advanced options can also be used:
Other Claims Value Providers
At times you may want finer grained control over the claims lookup HTTP request. In these cases, a Script Claims Value Provider can be used with an HTTP client, to send identity attributes and receive back custom claims, using JavaScript code similar to that shown below:
function result(context) {var requestData = {subject: context.subjectAttributes.accountId,email: context.subjectAttributes.userName};var requestHeaders = {'accept': 'application/json','content-type': 'application/json'};var options = {method: "POST",headers: requestHeaders,body: requestData}var response = context.getWebServiceClient().request(options);if (response.statusCode != 200) {var message = 'API custom claims endpoint returned status: ' + response.statusCode;logger.info(message);throw exceptionFactory.forbiddenException(message);}var responseBody = response.getBody();return JSON.parse(responseBody);}
It is also possible to develop a bespoke implementation as a plugin. For the implementation steps, see the Salesforce Claims Provider code example.
Authorize using Custom Claims
Once the custom claims issuing is complete, the main API endpoints will receive a useful JWT access token. On every request, the API digitally verifies the JWT, to ensure that it has been issued by the Authorization Server, then trusts the claims and can use them for authorization.
{"sub": "556c8ae33f8c0ffdd94a57b7eab37e9833445143cf6847357c65fcb8570413c4","purpose": "access_token","iss": "https://localhost:8443/oauth/v2/oauth-anonymous","active": true,"token_type": "bearer","client_id": "web-client","aud": "api.yourcompany.com","nbf": 1611673855,"scope": "openid profile userid transactions","exp": 1611674155,"delegationId": "93f036b6-7cdc-4f9e-89a6-2ab5ec635fbc","iat": 1611673855,"user_id": 123,"user_role": "customer","subscription_level": "gold","company_id": 0}
APIs will validate the JWT using a library, and after successful validation a ClaimsPrincipal object is typically returned. This will include the custom claims of user_role, user_subscription_level and user_company_id. It is then straightforward for the API to implement its business authorization.
Video
This video provides a step by step guide to including custom claims from your business data in access tokens. The example setup uses an API endpoint to return the claims, which is called by the Curity Identity Server at the time of token issuance.

Conclusion
The Curity Identity Server provides a number of behaviors to enable you to customize claims. These include building blocks of Claims Mapper, Claims Value Provider, Data Source and HTTP Client. Each of these can be customized as required, to provide complete flexibility when issuing claims. All of this provides the simplest and most secure authorization in your API code.
Customer Stories
Learn how organizations run identity and API security at scale.
Read customer storiesWas this helpful?