
User Self-Service Portal
On this page
The Curity Identity Server provides API Access to Identity Resources like user accounts. Any frontend application can integrate with identity APIs to enable users to manage their identity settings. Often, organizations also want an out-of-the-box application rather than needing to develop their own solution. For that, activate the User Self-Service Portal.
This tutorial explains how to get up and running with the Self-Service Portal and provides an overview of how it works, so that you know how to operate the portal and how users will interact with it. The tutorial summarizes the main behaviors you can expose to users, to enable them to take control over their identity resources. Read more about the portal in the Application Profile section of the production documentation.
Activating the Portal
To enable the self-service portal, first ensure that you have a User Profile with GraphQL endpoints enabled. If required, follow the User Management with GraphQL tutorial to create and configure the profile. Run the Admin UI and navigate to Profiles → User Service → Data Sources and make sure you configure a User Data Store of type Account Manager.
To activate the Self-Service Portal you need an Applications Profile. If you do not have one, use the Admin UI to navigate to Profiles → + New Profile, assign a name and a base path like /apps. Then deploy that endpoint to a service role.
Within the Applications Profile, select the option to create an application of type Self Service Portal, which runs a setup wizard. Create an HTTP Client to manage backend calls from the User Profile to the Token Service. The product documentation explains how the HTTP client can use imported Server Trust Stores if you use internally issued HTTPS certificates for the Token Service's external URL. Also select one or more authenticators for user logins to the self-service portal.
Next, activate self-service features that you want to provide to users. Only select settings for Opt-in MFA, TOTP or Passkeys if users authenticate with those methods. The following screenshot illustrates a deployment that enables all Self-Service Portal features.

Commit changes in the Admin UI to create a new user-facing application. The following sections explain how to expose the application and how users can operate it.
The Portal Application
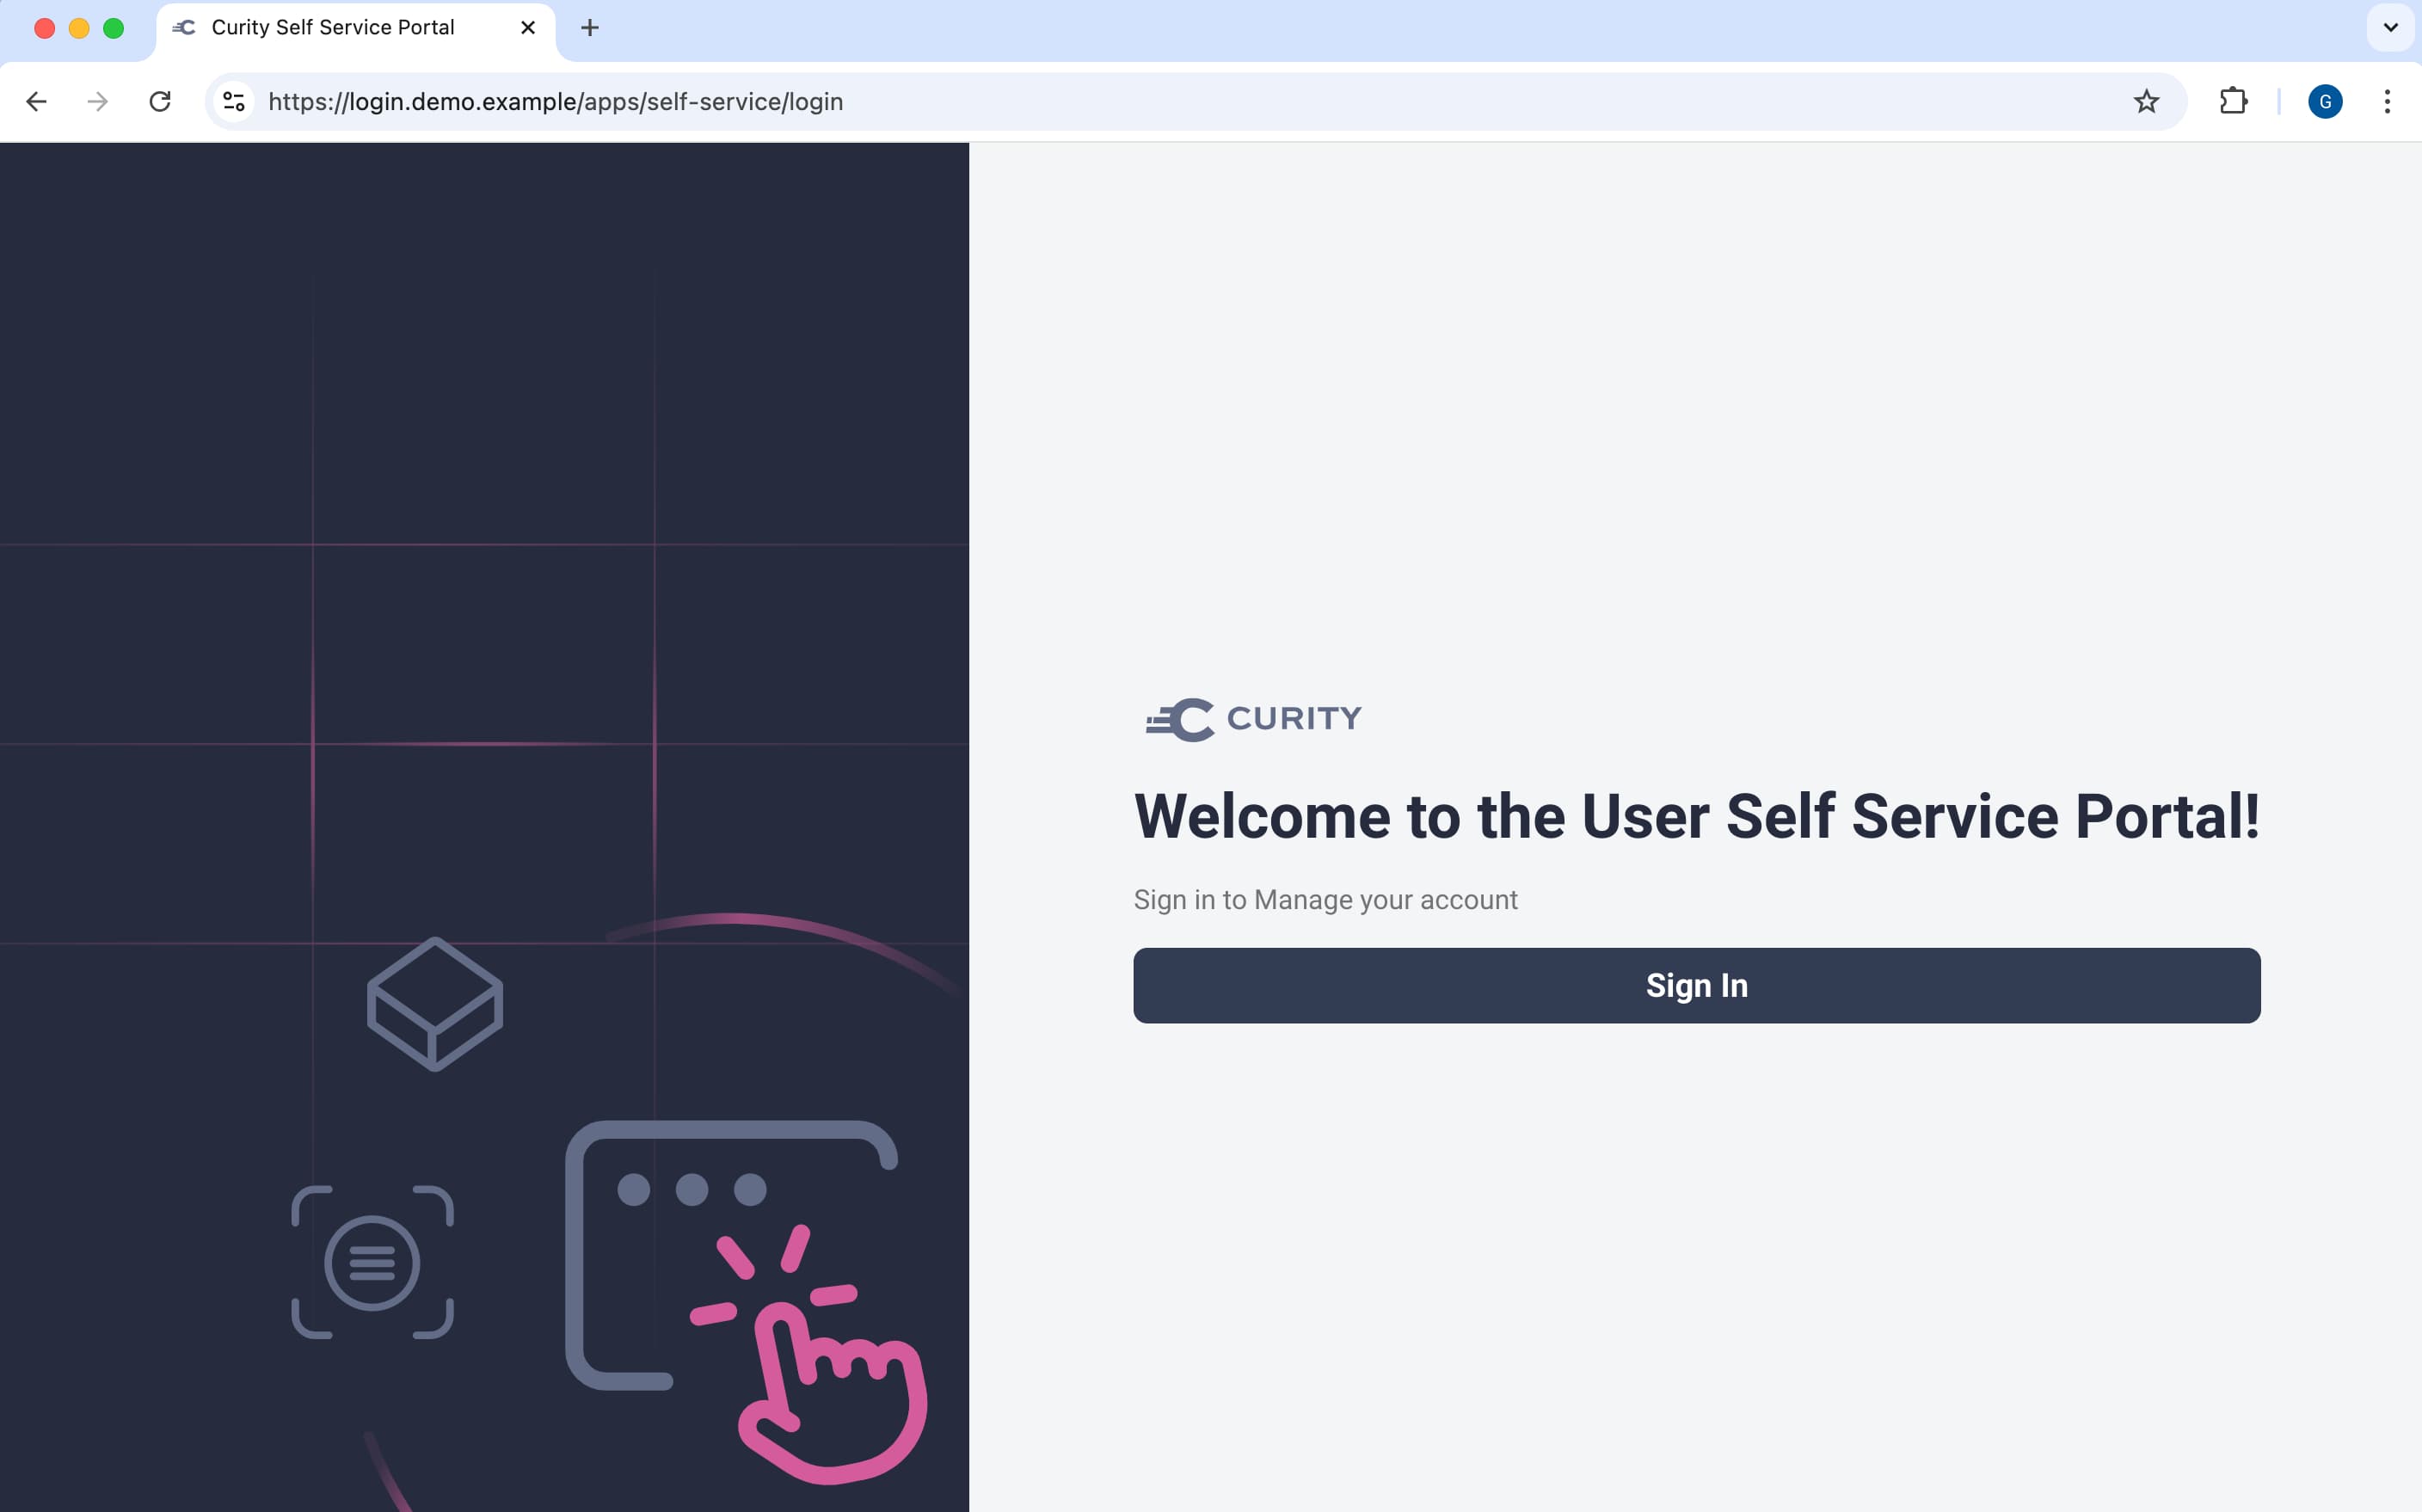
The Self-Service Portal is an OAuth-secured Single Page Application (SPA). You can run it an internet URL of the form https://login.example.com/apps/self-service, where https://login.example.comis an example base URL for the Curity Identity Server, /apps is an example application profile base path and self-service is an example Self-Service Portal Application ID.
In user-facing applications that should integrate with the Self-Service Portal, create a Manage my Account link that uses the portal's base URL. Typically, users Single-Sign On to access the portal. In some cases, such as if a user bookmarks a portal screen and returns to it at a later time when they need to re-authenticate, the portal presents a login screen and the user sees the following display.
After login, the user interacts with the portal's screens to manage their identity. You can use the Fast Look and Feel Customization of the Curity Identity Server to create a theme for the Self-Service Portal. In the Admin UI page for the Self-Service Portal, use the Template Area and Themes setting to select and activate the theme.
After customizing the look and feel, you can optionally customize screen labels with message file overrides, as explained in the Developer Guide. The Self-Service Portal default message files are located in the $IDSVR_HOME/messages/core/en/apps/self-service-portal folder of the Curity Identity Server.
User Features
Once the portal has your preferred presentation, users can interact with portal screens to control their identity details.
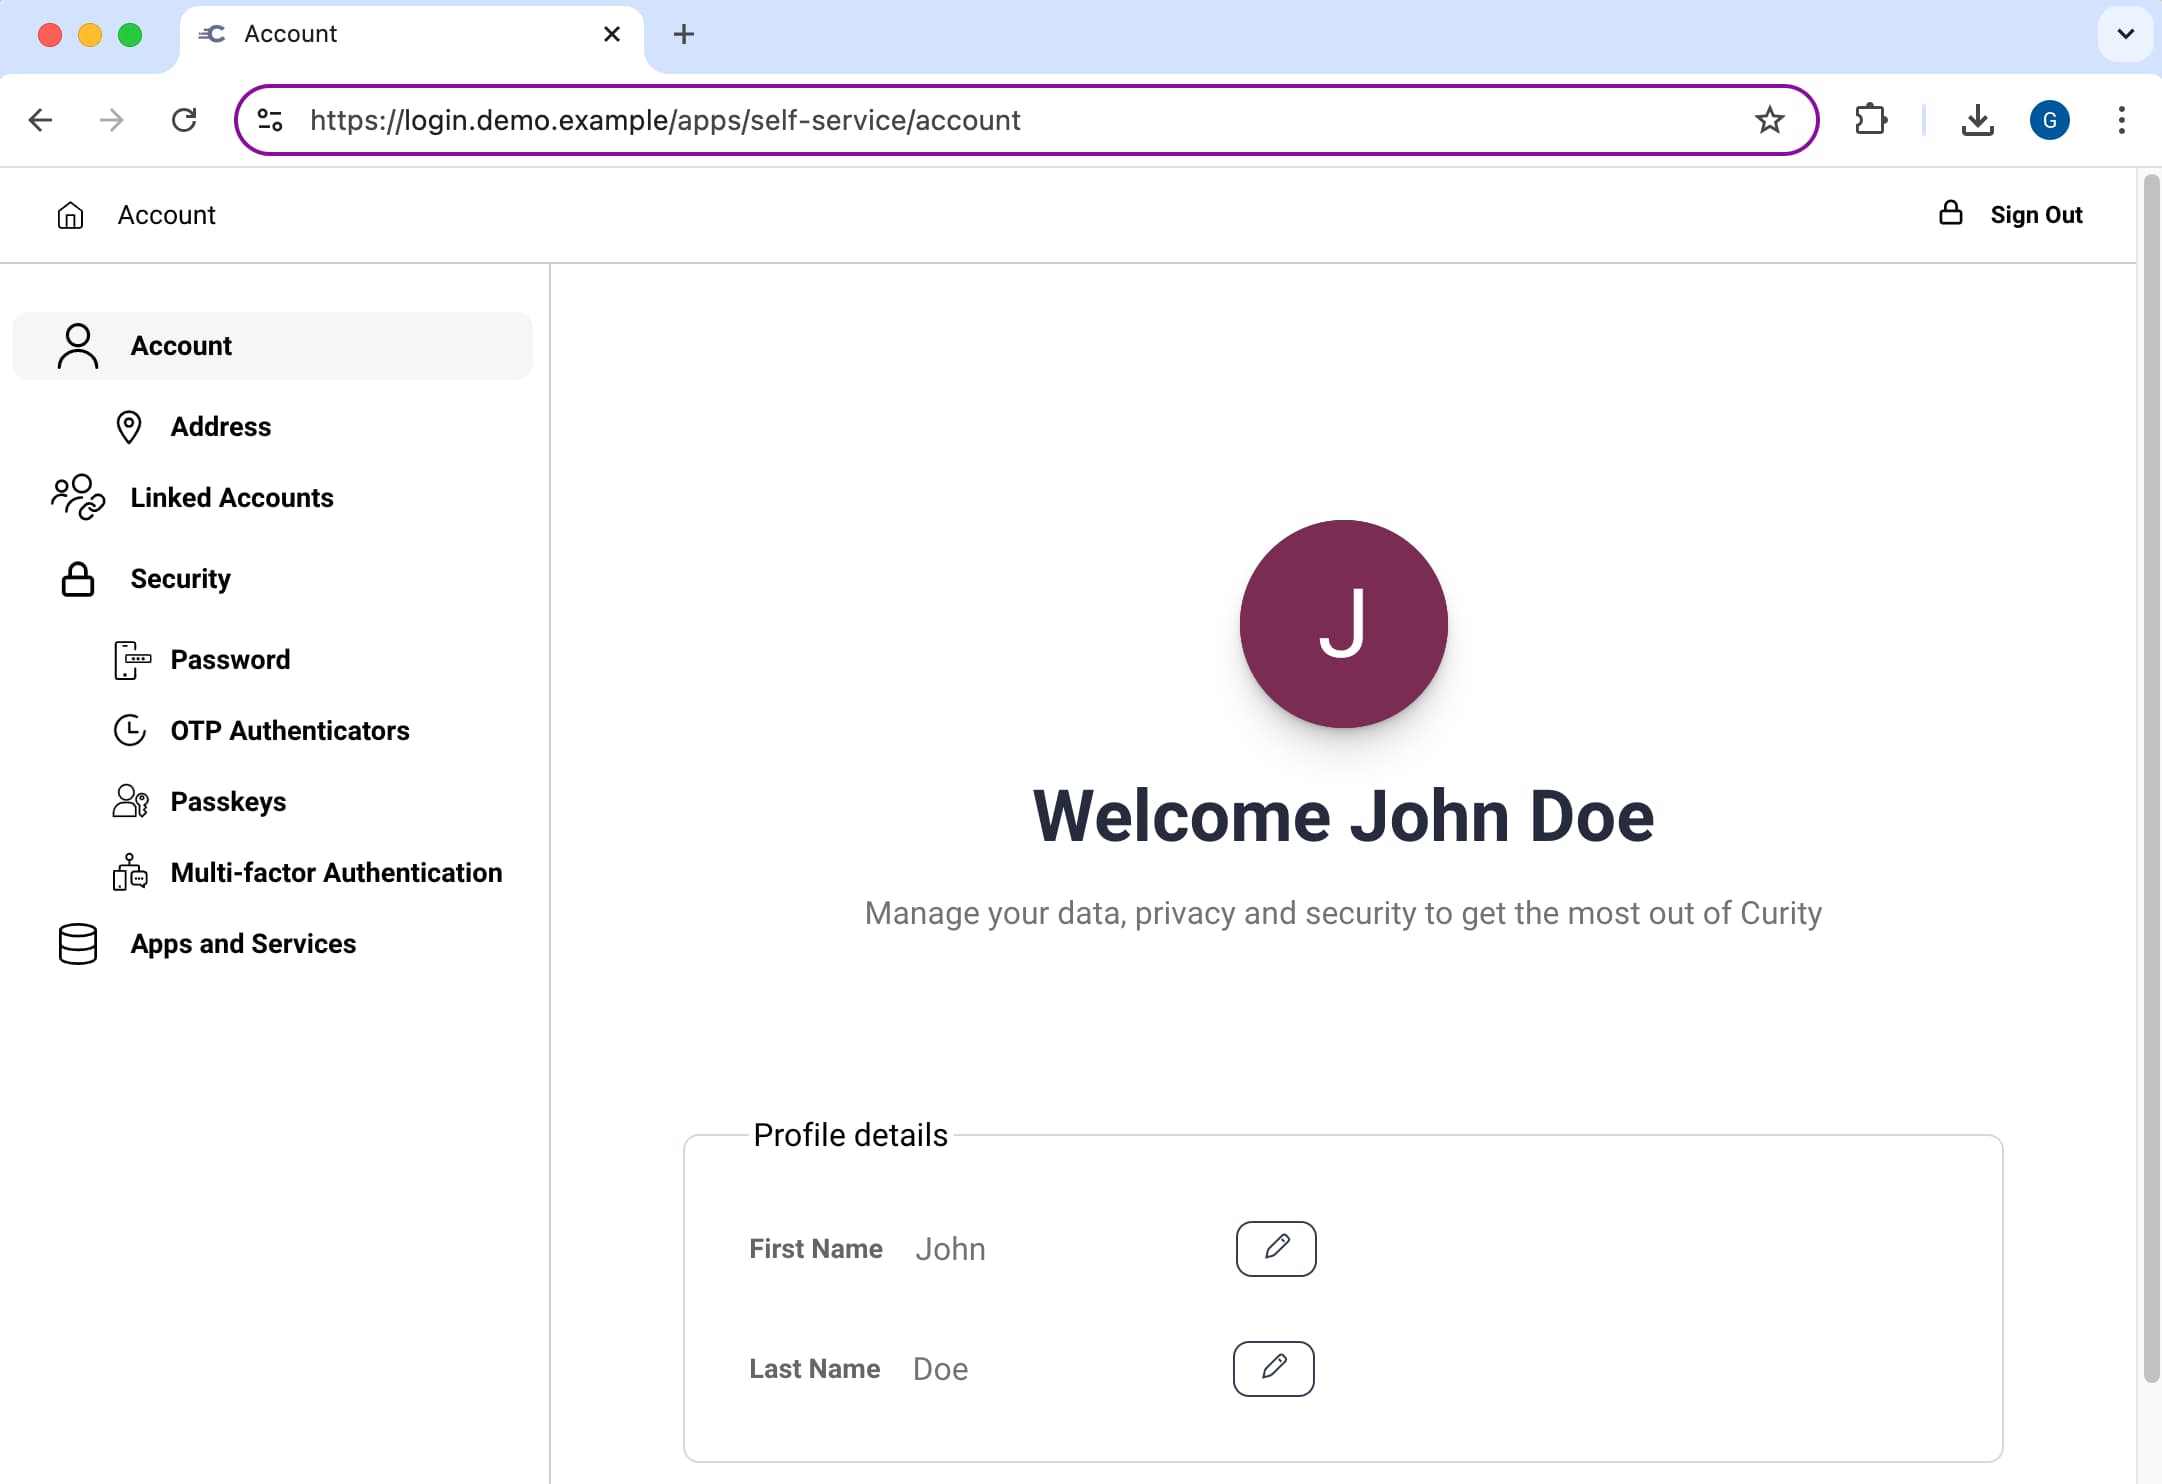
Edit Account
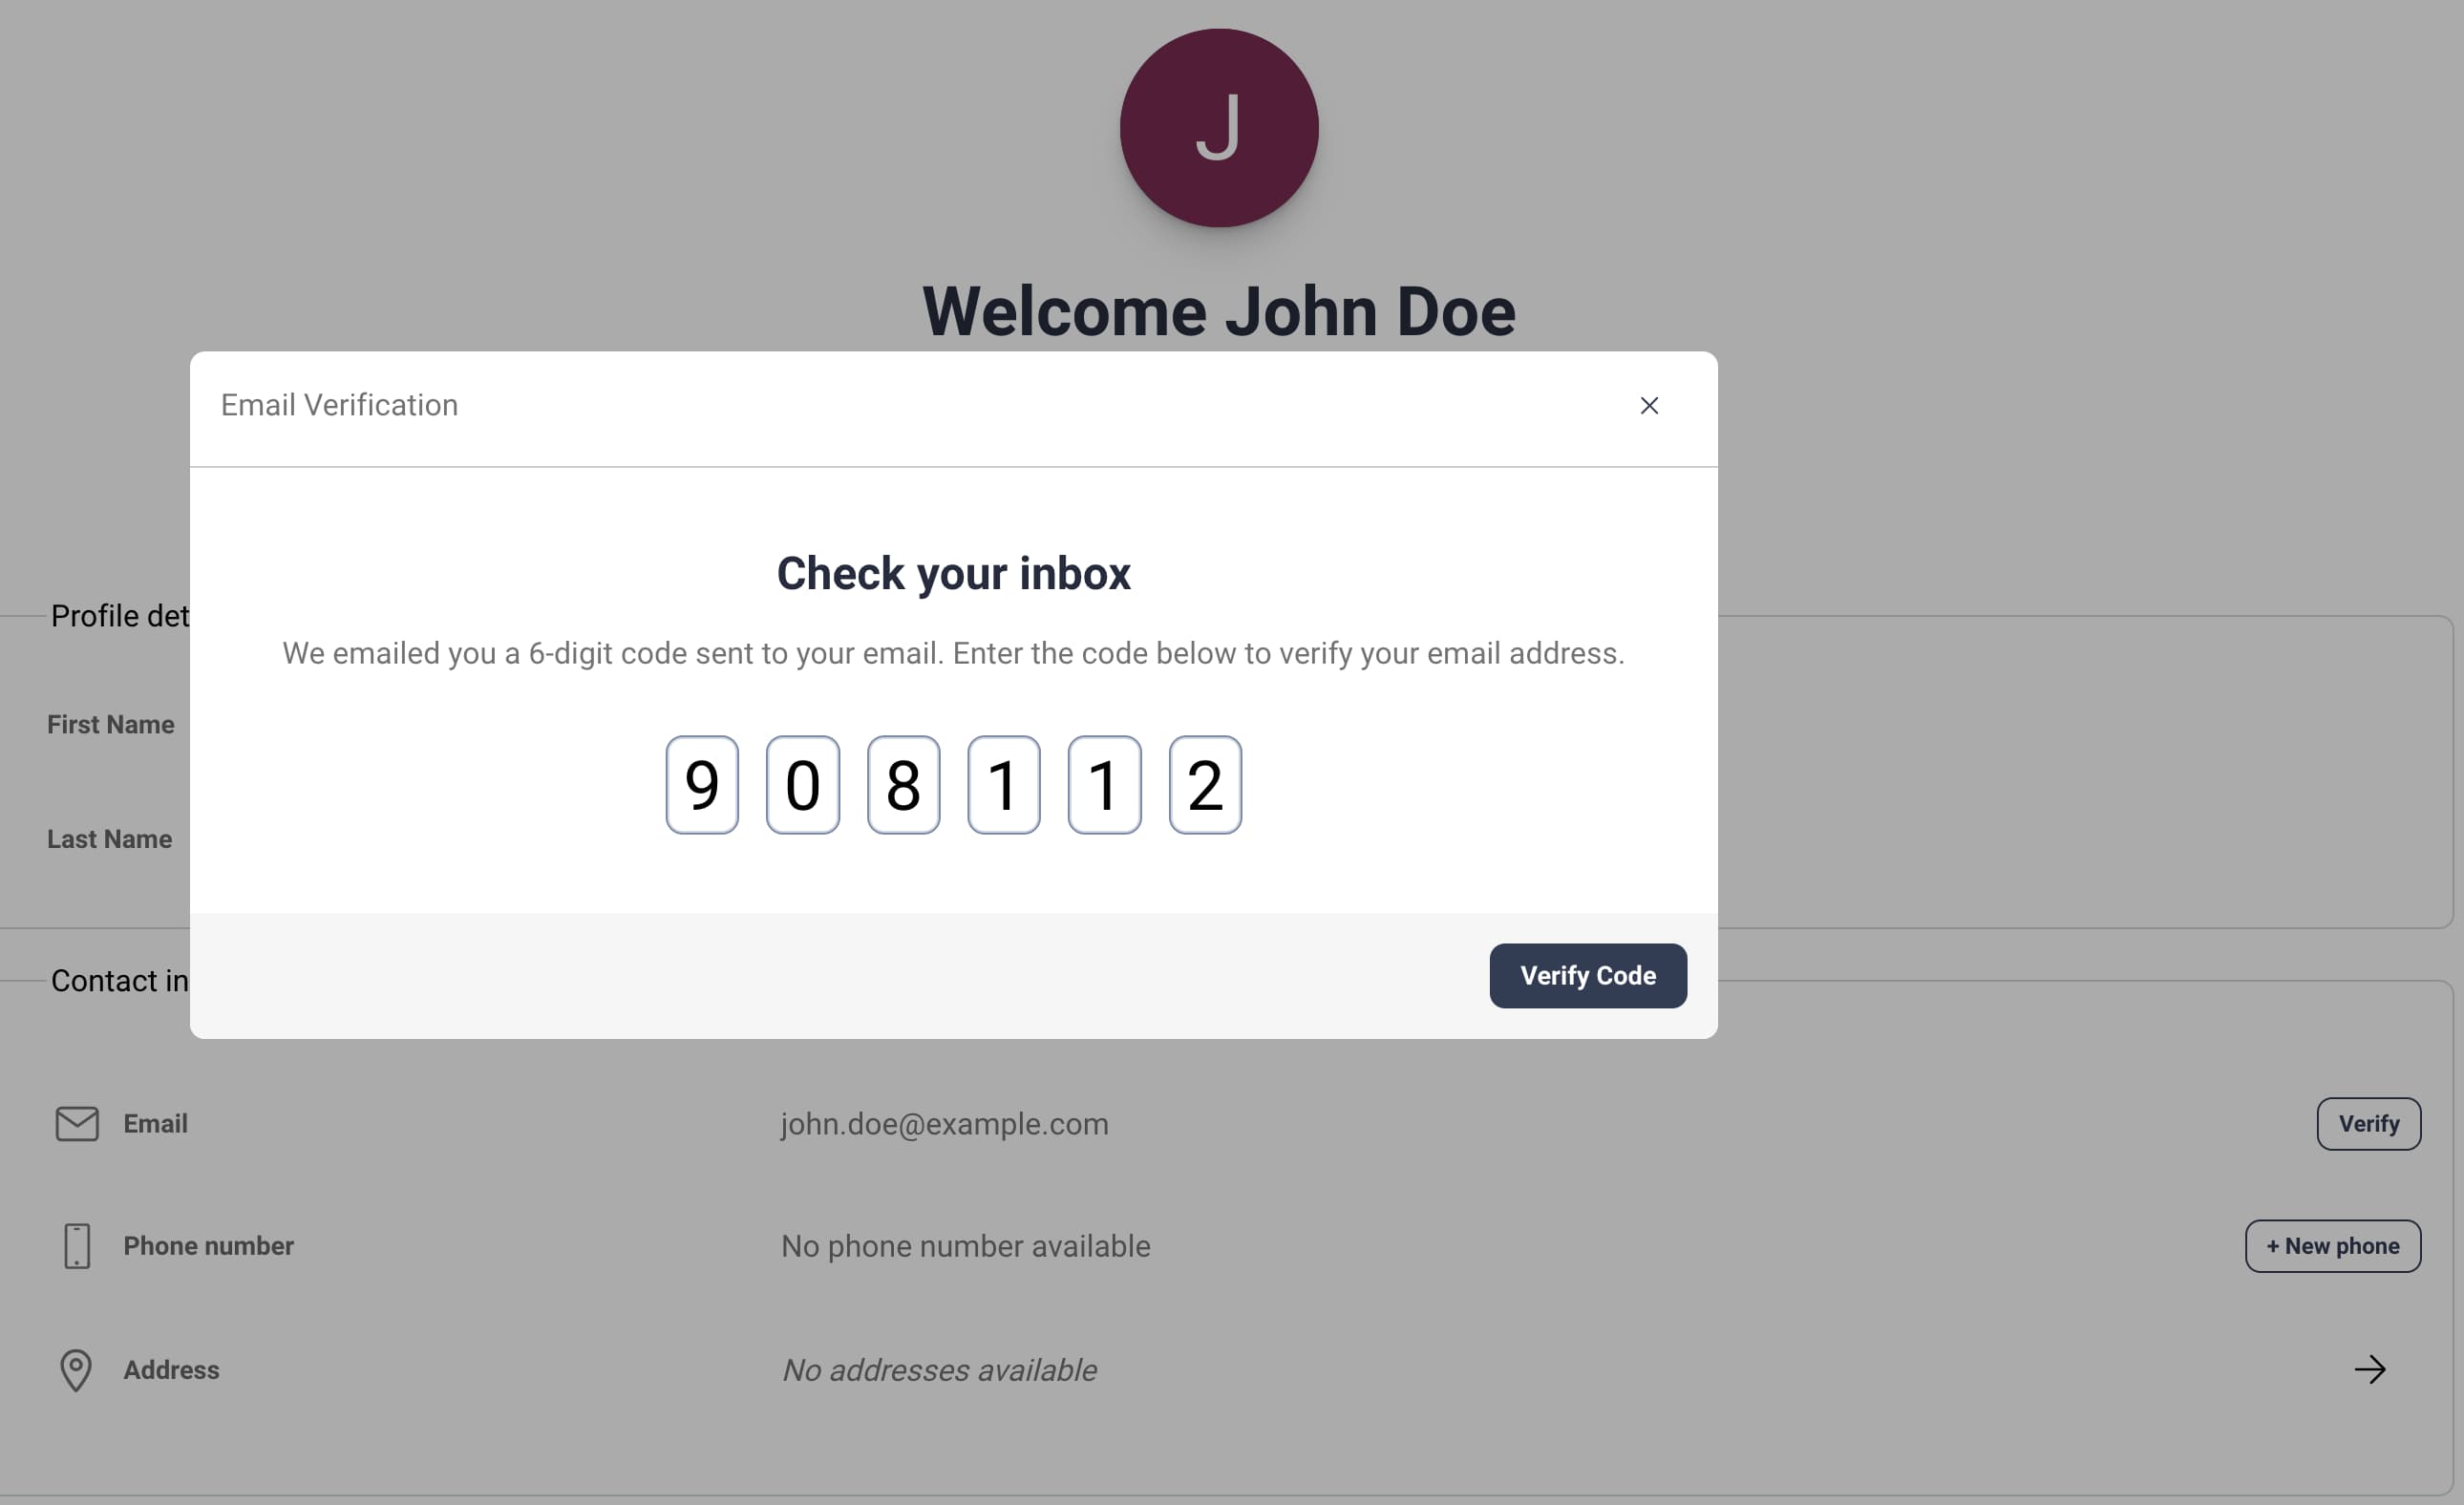
Users can edit built-in attributes of their account, like name and address. Users can also change phones that they use for authentication with Time-Based One-Time-Passwords (TOTP). Finally, users can trigger receipt of an email One-Time Password to change their email verification status, since some authentication workflows can require a verified email.
Login Control
The portal gives users control over authentication details while enforcing administrator-approved security policies. Organizations typically use the Curity Identity Server to implement end-to-end authentication workflows that provide multi-factor authentication and account recovery features. The following two example flows are popular options:
- Password authentication with OTPs as a second factor and OTPs for account recovery.
- Passkeys authentication with email-based account recovery.
To improve the security of password-based flows it is common to use the Opt-In MFA features of the Curity Identity Server. The portal allows users to change their passwords or manage their second factor. For example, users can create an OTP authenticator in the Self-Service Portal and assign it a name.
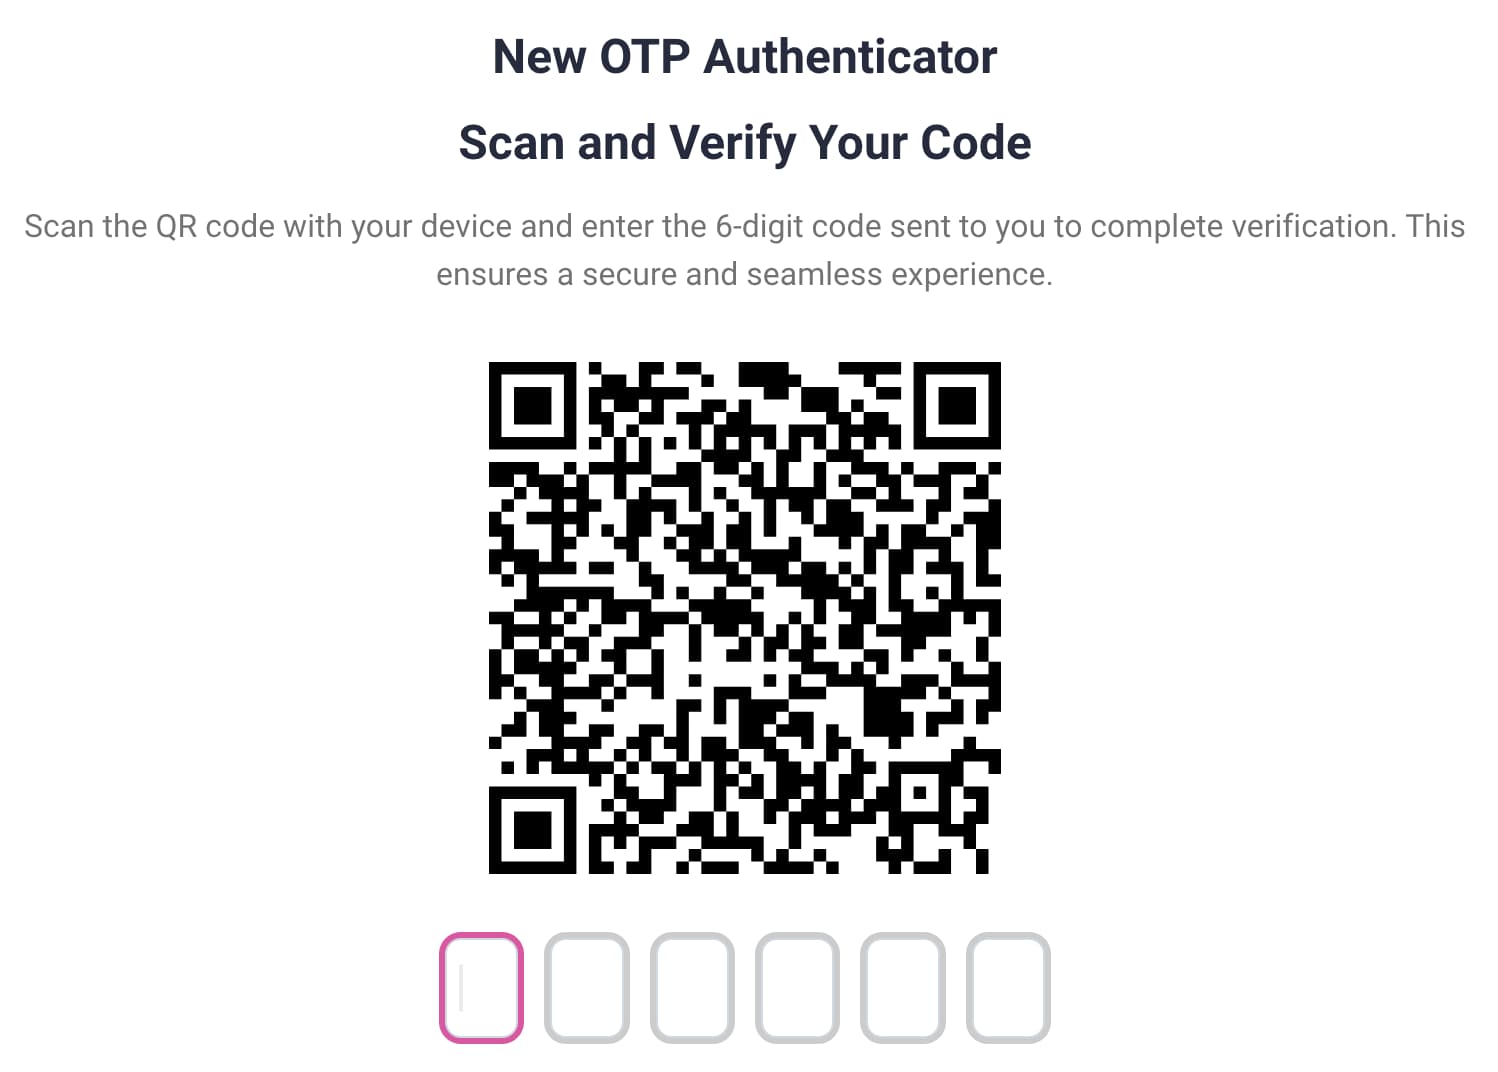
Users then switch to a mobile application like the Google Authenticator App, add an entry for the Curity Identity Server and select the Scan a QR Code option. The mobile application then displays a numeric code that the user can type to verify the authenticator. When the user needs to provide an OTP during logins to your applications, the user provides the latest numeric code from the mobile application.
Passkeys provide built-in MFA so users can avoid the overhead of OTPs, to improve their experience. You can implement a Passkeys Design where the user verifies their email to register a passkey. After registration, multi-factor authentication only requires a simple user action, and users can view registered passkeys in the portal:
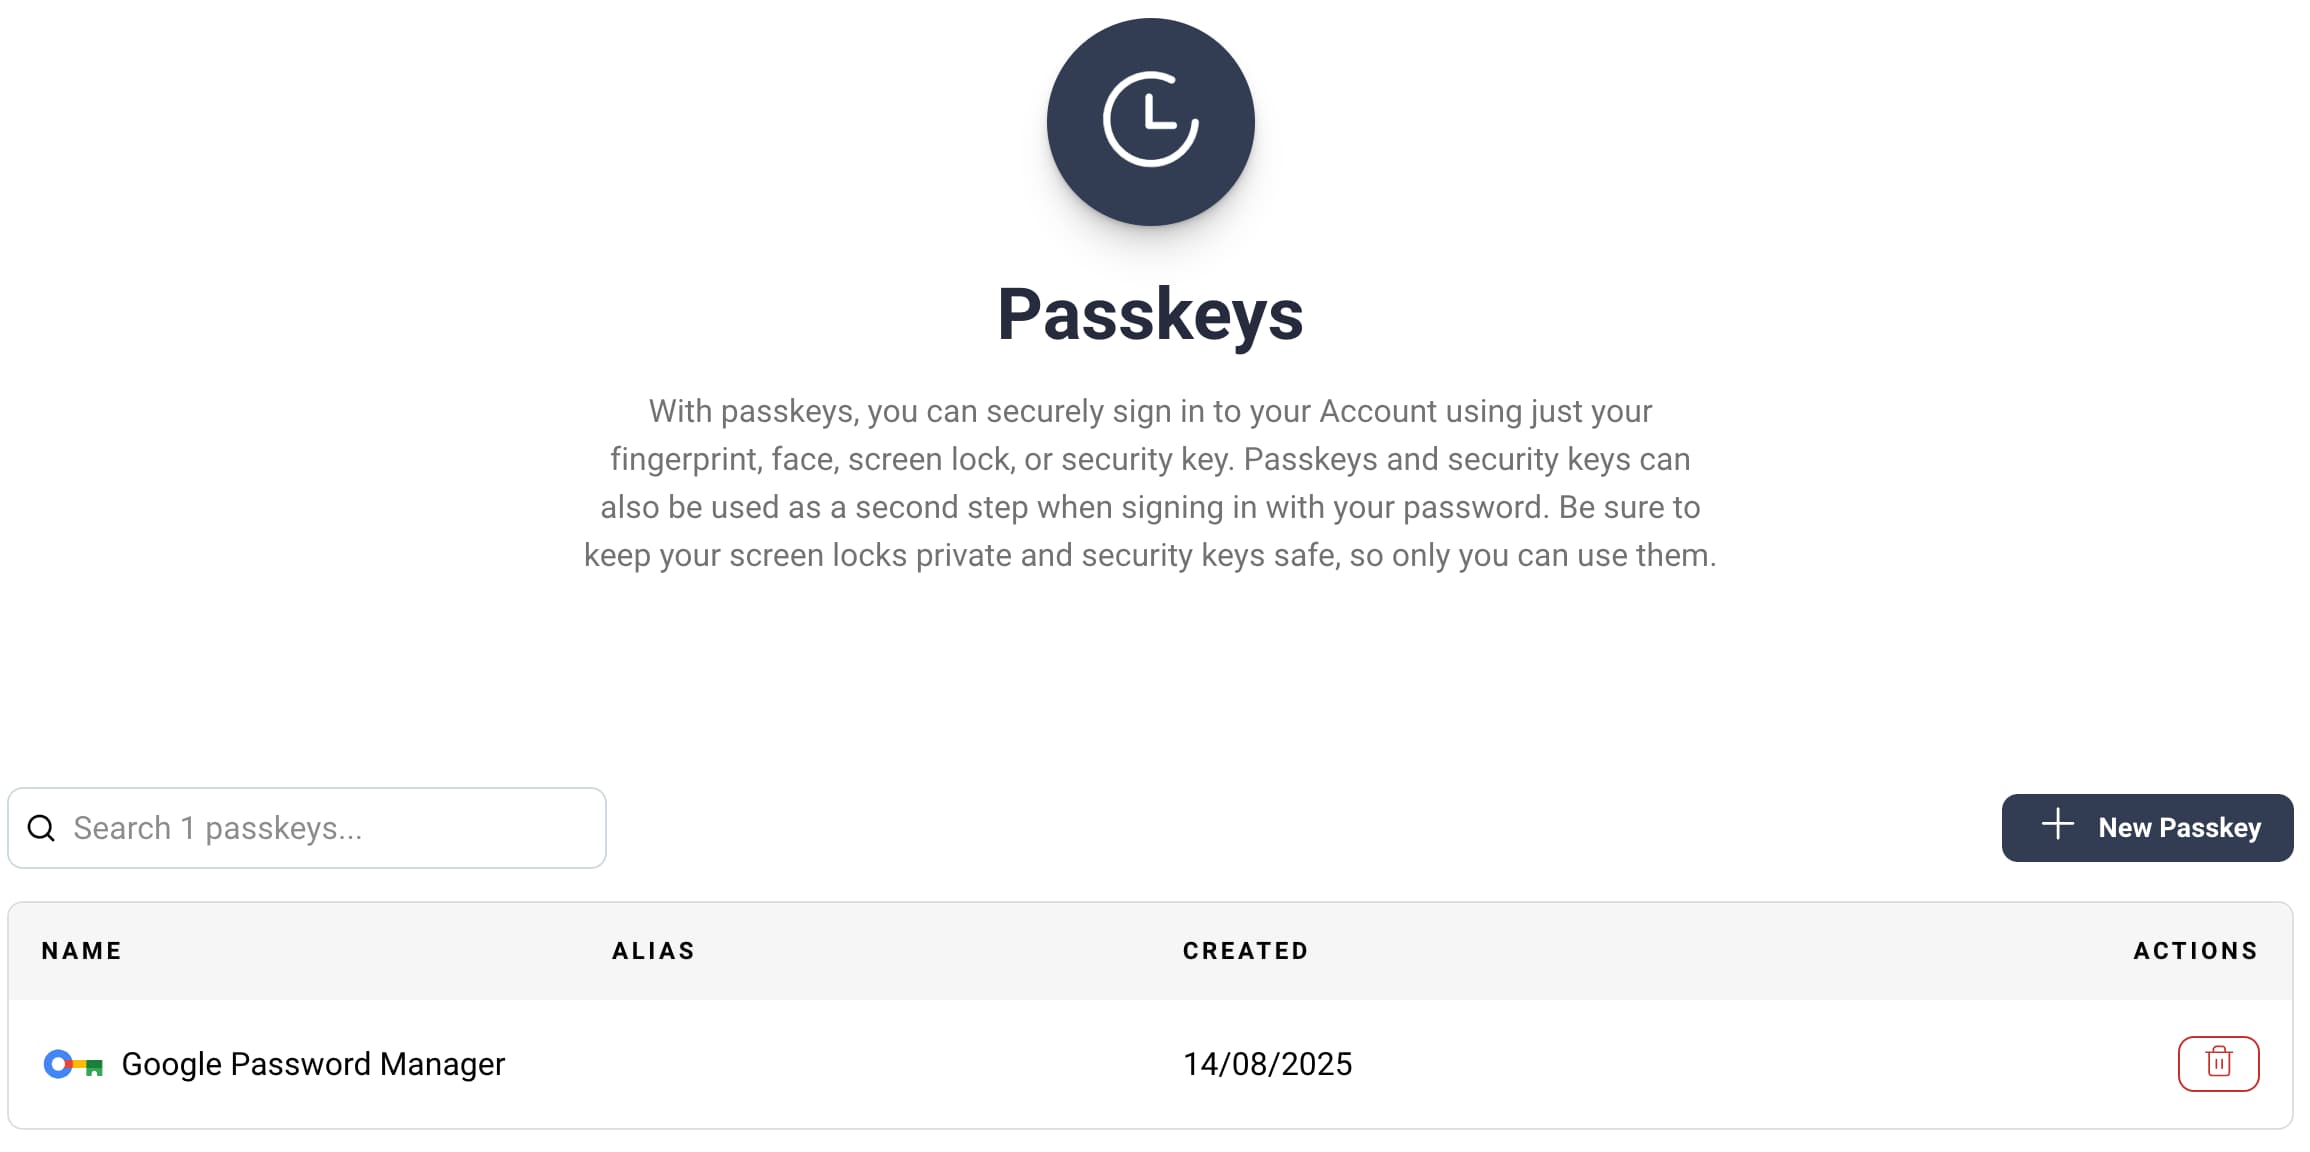
Passkeys can synchronize across devices, though synchronization technology is not always supported across all platforms. In the Curity Identity Server, that is not a problem since users can register multiple passkeys against their account, and see them all in the Self-Service Portal. Even if a user deletes a passkey from the portal, the user can register a new passkey to quickly recover.
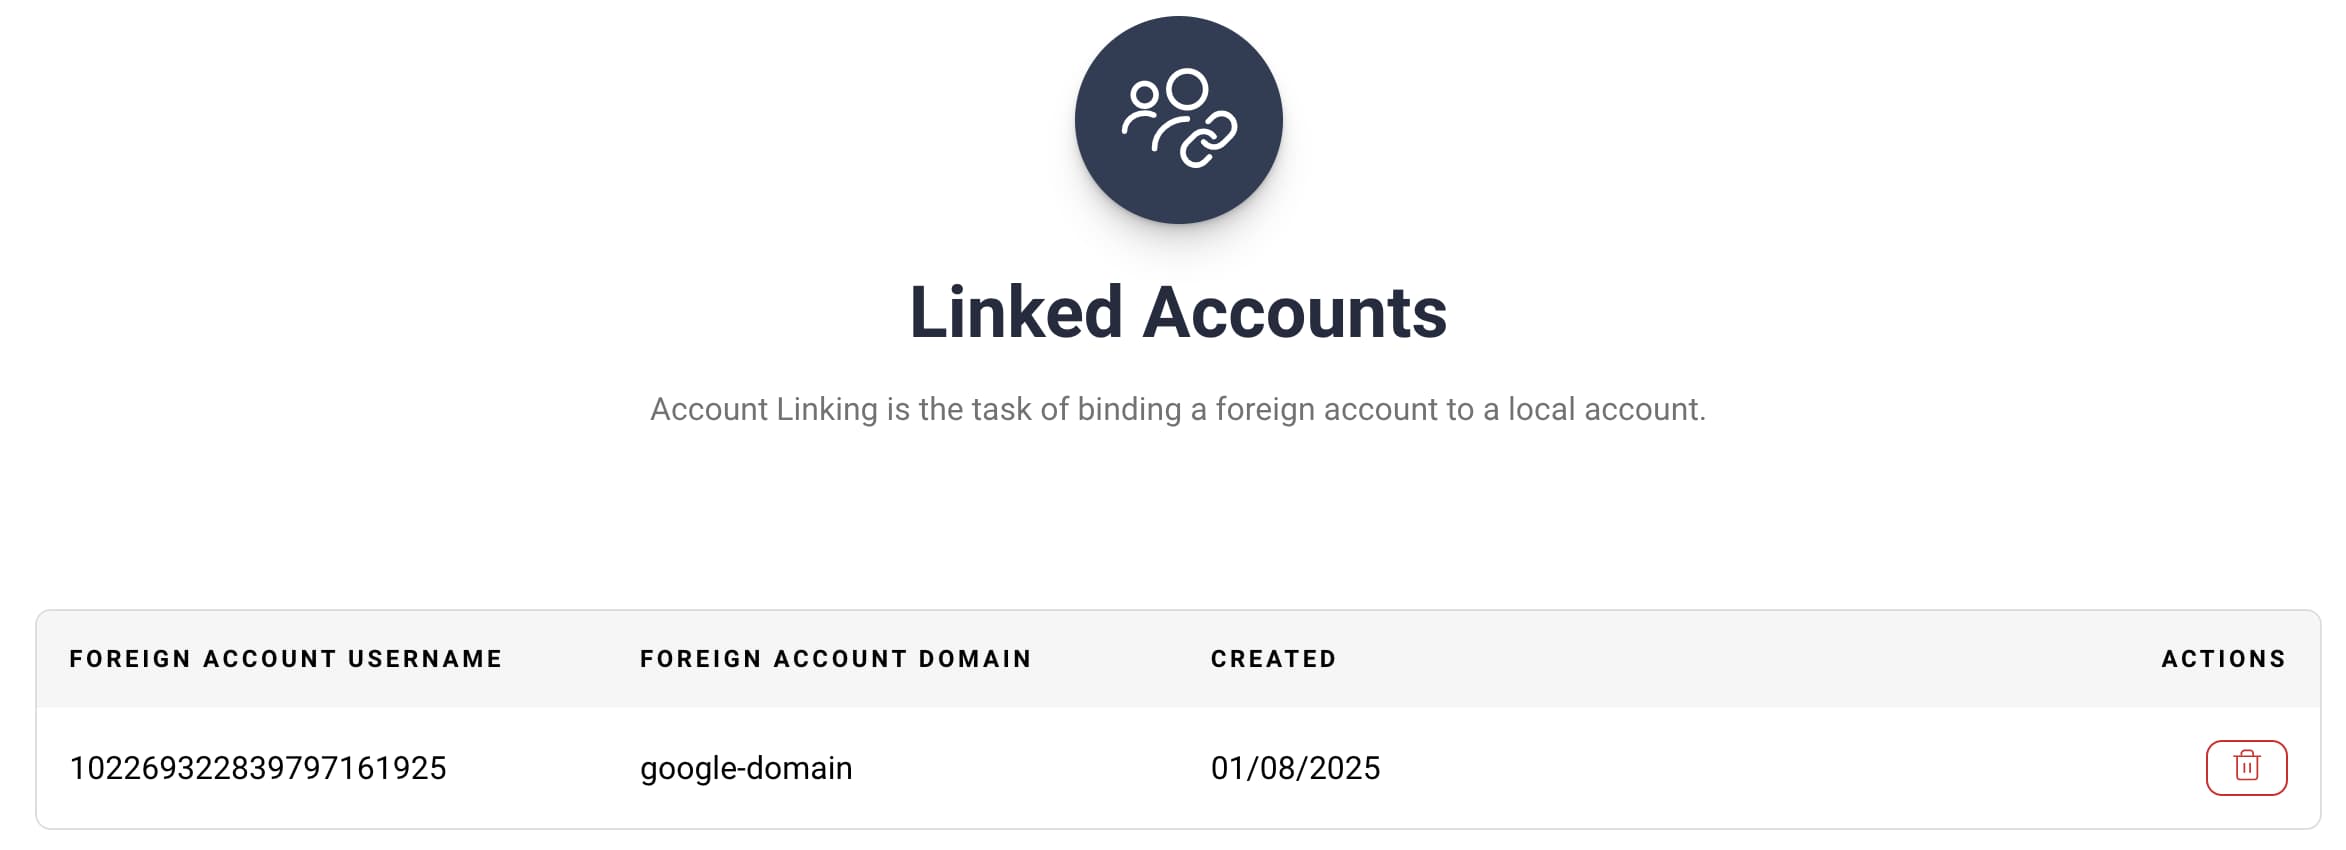
Finally, the user can view linked accounts, which the Curity Identity Server creates when users authenticate with External Identity Providers, like Microsoft Entra ID or Google. When users no longer sign in with a particular provider, they can delete its linked account.
API Access Control
Although login control improves the user experience, a greater concern for users is access to their data. Therefore, the Curity Identity Server allows the user to view the API access they have granted to clients. The level of access is displayed as Scopes and Claims.
The Self-Service Portal's Apps and Services screen shows a list of clients and allows users to view or revoke the client's level of API access. The following screenshot shows an example display for a test client. With the correct use of scopes and claims, users should be able to understand the data and what it means.
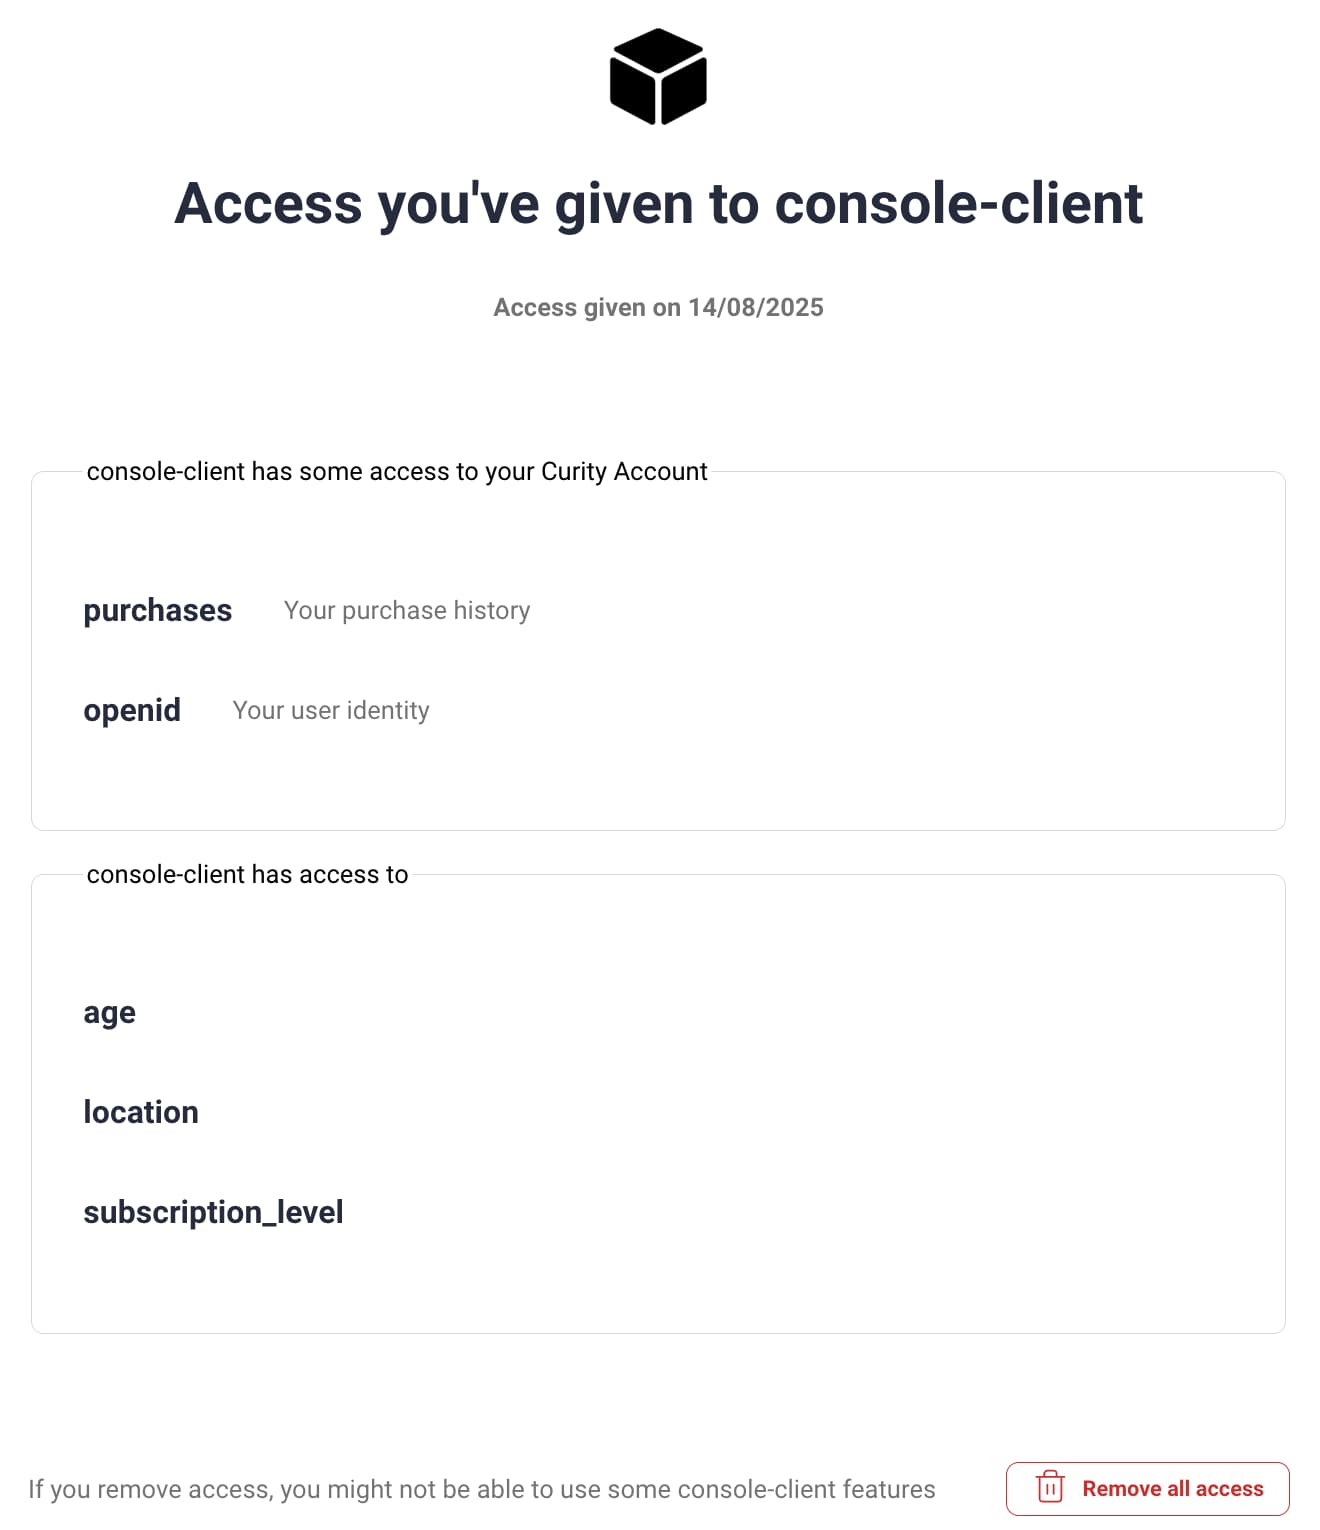
The Curity Identity Server can present consent screens where users grant the client its requested level of access to API resources. After the first consent with a set of scopes, the Curity Identity Server records a delegation record to represent the granted authorization.
Browser Security
The portal setup wizard registers an OAuth client named self-service-client. Run the Admin UI and navigate to Token Service → Clients to view its properties, which include a scope named self-service-scope. That scope includes a claim named self-service_account_id whose runtime value contains the user's identity.
The frontend uses the Token Handler Pattern to run an OAuth code flow to authenticate users, where the Curity Identity Server acts as a backend for frontend (BFF). The Curity Identity Server issues access tokens to the BFF with the self-service-scope and self-service_account_id. The BFF then issues an encrypted thp-proxy cookie to the browser.
The browser sends the secure cookie in requests to the backend, to read and write the user's stored identity resources. The BFF decrypts the cookie, retrieves the access token and forwards it to GraphQL APIs. The GraphQL APIs apply authorization to restrict access to the user referenced in the token's self-service_account_id claim.
API Authorization
GraphQL APIs also apply a detailed authorization policy. By default, the setup wizard uses a portal-based configuration model that provides a simplified view of the policy settings, to simplify Admin UI usage. The following example settings show some default values when activating all portal options.
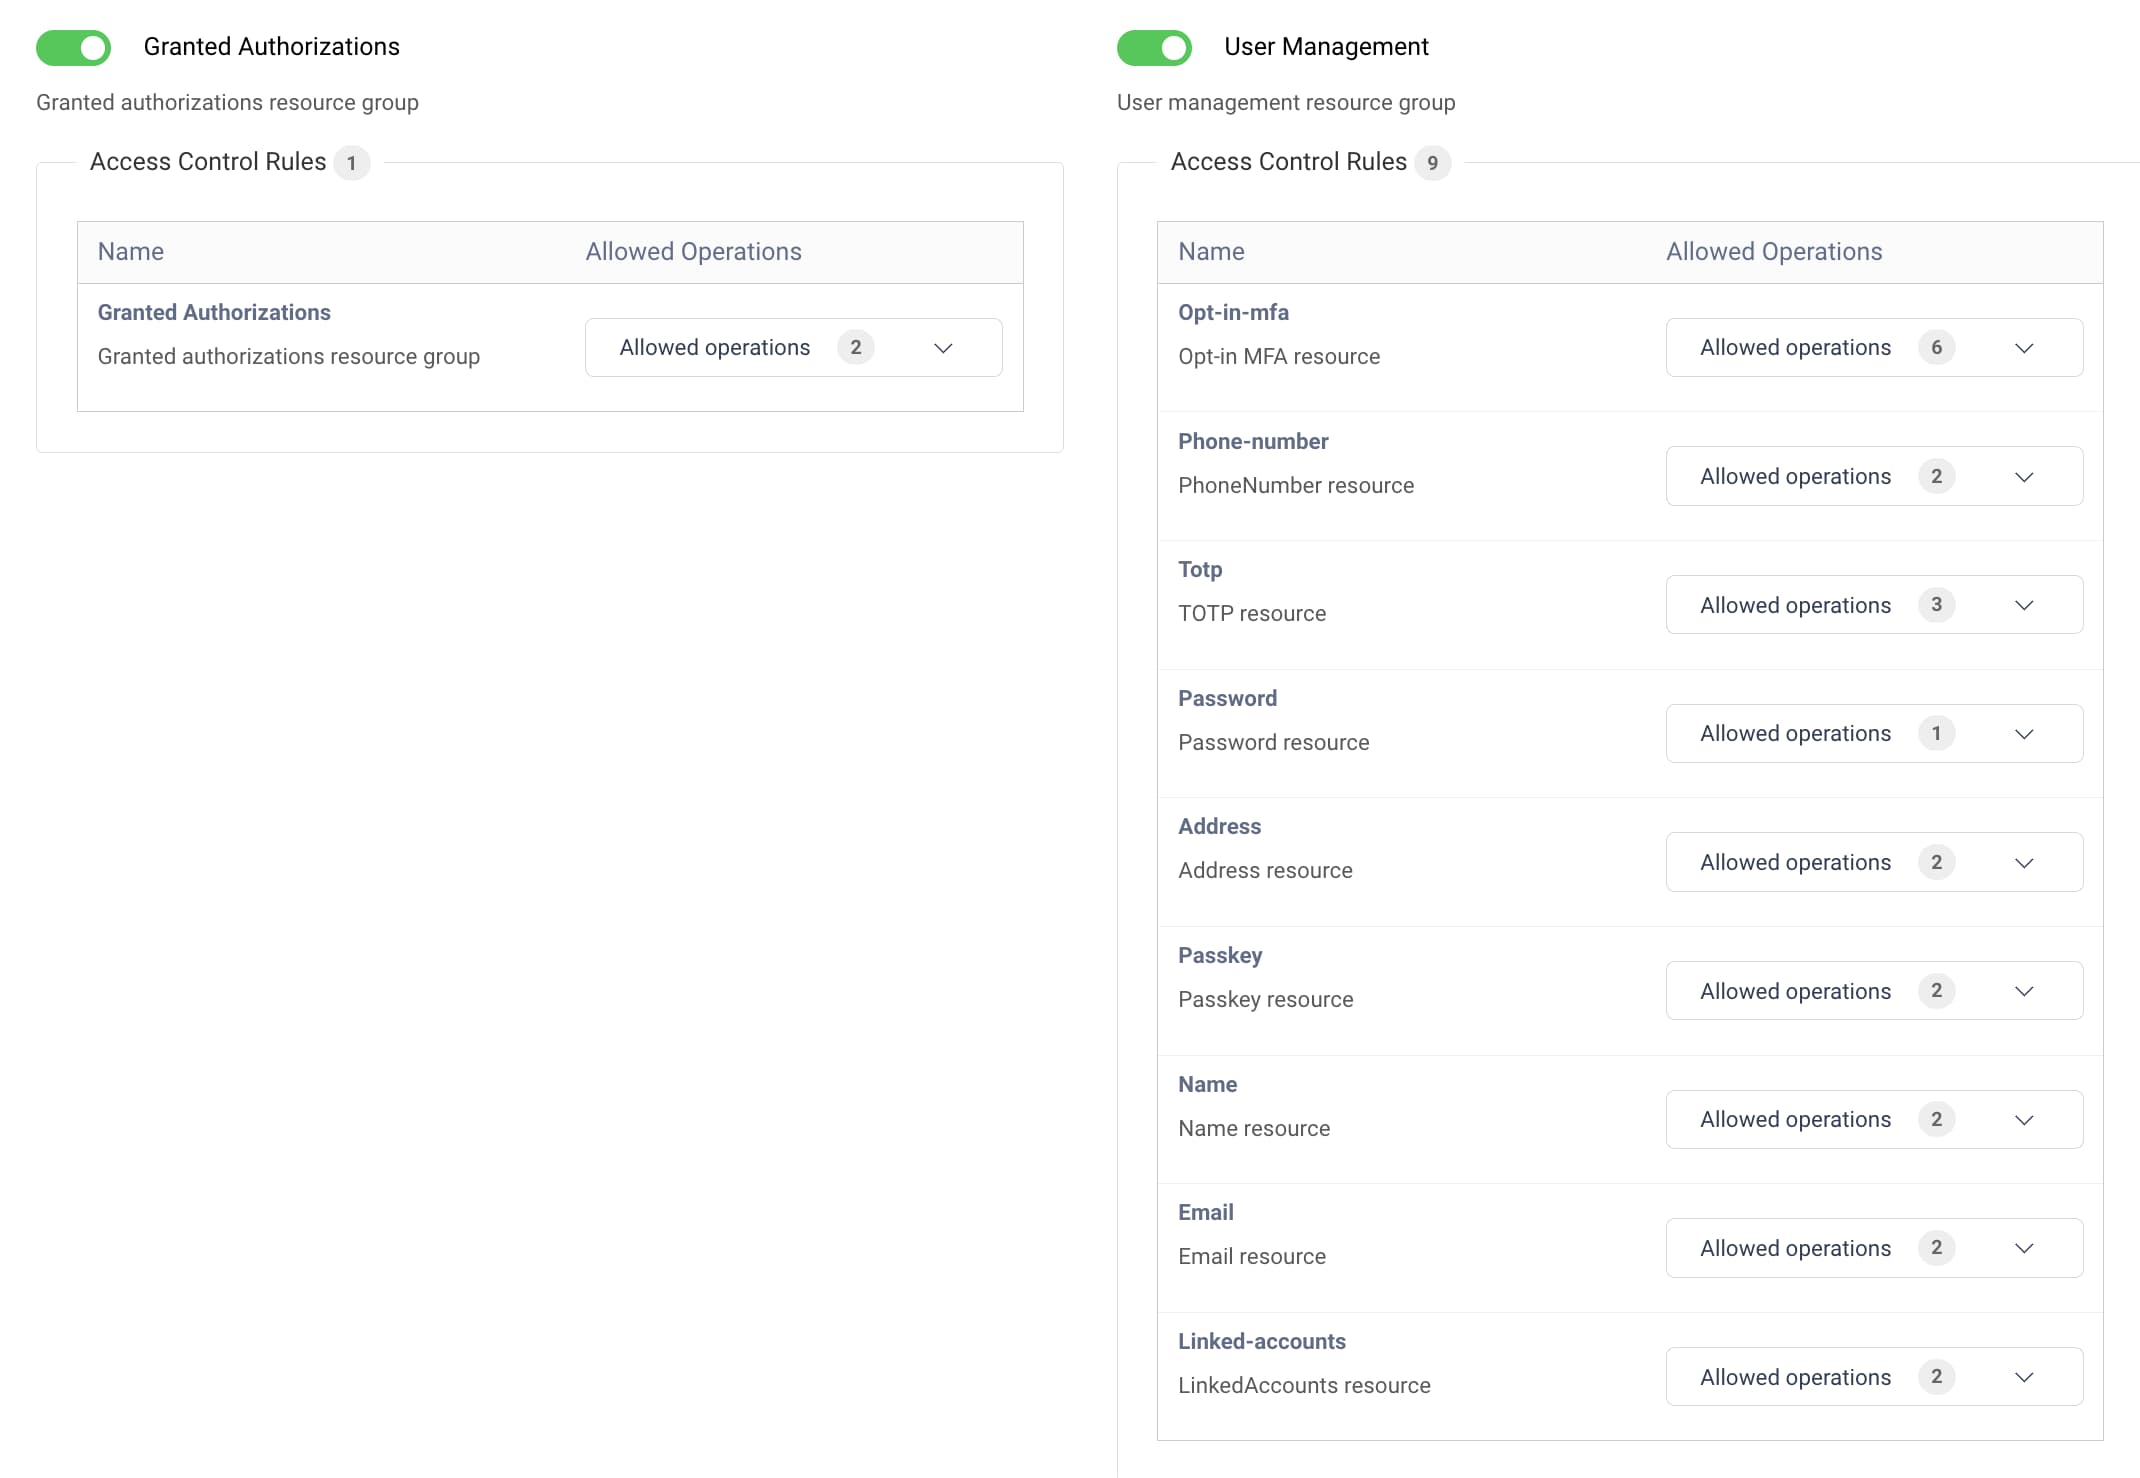
The setup wizard saves the policy settings to a Self-Service Authorization Manager that the Self-Service Portal uses. Both the User Management GraphQL API and a Granted Authorization GraphQL API use the policy settings to authorize requests from the portal frontend.
Once you gain some experience operating the Self-Service Portal, the Self-Service Authorization Manager documentation explains how you can alternatively use a lower-level GraphQL-based configuration model to manage permissions.
The lower-level configuration model enables the use of GraphQL APIs in your own applications. To do so, create an Attribute Authorization Manager with a rule list for the application. The rule list should use the user-management-graphql and granted-authorization contexts and you could use the self-service-scope and self-service_account_id to restrict access.
- Configure the authorization manager against the User Service, so that it comes into effect for GraphQL User Management APIs.
- Configure the authorization manager against the Token Service, so that it comes into effect for GraphQL Granted Authorization APIs.
Conclusion
With the Curity Identity Server you get a Self-Service Portal that gives users visibility and control of their identity settings. The portal is a modern web application that uses hardened browser security. The frontend uses cookies to transport access tokens to GraphQL APIs.
The underlying access token grants least-privilege access to the current user's identity resources. GraphQL APIs use the access token's claims for the current user to enforce an authorization policy that you configure for the Self-Service Portal. If required, GraphQL APIs can also be used directly from your applications.

Join our Newsletter
Get the latest on identity management, API Security and authentication straight to your inbox.

Start Free Trial
Try the Curity Identity Server for Free. Get up and running in 10 minutes.
Start Free TrialWas this helpful?