
Account Linking With Social Identity Providers
On this page
Account linking is a way of linking or binding a foreign account with a local account. A good example of this concept is linking a social account (foreign account) such as Facebook, Google, LinkedIn, Instagram, or Twitter to a local account that is stored in a corporate repository such as a database or directory.
Other examples of account linking that are not explicitly covered by this article:
- Linking legacy accounts with new accounts in an organization merger
- Linking multiple cloud-based accounts with a local account
- Linking multiple social accounts to simplify authentication
For more details on additional account linking scenarios check out the Account Linking Recipes.
This article covers how to set up account linking in the Curity Identity Server and requires a version of 7.5 or later. It shows how to use an HTML Forms Authenticator as a local authenticator to capture the locally held identity that gets linked with a Facebook account. The flow is able to capture registration of the local account as needed but in a realistic scenario the local account already exists.
Note that the Facebook Authenticator is just used as an example provider in this article, any other social provider would also work. Additional working examples are referenced at the end of this tutorial, that enables running an end-to-end setup locally.
Prerequisites
You need an installation of the Curity Identity Server. If you do not have an installation of the Curity Identity Server, follow this tutorial, Installation of the Curity Identity Server and configure the installation by running the Curity Basic Setup Wizard as outlined in this tutorial Curity Basic Setup Wizard.
Account Manager
Account linking is handled by a linking account manager. This is an Account Manager that is configured to use the data source that holds the local account in the link. The basic setup wizard creates a default account manager that uses the default data source. The local test database (HSQL) and the default account manager suffice for getting an example of account linking up and running.
In this example the HTML Forms Authenticator has the capability to register accounts. Since the HTML Forms Authenticator uses the default-account-manager the accounts created as part of the login process are stored in the data source used by this account manager, i.e., the default data source.
Account Domains
Linking leverages Account Domains when mapping an authenticator to being local or foreign. An authenticator is assigned to an Account Domain. In the linking process, one of the keys that is used to look up a link is the Account Domain. By placing an Authenticator in a domain and making the link key composed of this tuple (domain + authenticator), subsequent links performed with a different authenticator, where the username happens to be the same, can be clearly differentiated.
Navigate to Profiles → Authentication Service → Account Domains.
Create two Account Domains, one named local-domain and the other named facebook-domain.
HTML Forms Authenticator
Creating an HTML Forms Authenticator is very similar to creating a Username Authenticator. Configure the HTML Forms Authenticator to use the Account Manager (default-account-manager) and the Credential Manager (default-credential-manager).
Under the More tab, set Account Domains to local-domain.
In this example, the HTML Forms Authenticator is considered the local authenticator as it is mapped to a data source that is under your control (the local test database).
Facebook Authenticator
The details needed to create and configure this authenticator partially come from settings made in the Facebook developer account. Follow the Facebook documentation and the Curity Facebook Authenticator documentation to set that up.
Obtain the Client ID and Client Secret parameters from the Facebook Developer Portal.
Make sure to assign the Authenticator to an Account Domain. Under the More tab, set Account Domains to facebook-domain.
Configuring the Flow of Actions
The flow of resolving a link if it already exists or alternatively establishing the link if it isn't already established.
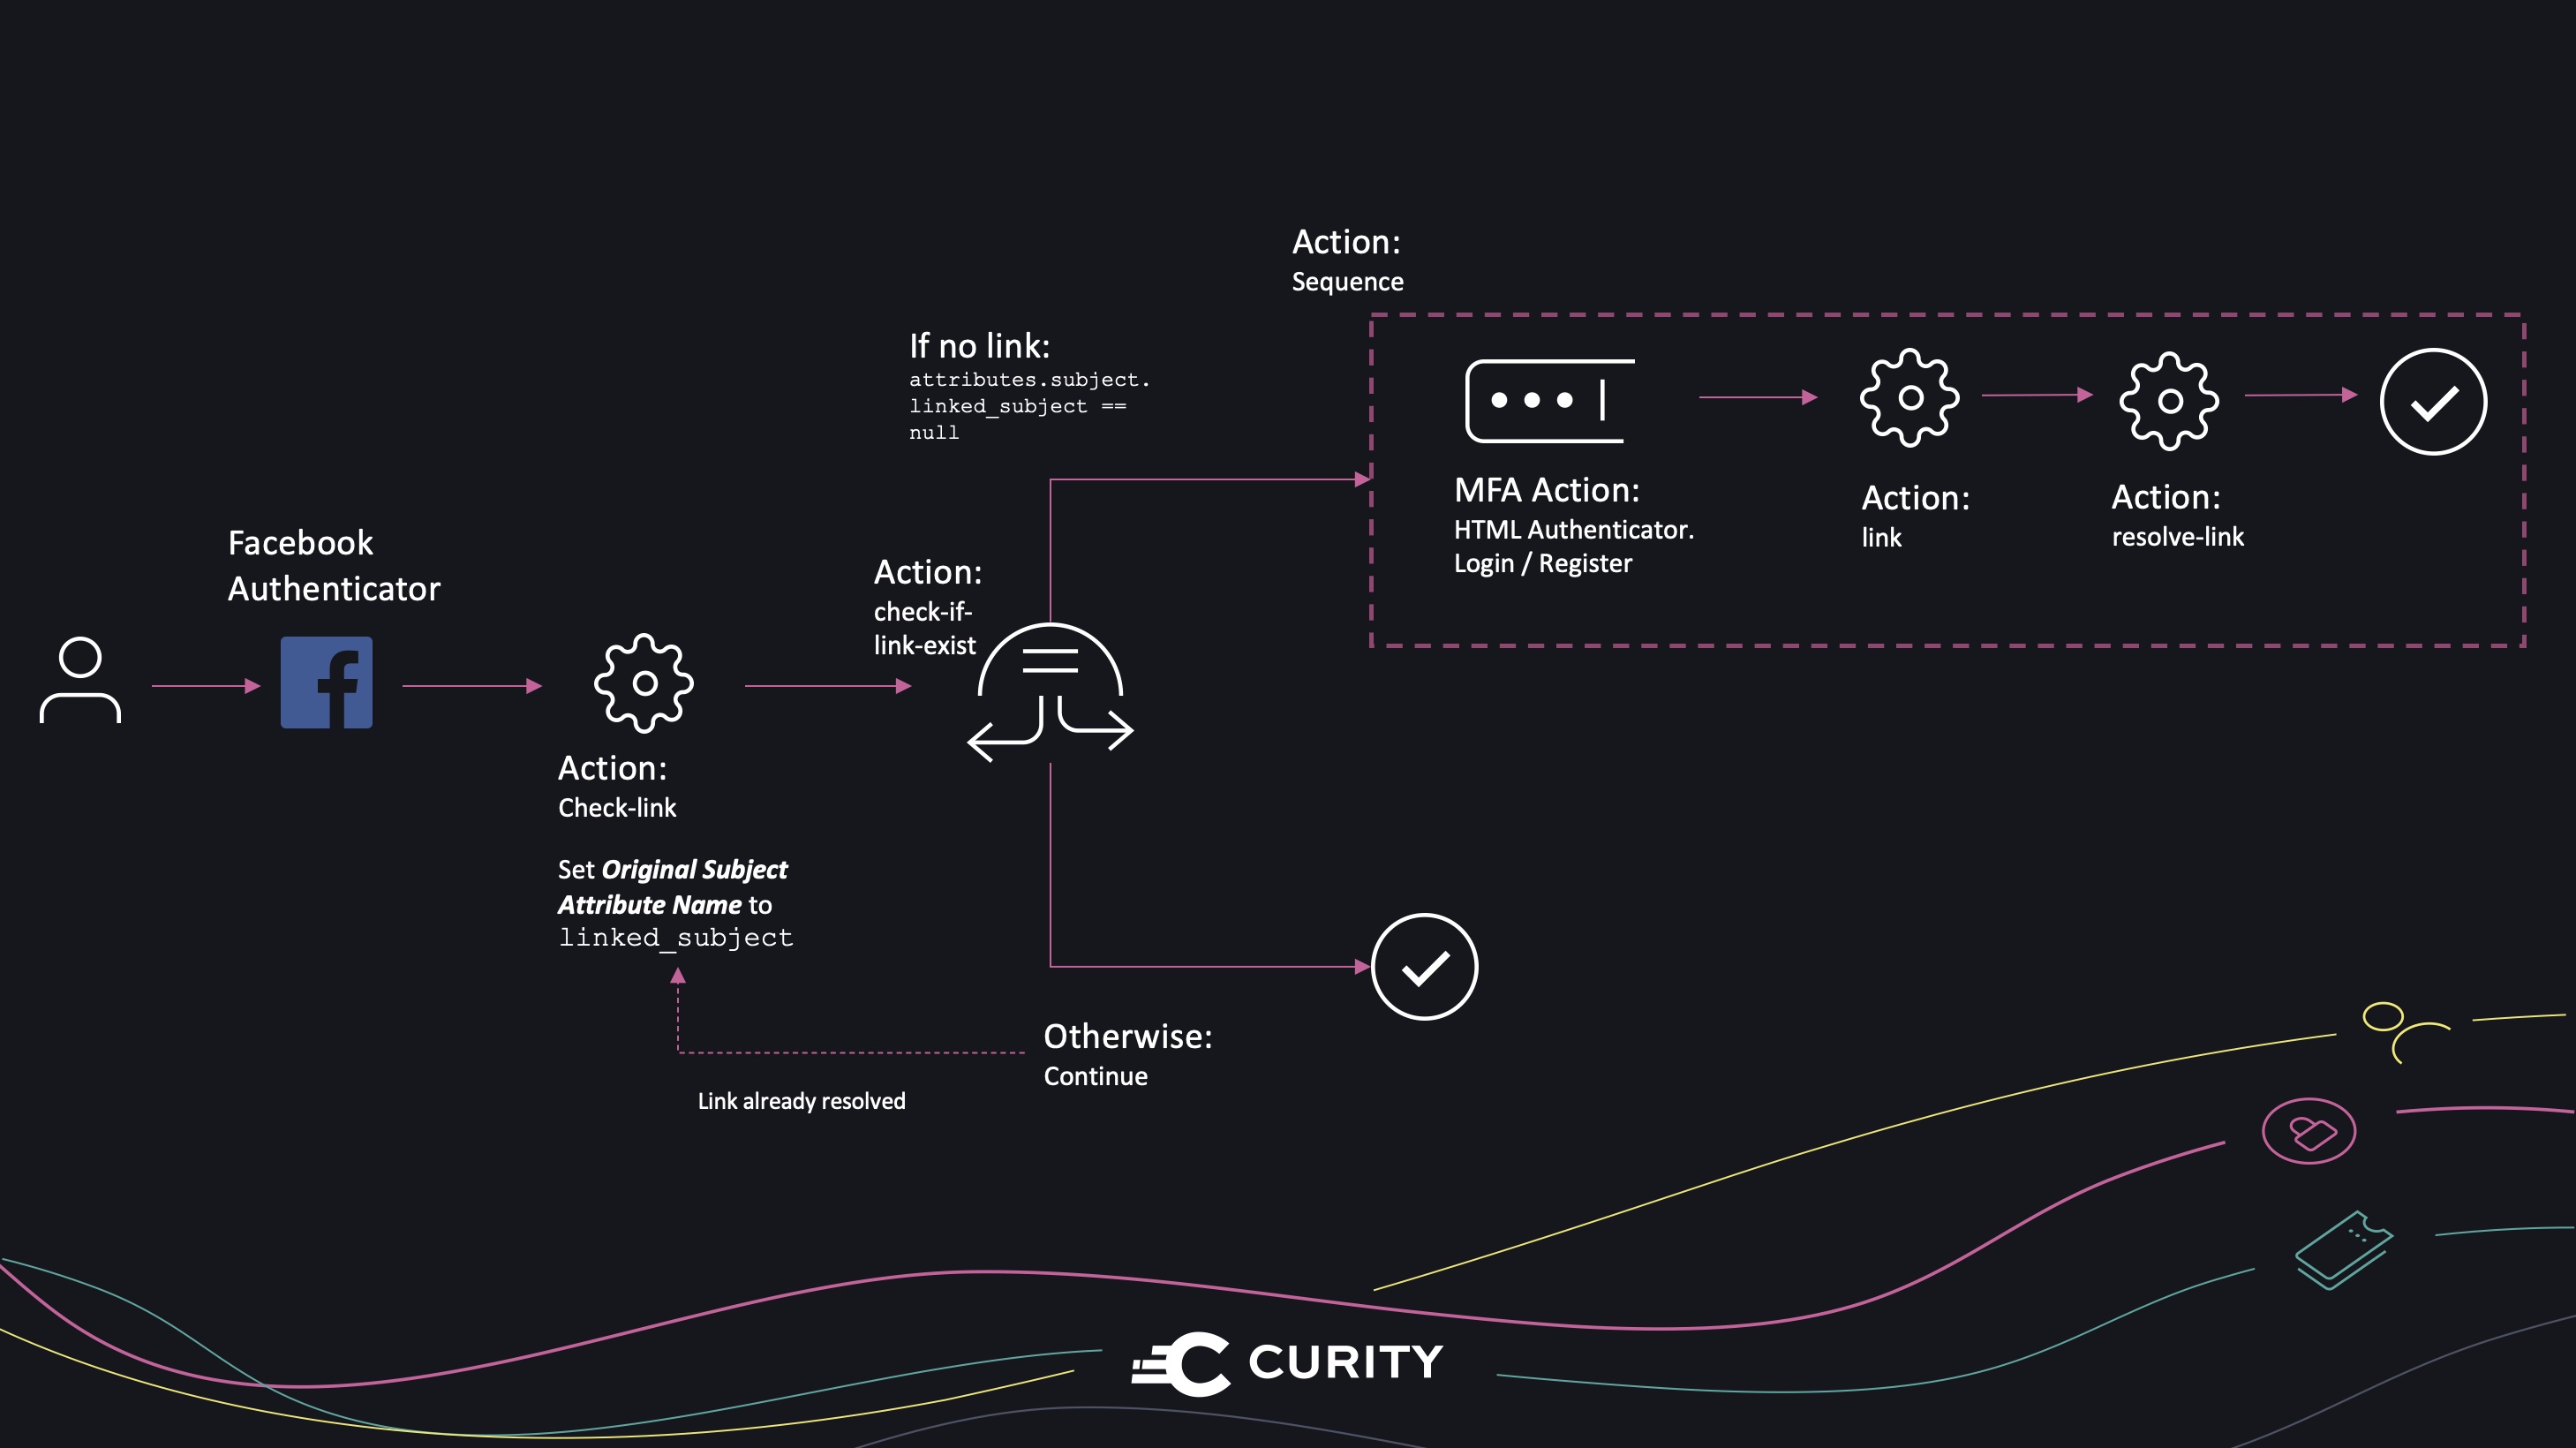
Action to Check if Link Exist
-
Navigate to the Facebook Authenticator, Profiles → Authentication Service → Authenticators → Facebook.
-
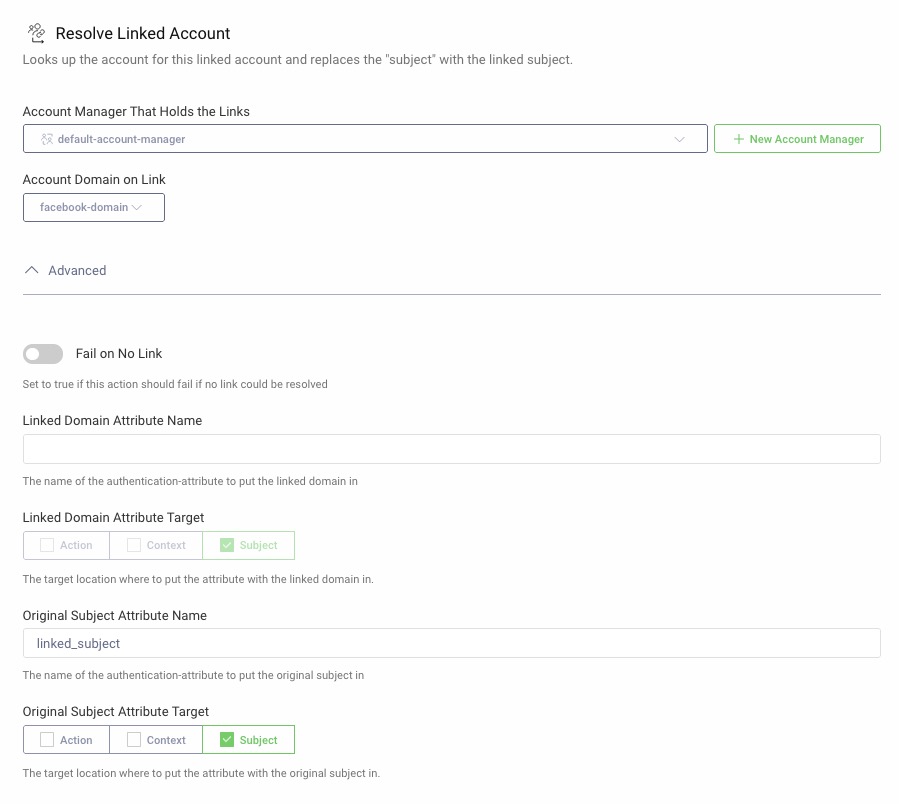
Under Actions and Login, click Add and choose New Action. Give it a name (
check-link) and choose the typeResolve Linked Account, then click Next. -
Under Account Manager That Holds the Links, choose
default-account-managerand for Account Domain on Link choosefacebook-domain. -
In the Advanced section, under Original Subject Attribute Name, add
linked_subject. -
Click Close.
Switch Action for Alternative Flows
The next step is to configure a Switch action that invokes different actions depending on if the preceding check-link action was able to resolve a link of not. If a link was resolved, use it and if not, the link needs to be established.
-
After the previously created
check-linkaction, click Add to add a second action on the Facebook Authenticator. -
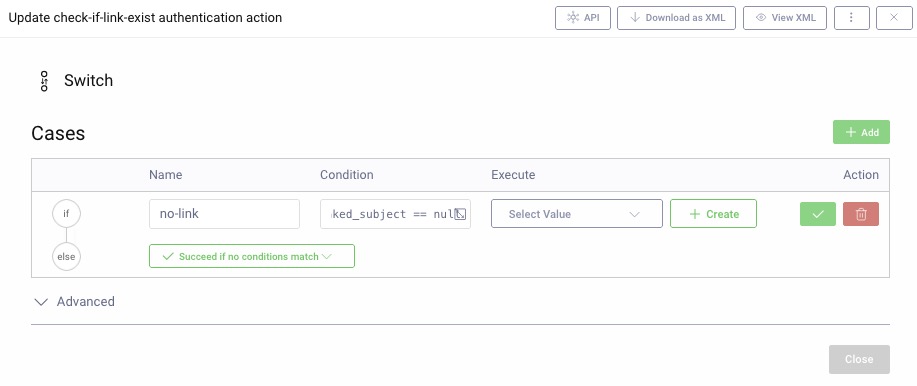
Choose New Action, give it a name (
check-if-link-exist) and choose the type Switch, click Next. -
Name the If statement (no-link) and add a condition to check if the link was not available,
attributes.subject.linked_subject == null. -
In the else row, select
Succeed if no conditions matchfrom the drop-down.
-
In the Execute column, click Create.
-
The action invoked if there is no link is a sequence of actions. Give it a name (
create-link) and choose the type Sequence, click Next. -
Click Add to add the first action in the sequence. Choose New Action, give it a name (
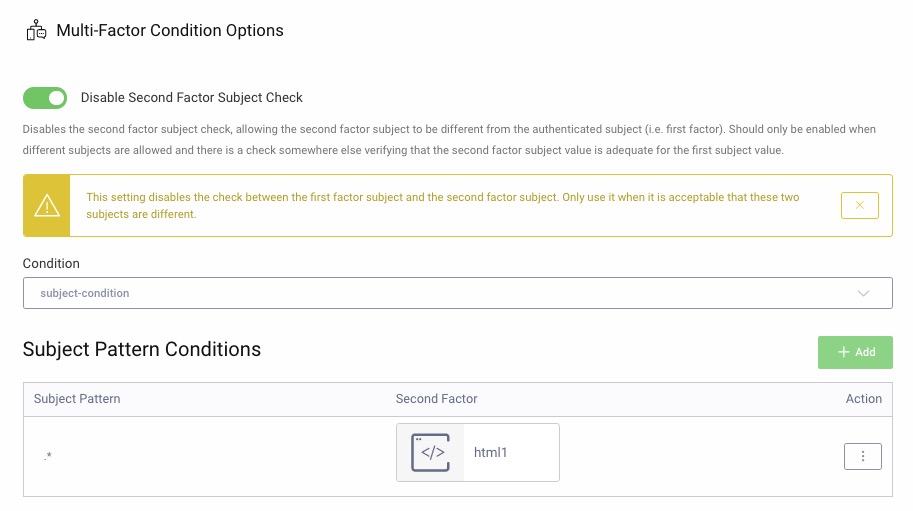
html-authenticator) and choose the type Multi Factor Condition, click Next. Ensure that the option for Disable Second Factor Subject Check is enabled. This action triggers the HTML Forms Authenticator. If the user already has a local account, the authenticator captures the user’s identity as part of the login and uses it later for the linking. If the user does not have a local account, they can create an account via the HTML Forms Authenticator. -
Under Condition choose
subject-condition, click Add to add a pattern. Under Subject Pattern type.*and click Select authenticator, choose the previously created HTML Forms Authenticator.
-
Click the green checkbox and then Close.
-
Click Add to add the second action in the sequence. Choose New Action, give it a name (
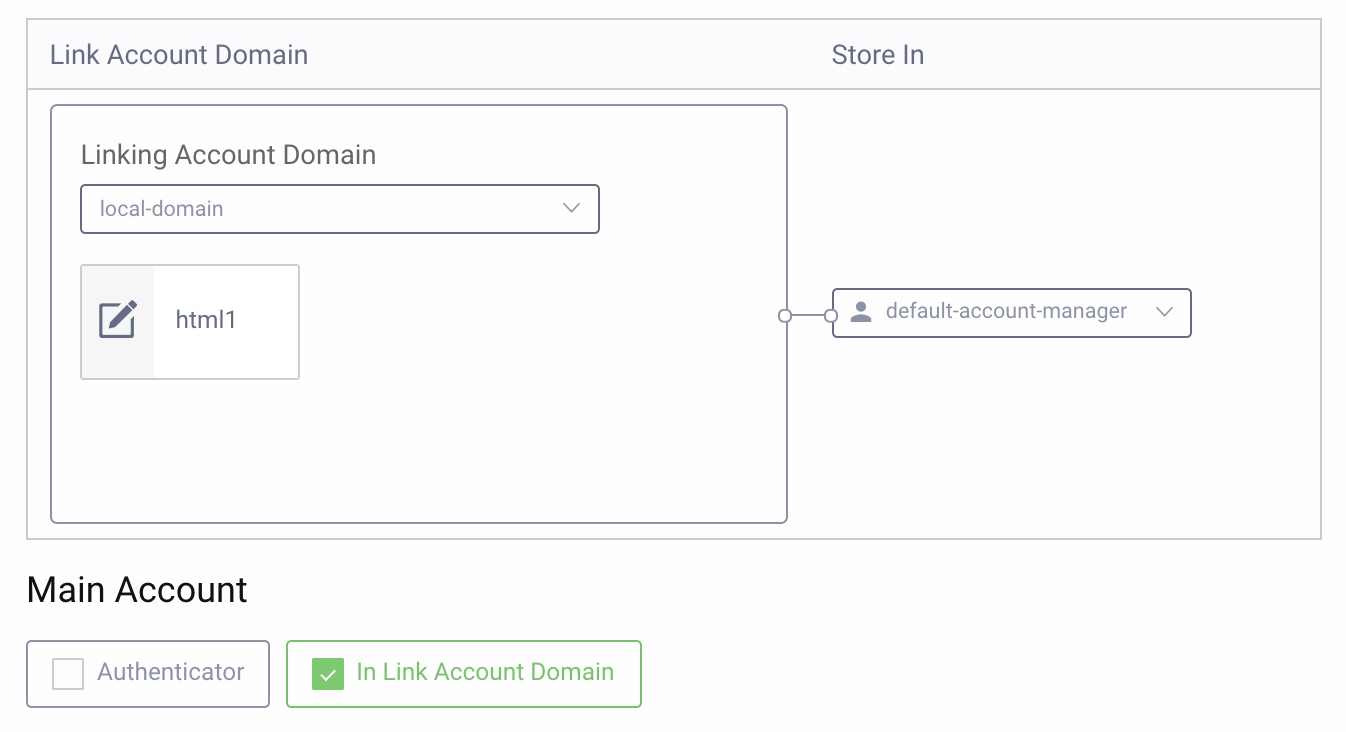
link) and choose the type Auto Link Account, click Next. -
In the drop-down for Linking Account Domain, choose
local-domain. Under Main Account, selectIn Link Account Domainand for Store In choose thedefault-account-managerand then click Close.
-
Since the flow started with an action that could not find an existing link, the Auto Link Account action creates one. Now that the link is created it needs to be resolved. Click Add to add the third action in the sequence. Give it a name (
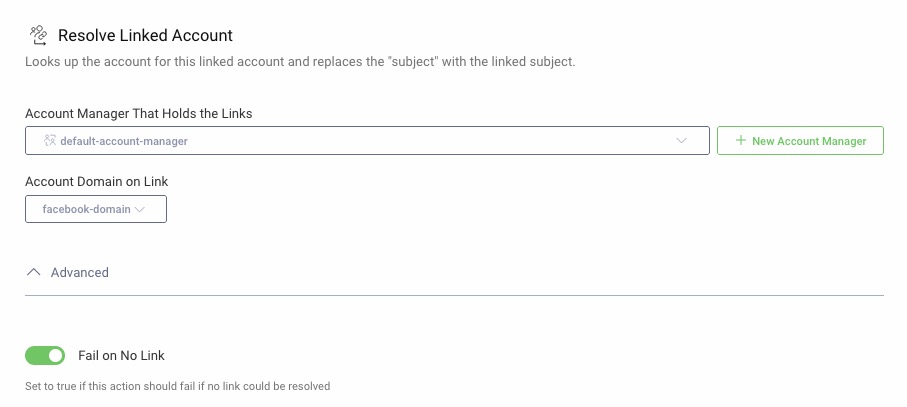
resolve-link), choose type Resolve Linked Account, click Next. -
Under Account Manager That Holds the Links, choose
default-account-managerand for Account Domain on Link choosefacebook-domain. -
In the Advanced section, enable Fail on No Link, click Close. As the preceding action creates the link, there is always a link available, and this setting is just a failsafe.
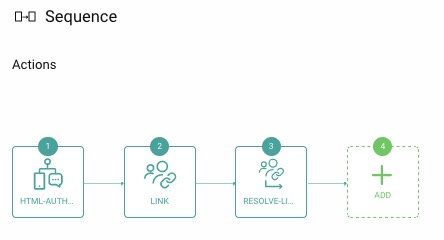
The sequence action is now ready and looks like this:
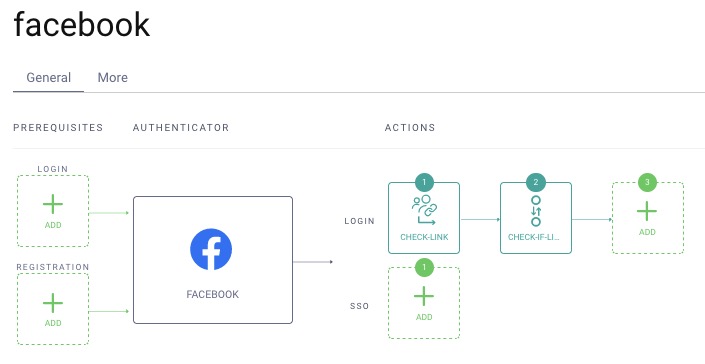
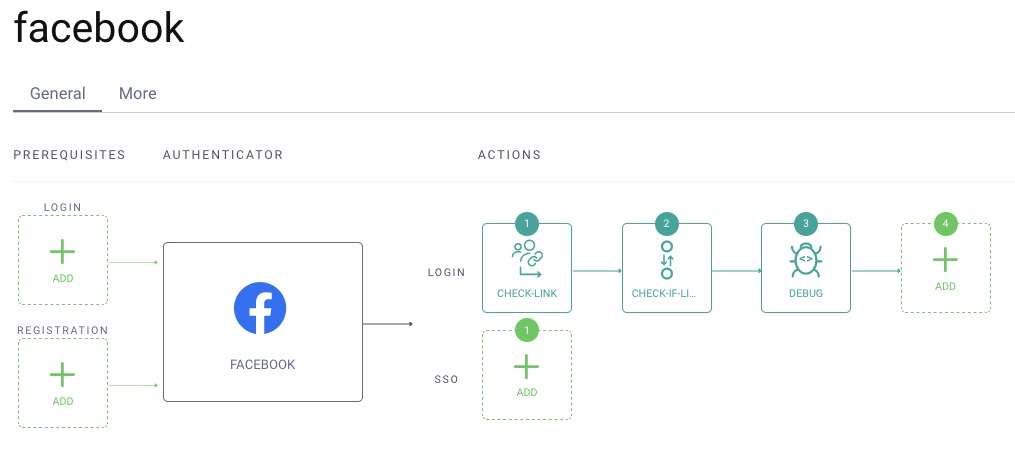
The Facebook Authenticator should now look like this:
Assign to a Client
The Facebook Authenticator can now be assigned to a Client. For example, use a client that supports the Code Flow to test the scenario. Note that you only need to assign the Facebook Authenticator to the client. The HTML Forms Authenticator is implicitly available via the Facebook Authenticator as it is referenced in one of the flows configured on the same.
Configure Facebook
You have to configure your Facebook app with a valid OAuth Redirect URI. The value depends on the path of the authentication endpoint and the ID of the Facebook Authenticator. An example URI where the authenticator is called facebook is, https://idsvr.example.com/authn/authentication/facebook/callback. A detailed example of how the URI is formatted is explained in the Curity Facebook Authenticator documentation.

Test Using OAuth Tools
You can now use OAuth Tools to test the configuration. As mentioned above, running the Code Flow is a suitable option. Use OAuth Tools to initiate a Code Flow using the client from Assign to a Client.
The flow triggers the Facebook Authenticator. If you have not logged in to Facebook yet, you will get a Facebook login screen. When running the flow for the first time, your Facebook account is not linked to any local account yet. Consequently, the HTML Forms Authenticator is triggered, where you can either log in using an existing account or create a new account.
The first thing prompted should be the HTML Forms Authenticator, choose Create account if needed.
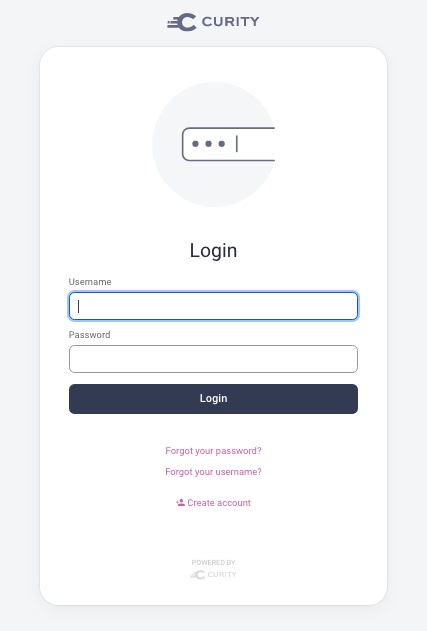
After having created the account, the browser redirects back to the login screen where you can log in with the new account.
Now the create link and resolve link actions run in the background and will not be visible. An entry is added to the linked_accounts table of the Curity Identity Server database, to store the link. It looks something like this (truncated for readability):
| account_id | linked_account_id | linked_account_domain_name | linking_account_manager | created |
|---|---|---|---|---|
| 855326...2db3ac | 101571...31682 | facebook-domain | default-account-manager | 2020-08-17 21:00:18 |
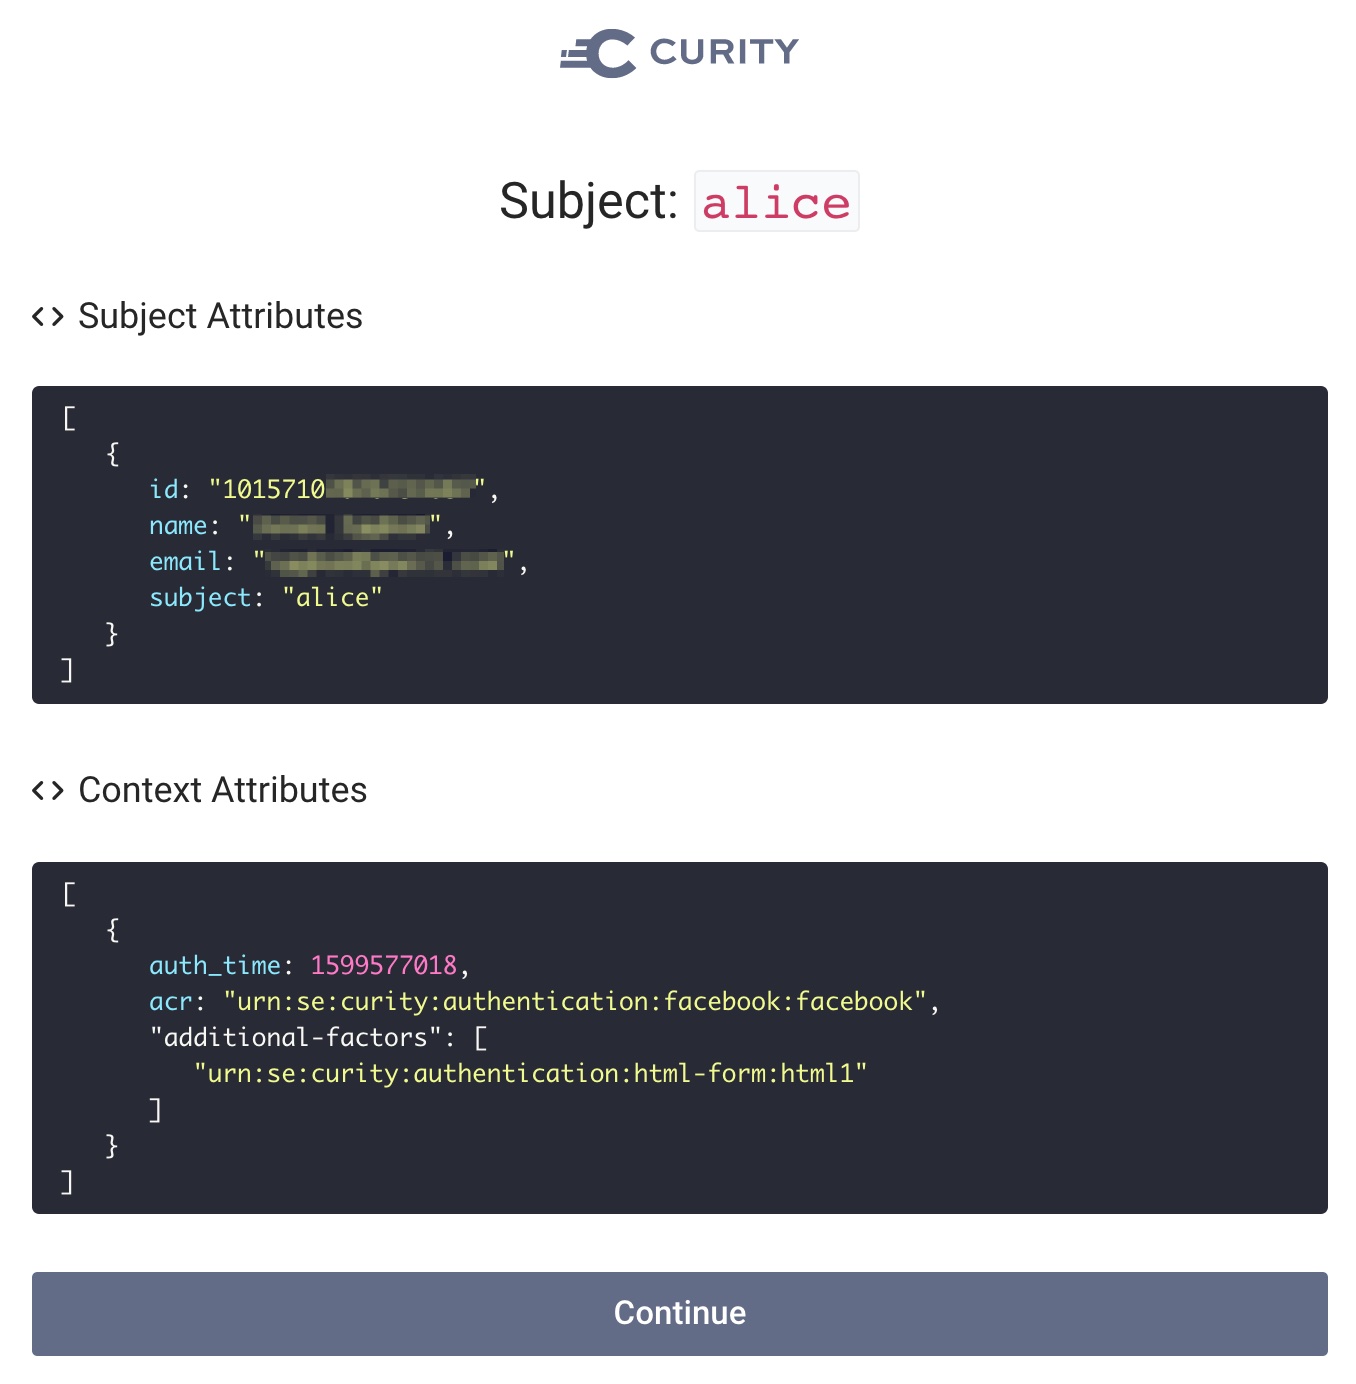
During development, it is recommended to add the Debug Action to the end of the authentication workflow. This enables you to verify that the authentication result contains the expected subject claim.
When running the flow in OAuth Tools after adding the Debug Action you can see that the subject claim is not your Facebook login but the local one. The local account in this example is stored in the local database and is alice. However other attributes such as name and email are actually from the Facebook Authenticator, including the id.
Summary
Authentication Actions are extremely powerful in creating advanced workflows in the authentication process. Account linking can help create a very smooth experience for the end user with some simple configurations on the server side. A link is created between accounts in order to resolve attributes from one account using information from another as keys. There are several different ways to achieve account linking and in the end the configuration depends on how the users flow through the system. Some of the configurations could be handled by application code but in this tutorial, we showed how to achieve account linking by configuring the Curity Identity Server only.
The product documentation provides further details on account linking technical concepts. For further details on design principles, see the Account Linking Recipes article. To run some end-to-end examples on a development computer, check out the GitHub Repository. Use case 2 includes an automated deployment of the Curity Identity Server, with working actions preconfigured, for social provider account linking. Google sign in is used, though you can easily adapt the setup to any social provider, or to run the Facebook flow from this tutorial. A database is also included, which can be queried, to understand how account linking storage works.

Join our Newsletter
Get the latest on identity management, API Security and authentication straight to your inbox.

Start Free Trial
Try the Curity Identity Server for Free. Get up and running in 10 minutes.
Start Free TrialWas this helpful?


