SITHS Authentication With Attributes From Active Directory
On this page
SITHS, short for Säker IT Hälsa och Sjukvård (Swedish), is a system used to issue electronic IDs for users and systems. The area of use is authentication to systems, electronic signing as well as securing system-to-system communication. In the case of IDs for users, the information can be securely stored on a smart card that is used for access control to for example buildings as well as logging in to systems.
When using SITHS smart card for authentication, it is likely that you want to bring in additional attributes from an external source. This guide explains how to get those attributes from an Active Directory.
Required components:
- Windows Connector
- SITHS Authenticator
- Active Directory Data Source
- Data Source Action
SITHS Authenticator Configuration
To be able to handle smart card authentication and Integrated Windows Authentication (IWA), the Curity Identity Server needs an additional application installed on IIS. This application is called the Windows Connector and the installation is covered in the Windows Authenticator documentation.
Configure a SITHS authenticator named siths and point to the IIS configured above.
Test the Configuration
To show the available attributes for a user, add the Debug Attribute action to the authenticator. If not yet available, create a Debug Attribute action first. You can remove the action after you confirmed that the configuration is correct.
In the following examples, the authentication profile is called "Authentication Service" and is identified via the id authentication-service.
Adapt the values according to your setup.
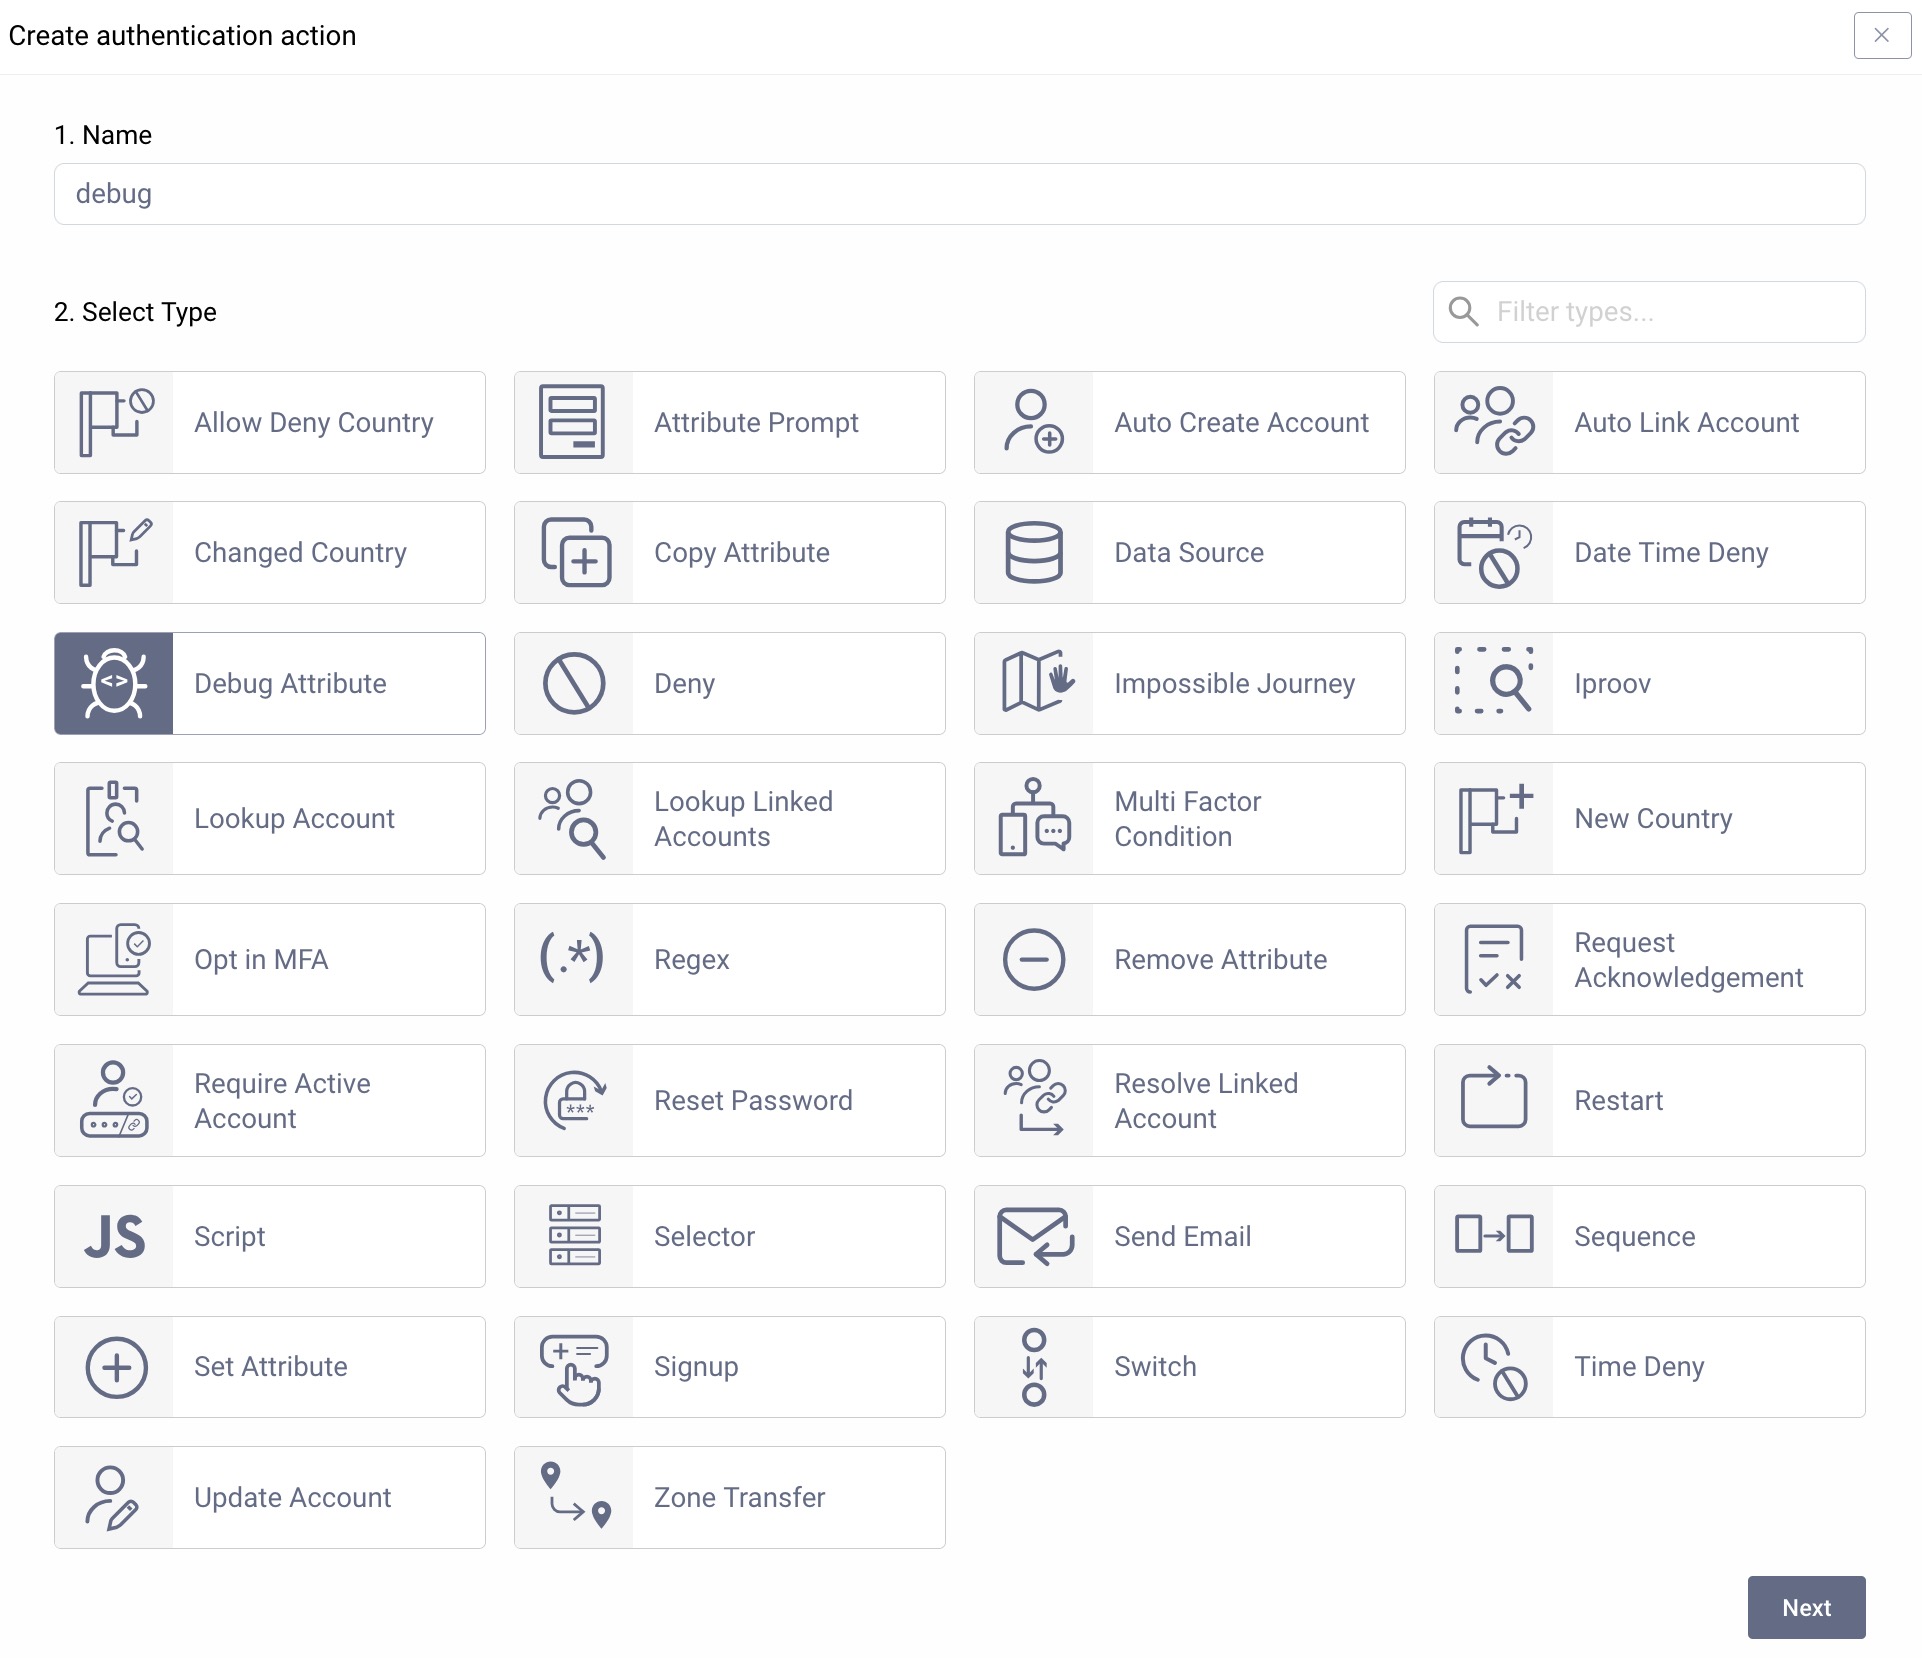
Create a Debug Attribute action.
- Navigate to Profiles → Authentication Service → Actions.
- Click on + New Action.
- Enter
debugin the name field. - Select the action called "Debug Attribute".
- Click Next and close the wizard.

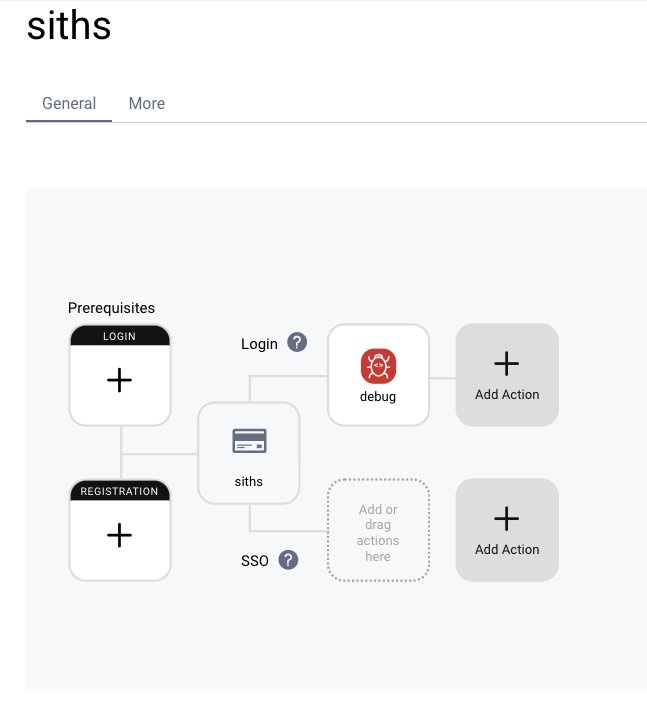
Then add the action to the authenticator.
- Navigate to Profiles → Authentication Service → Authenticators.
- Select the SITHS authenticator.
- Under Actions click on + Add in the login pipeline and select the action from above.

At the end, commit the changes under Changes → Commit.
To test the configuration, use an existing application if applicable or set up a dummy application. It will not need to point to an existing application, since the browsers developer tools can be used to inspect the result.
Add a service provider TestApp1 to authentication profile authentication-service (Authentication Service):
- Go to Profiles → Authentication Service → Service Providers.
- Click New Service Provider.
- Name it
TestApp1. - Add the Target URL
https://localhost:7777/auth-done.
This should result in an added Service Provider:

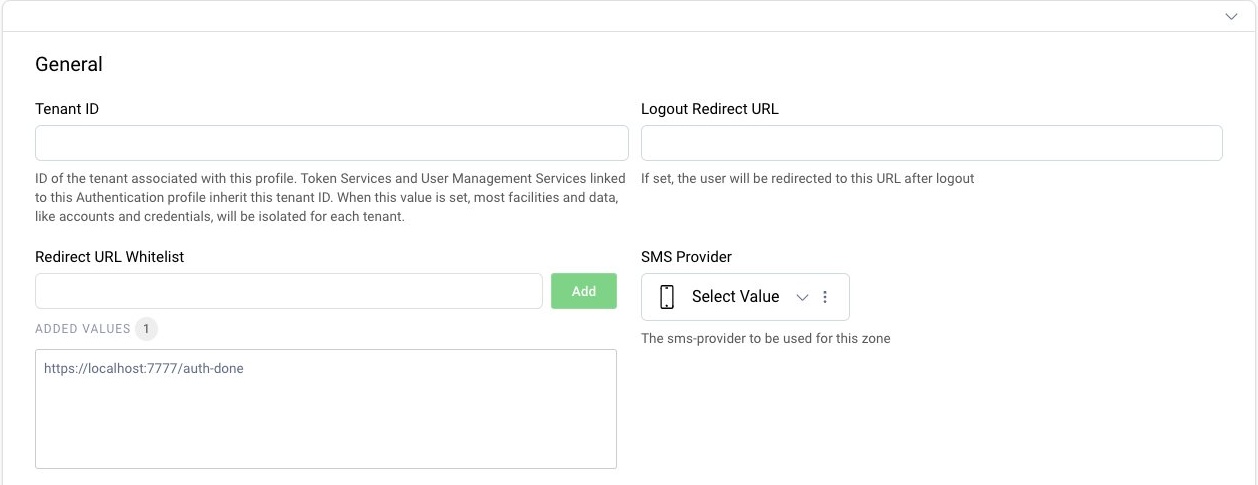
- Open Profiles → AuthenticationService → General.
- Enter the target url to the list of approved redirect URLs (Redirect URL Whitelist).
- Then commit the changes through Changes → Commit.

Make sure you have access to a computer with Secmaker Net iD installed, and a SITHS smart card.
Open up a new browser window in private mode.
- Access the Curity Identity Server in your browser by visiting
https://localhost:8443/authn/authentication?serviceProviderId=TestApp1. You will be prompted with the available authentication methods. If multiple authenticators are displayed, selectsiths. - Authenticate using your newly configured SITHS authenticator. You should be prompted for the PIN.
- In the next view, study the subject attributes. The only attribute in the list is the
subjectattribute with the HSA-ID from the SITHS smart card. - Finish the authentication flow.
- The result will be POSTed to the URL of
TestApp1. Your browser will show a connection error as no application is listening on the URL. You can safely ignore that.
If the subject attribute matches the HSA-ID from the SITHS smart card, then you configured the SITHS authenticator correctly. Otherwise, double-check the SITHS Authenticator Configuration.
Active Directory Data Source
To be able to find a user account corresponding to the smart card, the HSA-ID needs to be in the directory somehow. It is typically stored in a custom attribute like extensionAttribute1, but any string attribute could be used.
Configure an LDAP Data Source with the type Active Directory:
- Go to Facilities → Data Sources
- Click the + to add a new Data Source and give it a name,
activeDirectory - Select
ldapas the type. - Configure the Hostname, Client ID (username), Client Secret (password) and Default Root according to your AD environment
- Scroll down and set the Ldap Server Type to
active-directory - Scroll down to the bottom and in the Attributes section set Search Filter to
(extensionAttribute1={}) - Changes → Commit
Note the search filter. It will return the attributes of a user with extensionAttribute1 being the same as the HSA-ID from the authentication.
Tip
To speed up the search, make sure that the Active Directory indexes the attribute. Otherwise, the directory will need to check each object.
This configuration will return all attributes from the directory. See the LDAP documentation for how to only return selected attributes.
Data Source Action
You now have the SITHS authenticator in place, and you have configured a data source to fetch the attributes from. A Data Source Action needs to be configured to connect the two to add the attributes to the authentication.
Create a new action of type "Data Source".
- Navigate to Profiles and open the Authentication Service profile
- Select Actions from the left panel menu.
- Click on + New Action. Give it a name,
getAdAttribute. - Choose Data Source as the type and click
next. - Select
activeDirectoryfrom the list of available attribute sources. - Close the window and commit the changes via Changes → Commit.
This is a simple configuration and will add all attributes from the directory as is.
Add the Data Source Action to the Authenticator
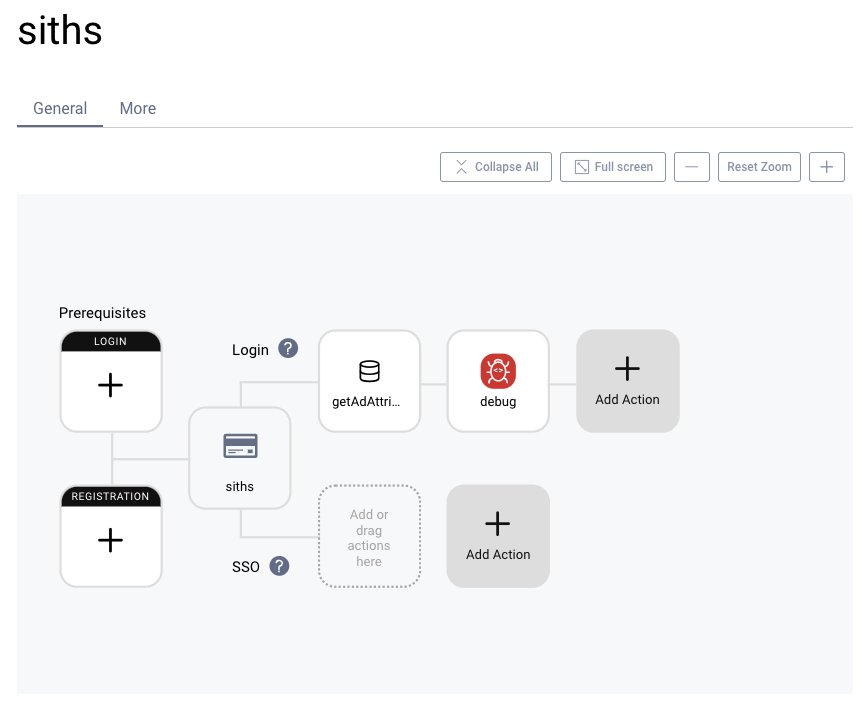
Finally, to make sure the attribute transformer runs, add it to the authenticator:
- Navigate to Profiles → Authentication Service → Authenticators
- Select SITHS authenticator from the list.
- Under actions, click on + Add in the Login pipeline
- Choose the
getAdAttributesaction. - Drag and drop the action before the Debug Attribute action.
- Commit the changes.

Test the Configuration
Restart your private mode browser, to clear the login state. Then go through Test the configuration again.
The subject should now contain all the user's attributes from Active Directory.

Join our Newsletter
Get the latest on identity management, API Security and authentication straight to your inbox.

Start Free Trial
Try the Curity Identity Server for Free. Get up and running in 10 minutes.
Start Free TrialWas this helpful?


