
Device Authorization Grant
On this page
The OAuth 2.0 Device Authorization Grant, also known as the Device Flow, handles the scenario where user authentication is difficult to enter on the device itself. In a Device Flow, the flow is initiated by the device, but authentication is handled out-of-band on a different device with a better input, such as a browser with a keyboard for input.
The initial device polls the authorization server for a completed and successful user authentication. When it's available, tokens are issued. The Device Flow is a useful authorization flow commonly used with smart TVs and devices like Apple TV.
The OAuth Device Flow article describes the mechanics of the flow. In this tutorial, we will outline how to set it up in the Curity Identity Server.
Pre-Requisites
This tutorial builds on the configuration setup described in the steps First Configuration and Configure an Authenticator under the menu Getting Started. If you have not gone through those steps yet, you can visit the guides by clicking on the links.
You may run this tutorial on a custom setup also, but keep in mind that names and URLs may be different, as well as the capabilities configured in the profiles.
Enable Device Flow
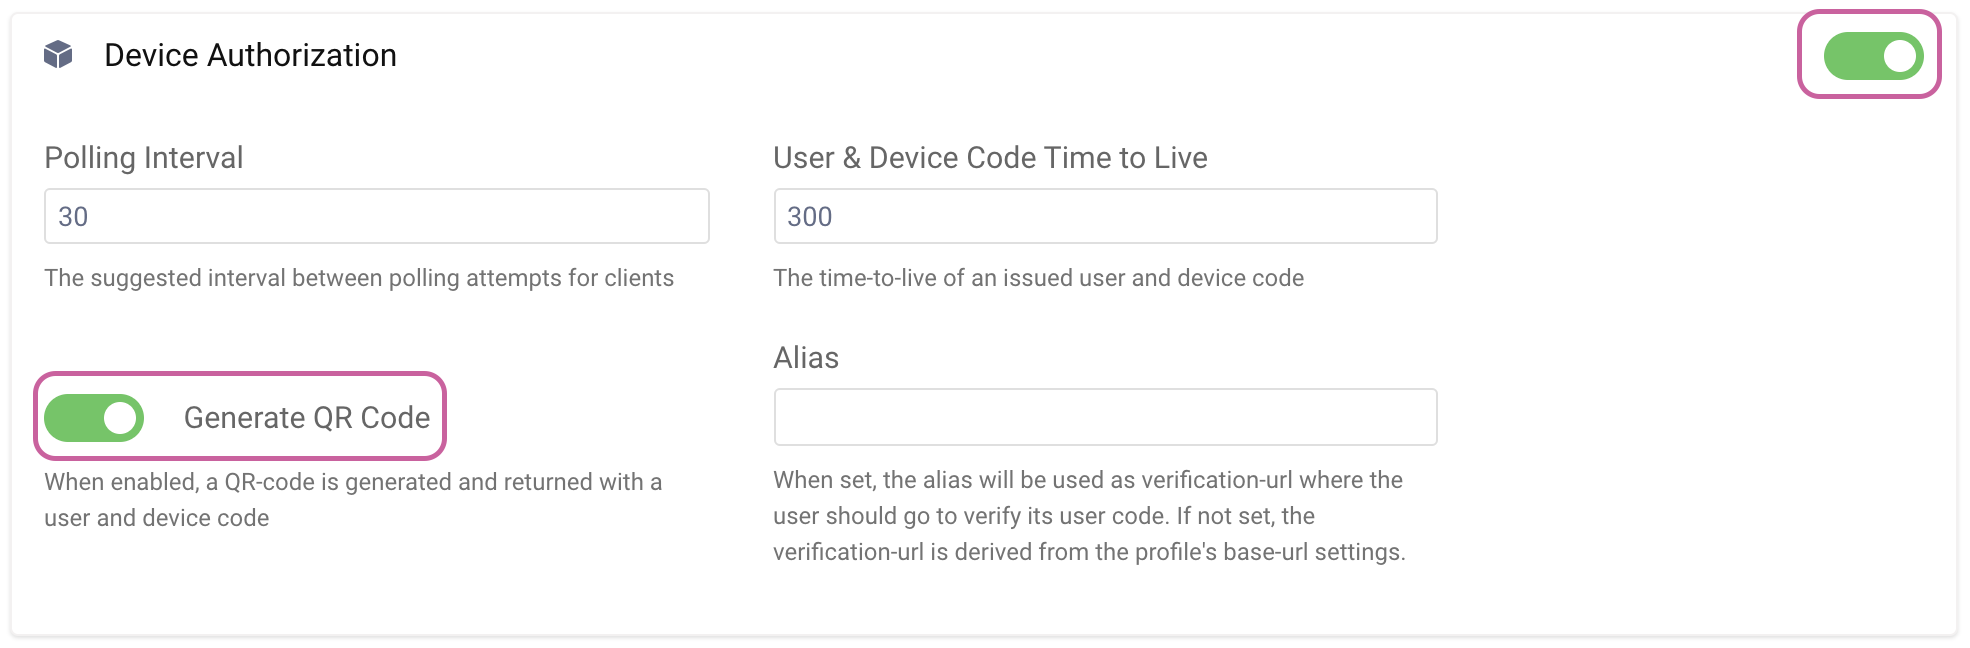
You must enable the Device Flow in the Curity Identity Server as it is not enabled by default. Go to Profiles -> Token Service -> Client Settings and set Device Authorization to enabled. Here, you can also enable Generate QR Code to leverage QR codes in addition to standard codes when authenticating the user out-of-band.
Configure Device Endpoint
The device authorization endpoint is not enabled by default in the Curity Identity Server. Go to Profiles -> Token Service -> Endpoints. Click New Endpoint and give it a name (device), Path (/oauth/v2/) and set the type to oauth-device-authorization, then click Create.
In the column Running On, click NOT Deployed and choose the service role to deploy the endpoint to (default). Next, click Submit and then Done. Commit the changes.

Enable Dynamic Client Registration (DCR)
In Curity, only clients that are registered dynamically can use the Device Flow. DCR won't be outlined in detail in this article, but more information can be found in the articles describing templatized DCR and non-templatized DCR.
Enable DCR:
- Go to Profiles -> Token Service -> Dynamic Registration and click
Enable Dynamic Client Registration. - Click Next and then choose a Client Data Source. Click Next again.
- Select the Profile (default) and click Next.
- Click Commit to commit the changes to the system.
Create a Client With DCR Enabled
First, we must create a client that can be used to obtain an initial access token to be used in the Dynamic Client registration process. We can use the client created in the Getting Started Guide called www. If you haven't created this client yet, head over to the Configure a Client article and set it up.
To make things a bit more realistic, we will authenticate the client (not the user) when registering the Dynamic Client. For that to work, we need to add the Client Credentials Flow to our www client. Go to Token Service -> Clients -> www and Edit the Capabilities to add the Client Credentials capability. Remember to commit the changes.
Register a Client With Device Flow Enabled
We are now ready to create the DCR template client with the Device Flow capability.
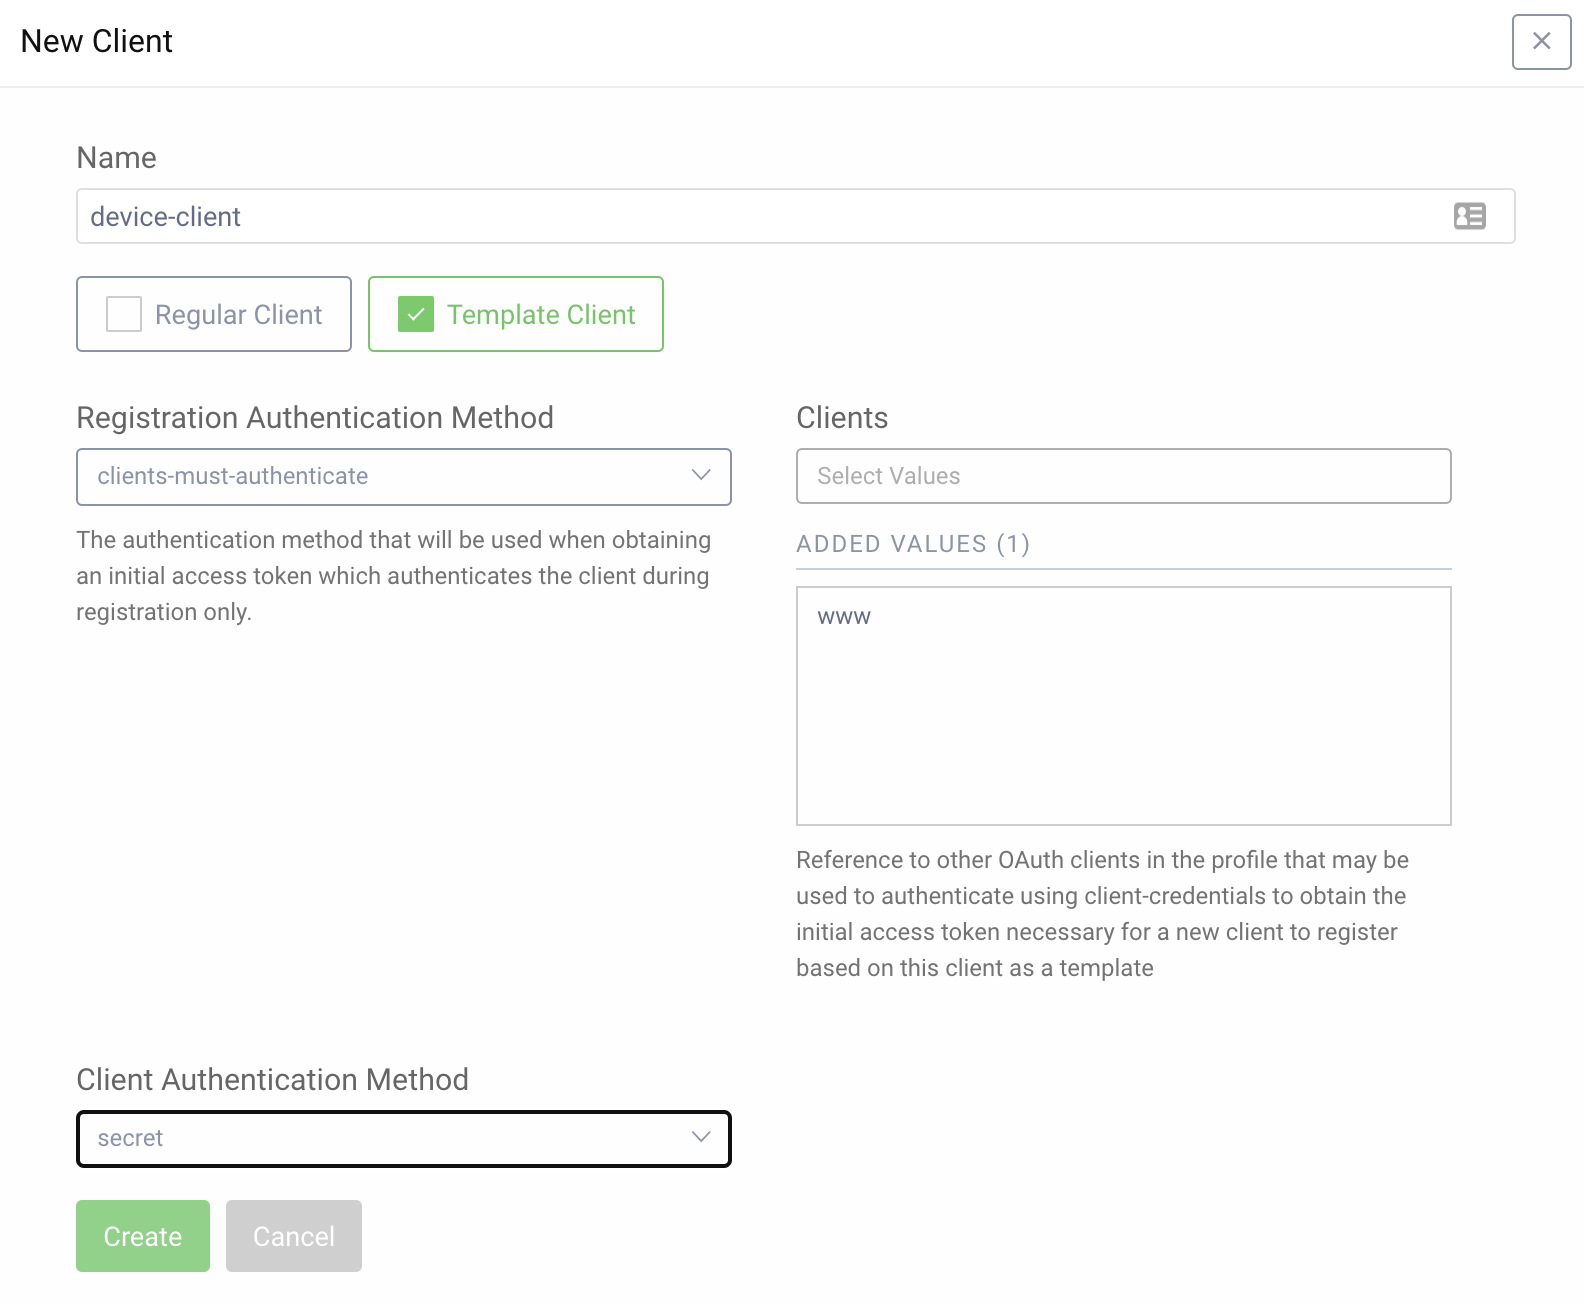
- Go to Token Service -> Clients and click New Client. Give it a name,
device-clientfor example. - Choose Template Client, select
clients-must-authenticatefrom the drop-down menu then select thewwwclient. - For Client Authentication Method choose
secret. - Click Create.
- In the Capabilities section click Add capabilities, select
Device Authorization, and click Next. - Click Add OAuth.tools to add OAuth Tools as an allowed origin. Click Next.
- Choose the
username-passwordauthenticator and click Done. - Commit the changes.
Get Initial Token
Now let's use our www client to obtain an initial access token needed to register the dynamic client we will use for the Device Flow. We will use OAuth Tools for this purpose. Details on configuring it can be found in the Getting Started Guide and specifically in the Test using OAuth Tools article.
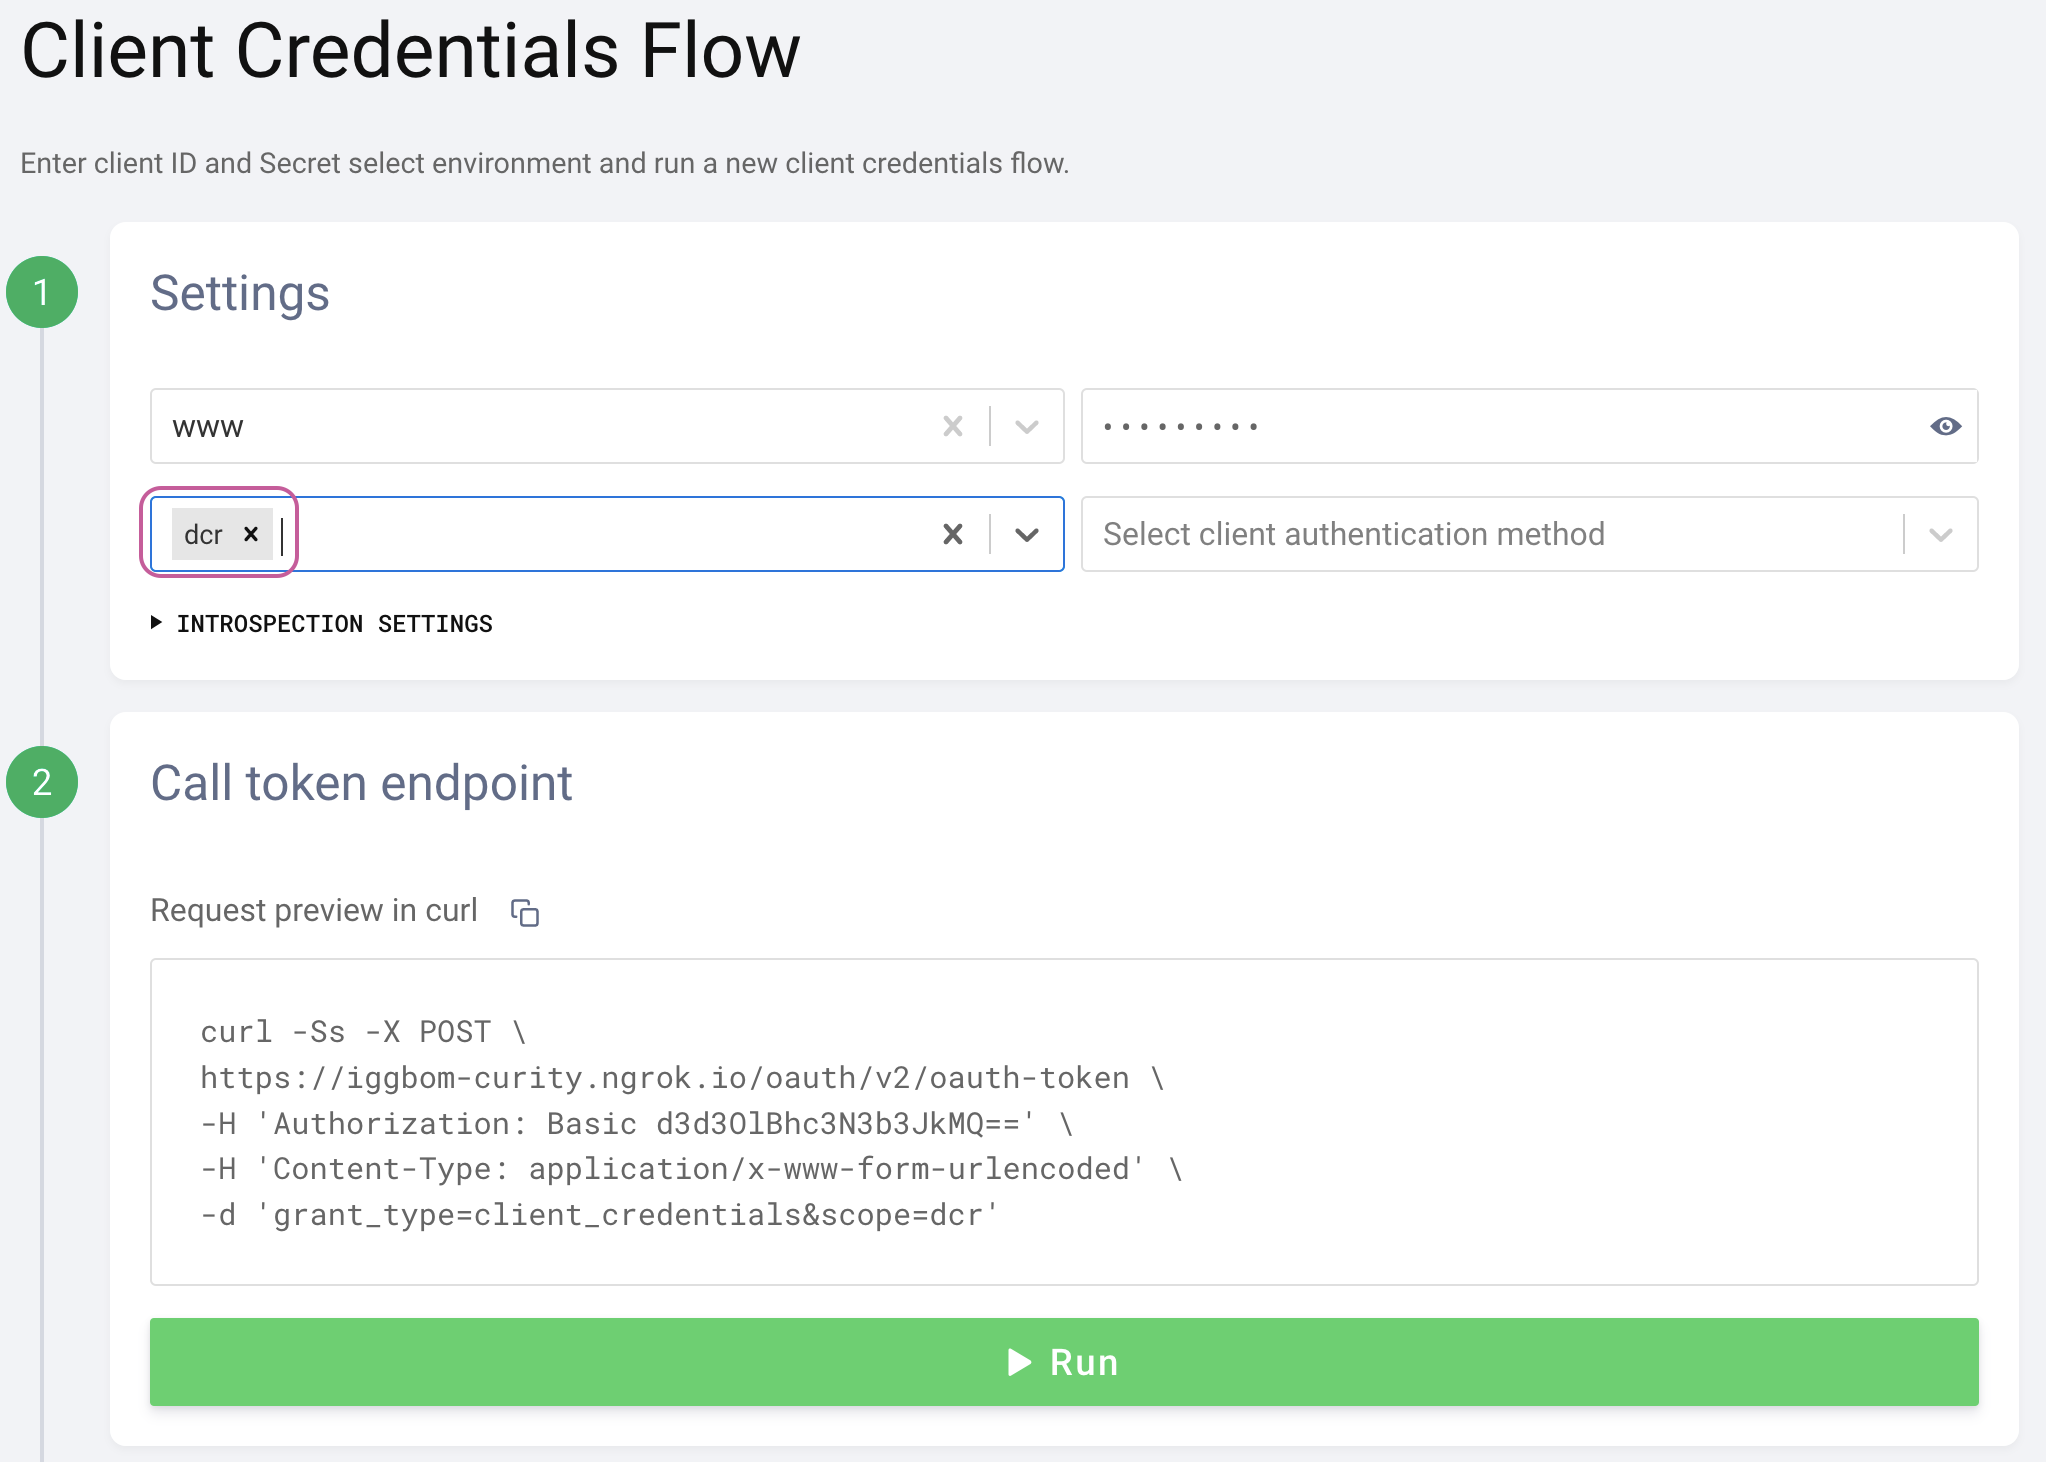
Initiate a Client Credentials Flow using the www client.
DCR scope
Make sure to request the dcr scope for a token that can register a dynamic client to be issued.
Register a Dynamic Client
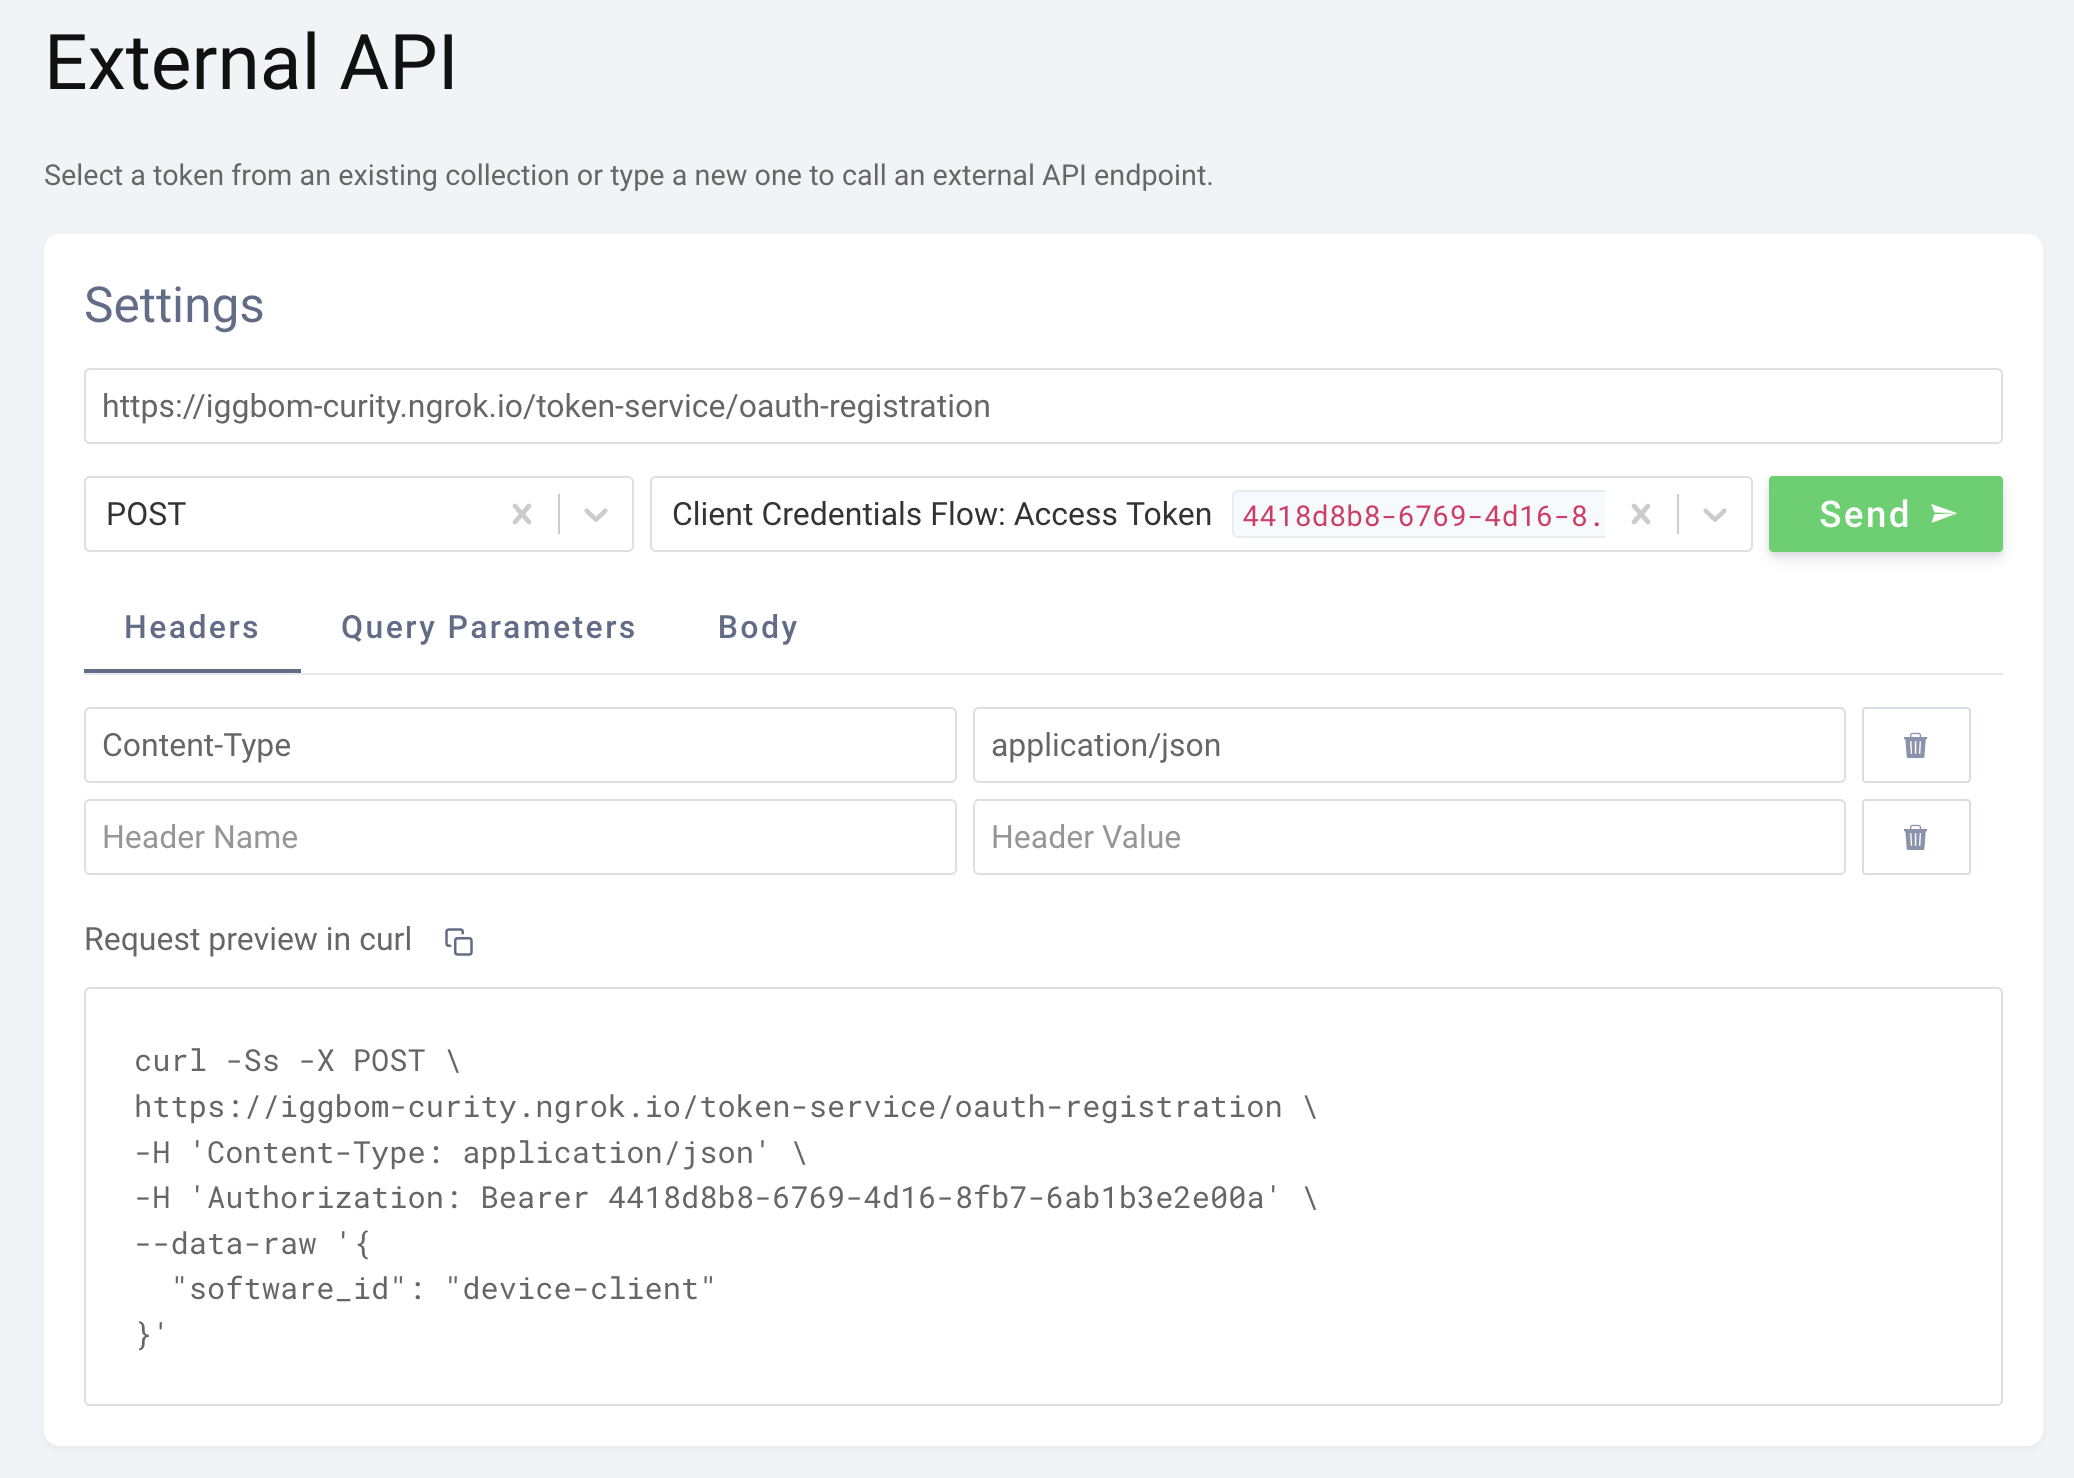
Once the initial access token is obtained, we can use it to register a new client. You can accomplish this in OAuth Tools using the External API flow, which sends a POST request to the registration endpoint (/token-service/oauth-registration by default).
With OAuth Tools, the previously retrieved access token is available from the drop-down. When selected, it's added as a Bearer token in the Authorization header. We can also set the Content-Type to application/json. The body defines what dynamic client template to use. In our case, the body would look like this:
{"software_id": "device-client"}
The response from the client registration request includes details of the dynamic client. It would look something like this:
{grant_typesurn:ietf:params:oauth:grant-type:device_codesubject_type pairwisedefault_acr_valuesurn:se:curity:authentication:html-form:username-passwordregistration_client_uri https://iggbom-curity.ngrok.io/token-service/oauth-registration/12cd04e8-2505-4e5d-b2a0-cb4118b0f7a2redirect_urisregistration_access_token_expires_in 31536000registration_access_token c475ed52-5249-467d-98f0-020eae39ab13client_id 12cd04e8-2505-4e5d-b2a0-cb4118b0f7a2token_endpoint_auth_method client_secret_basicsoftware_id device-clientclient_secret_expires_at 0scopetoken_endpoint_auth_methodsclient_secret_basicclient_secret_postclient_id_issued_at 1611103260client_secret XM92xQlfxyVuAwEzeqHItUZCDTayeeHlQptqMlhSxqoclient_name device-clientallowed_originshttps://oauth.toolsresponse_types}
Note the information we need on the highlighted lines (11 and 20). We now have a dynamically registered client with the Device Flow enabled. The next step is to use the retrieved client_id and client_secret to initiate a Device Flow.
Running the Device Flow
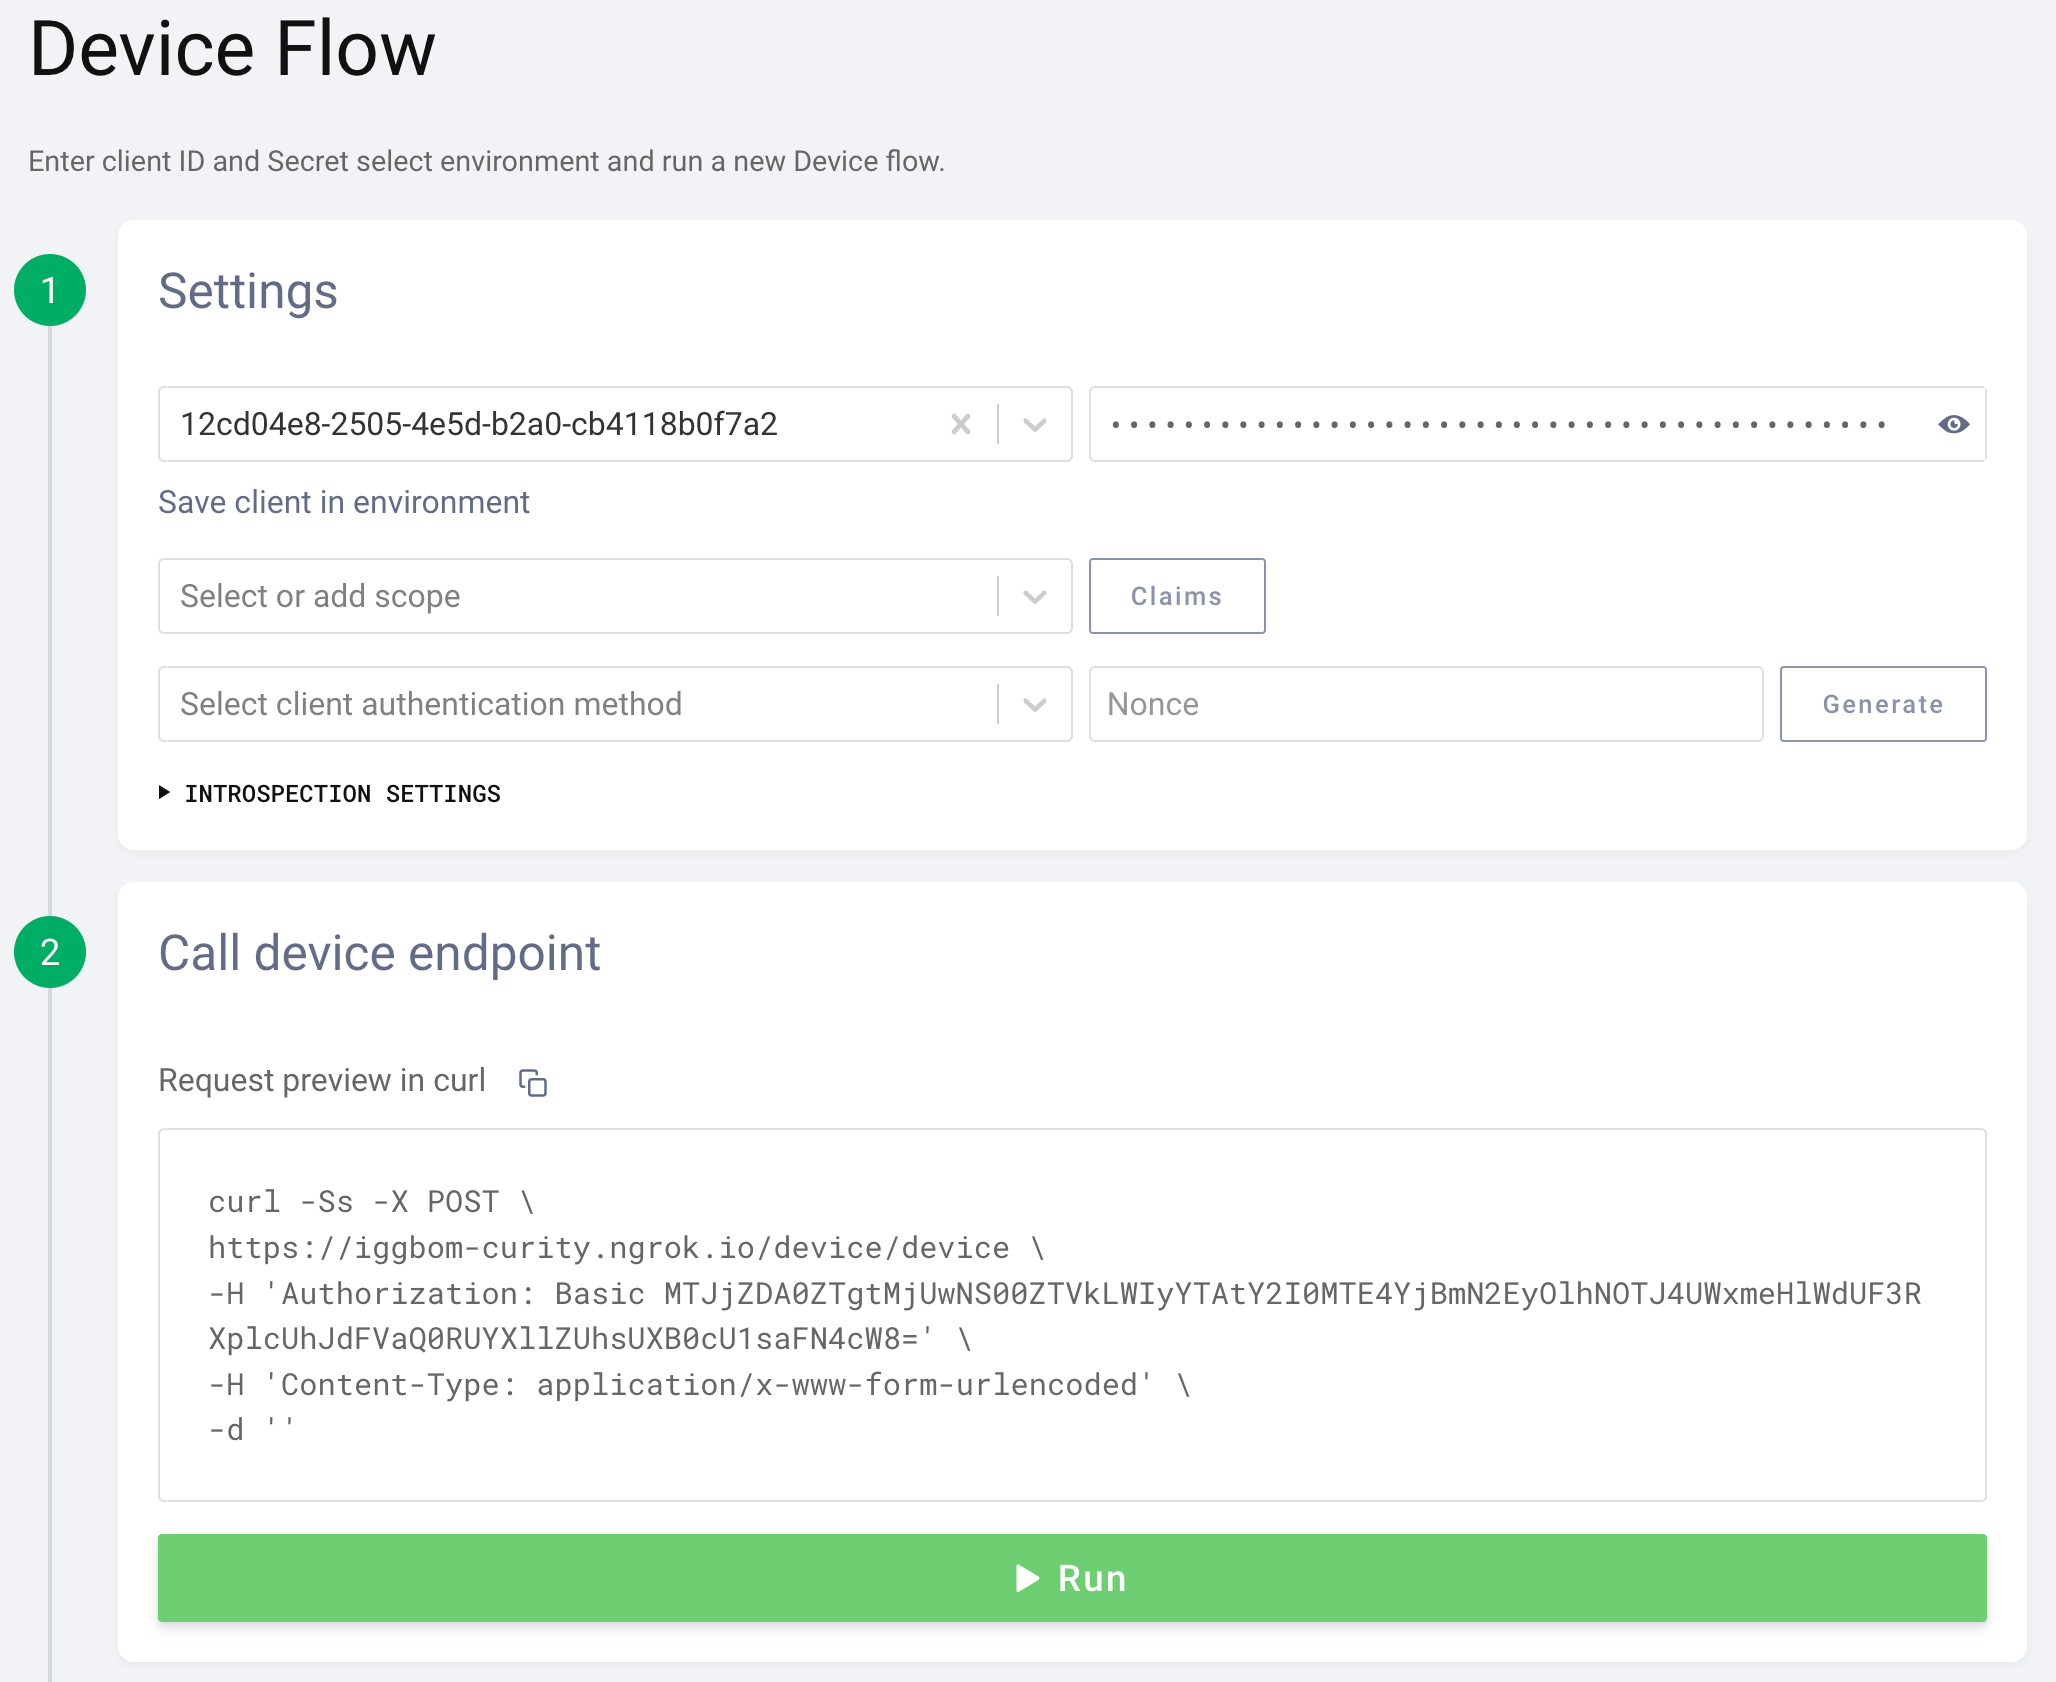
The Device Flow can also be executed in OAuth Tools. We can simply copy the client_id and client_secret from our DCR registration response from above to use in the Device Flow. Optionally, we could add scopes here if they are configured on the client template that the dynamic client is based on.
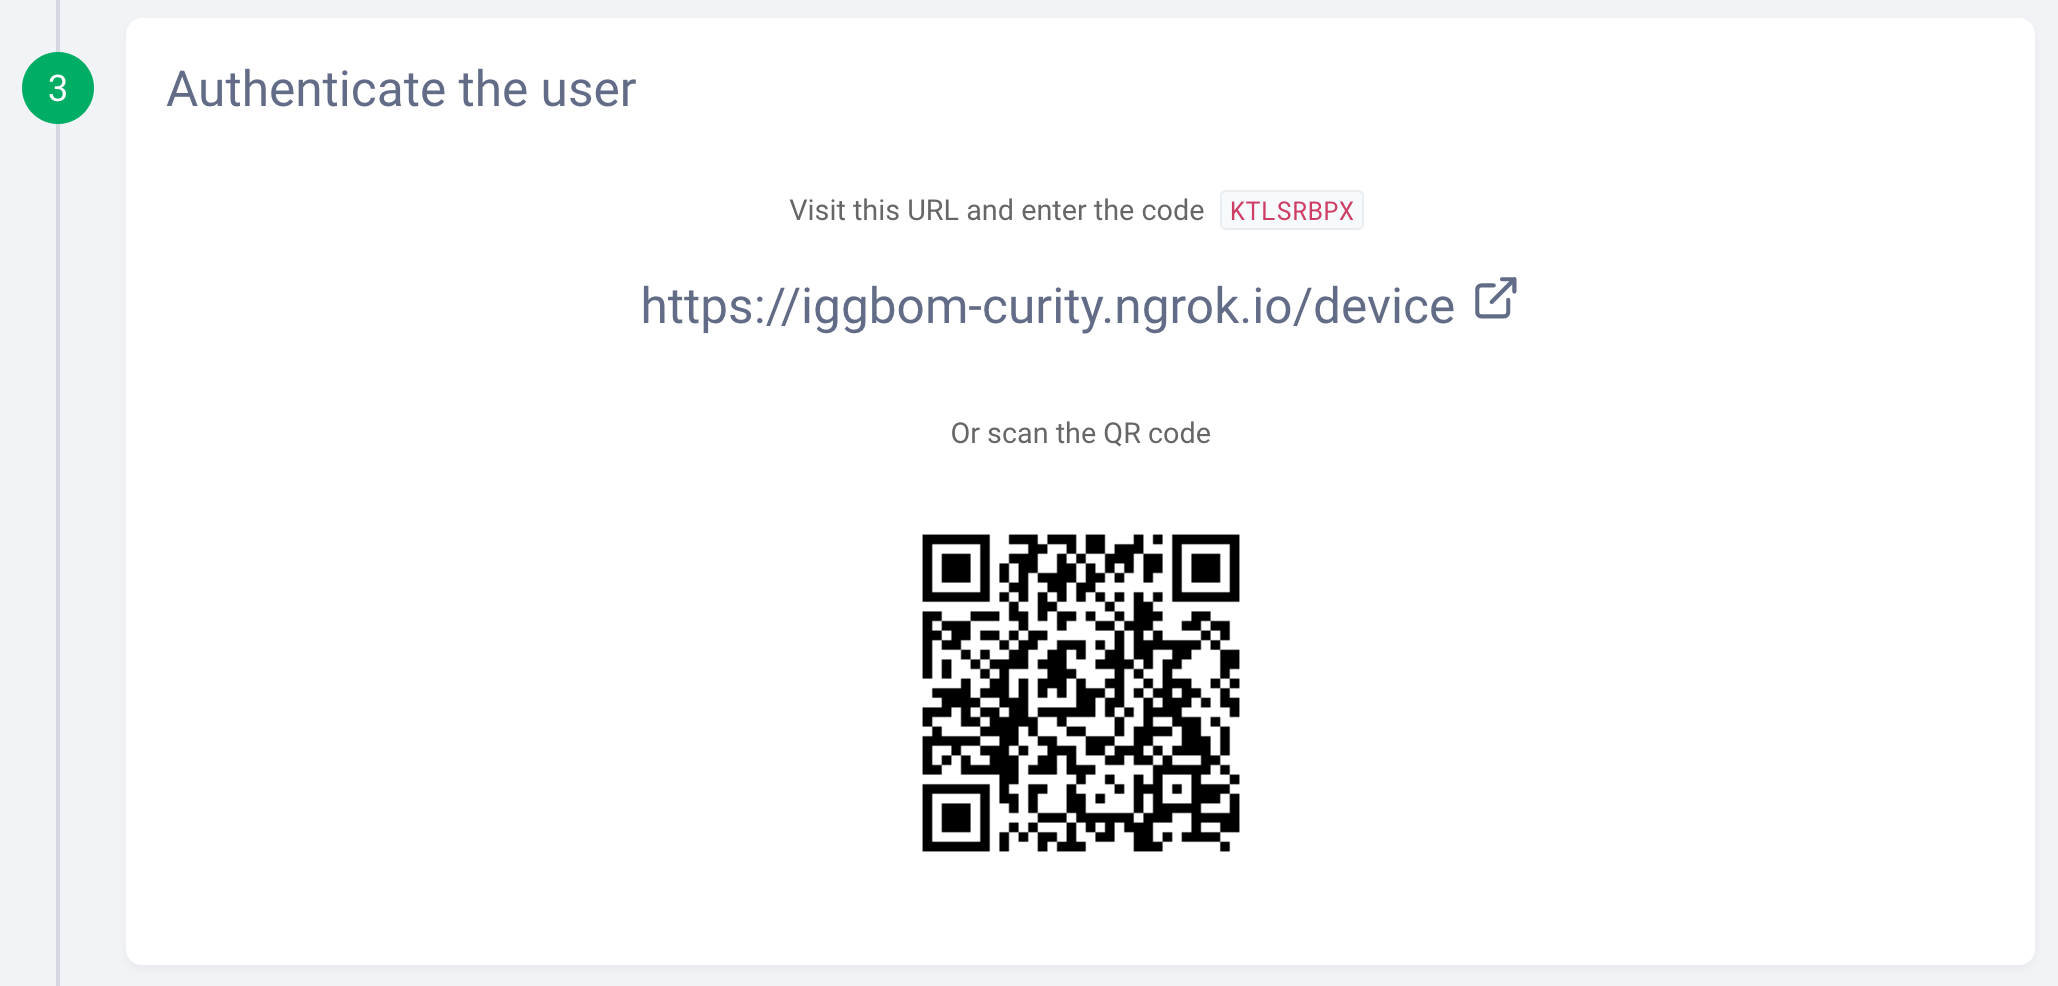
After initiating the flow, we will see a response from the Curity Identity Server. This is the out-of-bound step that the actual client app would now be polling the identity server for. We could now scan the QR code to get directed to the login configured for the client (username-password in our case). Or, we could follow the link and enter the provided code.
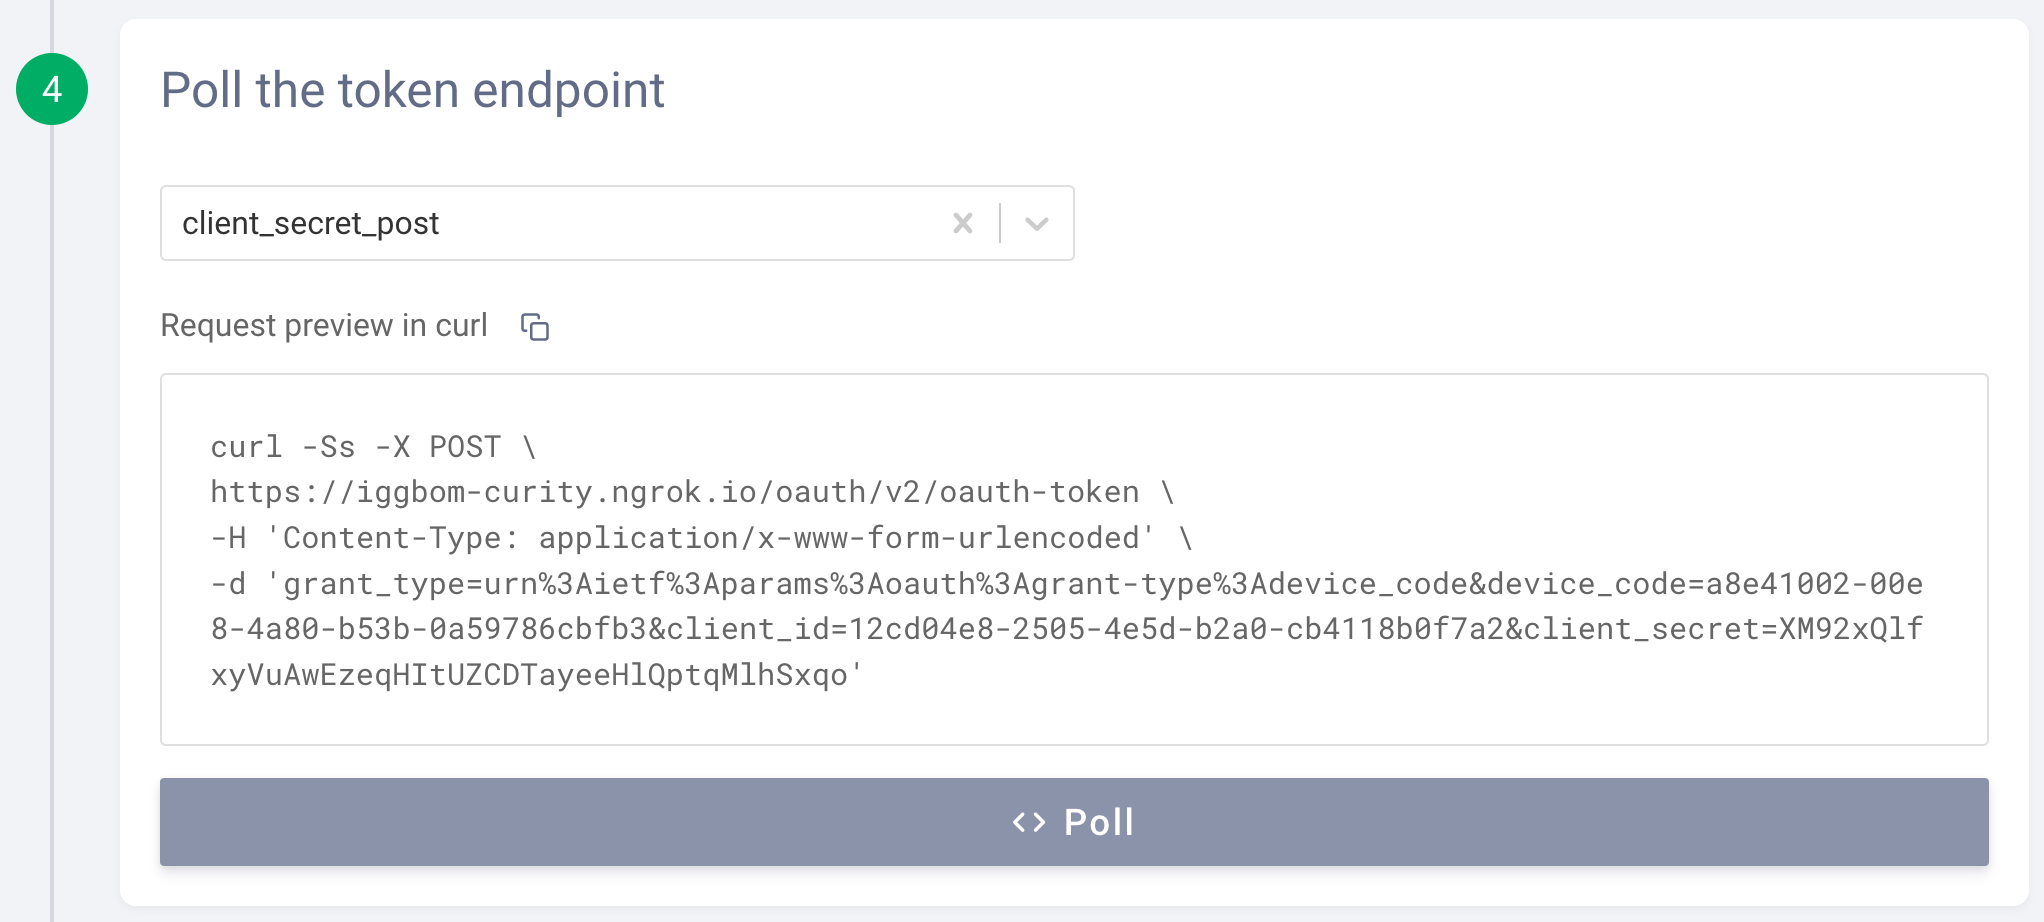
In OAuth Tools, we can simulate this manually in step four and use the Poll button to poll the Curity Identity Server. This checks if the user authentication is completed and successful.
Select client authentication method
Make sure to select client_secret_post as the client authentication method from the drop-down list. Otherwise, the polling request will fail with a message that the client_id is missing.
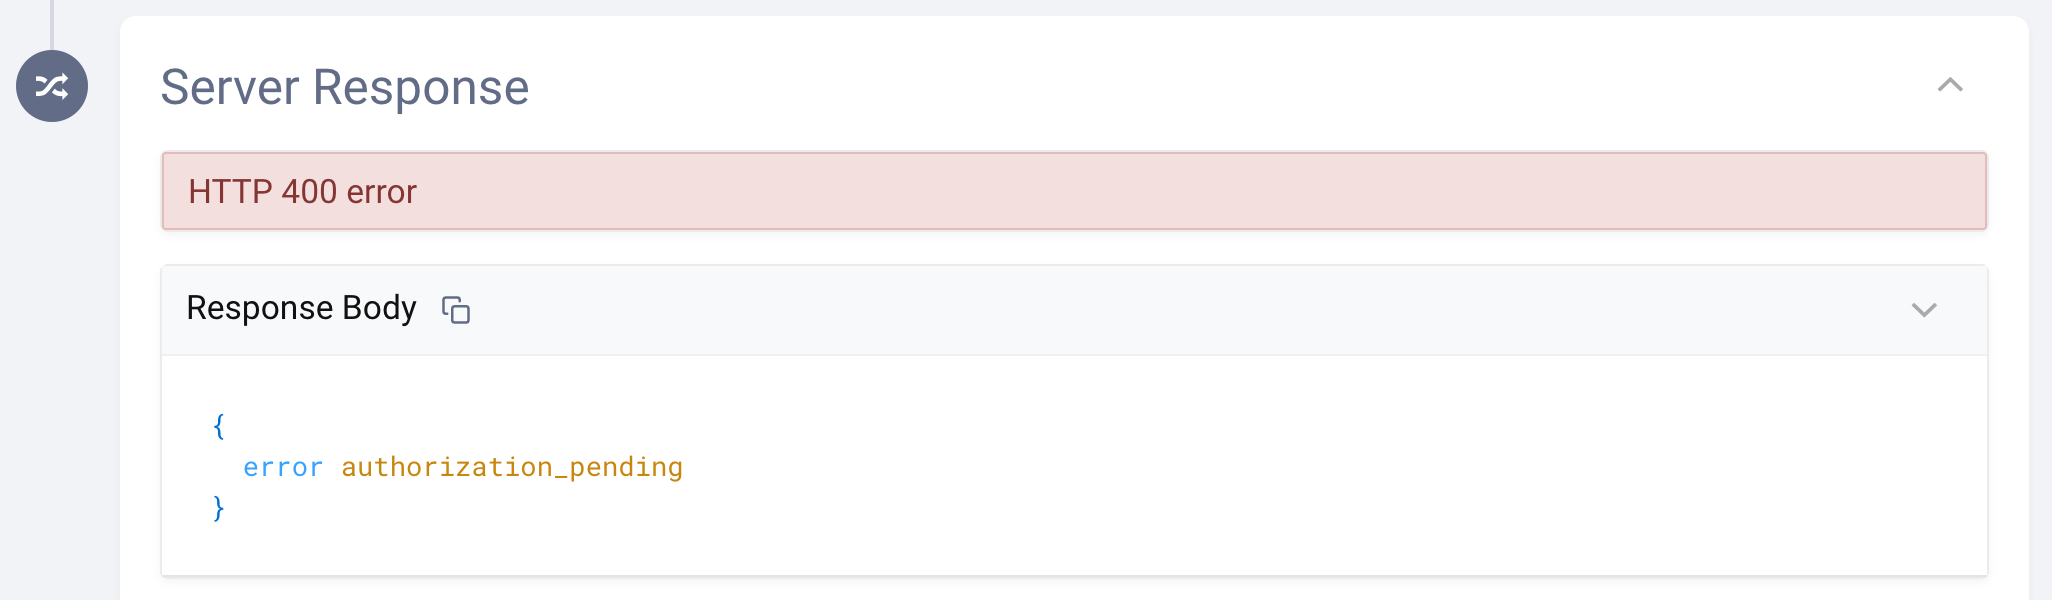
If authentication has not yet been completed out-of-band, the polling will result in a response showing that authorization is still pending.
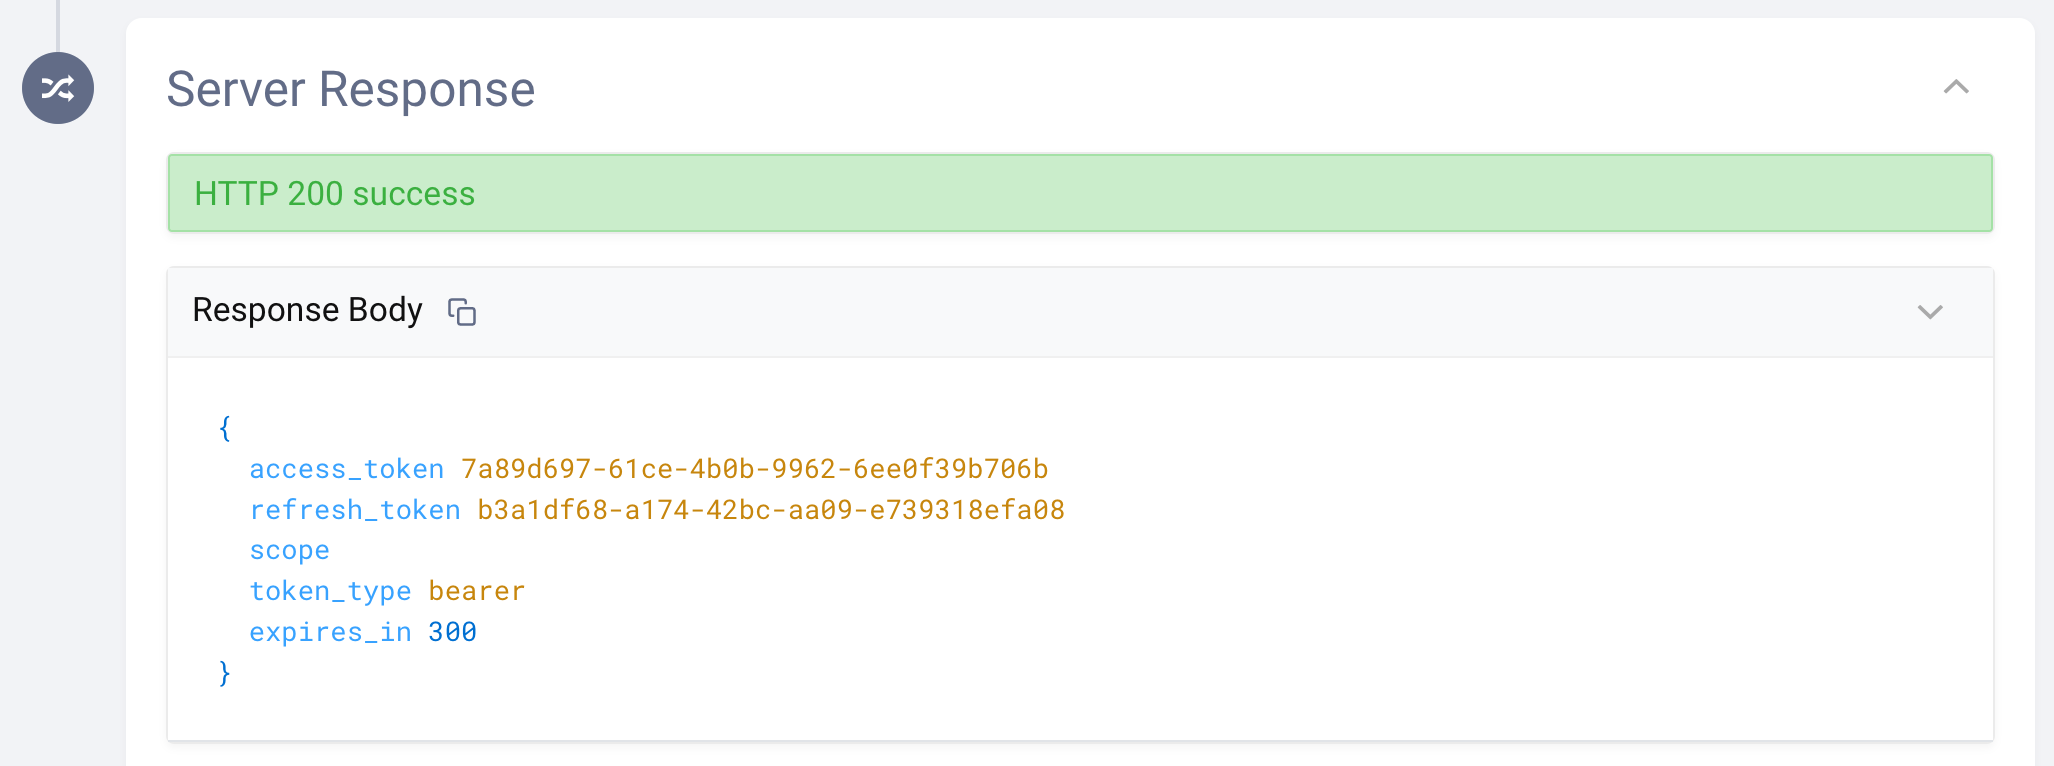
After a successful user authentication, the poll will respond with an access token and a refresh token.
This short recording demonstrates testing the Device Flow in OAuth Tools.
Conclusion
The Device Authorization Grant, or Device Flow, is very useful for handling authentication and authorization when it is difficult for the user to perform authentication using the device itself. The Device Flow takes the authentication out-of-band, allowing authentication to occur on a more convenient device or app for the end-user. The client application will then poll the authorization server for a successful authentication and proceed when a poll response provides an access and refresh token.
If you have questions on anything in this tutorial, don't hesitate to contact us.

Join our Newsletter
Get the latest on identity management, API Security and authentication straight to your inbox.

Start Free Trial
Try the Curity Identity Server for Free. Get up and running in 10 minutes.
Start Free Trial


