
Templatized Dynamic Client Registration
On this page
This tutorial shows step by step how to enable Dynamic Client Registration with Templatized clients in Curity. It is recommended to get an understanding on how DCR works by reading Dynamic Client Registration Explained and Using Dynamic Client Registration.
Pre-requisites
This tutorial builds on the configuration setup described in the steps First Configuration and Configure an Authenticator under the menu Getting Started. If you have not gone through those steps yet, you can visit the guides by clicking on the links.
You may run this tutorial on a custom setup also, but keep in mind that names and URLs may be different, as well as the capabilities configured in the profiles.
We will also need the client credentials client from the Client Credentials Tutorial
Overview
In order to be able to register a client using a client-template we need an Initial Access Token. This is a token obtained by requesting the scope dcr. Clients configured for dynamic client registration can obtain this scope.
This tutorial will use the Client Credentials flow to obtain the Initial Access Token. It is also possible to use a user interactive flow, where the user needs to be authenticated in order to register a new client.
Setup in Curity
Visit the Profiles screen and click the Token Service.
Enable Dynamic Client Registration
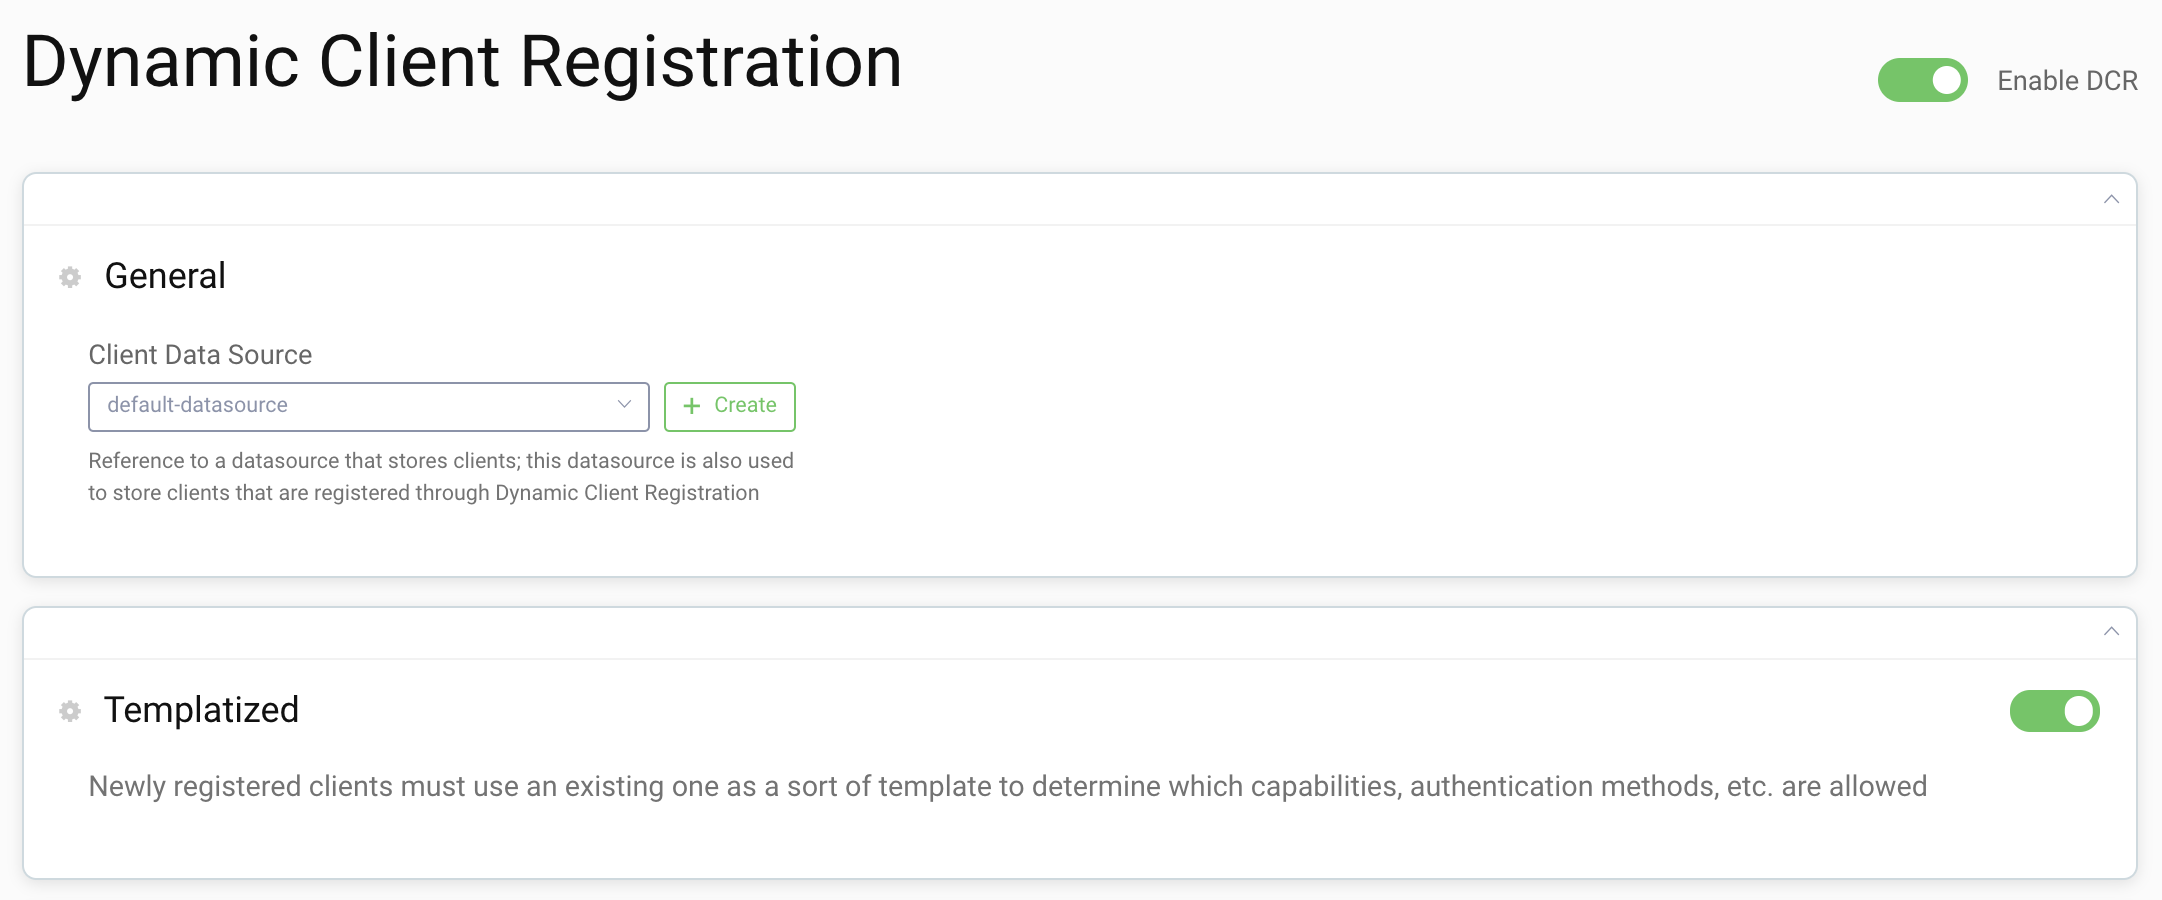
In the menu on the left, go to Dynamic Registration section to enable Templatized DCR.
Toggle on the following:
- Enable DCR
- Templatized
Select the token-datasource or default-datasource as the Client Data Source depending on what was setup in the initial wizard.
Create Client Template
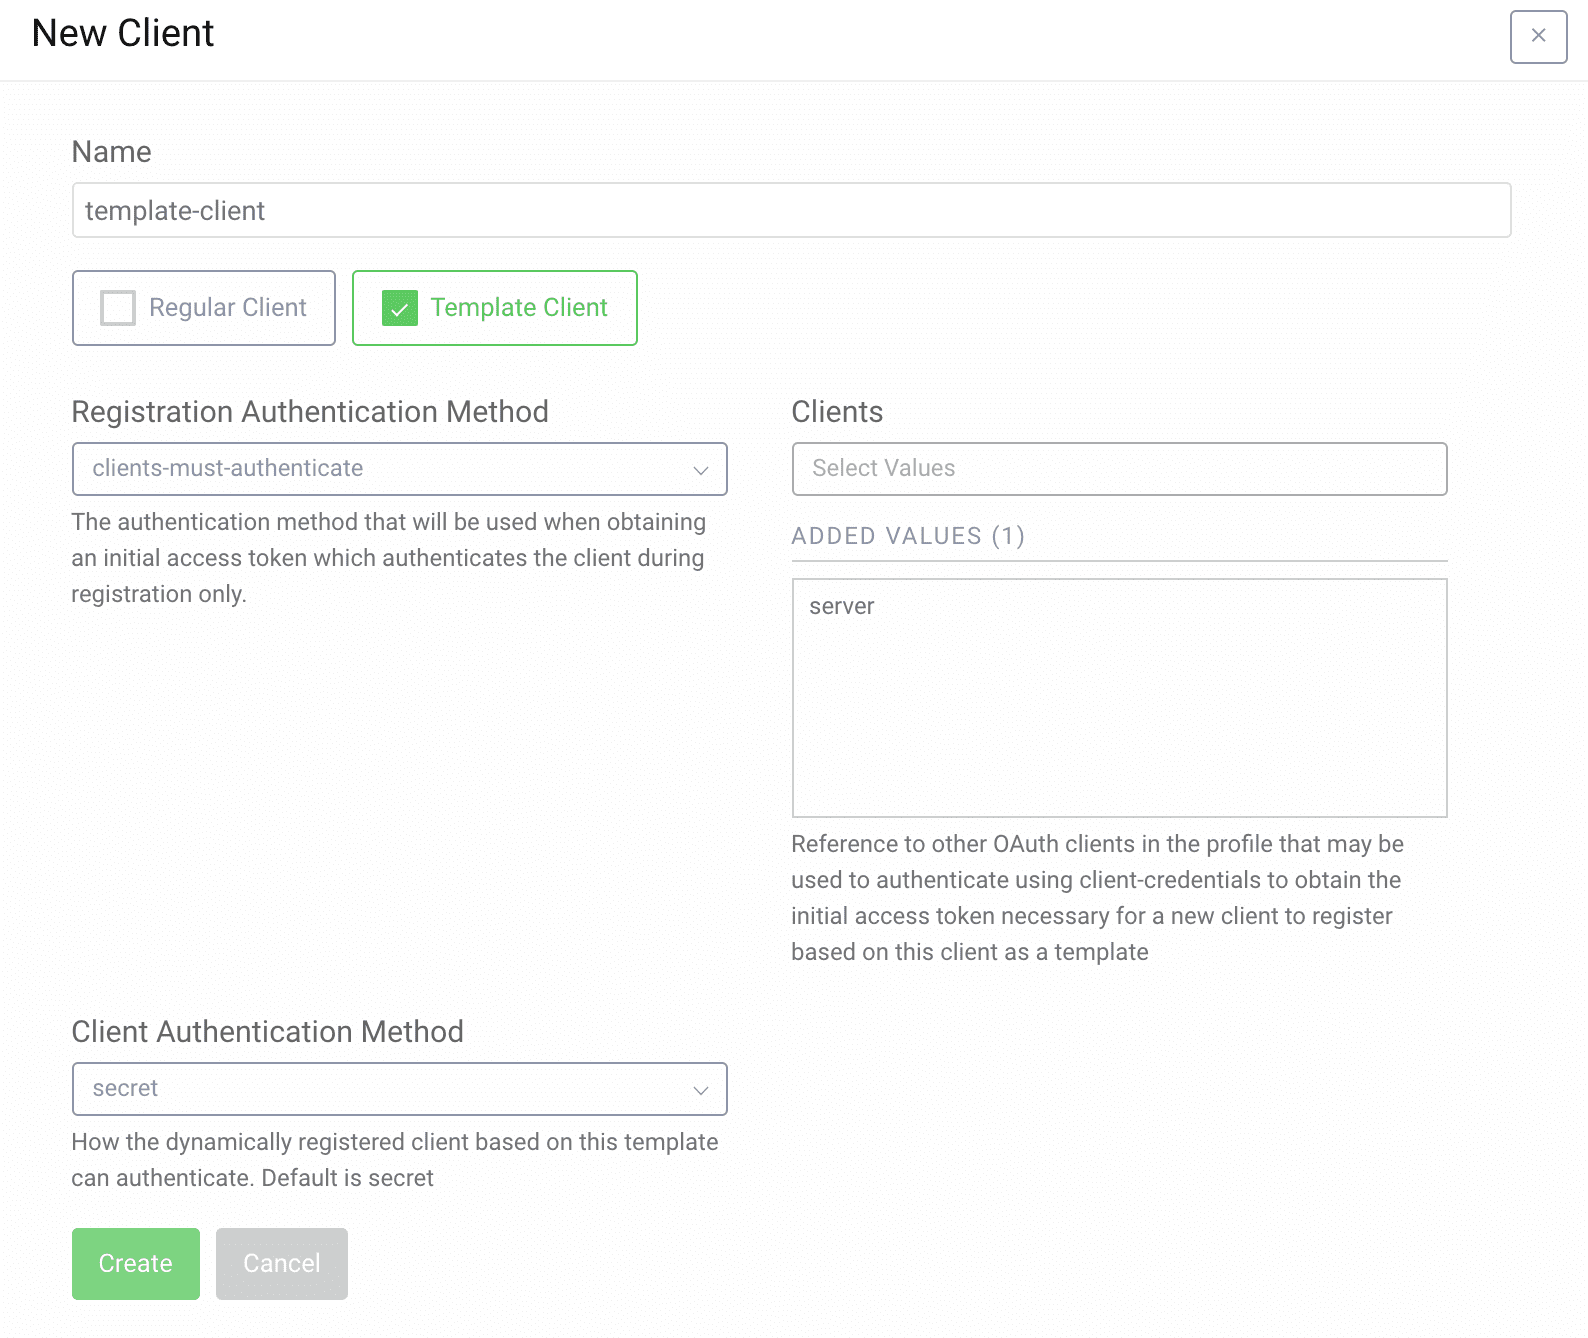
Click on the Clients menu to the right and click New Client
Name the client template-client and check the Template Client box.
Select Clients must authenticate as Registration Authentication Method.
Select the server client in the dropdown under Clients. This enables the server client to be used to obtain the dcr scope with an Initial Access Token.
Select secret as Client Authentication Method. New clients will receive a secret when registering for this template.
Click Create
Add Capabilities
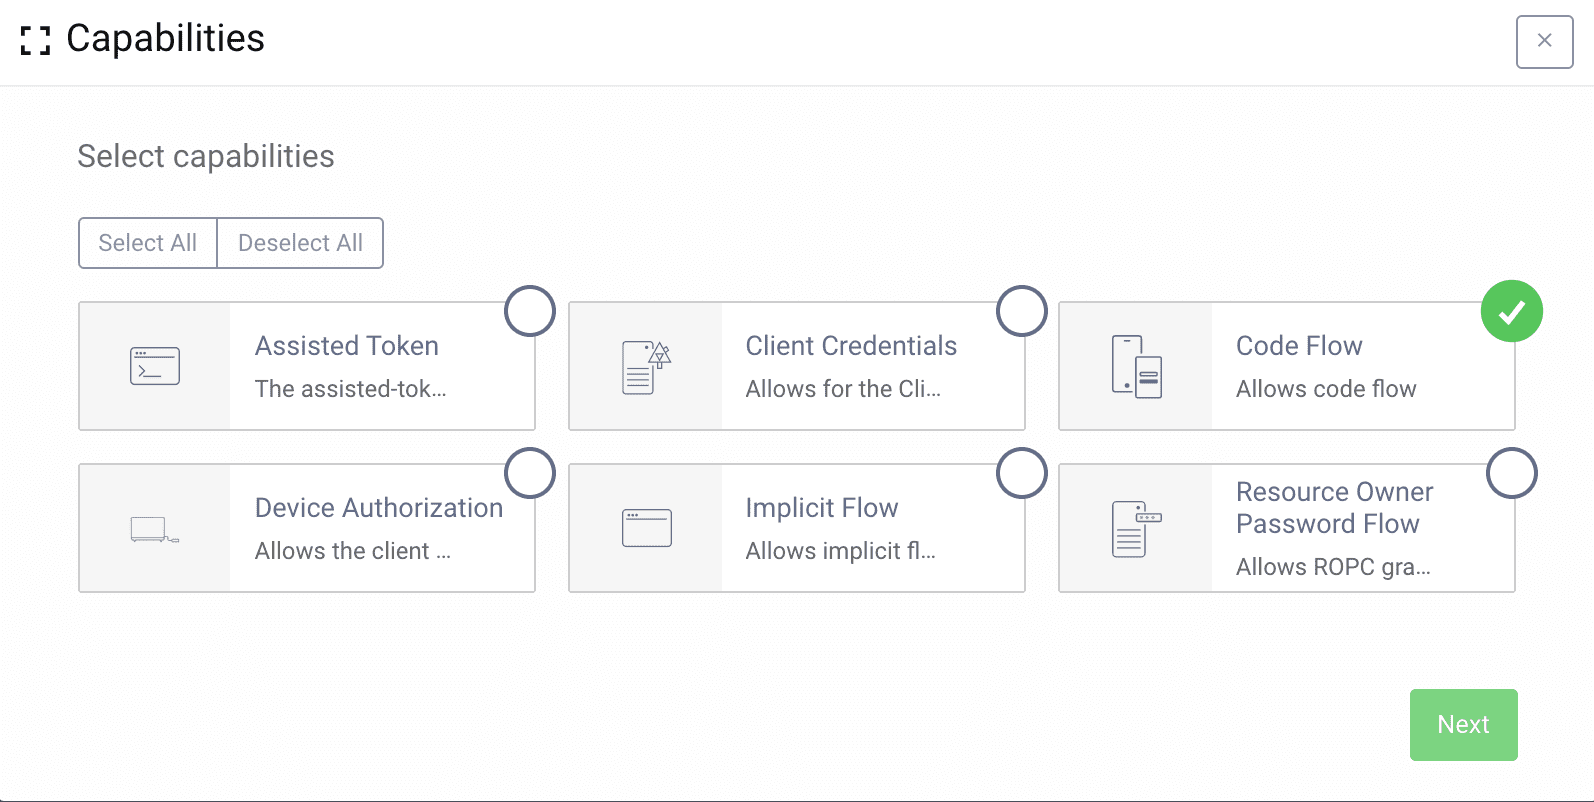
Scroll down to the Capabilities section and add the code flow capability.
Set Redirect URI
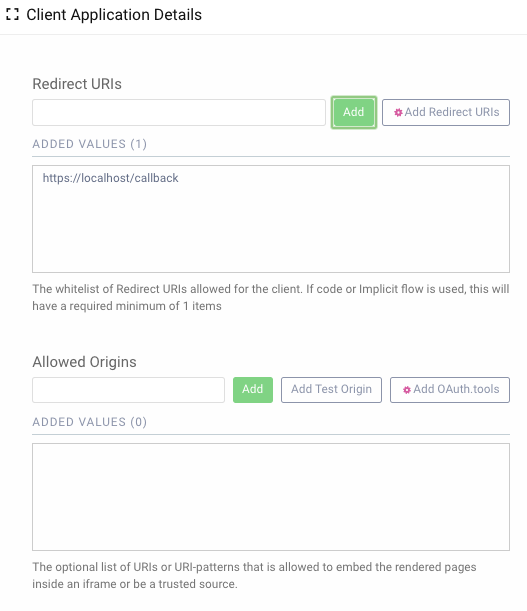
On the next screen add a redirect uri. Commonly templatized clients are used with mobile applications where the redirect uri would be something like myapp://callback. But for this tutorial use https://localhost/callback.
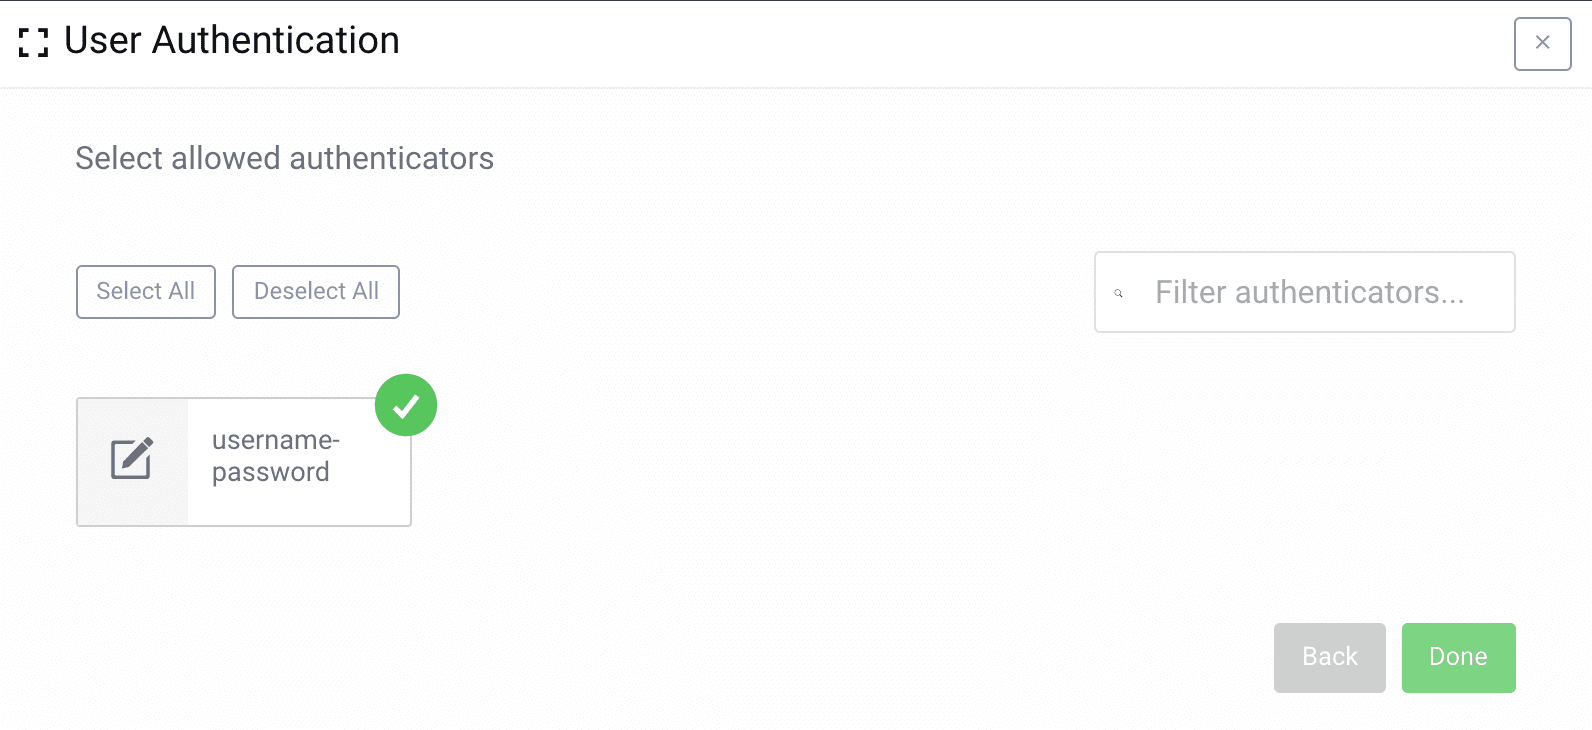
Select User Authentication Methods
For user authentication either select the authentication method you want, or skip to allow all.
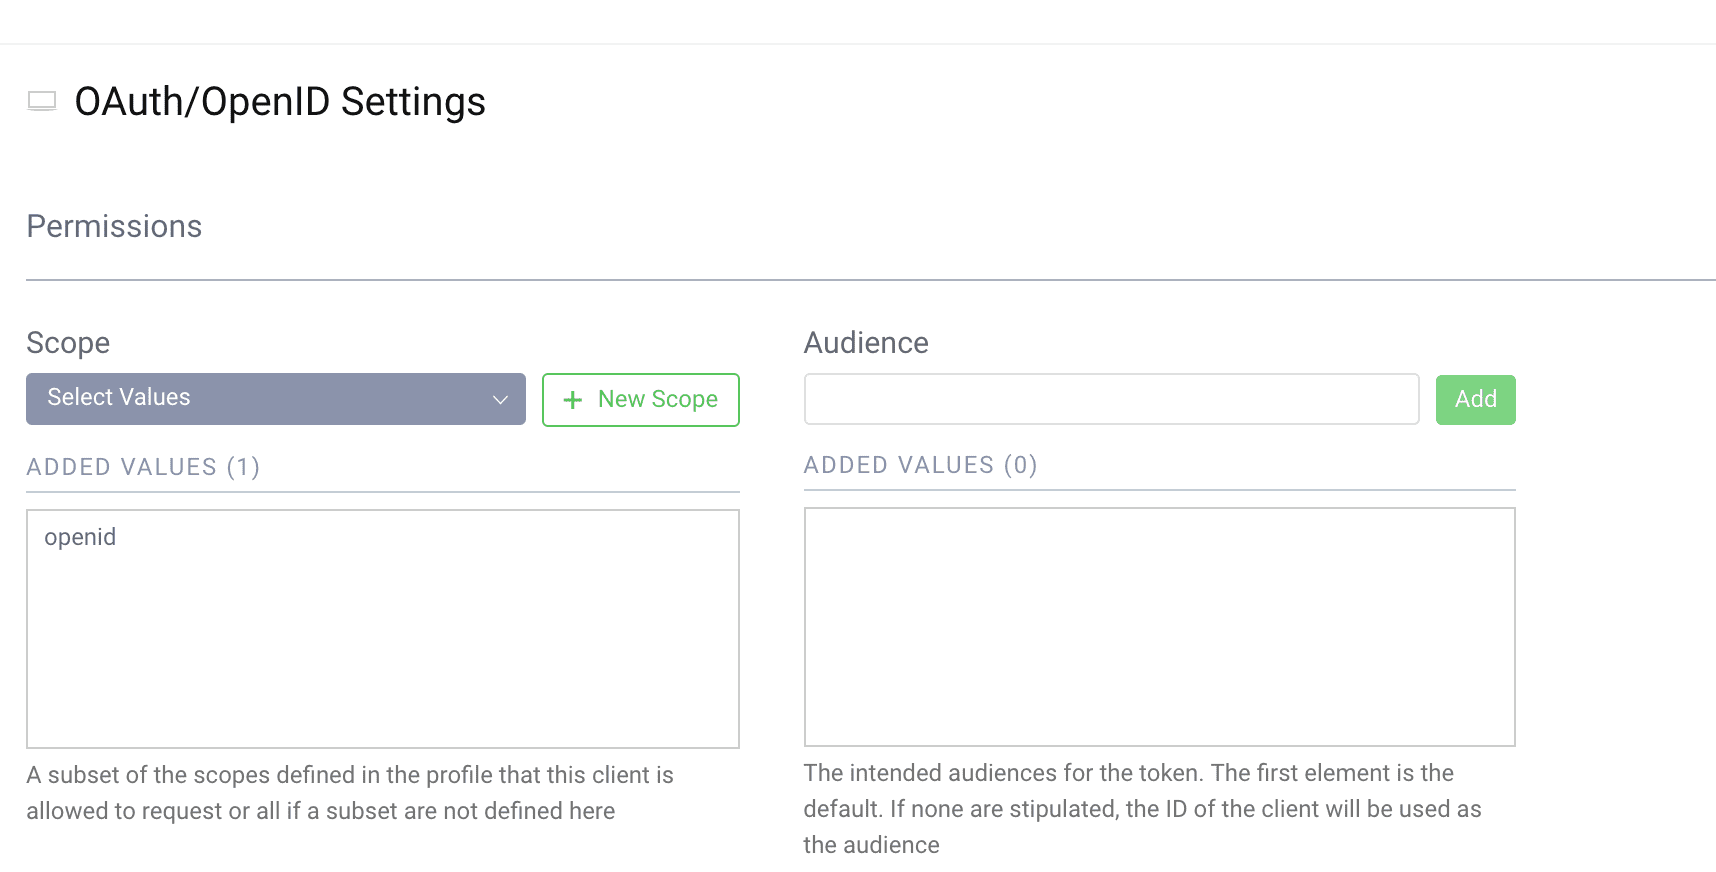
Add the openid scope
If the client should be able to do OpenID Connect flows, add the openid scope to the client. Scroll down to the Scopes section and select the openid scope.
Commit
Make sure to remember to commit the changes in the Changes -> Commit menu.
No secret
Note how the template itself doesn't have an authentication method such as secret. The template client cannot be used directly, but must be instantiated via DCR to be used.
Registering a new Client
Now that we have the template setup we can register a new client.
Before we do that, we must obtain an initial access token. To do that we will use the server client like before. The only scope we will request now is dcr. This scope is not visible in the configuration, but is added to that client when we selected it to be used for registration of the template.
Obtain initial access token
curl -X POST \https://localhost:8443/oauth/v2/oauth-token \-H 'Content-Type: application/x-www-form-urlencoded' \-d 'grant_type=client_credentials&client_id=server&client_secret=THE_SECRET&scope=dcr'
This will result in a response like this:
{"access_token": "25a3ee8e-451d-4d00-9ea4-4d8f258405bb","scope": "dcr","token_type": "bearer","expires_in": 300}
One time token
The Initial Access Token with the dcr scope can only be used once, if your request fails for some reason you need to request a new access token before trying again.
Register a Client
Now we can use the token from the previous request to register a new client.
We use the access token in the Authorization header to call the API, just like normal usage of an access token. In the body we provide the software_id parameter with the value template-client. This tells Curity to instantiate a client from the template with that name.
curl -X POST \https://localhost:8443/oauth/v2/oauth-dynamic-client-registration \-H 'Authorization: Bearer 25a3ee8e-451d-4d00-9ea4-4d8f258405bb' \-H 'Content-Type: application/json' \-d '{"software_id": "template-client"}'
The response will be a json document with the following content:
{"grant_types": ["authorization_code","refresh_token"],"subject_type": "public","default_acr_values": ["urn:se:curity:authentication:html-form:username-password"],"redirect_uris": ["https://localhost/callback"],"client_id": "d3891215-8e7c-4c5c-b102-c2ea1bea33d5","token_endpoint_auth_method": "client_secret_basic","software_id": "template-client","client_secret_expires_at": 0,"scope": "openid","token_endpoint_auth_methods": ["client_secret_basic","client_secret_post"],"client_secret": "0on59r6QSrdSJxj3fXRTgMEUpOgJ0ZAPBc1bOeHmCxQ","client_id_issued_at": 1560280923,"client_name": "template-client","response_types": ["code","id_token"],"refresh_token_ttl": 3600,"id_token_signed_response_alg": "RS256"}
This is all the necessary metadata the client need in order to start making requests.
The important fields are the client_id and client_secret.
Run the code flow with the new client
If you need a refresh of the code flow see the Code Flow Overview or the Code Flow Tutorial.
Call the authorize endpoint. Open a browser and enter the following URL:
https://localhost:8443/oauth/v2/oauth-authorize?response_type=code&client_id=d3891215-8e7c-4c5c-b102-c2ea1bea33d5&scope=openid&redirect_uri=https://localhost/callback
With the resulting code call the token endpoint:
curl -X POST \https://localhost:8443/oauth/v2/oauth-token \-H 'Content-Type: application/x-www-form-urlencoded' \-d 'grant_type=authorization_code&client_id=d3891215-8e7c-4c5c-b102-c2ea1bea33d5&client_secret=0on59r6QSrdSJxj3fXRTgMEUpOgJ0ZAPBc1bOeHmCxQ&code=gPsQ97Al9K5vsVdlc7JRK2DbbwDKVNR2&redirect_uri=https%3A%2F%2Flocalhost%2Fcallback'
Conclusion
Using templatized clients it's easy to instantiate new clients. Any change done in the template will immediately be reflected for all instances of that client. Try removing the openid scope and make a new request with the client. See how it now will fail to obtain a token.

Join our Newsletter
Get the latest on identity management, API Security and authentication straight to your inbox.

Start Free Trial
Try the Curity Identity Server for Free. Get up and running in 10 minutes.
Start Free TrialWas this helpful?


