
Implementing HAAPI Attestation Fallback
On this page
Intro
When using the hypermedia authentication API (HAAPI), the mobile client proves its identity to the Curity Identity Server before allowing authentication to begin. In production environments this is done using mobile attestation techniques, to obtain a certificate that asserts the app's identity, and includes its package name and signing certificate. After verification, the Curity Identity Server issues an authentication access token (AAT) with a haapi scope, which is then used for every API request during the authentication process.
To use mobile attestation, hardware support is required, which may not be present in certain mobile devices, such as Android devices originally released before Android 8.0. The Mobile Attestation Fallback article explains the design for secure alternative methods to prove the client identity. This tutorial shows how to implement this pattern using the Curity Identity Server.
Fallback Simulation
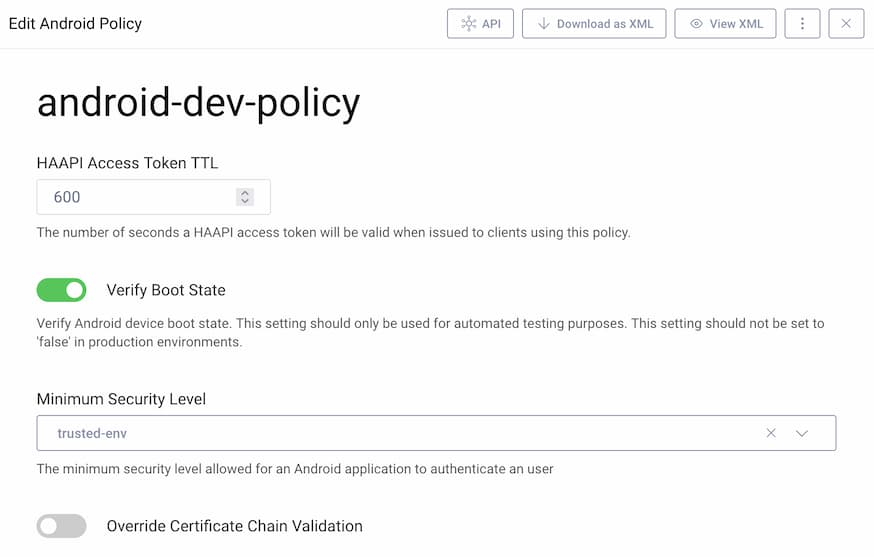
To reproduce failed signing key-based attestation on Android you can use an emulator and configure the Curity Identity Server with production-level attestation. This can be done from the facilities menu of the Admin UI. (Facilities → Client Attestation → Android Policies)
Emulators lack the hardware support needed for production attestation, so this will lead to the following error:

Fallback Configuration
This section explains how to configure the Curity Identity Server to support attestation fallback when needed. Instances of the mobile app running on non-compliant devices will then prove their identity based on an alternative client credential, resulting in the creation of a dynamic client. Start with base XML configuration such as that from the Android and iOS HAAPI code examples.
Add Client Authentication
Next, configure client authentication. This will provide a client credential that is used by non-compliant devices, when they fall back to dynamic client registration. Start with a simple fixed string secret.
Enable DCR
Next, navigate to Profiles → Token Service → Dynamic Registration and use the wizard to enable the Templatized option.
Add a Template Client
Then add a template client called haapi-template-client, with the Code Flow and HAAPI capabilities, or import the following XML. The OAuth settings such as scopes must match those of the main HAAPI client. Also ensure that the allow-without-attestation value is set to true.
<config xmlns="http://tail-f.com/ns/config/1.0"><profiles xmlns="https://curity.se/ns/conf/base"><profile><id>token-service</id><type xmlns:as="https://curity.se/ns/conf/profile/oauth">as:oauth-service</type><settings><authorization-server xmlns="https://curity.se/ns/conf/profile/oauth"><client-store><config-backed><client><id>haapi-template-client</id><client-name>haapi-template-client</client-name><redirect-uris>app://haapi</redirect-uris><proof-key><require-proof-key>false</require-proof-key></proof-key><refresh-token-ttl>3600</refresh-token-ttl><audience>haapi-client</audience><scope>address</scope><scope>email</scope><scope>openid</scope><scope>phone</scope><scope>profile</scope><user-authentication></user-authentication><capabilities><code></code><haapi><allow-without-attestation>true</allow-without-attestation></haapi></capabilities><dynamic-client-registration-template><secret/><authenticate-client-by>haapi-client</authenticate-client-by></dynamic-client-registration-template><validate-port-on-loopback-interfaces>true</validate-port-on-loopback-interfaces></client></config-backed></client-store></authorization-server></settings></profile></profiles></config>
Remember to Commit any configuration changes.
Mobile Code Updates
Configure the HAAPI SDK in your mobile app to enable dynamic client registration (DCR) attestation fallback. Do so by adding the setDcr and setClientAuthentiationMethod methods on the configuration builder. The first of these provides the template client's ID and the DCR endpoint of the Curity Identity Server.
class DemoApplication: Application(), HaapiUIWidgetApplication {private val baseUri = URI("https://login.example.com")override val widgetConfiguration: WidgetConfiguration =WidgetConfiguration.Builder(clientId = "haapi-client",baseUri = baseUri,tokenEndpointUri = baseUri.resolve("/oauth/v2/oauth-token"),authorizationEndpointUri = baseUri.resolve("/oauth/v2/oauth-authorize"),appRedirect = "app://haapi").setPresentationMode(PresentationMode.MODAL).setShouldAutoHandleFlowErrorFeedback(true).setAutoPollingDuration(Duration.ofSeconds(10)).setOauthAuthorizationParamsProvider {WidgetConfiguration.OAuthAuthorizationParams(scope = listOf("openid", "profile"))}.setDcr(WidgetConfiguration.Dcr("haapi-template-client",baseUri.resolve("/token-service/oauth-registration"),this)).setClientAuthentiationMethod(WidgetConfiguration.ClientAuthenticationMethod.Secret("Password1")).build()}
SDK Behavior
The first time this code runs, the SDK will try to perform client attestation in the most secure way. If this is not possible then the SDK will fall back to registering a dynamic client, using the credential provided. This will result in a dynamic client ID and client secret that the SDK persists in mobile storage. This dynamic client ID and secret will then be used to get the HAAPI access token.
On all subsequent authentication attempts, the application will continue to create objects in the above manner, and does not need to be aware of the dynamic client ID being used. The SDK will detect that there is already a dynamic client ID and secret stored on this device, and will again use them to get the HAAPI access token. In both cases the HAAPI flow will then proceed in the normal way, using the access token to protect each hypermedia API request.
Strong Credentials
Once you understand the process for implementing DCR fallback, you could harden security with client credentials based on public key infrastructure (PKI). Use one of the options described in the following sections. Curity may provide other SDK options in the future. We recommend to use distinct client keys per device where possible, for the highest security. One way to enable this is to use a Mobile Device Management (MDM) system.
Using Client Certificates
Attesting the client identity via a client certificate requires the use of transport level security (TLS). The process for sending client certificates from Android code is to update the client authentication method to represent a client certificate, by supplying the following properties:
| Field | Description |
|---|---|
| deviceKeyStore | A keystore containing a client certificate sent in a Mutual TLS connection to the Curity Identity Server. |
| deviceKeyStorePassword | The password needed to access the client certificate's key, if applicable. |
| serverTrustStore | A trust store referencing the root authority of the Curity Identity Server's SSL certificate. |
Platform specific technology would then be used, to load keystores and supply them to the SDK. The server trust store could be a file deployed with the app, whereas the client certificate could be a separate keystore that has been populated by a third party system.
WidgetConfiguration.ClientAuthenticationMethod.Mtls(clientKeyStore = deviceKeyStore,clientKeyStorePassword = deviceKeyStorePassword,serverTrustStore = serverTrustStore)
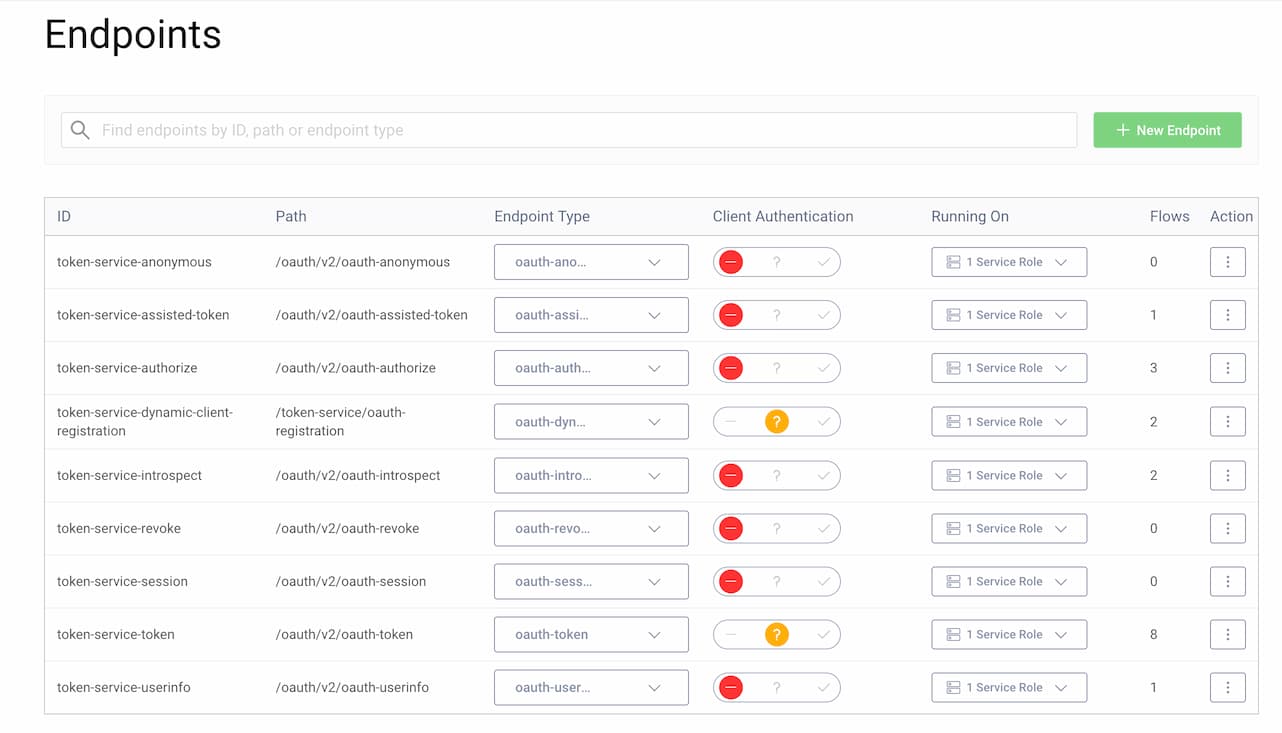
You first need to update the Curity Identity Server to allow Mutual TLS on the token endpoint and the registration endpoint. Go to Profiles → Token Service → Endpoints, and set Client Authentication to Allow (the orange question mark) for these endpoints.
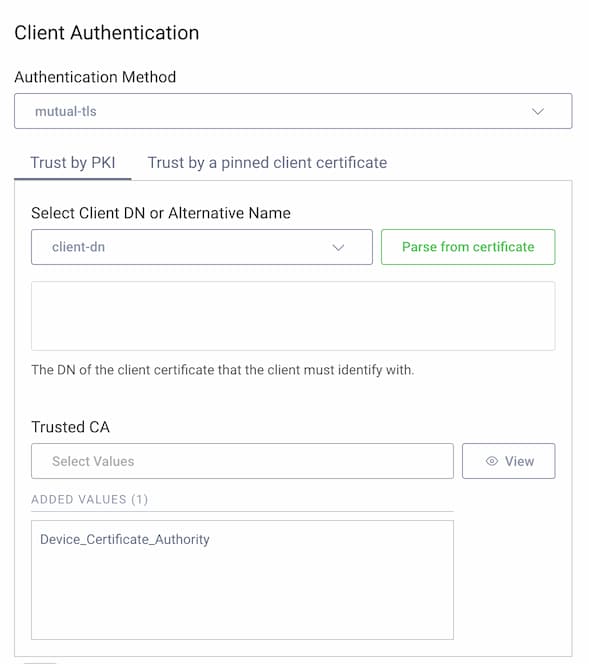
Then, set the HAAPI client's authentication method to Mutual TLS, and configure it to trust a root certificate authority from the issuing third party. Go to Profiles → Token Service → Clients → haapi-client and scroll down to Client Authentication in the General tab:
Using Client Assertions
Alternatively, you can use message level security by sending a JWT client assertion from each device. This is achieved by sending a JWT client assertion from each device. This requires similar changes to the client authentication method, to supply the following values:
| Field | Description |
|---|---|
| deviceKeyStore | A keystore containing a client key with which to sign a client assertion. |
| deviceKeyStorePassword | The password needed to access the client key, if applicable. |
| serverTrustStore | A trust store referencing the root authority of the Curity Identity Server's SSL certificate, if applicable. |
You would again load the keystore to supply the key to the SDK, which then does the work of producing the JWT client assertion and sending it to the Curity Identity Server. The SDK supports various asymmetric signature algorithms, and the mainstream RS256 option is used here.
WidgetConfiguration.ClientAuthenticationMethod.SignedJwt.Asymmetric(clientKeyStore = deviceKeyStore,clientKeyStorePassword = deviceKeyStorePassword,alias = "rsa",algorithmIdentifier = WidgetConfiguration.ClientAuthenticationMethod.SignedJwt.Asymmetric.AlgorithmIdentifier.RS256)
Ensure that the Curity Identity Server is configured to allow use of JWT assertions for client authentication, and that the asymmetric algorithm specified in the mobile code is enabled:

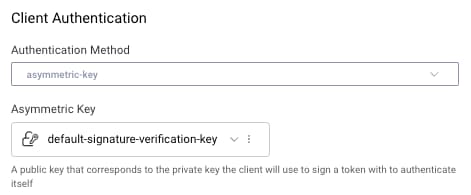
Next, update the app's client configuration in the Curity Identity Server to use an asymmetric-key client authentication method. A public key must be configured, that is used to verify received client assertions. This must correspond to the full private key that is installed on devices, and which signs client assertions sent by the mobile app:
Crypto on Development Computers
Running an end-to-end Android and Curity Identity Server setup is a little tricky for developers. The mobile deployments repo therefore has some Crypto Resources. The README file explains how to use OpenSSL to issue keys and certificates for development. Public keys can then be configured in the Curity Identity Server. Private keys can be loaded from keystores into the code example, then used as the basis for Mutual TLS or Client Assertion credentials.
Multi-User Behavior
Although mobile apps reference DCR related details when creating HAAPI objects, the SDK always tries to use the most secure attestation, by verifying the app's production certificate details. This ensures that the majority of users will continue to use the highest security. Only when this fails does the SDK fall back to using the configured DCR details. The small percentage of users with non-compliant devices will then use HAAPI based logins via DCR fallback, but with the same user experience.
Client Assurance Level
Once authentication completes, a client assurance level (cal) authentication attribute is available, to represent the strength with which the client app's identity was proven. This is illustrated below using a Debug Authentication Action.
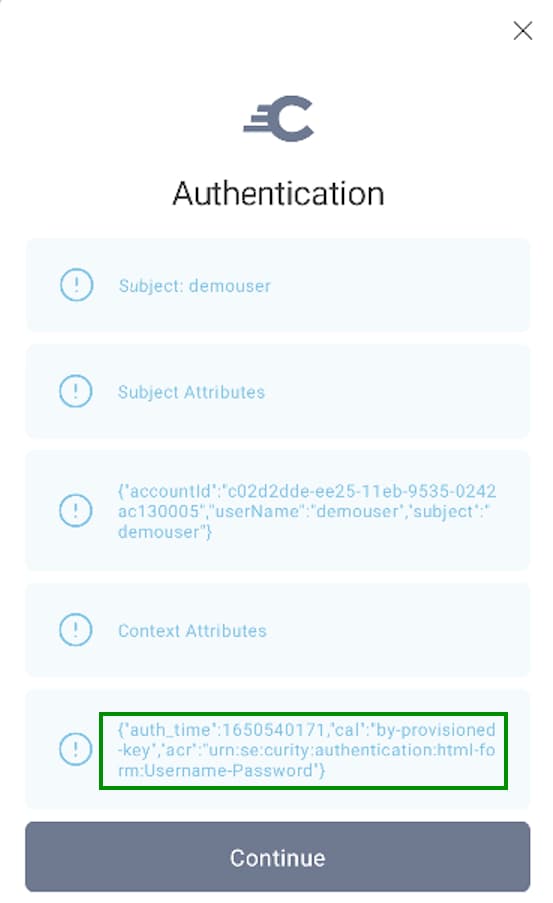
The possible values issued by the Curity Identity Server are summarized in the following table:
| Client Assurance Level | Description |
|---|---|
| by-policy | The user retrieved a HAAPI access token via signing key attestation, with the properties configured in the Curity Identity Server. |
| by-provisioned-key | The user retrieved a HAAPI access token with credentials created via a client certificate or asymmmetric key. |
| none | The user retrieved a HAAPI access token via credentials created with a client secret. |
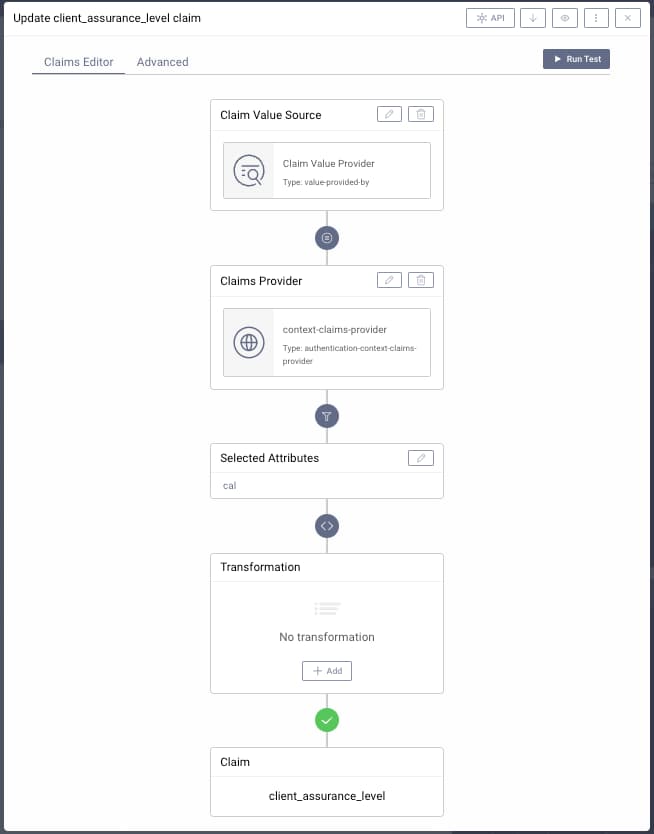
If required, a claim can be created to represent the assurance level, and issue it to tokens. To do so, first navigate to Profiles → Token Service → Scopes → Claims Providers → and create an authentication context claims provider if required. Then use the token designer window to add the scope to access tokens or ID tokens issued to the app.
Conclusion
This tutorial showed how to update code in a HAAPI-secured mobile app, to support DCR fallback. This ensures that non-compliant devices can be identified in a secure way before authentication begins. For the most secure DCR fallback, it is recommended to use strong credentials, with distinct client keys per device if possible.

Join our Newsletter
Get the latest on identity management, API Security and authentication straight to your inbox.

Start Free Trial
Try the Curity Identity Server for Free. Get up and running in 10 minutes.
Start Free TrialWas this helpful?