
Create a Token Handler
On this page
The Token Handler Design Overview explains how to follow OAuth best practices for browser-based apps while also ensuring the best all-round architecture for your SPAs. You implement the token handler pattern by deploying components to the API side of the architecture:

Curity provides a tested and supported token handler implementation available for purchase. It consists of an OAuth Agent and an OAuth Proxy. You plug them in and do not need to write any code to deal with cookie mechanics:
- Curity's security experts develop and maintain your web cookie security.
- The solution works with any OAuth authorization server.
- You get design guidance and professional services support.
- SPA developers can follow a code example to upgrade their SPAs to cookie security.
Standards-based Solution
The token handler is a Backend for Frontend (BFF) that can be used with any OAuth authorization server. Your SPA integrates with token handler endpoints using lightweight Ajax requests.
If you are new to the token handler pattern, start with the Getting Started Tutorials to gain a high level understanding. You may also want to run the SPA and Token Handler Code Example on your computer to see a working solution in action. This tutorial takes a detailed look at the configuration steps.
Design Token Handler URLs
Since the token handler is a backend for frontend, you must deploy it in the same site as your SPA, so that your SPAs can call APIs without the browser dropping cookies due to third-party cookie restrictions. For the purposes of this tutorial we use the following example URLs:
| Component | Base URL |
|---|---|
| SPA Web Origin | https://www.product.example |
| Token Handler | https://bff.product.example |
| Authorization Server | https://login.example.com |
Other options are supported and we say more about deployment at the end of this tutorial. First though, we explain configuration settings and show you how to get up and running.
Base Setup
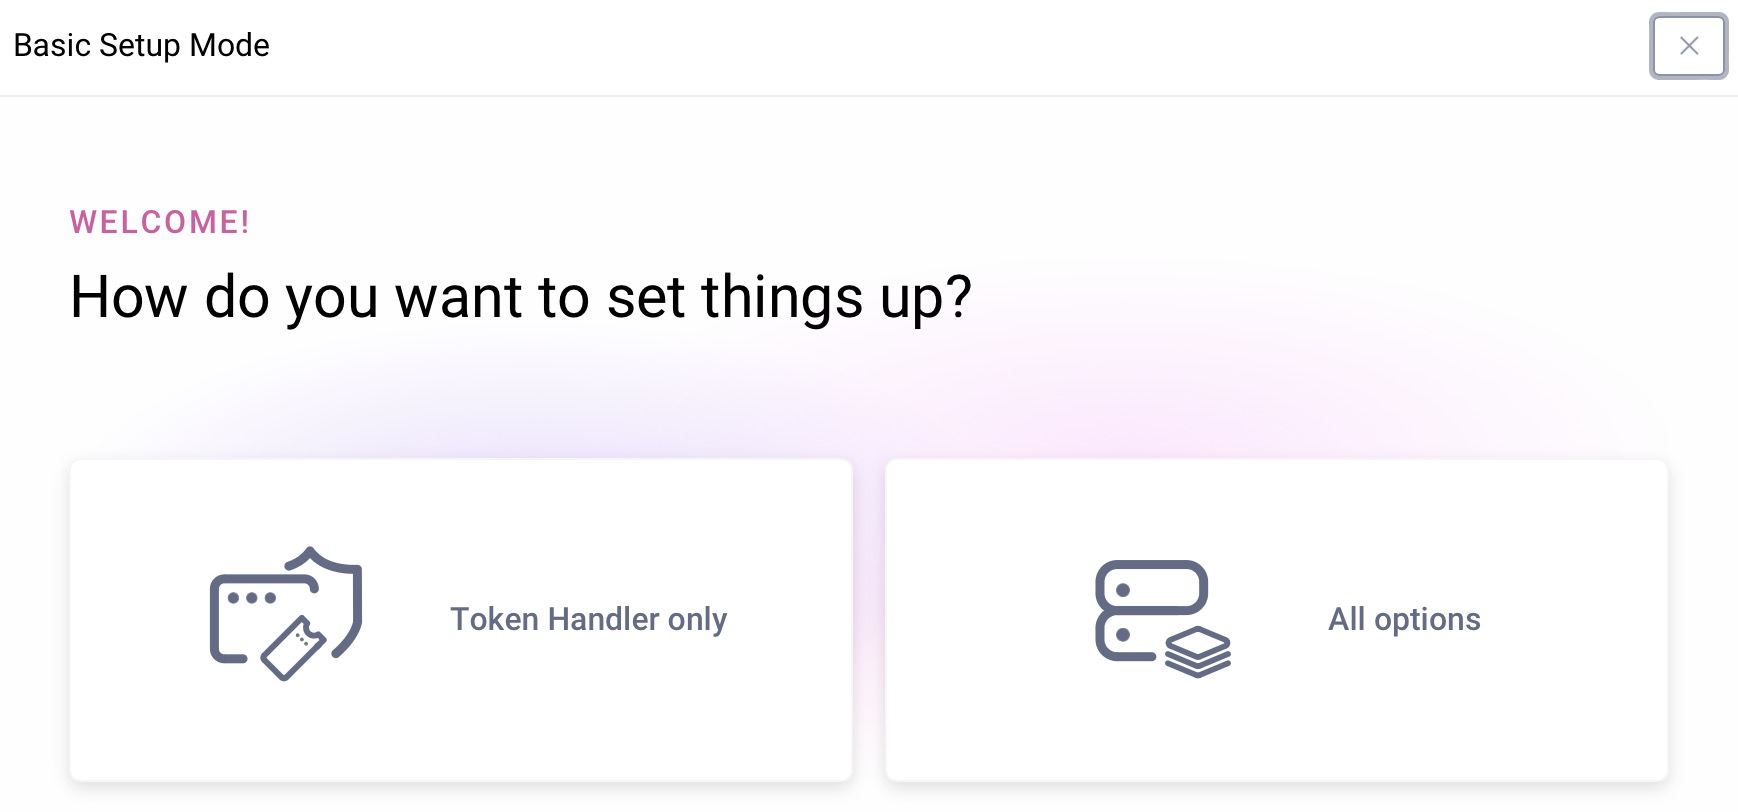
First, ensure that you have a license with support for the token handler feature. You can download a trial license from the Curity Developer Portal. If required, follow the Getting Started Guides and run the initial setup wizard. Select the Token Handler only option if you want to run the standalone token handler, or All options if you want to run the full authorization server role:
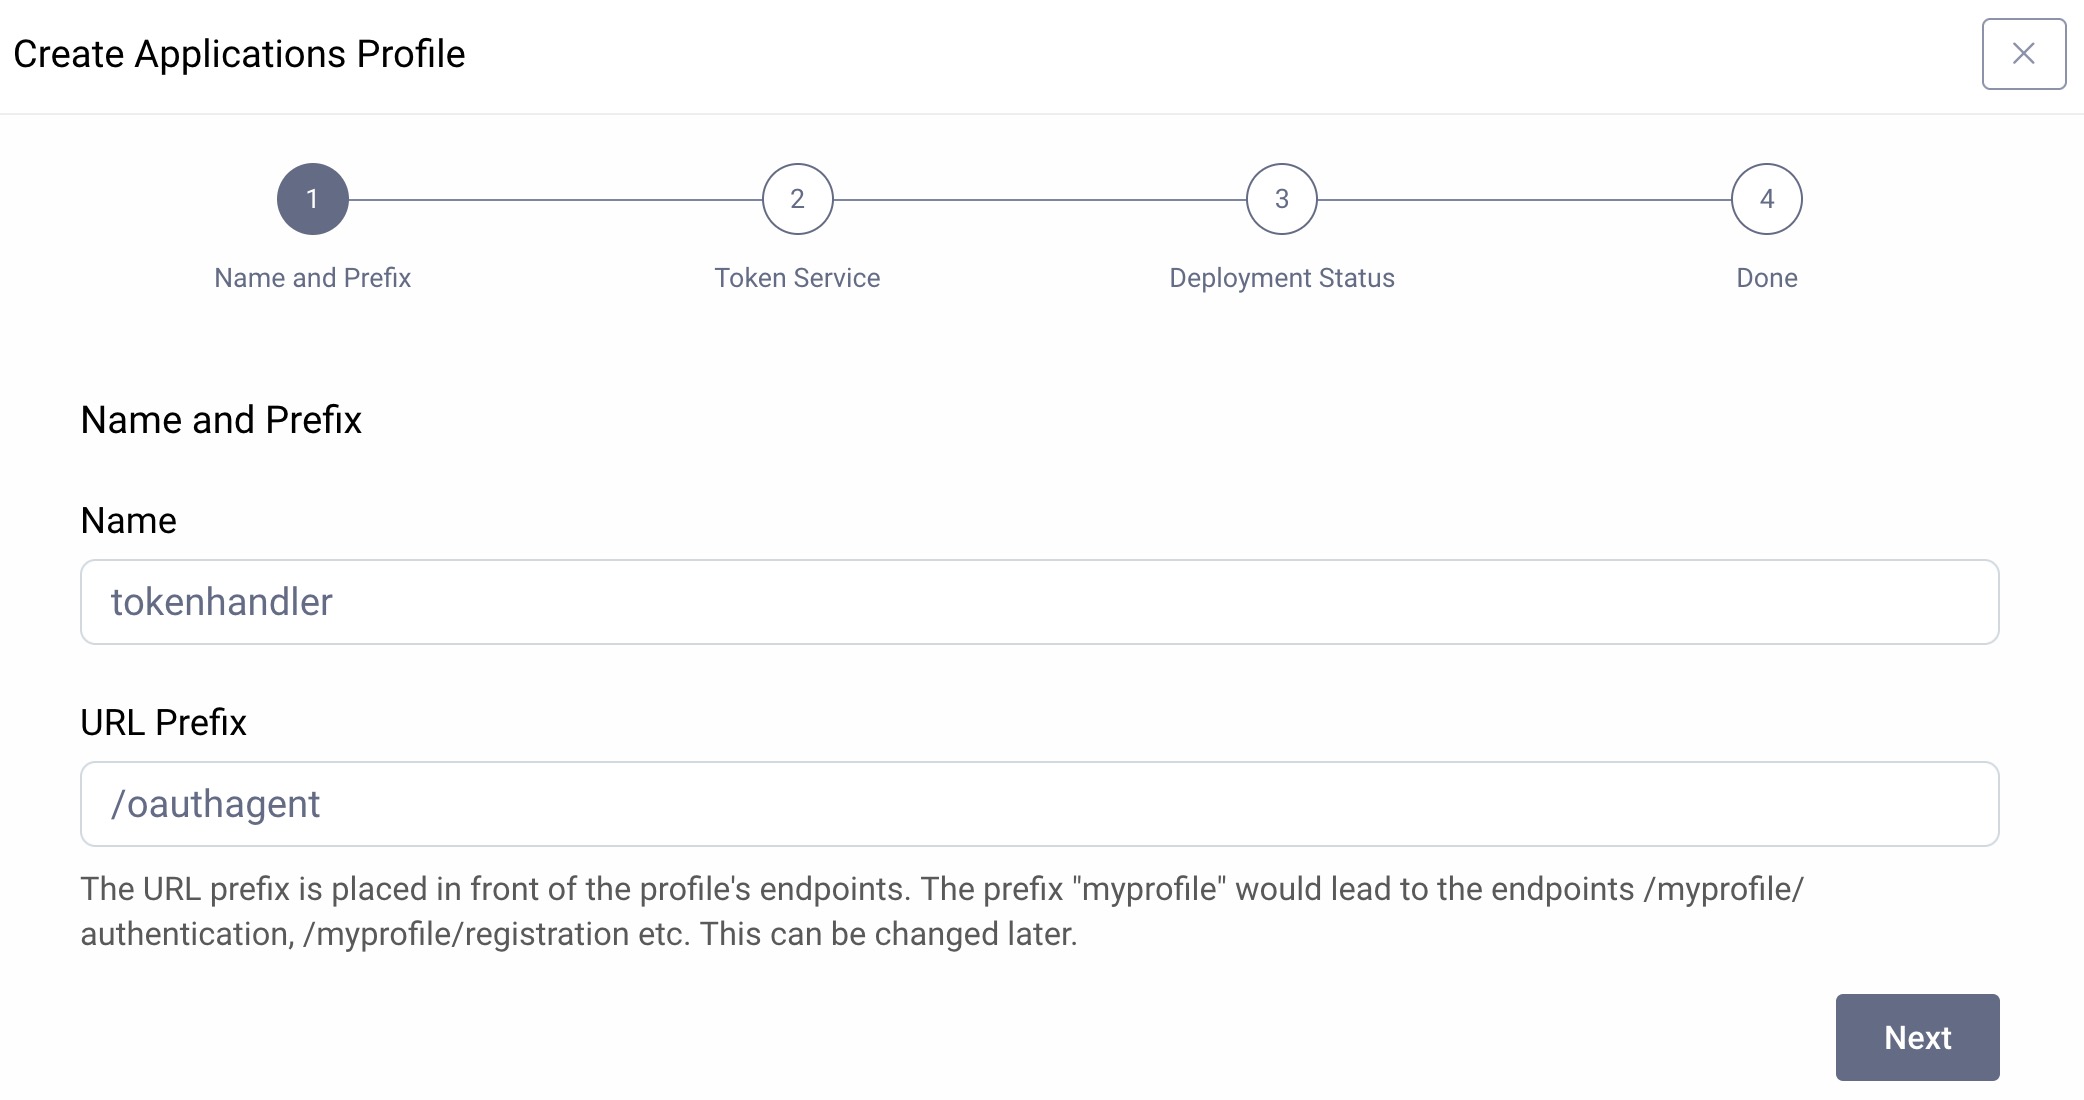
If you already use the Curity Identity Server as your authorization server, create an Applications Profile instead. Give it a name such as tokenhandler and a base path such as /oauthagent.
In either case, you can switch to Expert mode and change the applications profile base URL if required:

Create a Token Handler Application
Next, create a token handler application for your SPA. The following screenshot shows a token handler application called example. The OAuth agent for this SPA runs at a path of /oauthagent/example.
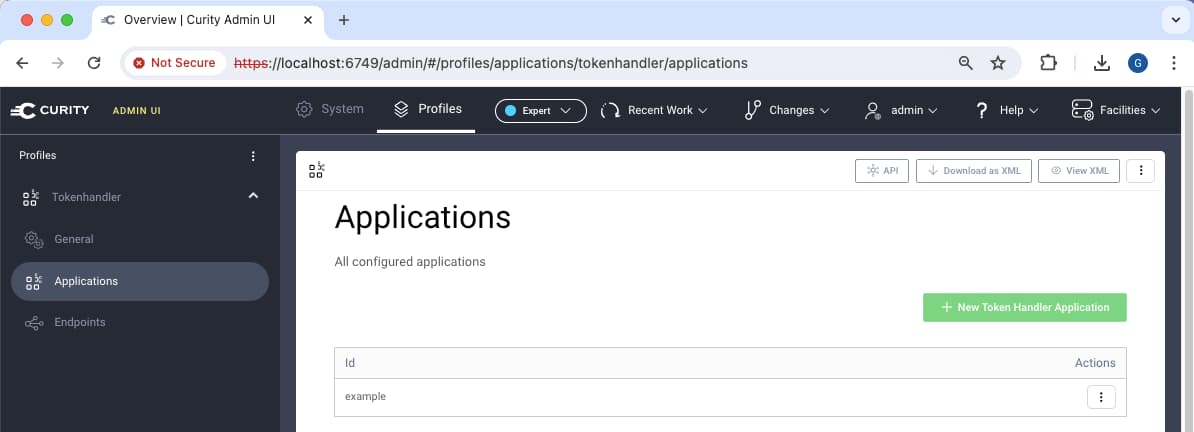
Once the token handler application is created, click on it to configure its settings for the OAuth Agent and OAuth Proxy.
Configure the OAuth Agent
In the left pane of the admin UI you configure the OAuth Agent. You do this differently depending whether you are using the Curity Identity Server or an external authorization server.
External Authorization Server
If you are using OAuth 2.0 and OpenID Connect with an external authorization server, select the external option and populate settings:
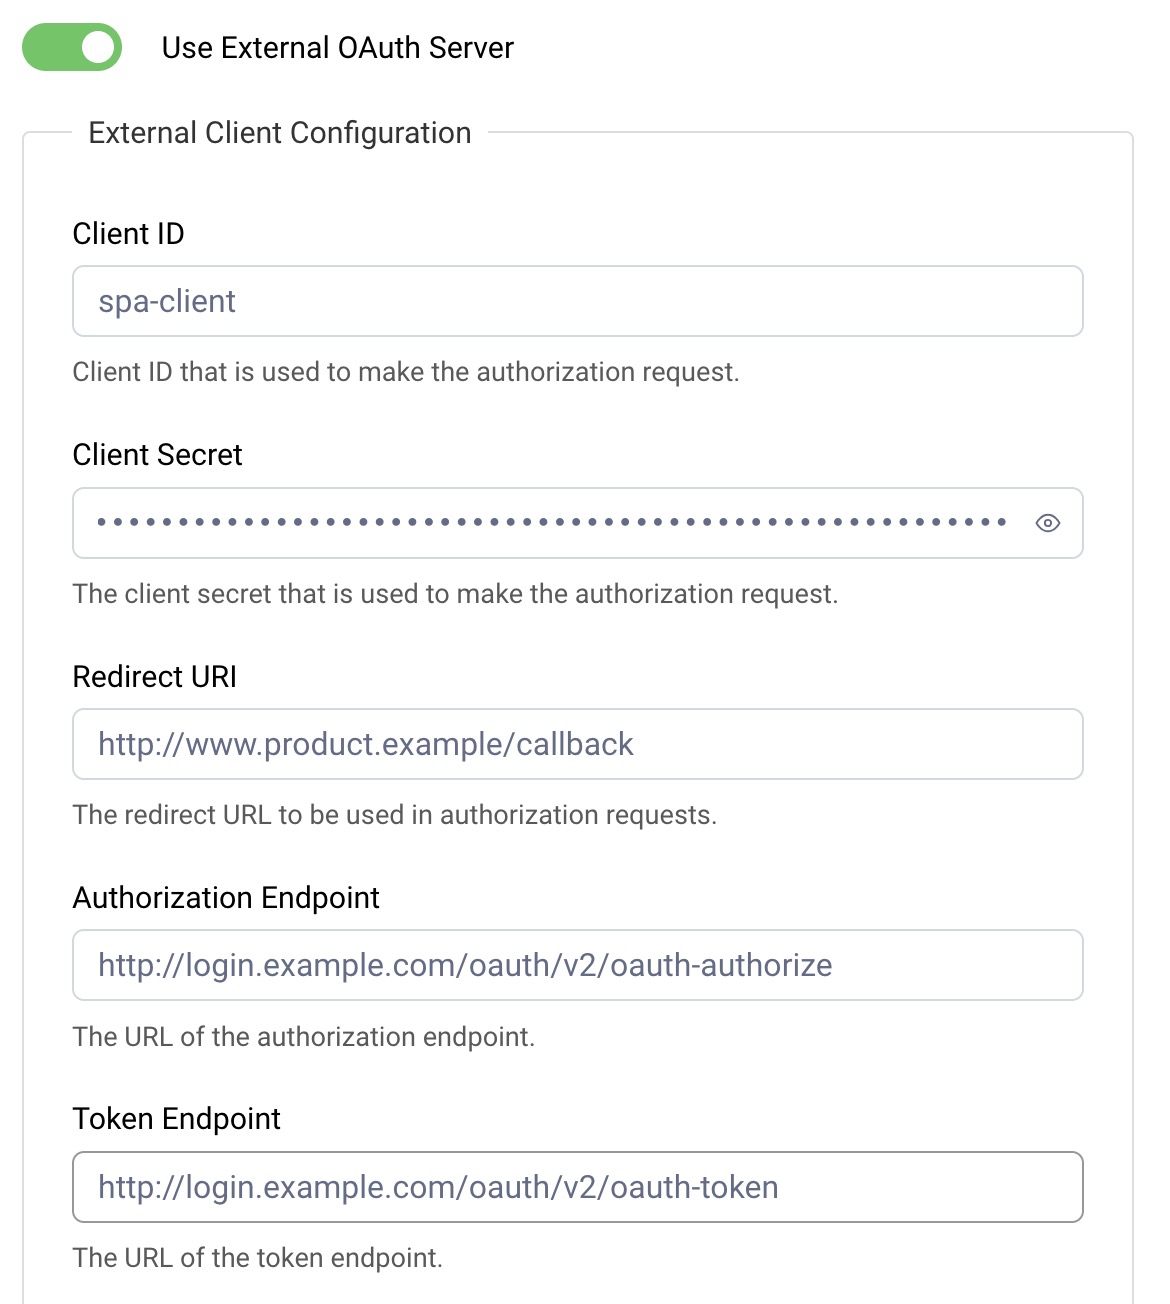
The settings refer to the OAuth client for your SPA at your authorization server and should be familiar to you if you are already using OAuth 2.0 and OpenID Connect:
| Field | Description |
|---|---|
| Client ID | The client ID for the SPA, as registered in your authorization server |
| Client Secret ⃰ | The client secret for the SPA, as registered in your authorization server |
| Redirect URI | The redirect URI for your SPA, as registered in your authorization server |
| Authorization Endpoint | The location of your authorization server's authorization endpoint |
| Token Endpoint | The location of your authorization server's token endpoint |
| Token Issuer | The issuer value your authorization server writes to OAuth tokens that it issues |
| Scopes | The scopes your SPA uses, as registered in your authorization server |
| Use PKCE | Only deactivate this if your authorization server does not support Proof Key for Code Exchange (PKCE) |
| Logout | Activate this to enable RP-initiated logout for your SPA |
| Logout Endpoint | The location of your authorization server's end-session endpoint |
| Post Logout Redirect URI | The post logout redirect URI for your SPA, as registered in your authorization server |
⃰Your SPA is a Confidential Client
Using a backend for frontend (BFF) improves the OAuth security of your SPA. Make sure that you update your authorization server settings so that the SPA is a confidential client that uses a client secret to get tokens.
Internal Authorization Server
If you are using the Curity Identity Server as the authorization server, you use an internal client by referencing an existing OAuth client and entering your SPA's base URL:
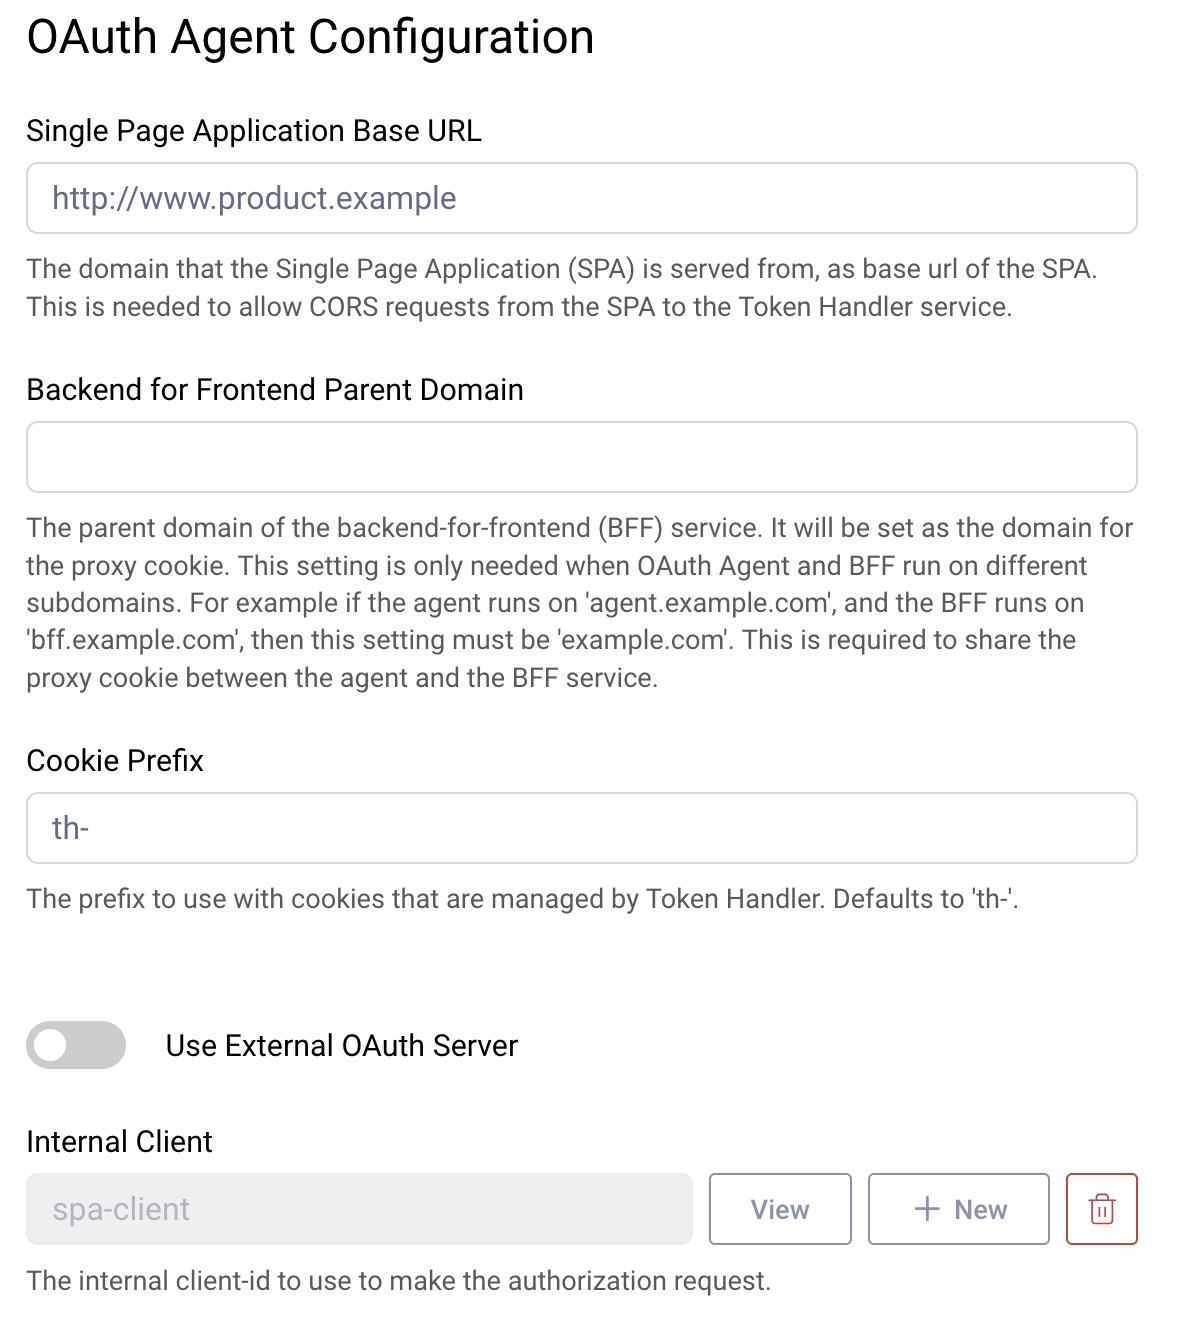
New Clients
If required, create a new SPA client using the New button and enter basic details. The wizard will then generate all of the correct settings the OAuth Agent needs:
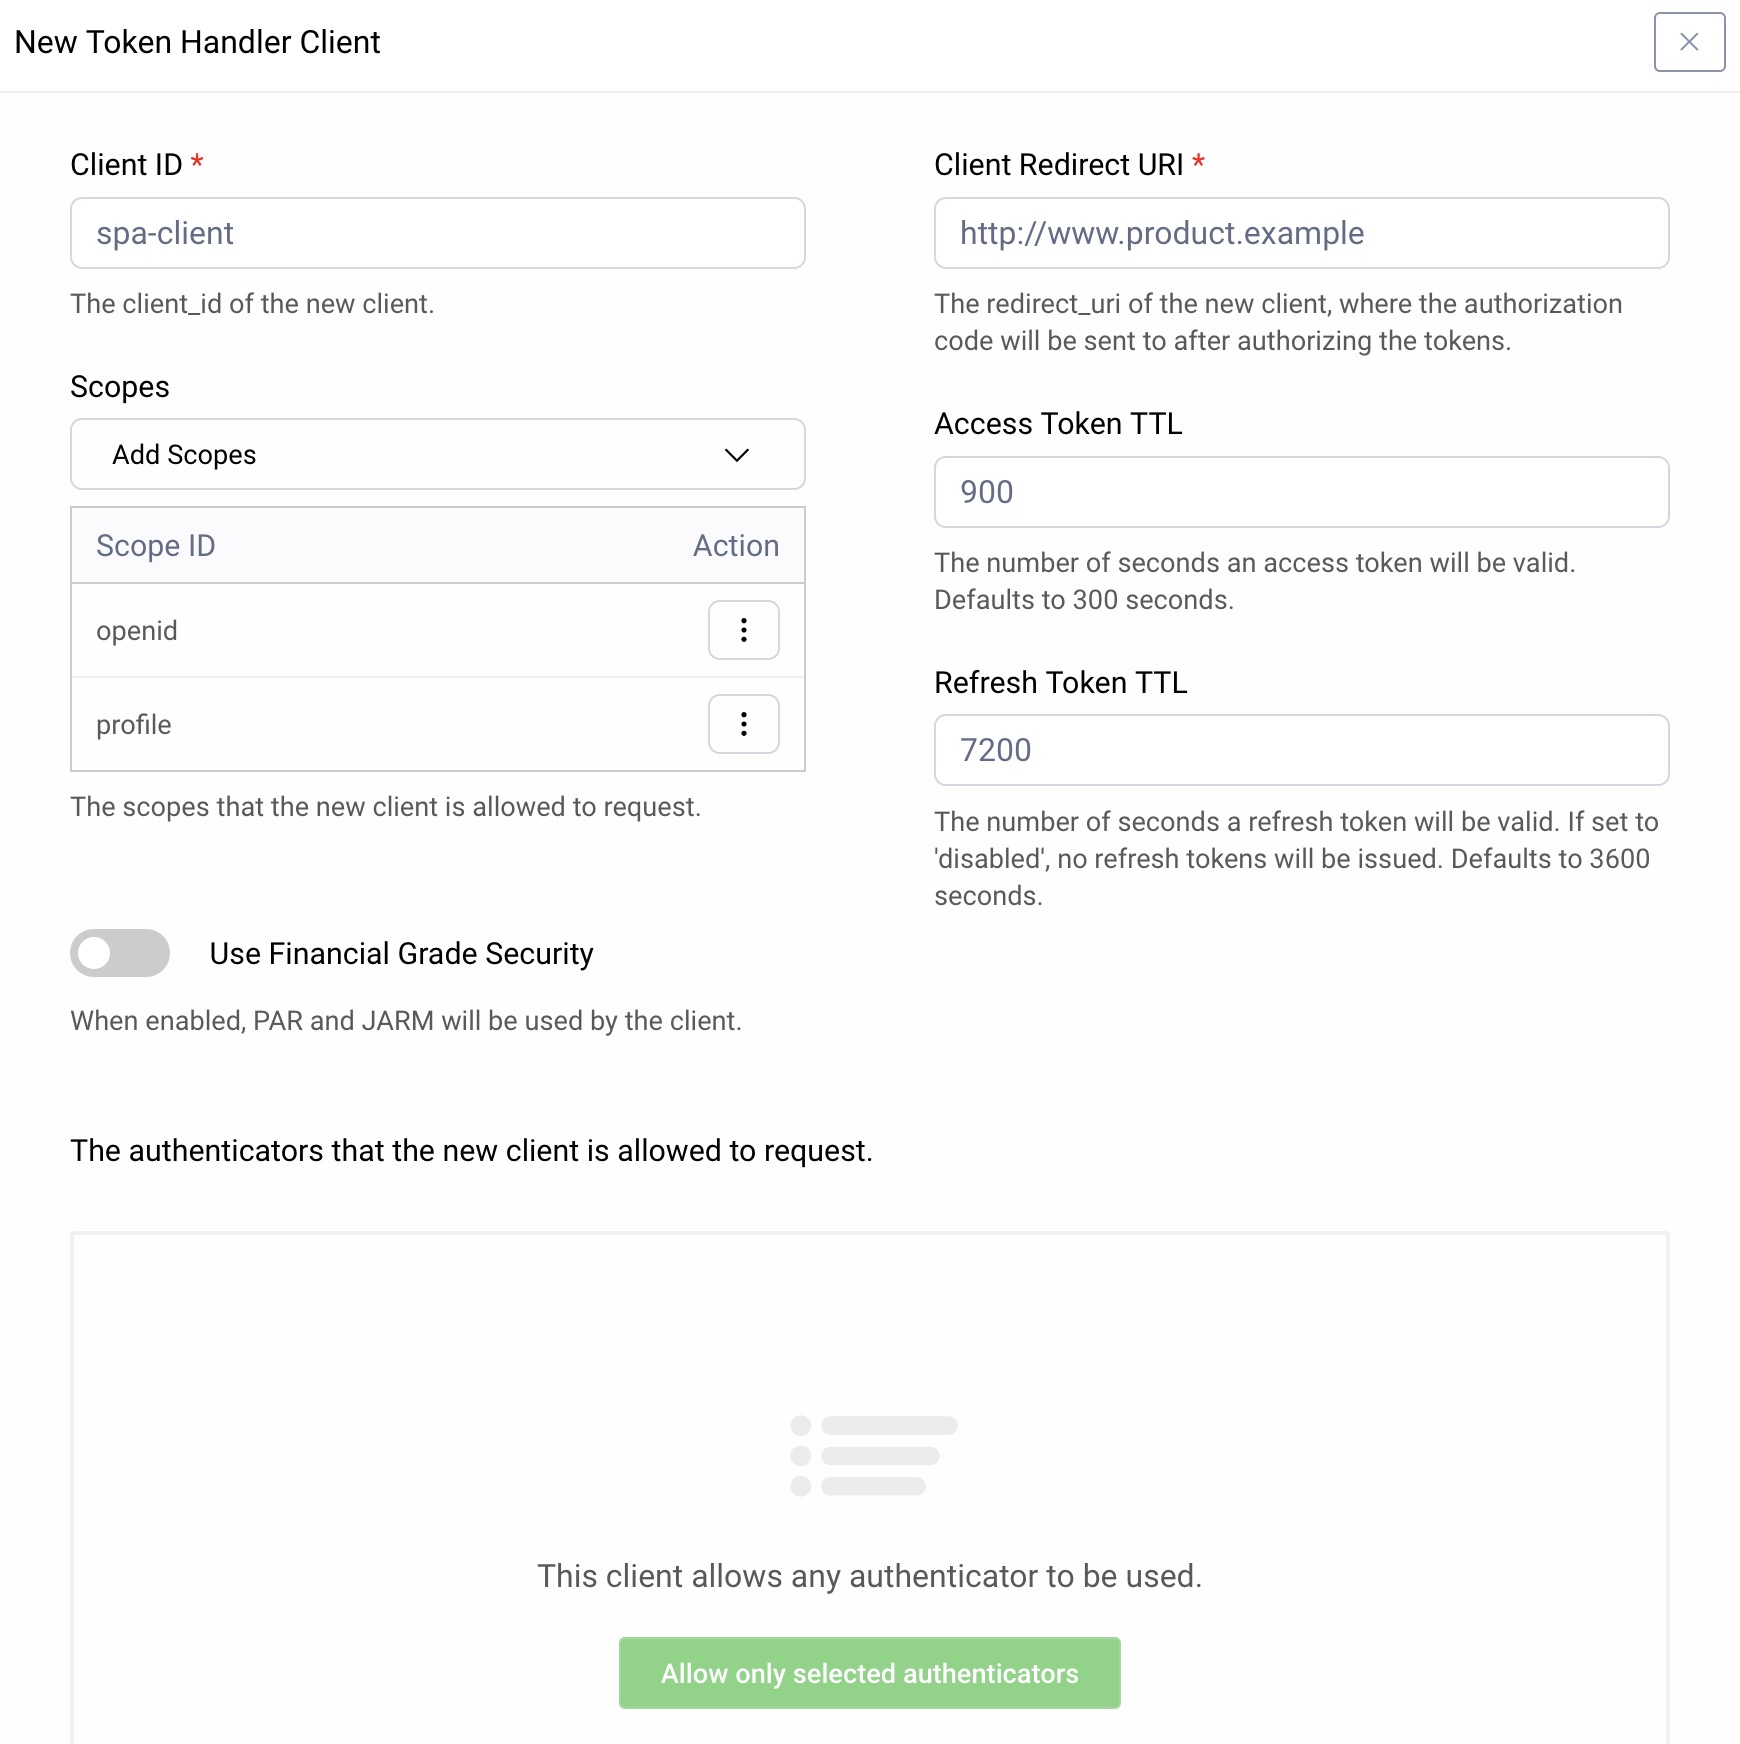
If you have a license with access to the financial-grade package, activate the Use Financial Grade Security option. Your SPA will then use Pushed Authorization Requests (PAR) and JWT Secured Authorization Response Mode for OAuth 2.0 (JARM) for best protection of browser-level requests.
Existing Clients
If you have an existing client you must edit a couple of settings. First, navigate to Token Service → Client Settings → Client Authentication and enable Symmetrically Signed JWTs:
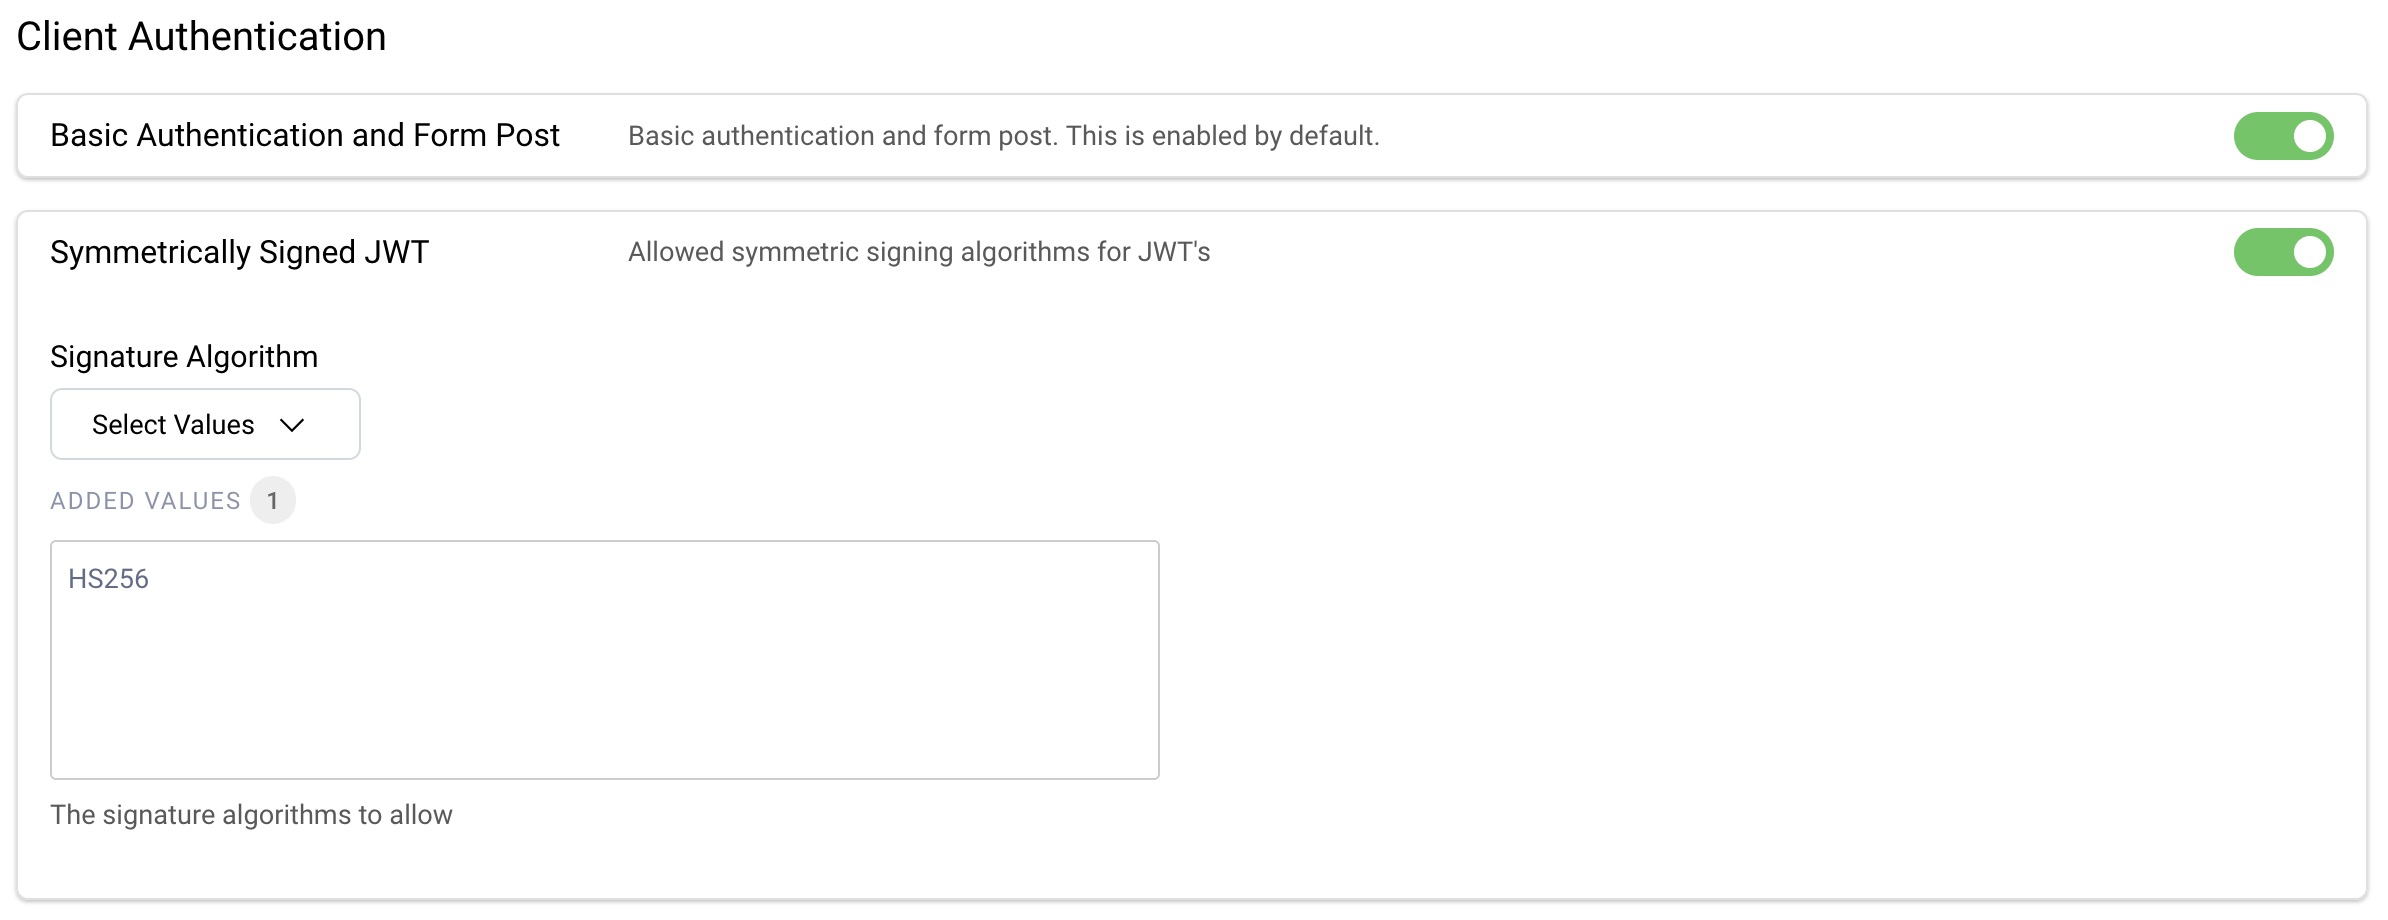
Then, navigate to Token Service → Clients and edit the client settings. Under Client Authentication, ensure that the SPA uses an authentication method of Symmetric Key, and generate one if required. If you have the financial-grade package, also activate the PAR and JARM options.
When tokens are issued for an internal SPA client, the OAuth Agent authenticates at the token endpoint of the Curity Identity Server with a JWT Client Assertion. The OAuth Agent uses the symmetric key to create the JWT and the token endpoint uses the same symmetric key to verify the JWT.
Certificate Trust
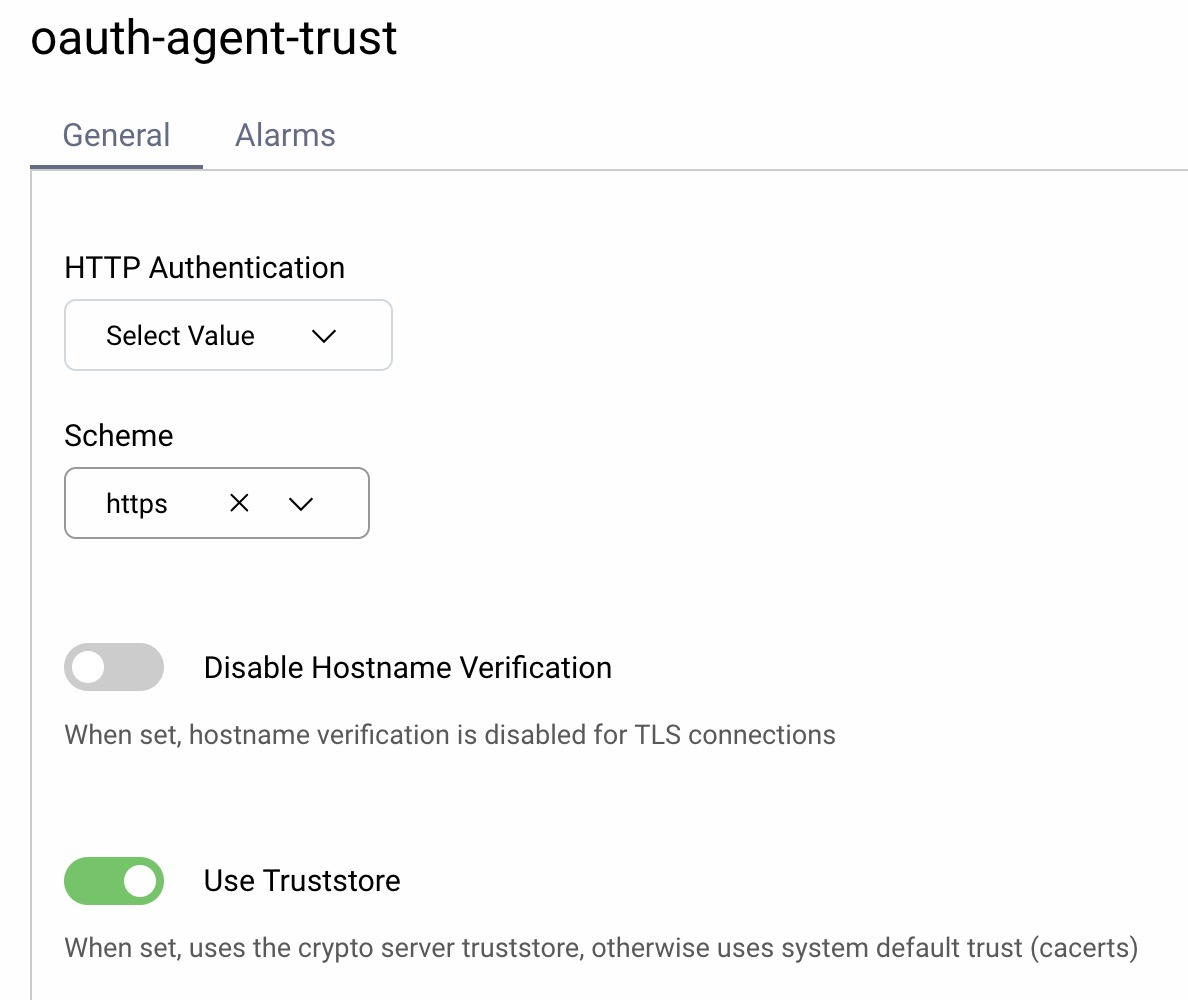
In some deployments, the OAuth Agent may call the authorization server over HTTPS using its external URL. In test environments, you might issue your own certificates using a certificate authority that is untrusted by default. In such cases, you must configure the OAuth Agent to use an HTTP client with a trust store.
For example, if using the admin UI, you could navigate to Facilities → Keys and Cryptography → Trust Anchors → Server Trust Stores and import a root certificate. Then, navigate to Facilities → HTTP Clients and add a client that uses the trust store. Then configure this HTTP client against the OAuth Agent.
Configure the OAuth Proxy
Next, in the right pane of the admin UI, you prepare your OAuth Proxy. This component enables your SPA to make direct calls to APIs through a high-performance API gateway. The OAuth Proxy runs as an API gateway plugin.
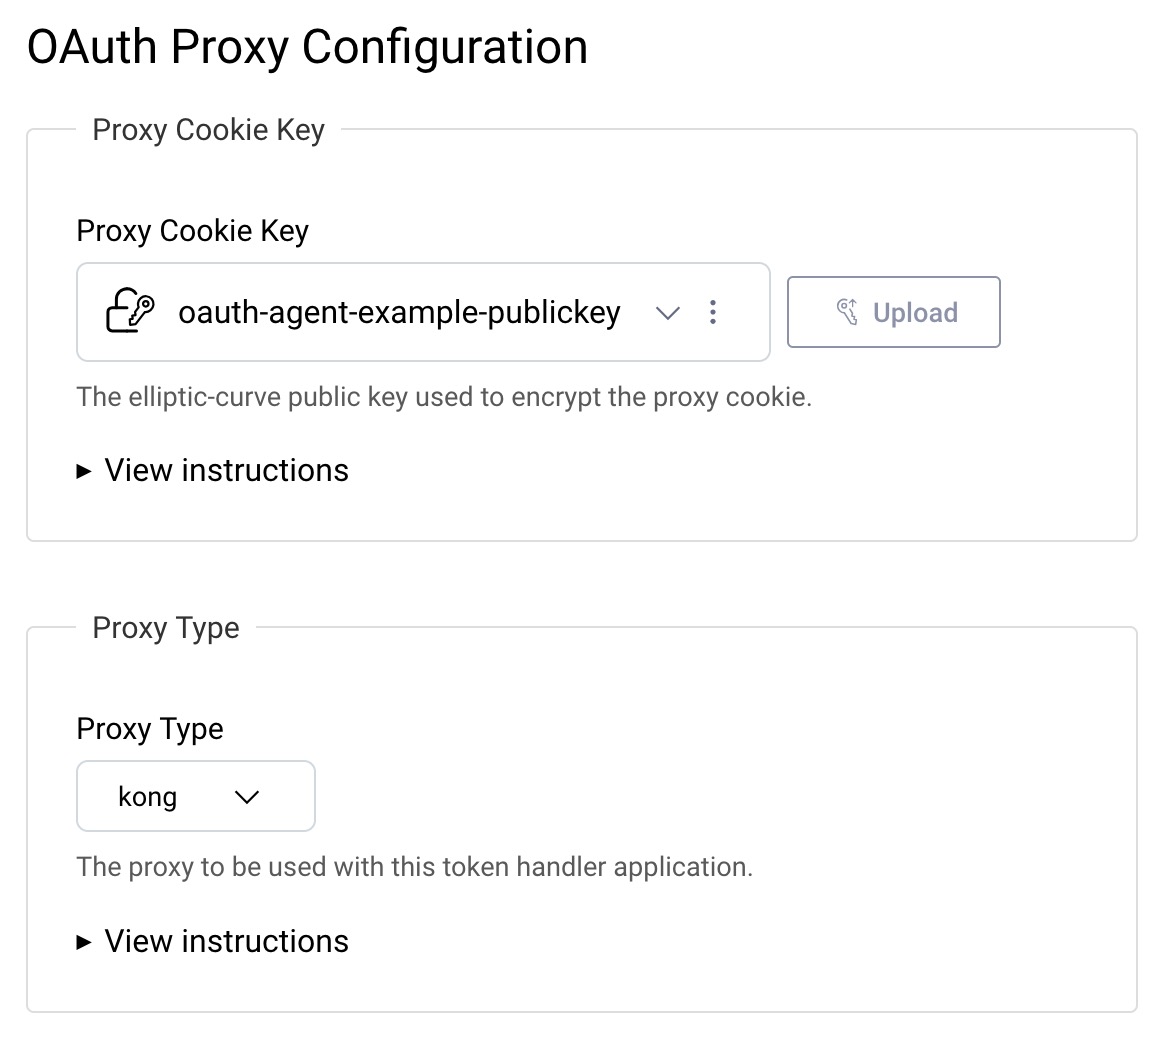
Choose your type of gateway and follow the link to download the plugin from the developer portal, along with configuration and deployment instructions. The following tutorials walk you through the details:
- Integrate with the Kong API Gateway
- Integrate with the OpenResty API Gateway
- Integrate with the NGINX API Gateway
- Integrate with Azure API Management
- Integrate with the AWS API Gateway
- Integrate with Google Apigee API Management
You must configure the OAuth Proxy plugin to execute on all gateway routes from the SPA to APIs. If the SPA calls the OpenID Connect Userinfo endpoint, the OAuth Proxy plugin must also be configured for that route.
Configure Cryptographic Keys
The OAuth Proxy configuration also provides instructions on creating an elliptic curve asymmetric keypair, using the following commands:
openssl ecparam -name prime256v1 -genkey -noout -out private-key.pemopenssl ec -in private-key.pem -pubout -out public-key.pemopenssl pkcs8 -topk8 -in private-key.pem -out private-key.pkcs8
Use the Upload button to save the public key to the Curity OAuth Agent, which uses it for encryption. The PKCS8 file is a protected private key that you configure in the OAuth Proxy, to enable it to decrypt the cookie containing the access token, so that it can forward the access token to your APIs.
Cookie Details
The OAuth Agent issues a proxy cookie and a session cookie. The proxy cookie contains the access token for the OAuth Proxy. The OAuth Agent protects this cookie using an ephemeral symmetric key that it derives at runtime from the OAuth Proxy's public key. The OAuth Proxy can derive the same ephemeral symmetric key using its private key and decrypt the proxy cookie.
The session cookie contains the refresh and ID tokens, which are intended for the OAuth Agent. It protects the session cookie with the system's symmetric key. You can locate this key in the admin UI by navigating to System → Zones → Symmetric Key.
Cookie Limits
The token handler uses advanced encryption and compression to reduce cookie sizes. Large JWT access tokens such as those issued by the RS256 algorithm will result in a total cookie size of around 3KB in normal usage, and will not exceed browser or HTTP server limits. For smaller cookies, we recommend using opaque tokens or a more efficient JWT algorithm.
Deploy Token Handler Components
The OAuth Agent is a stateless API that you can cluster. It has no server affinity requirements, so requests during the same OAuth flow can be routed to different instances. You deploy each instance of the OAuth Agent as a docker container or virtual machine. It does not use any data stores, so the component is easy to manage.
Once the OAuth Agent is deployed, the SPA can call it by sending HTTP requests of the following form:
curl -i -X POST https://bff.product.example/oauthagent/example/login/start \-H "origin: https://www.product.example"
You use your cloud platform to provide the external base URL for token handler components. To get you started, we provide a Docker-based Token Handler Deployment Example that you can run on a development computer. It explains all of the settings needed by the SPA, its web static content host, APIs and the OAuth Agent. It gives you clear steps for translating the example environment to your deployed environments.
You can choose between several Token Handler Deployment Patterns. If your API gateway supports routing by host name you could use the same instances of the Curity OAuth Agent to serve multiple SPAs running in different web domains. Alternatively, you can use Service Roles to isolate OAuth Agents from the main authorization server.
Integrate Your SPA
Once you have a deployed token handler you can integrate your SPA with it. Your SPA can call the endpoints of the OAuth Agent, which are summarized in the following table:
| HTTP Method | Endpoint Path | Behavior |
|---|---|---|
| GET | /session | The SPA asks the OAuth Agent for its authentication status and ID token claims |
| POST | /login/start | The SPA asks the OAuth Agent for an authorization request URL |
| POST | /login/end | The SPA asks the OAuth Agent to process an authorization response URL and for its ID token claims |
| POST | /refresh | The SPA asks the OAuth Agent to perform a token refresh and rewrite cookies |
| POST | /logout | The SPA asks the OAuth Agent to expire all cookies and, when logout is enabled, to return an end session request URL |
The SPA using Token Handler code example explains the code integration for SPA developers, covering login, logout, API requests, token refresh, and working with ID token claims and userinfo. The tutorial also focuses on usability control and reliability for your SPAs. We explain how to handle both error and expiry conditions.
Conclusion
The token handler provided by Curity gives you a professional solution, developed by experts, that enables you to upgrade your SPAs to use strong cookie security. This is done in a way that serves your SPAs and externalizes the complexity. You can read more about the token handler in the Product Documentation.

Join our Newsletter
Get the latest on identity management, API Security and authentication straight to your inbox.

Start Free Trial
Try the Curity Identity Server for Free. Get up and running in 10 minutes.
Start Free TrialWas this helpful?


