Token Handler Deployment Example
On this page
This tutorial explains how to run an SPA code example that uses token handler backend components, for an end-to-end security solution. Token handler components from Curity implement the difficult security.

If you are new to the token handler pattern, start with the Getting Started Tutorials to gain a high level understanding. The SPA using Token Handler tutorial then explains the SPA code you need to write. This tutorial dives deeper into the deployment details, so that you understand the moving parts of the solution and the key configuration settings. Once understood, you can adapt the deployment to any other environment.
Deploy the Code Example
First, clone the GitHub repository at the top of this page and ensure that your local computer meets the prerequisites explained in its deployment instructions. Follow the instructions to configure the example domains, summarized below:
| Component | Domain |
|---|---|
| SPA | http://www.product.example |
| Token Handler | http://bff.product.example |
| Authorization Server | http://login.example.com |
A Docker Compose deployment is used, where you can choose a deployment scenario based on your authorization server. Locate the deployment folder for your scenario:
| Scenario | Deployment Folder Location |
|---|---|
| An SPA that uses Keycloak as an the authorization server, where the OAuth Agent uses external client settings for the SPA. | deployments/external |
| An SPA that uses the Curity Identity Server as its authorization server, where the OAuth Agent can use internal client settings for the SPA. | deployments/curity |
Any Authorization Server
The example deployment can use any standards-based authorization server. To use Keycloak, run the example with the following commands. Use the OAUTH_PROXY_TYPE environment variable to choose the type of API gateway. It can have a value of either kong, openresty or nginx:
export DEPLOYMENT='external'export OAUTH_PROXY_TYPE='kong'./build.sh./deploy.sh
The SPA then uses an OAuth 2.0 and OpenID Connect based flow that includes PKCE. The OAuth Agent acts as a confidential client for the SPA and uses a client secret when getting tokens from the token endpoint.
Curity Identity Server
You can use the Curity Identity Server as your authorization server if you run the following commands. Use the OAUTH_PROXY_TYPE environment variable to choose the type of API gateway. It can have a value of either kong, openresty or nginx.
export DEPLOYMENT='curity'export OAUTH_PROXY_TYPE='kong'./build.sh./deploy.sh
Run the SPA
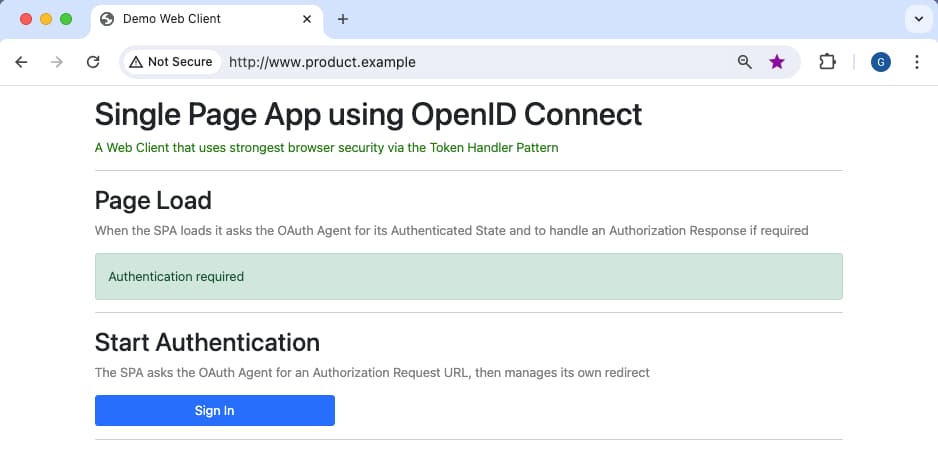
Once you have deployed the system and backend components are ready, you can browse to the SPA at http://www.product.example and exercise all lifecycle operations. Initially, the SPA does not yet have a cookie so presents an unauthenticated view that prompts the user to sign in:
The SPA then implements a code flow, where you can login using a pre-shipped user account of demouser / Password1. The SPA then presents an authenticated view from which the SPA can call APIs:

The code example is a simple app coded in React that only renders text to explain the main behaviors. Any SPA developer could migrate the SPA to their preferred frontend technology stack.
Deployed Components
The deployed system consists of a number of components, with the roles summarized in the following table. You can find these components listed in the docker-compose.yml file within the deployment folder.
| Component | Description |
|---|---|
| SPA | The JavaScript application that runs in the browser. |
| Web Host | The component from which the SPA downloads its static content. |
| API Gateway | The API gateway proxies all requests from the SPA to backend components. |
| Authorization Server | The main security component that manages user authentication and token issuance for the SPA. |
| OAuth Agent | Implements cookie issuing for the SPA, and the main code for its OAuth flows. |
| OAuth Proxy | An API gateway plugin used during API requests to process cookies and forward access tokens to APIs. |
| API | An example API through which the SPA accesses its business data. |
SPA Flow
For the SPA to initiate user authentication and then call APIs with secure cookies, the following flow takes place:

- The SPA downloads static content from its web host..
- The SPA runs an OpenID Connect Code Flow to authenticate the user.
- The SPA receives an authorization response containing an authorization code.
- The SPA calls the OAuth Agent to complete its code flow.
- The OAuth Agent sends the authorization code to the authorization server.
- The authorization server returns tokens to the OAuth Agent.
- The OAuth Agent encrypts tokens into cookies that it issues to the browser.
- The SPA sends a secure cookie to the API gateway to call APIs.
- The OAuth Proxy decrypts the cookie and forwards a JWT access token to the API.
- The API validates the JWT and uses its claims for its authorization.
The example deploys both the authorization server and backend for frontend (BFF) components behind the same API gateway. The gateway processes incoming requests based on their external host names. When the SPA sends requests to https://login.example.com the gateway routes requests to the authorization server. When the SPA sends requests to https://bff.product.example they are routed to token handler components.
Configuration Settings
The deployment folder contains the configuration for each component. The main settings you need to configure are explained in the following sections.
SPA
The SPA uses a JSON configuration file, which it downloads from its web host at runtime. The configuration file is at spa/config.json within the deployment folder and contains the following content. Primarily this is the backend for frontend base URL, which varies for the stages of your deployment pipeline. In the SPA's code, the OAuthAgentClient and ApiClient objects use these URLs and paths.
{"bffBaseUrl": "http://bff.product.example","oauthAgentPath": "/oauthagent/example","oauthUserinfoPath": "/oauthuserinfo","apiPath": "/api"}
Web Host
Since the deployment example is Docker-based, you deploy the web host as a Docker container that runs behind the API gateway. Within the deployment folder you can find the configuration settings in the webhost/config.json file.
{"port": 3001,"bffBaseUrl": "http://bff.product.example",}
You can use any kind of web host with the token handler pattern, such as a content delivery network. The web host's content security policy (CSP) should allow the SPA to connect to its backend for frontend URL. The code for the example web host uses the following code to set a secure CSP:
let policy = "default-src 'none';";policy += " script-src 'self';";policy += ` connect-src 'self' ${configuration.bffBaseUrl};`;policy += " child-src 'self';";policy += " img-src 'self';";policy += " style-src 'self' https://cdn.jsdelivr.net;";policy += ` font-src 'self';`;policy += " object-src 'none';";policy += " frame-ancestors 'none';";policy += " base-uri 'self';";policy += " form-action 'self';";
API Gateway
The example deployment uses a cloud native API gateway, deployed as a custom Docker image containing plugins. You can use Kong, OpenResty or NGINX as the API gateway.
A central team might manage your organization's API gateway and be responsible for its deployment and availability. Often, application teams can dynamically update gateway routes without needing to redeploy the entire gateway. The example deployments for various gateways provide routes in a configuration file.
The Docker image for the Kong API gateway follows the Curity Kong OAuth Proxy Plugin tutorial. The deployment activates the plugin with the KONG_PLUGINS environment variable in the docker-compose.yml file. The kong.yml file provides the gateway routes.
api-gateway:image: apigateway-kong:1.0.0hostname: apigateway-internalports:- 80:3001volumes:- ./apigateway/kong.yml:/usr/local/kong/declarative/kong.ymlenvironment:KONG_DATABASE: 'off'KONG_DECLARATIVE_CONFIG: '/usr/local/kong/declarative/kong.yml'KONG_PROXY_LISTEN: '0.0.0.0:3001'KONG_LOG_LEVEL: 'info'KONG_PLUGINS: 'bundled,cors,oauth-proxy'
Within the deployed system, components interact within a Docker network, using internal URLs. For example, the authorization server uses an internal host name of login-internal. When the SPA makes a request to http://login.example.com, the gateway receives the request and routes to the internal URL. The apigateway/kong/kong.yml file includes the authorization server route:
- name: authorization-serverurl: http://login-internal:8443routes:- name: authorization-server-routehosts:- login.example.compaths:- /
In some deployments, the authorization server could be a platform as a service (PaaS) solution such as Microsoft Entra ID. In this case, components would route to the authorization server using public URLs instead of internal URLs.
API
The example API uses a JSON configuration file, located at api/config.json within the deployment folder, with the following main content. Any OAuth-secured API includes settings like these so that it can validate JWT access tokens according to best practices. In the example deployment, the JWKS URI is an internal location within the Docker network.
{"port": 3001,"jwksUri": "http://login-internal:8443/oauth/v2/oauth-anonymous/jwks","issuer": "http://login.example.com/oauth/v2/oauth-anonymous","audience": "api.example.com",}
Authorization Server
The docker-compose.yml file includes a Docker deployment for the authorization server. If using an external authorization server you run a basic deployment of Keycloak, along with a SQL database containing a pre-shipped user account with which you can test logins. You run a similar deployment when you use the Curity Identity Server as the authorization server.
curity-idsvr:image: curity.azurecr.io/curity/idsvr:latesthostname: login-internalextra_hosts:- login.example.com:host-gatewayports:- 6749:6749volumes:- ../../license.json:/opt/idsvr/etc/init/license/license.json- ./idsvr/config-backup.xml:/opt/idsvr/etc/init/config.xmlenvironment:ADMIN: 'true'LOGGING_LEVEL: 'INFO'IDSVR_BASE_URL: 'http://login.example.com'curity-data:image: postgres:latesthostname: dbservervolumes:- ./idsvr/data-backup.sql:/docker-entrypoint-initdb.d/data-backup.sqlenvironment:POSTGRES_USER: 'postgres'POSTGRES_PASSWORD: 'Password1'POSTGRES_DB: 'idsvr'
The authorization server returns its external URL to the browser during authentication flows, which the SPA can resolve, whereas only backend components like APIs can resolve the authorization server's internal hostname.
OAuth Agent
The main OAuth Agent configuration follows the Create a Token Handler tutorial. When you use the Curity Identity Server as the authorization server, the OAuth Agent configuration is at idsvr/config-backup.xml file within the deployment folder. The OAuth Agent derives most settings it needs from the referenced OAuth client.
<application><id>example</id><token-handler xmlns="https://curity.se/ns/conf/apps/tokenhandler"><single-page-application-base-url>http://www.product.example</single-page-application-base-url><internal-client><client-id>spa-client</client-id></internal-client><proxy-keystore><id>oauth-agent-example-publickey</id></proxy-keystore><require-custom-header>true</require-custom-header><proxy-type>kong</proxy-type><cookie-prefix>th-</cookie-prefix></token-handler></application></applications>
When using an external authorization server, the OAuth Agent uses configuration settings similar to those shown here, in the oauthagent/config-backup.xml file within the deployment folder:
<application><id>example</id><token-handler xmlns="https://curity.se/ns/conf/apps/tokenhandler"><single-page-application-base-url>http://www.product.example</single-page-application-base-url><external-client><client-id>spa-client</client-id><client-secret>xyNcensqT1FG0Zs0CMQtC1dDW1Vw1Luz</client-secret><scope>openid</scope><scope>profile</scope><authorization-endpoint>http://login.example.com/realms/example/protocol/openid-connect/auth</authorization-endpoint><token-endpoint>http://login-internal:8080/realms/example/protocol/openid-connect/token</token-endpoint><logout><logout-endpoint>http://login.example.com/realms/example/protocol/openid-connect/logout</logout-endpoint><post-logout-redirect-uri>http://www.product.example/</post-logout-redirect-uri></logout><token-issuer>http://login.example.com/realms/example</token-issuer><redirect-uri>http://www.product.example/callback</redirect-uri></external-client><proxy-keystore><id>oauth-agent-example-publickey</id></proxy-keystore><cookie-prefix>th-</cookie-prefix><require-custom-header>true</require-custom-header><proxy-type>kong</proxy-type></token-handler></application>
Any OAuth endpoints that the OAuth Agent returns to the browser must use the external URL of the authorization server. Note also that the Curity configuration system protects any secret values, like the OAuth Agent's client secret.
API Gateway Plugins
Next, look at routes from the SPA to the example API (or the OpenID Connect userinfo endpoint), to understand plugins that run during API requests. First, CORS instructs the browser to only send cookies in cross origin requests from the SPA's precise web origin. Next, the OAuth Proxy Plugin runs, to decrypt the proxy cookie, set the HTTP authorization header with the access token, then forward the request to internal API endpoints. You can view the following configuration examples for various gateways.
For the Kong API gateway, you can view the API routes in the apigateway/kong/kong.yml file.
- name: example-apiurl: http://api-internal:3001routes:- name: example-api-routehosts:- bff.product.examplepaths:- /apiplugins:- name: corsconfig:origins:- http://www.product.examplecredentials: truemax_age: 86400- name: oauth-proxyconfig:cookie_key: "-----BEGIN ENCRYPTED PRIVATE KEY ..."cookie_key_pass: Password1
For the curity deployment scenario, the authorization server issues opaque access tokens. Therefore, the gateway also configures a phantom token plugin to run after the OAuth Proxy plugin. This plugin introspects the access token and makes a further update to the request's HTTP authorization header, to replace the opaque access token with a JWT access token.

Cryptographic Keys
Every deployment creates new cryptographic keys for cookie encryption. The Create a Token Handler tutorial explains the commands you must use to create the keys. For further details to configure keys using the Curity configuration system, see the configuration management tutorials.
Cookies in the browser
If you redeploy token handler components with new cookie encryption keys, some user browser sessions may contain existing HttpOnly cookies produced with old keys, which token handler components no longer accept. You can login to the SPA and then re-run the deployment to see how the SPA reliably copes with this condition.
Troubleshoot Errors
The token handler involves several components that you need to integrate. Mistakes can happen. For example, you might provide the URL to an endpoint incorrectly, or perhaps use a URL for the wrong stage of your deployment pipeline. Since the token handler runs in a distributed system, you need a logical process for resolving issues.
If your SPA receives an error during an OAuth operation, such as a user login, you need to look at logs for OAuth-related components. Most commonly this means you configured OAuth settings incorrectly or there is a mismatch between the settings of the OAuth Agent and the authorization server.
- Use browser tools to see the error response the SPA receives, which may include fields like
error_codeanddetailed_error. - To start troubleshooting the backend, view the logs for the OAuth Agent, with the following command.
- If the OAuth Agent logs indicates errors from the authorization server, view your authorization server logs to find the root cause.
OAUTH_AGENT_CONTAINER_ID=$(docker ps | grep oauth-agent | awk '{print $1}')docker logs -f $OAUTH_AGENT_CONTAINER_ID
If your SPA receives an error during an API operation, you need to look at logs for API-related components. The error could be caused by an incorrect URL in gateway plugin configuration settings. Another common cause is to configure incorrect values for the API, where you need to specify the issuer and audience that the API expects to receive in JWT access tokens and a JWKS URI from which the API downloads token signing public keys:
- Use browser tools to see the error response the SPA receives, which may include error fields in
www-authenticateresponse headers. - To start troubleshooting the backend, view the logs for the API gateway, with the following command.
- If there are no gateway errors, look at the logs for the target API to find the root cause.
API_GATEWAY_CONTAINER_ID=$(docker ps | grep apigateway | awk '{print $1}')docker logs -f $API_GATEWAY_CONTAINER_ID
Adapt the Deployment
You can adapt the deployment in various ways by editing your deployment folder. Then re-run the deploy.sh script to recreate the Docker deployment with updated settings. This section walks through some example use cases.
Change External URLs
You can rename external URLs using a search and replace operation within your deployment folder. These are the default values that the SPA uses:
| Domain | Value |
|---|---|
| Web Origin | www.product.example |
| Backend for Frontend | bff.product.example |
| Authorization Server | login.example.com |
For example, you could update to the following custom values, then run the SPA using a new custom URL. When changing domains, ensure that the web domain and the backend for frontend remain in the same parent site, so that cookies issued remain first-party and the browser allows the SPA to send them.
| Domain | Value |
|---|---|
| Web Origin | myapp.com |
| Backend for Frontend | api.myapp.com |
| Authorization Server | login.mycompany.com |
Same Origin Deployment
A special case of renaming URLs is a same origin deployment, where all backend for frontend components run in the web host's domain behind an API gateway. This enables you to avoid any CORS requests from the browser.
| Domain | Value |
|---|---|
| Web Origin | www.product.example |
| Backend for Frontend | www.product.example |
| Authorization Server | login.example.com |
SPA Developer Setup
You can easily adapt the example deployment to a development setup. To do so, first delete the web host component from your deployment folder's docker-compose.yml file. Then, do a search and replace in your deployment folder, to replace occurrences of www.product.example with www.product.example:3000.
Re-run the deployment, then run the following commands to run the SPA code example in development mode, with static content served by the webpack development server.
cd spanpm start
Then browse to http://www.example.com:3000 and change code in the example SPA to see fast feedback in the browser. This deployment demonstrates a pure SPA developer experience while also using HTTP-only SameSite=strict cookies. In development mode, the SPA's config.json file uses the following settings by default, and connects to backend components via the API gateway, which runs on port 80:
{"bffBaseUrl": "http://bff.product.example","oauthAgentPath": "/oauthagent/example","oauthUserinfoPath": "/oauthuserinfo","apiPath": "/api"}
HTTPS Setup
By default, the examples run using plain HTTP, to reduce infrastructure on a development computer. You can update the example deployment and run HTTPS URLs in the browser. To do so, first inspect the files in the GitHub repository's certs folder. If required, change the domains listed in the server.ext file. Then run the create-certs.sh script to generate certificates and keys using the OpenSSL tool. Next, do a search and replace on external URLs within your deployment folder, to update them to use HTTPS, as in this example:
| Old Values | New Values |
|---|---|
http://www.product.example | https://www.product.example |
http://bff.product.example | https://bff.product.example |
http://login.example.com | https://login.example.com |
Then, update your docker-compose.yml file so that the API gateway listens on port 443 and uses the generated certificate files. See the following deployment updates to configure HTTPS for various gateways.
For Kong, update the Docker Compose file to include certificate files in the deployment, provide the required environment variables and include ssl in the KONG_PROXY_LISTEN environment variable:
api-gateway:image: apigateway:1.0.0hostname: apigateway-internalports:- 443:3001volumes:- ./apigateway/kong.yml:/usr/local/kong/declarative/kong.yml- ../../certs/example.ssl.key:/usr/local/share/certs/example.ssl.key- ../../certs/example.ssl.crt:/usr/local/share/certs/example.ssl.crt- ../../certs/example.ca.crt:/usr/local/share/certs/example.ca.crtenvironment:KONG_DATABASE: 'off'KONG_DECLARATIVE_CONFIG: '/usr/local/kong/declarative/kong.yml'KONG_PROXY_LISTEN: '0.0.0.0:3001 ssl'KONG_SSL_CERT: '/usr/local/share/certs/example.ssl.crt'KONG_SSL_CERT_KEY: './usr/local/share/certs/example.ssl.key'KONG_LUA_SSL_TRUSTED_CERTIFICATE: './usr/local/share/certs/example.ca.crt'KONG_LOG_LEVEL: 'info'KONG_PLUGINS: 'bundled,cors,oauth-proxy'
You may also need to do some additional trust configuration so that the OAuth Agent trusts the authorization server's root certificate authority. Finally, ensure that your browser trusts the root certificate created at certs/example.ca.crt. For example, on macOS you can do so by importing the root certificate into your system keychain.
The code example uses the webpack development server and shows how to serve static content for a React app using HTTPS and a custom domain name. You can then browse to https://www.product.example, after which cookies issued by the OAuth Agent include the Secure property.
const devServer: webpackDevServer.Configuration = {server: {type: 'https',options: {key: fs.readFileSync('./certs/example.ssl.key'),cert: fs.readFileSync('./certs/example.ssl.crt'),},},static: {directory: path.join(dirname, './dist'),},port: 3000,historyApiFallback: true,hot: true,allowedHosts: ['www.product.example',],};const devConfig: webpack.Configuration = {mode: 'development',devServer,};
Conclusion
The token handler pattern separates concerns to enable cookie security to be externalized from your application level components. This tutorial explained how to compose a deployment and enable an end-to-end flow. Once you understand the logic, you can adapt the deployment to meet your use cases. You can then continue to develop and run a pure SPA architecture.
Customer Stories
Learn how organizations run identity and API security at scale.
Read customer storiesWas this helpful?