OpenID Connect Client with Encrypted ID Tokens
On this page
Intro
This tutorial shows how to use the Curity Identity Server and JSON Web Encryption (JWE), to protect ID tokens that contain Personally Identifiable Information (PII). The web app must be a confidential client, where a backend component manages the private key used for decryption. See the Encrypted ID Tokens article for further details on how encrypted ID tokens are used.
The code example provides a Spring Boot website developed with Kotlin, though the same techniques could be applied to any other backend technology. The same solution is possible for a single page application (SPA) that uses a backend for frontend (BFF) approach, such as the Token Handler Pattern.
Create Encryption Keys
First, get the code by cloning the GitHub repository, then run the supplied helper script, which will create public and private keys that are used for encryption:
./create-keys.sh
This will result in the following two main files being generated for testing:
| File | Description |
|---|---|
| client.pub | The public key used by the Curity Identity Server to encrypt ID tokens |
| client.p12 | A password protected file containing the public key, and also the private key used by the website to decrypt ID tokens |
Note
The example uses the Curity Identity Server, but you can run the code against any standards-based authorization server.
Configure the Curity Identity Server
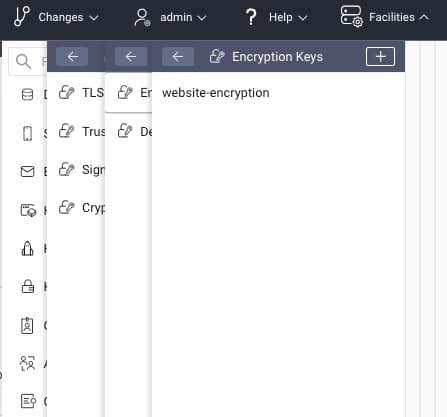
Import the client’s public key via the Facilities menu in the top right of the Admin UI. Navigate to Keys and Cryptography -> Crypto. Click on the + next to Encryption Keys and select the asymmetric key type from the drop-down, then enter a name of website-encryption. Click the Upload Existing button, then select File. Browse to either the client.pub or client.p12 file and then click Add and Commit. If uploading the P12 file, also enter its password, which is available in the create-keys.sh script:
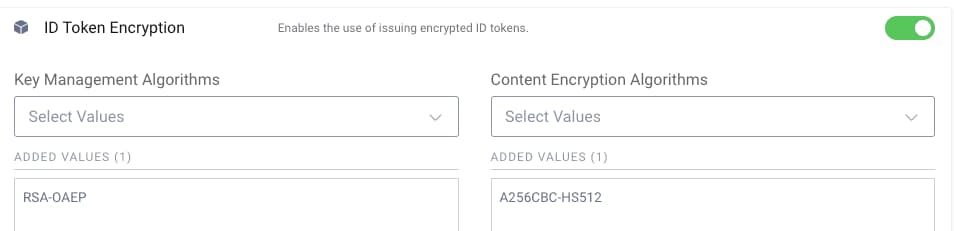
Navigate to Profiles -> Token Service -> General and enable the use of ID token encryption, then select the following options as whitelisted algorithms:
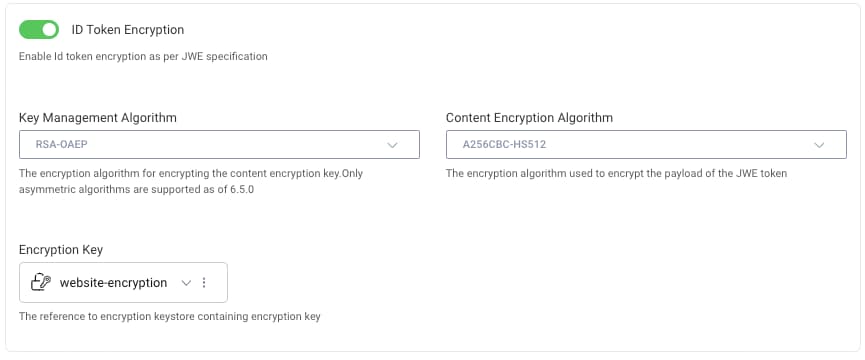
Next, you need a standard web client that uses the code flow with a client secret, with encrypted ID tokens activated. The correct settings configured in the Admin UI are shown here:
The following OpenID Connect settings can be used with the code example. The Spring Boot app will receive responses on these URLs, then use claims from the profile scope to present the username:
| Field | Value |
|---|---|
| Redirect URI | http://localhost:8080/login/oauth2/code/curity |
| Post Logout Redirect URI | http://localhost:8080/ |
| Scope | openid profile |
The full XML for the web client is provided below. You can save it to a file and then upload the configuration in the Admin UI, to create the client. Do so by accessing the Changes menu and selecting the Upload option.
<config xmlns="http://tail-f.com/ns/config/1.0"><profiles xmlns="https://curity.se/ns/conf/base"><profile><id>token-service</id><type xmlns:as="https://curity.se/ns/conf/profile/oauth">as:oauth-service</type><settings><authorization-server xmlns="https://curity.se/ns/conf/profile/oauth"><client-store><config-backed><client><id>website-client</id><client-name>website-client</client-name><secret>Password1</secret> <!-- Don't forget to change this --><redirect-uris>http://localhost:8080/login/oauth2/code/curity</redirect-uris><scope>openid</scope><scope>profile</scope><user-authentication><allowed-post-logout-redirect-uris>http://localhost:8080/</allowed-post-logout-redirect-uris></user-authentication><allowed-origins>http://localhost:8080</allowed-origins><capabilities><code></code></capabilities><validate-port-on-loopback-interfaces>true</validate-port-on-loopback-interfaces><id-token-encryption><encryption-key>website-encryption</encryption-key><content-encryption-algorithm>A256CBC-HS512</content-encryption-algorithm><key-management-algorithm>RSA-OAEP</key-management-algorithm></id-token-encryption></client></config-backed></client-store></authorization-server></settings></profile></profiles></config>
Build the Code
The code example is based on the OpenID Connect Client with Spring Security, and implements the Code Flow. Open the project in an IDE of your choice, then ensure that the website's OAuth settings match those of your environment:
spring:security:oauth2:client:registration:idsvr:client-id: website-clientclient-secret: Password1authorization-grant-type: authorization_coderedirect-uri: "{baseUrl}/login/oauth2/code/curity"scope: openid, profileprovider:idsvr:issuer-uri: https://localhost:8443/oauth/v2/oauth-anonymous
Ensure that Java 8 or later and Maven are installed, then run the following commands to build and run the app, which will listen on port 8080 by default:
mvn packagejava -jar target/example-website-0.0.1-SNAPSHOT.jar
Run the Web Client
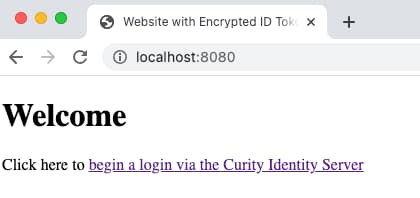
The website application has a minimal UI, so that the focus is only on working with encrypted ID tokens. Browse to http://localhost:8080, which is an unsecured home page that prompts the user to sign in:
After authentication the app displays the user's name by rendering claims received in the ID token, then shows a logout link:

OAuth Customization
Some OAuth security libraries used by web clients do not yet support JSON Web Encryption. At the time of writing this includes Spring Boot, but we can use Spring's extensibility features to customize handling of responses from the token endpoint. This results in the following web security configuration, where a custom handler is used to process responses from the token endpoint:
@Configurationclass OAuth2SecurityConfig : WebSecurityConfigurerAdapter() {override fun configure(http: HttpSecurity) {http.authorizeRequests().antMatchers("/").permitAll().antMatchers("/error").permitAll().anyRequest().authenticated().and().logout().logoutSuccessHandler(CustomLogoutHandler()).and().oauth2Login().tokenEndpoint().accessTokenResponseClient(accessTokenResponseClient())}}
A utility Token Response Converter then manages updating the token response with a Signed JWT that is extracted from the ciphertext of the Nested JWT. A little boiler plate code is needed, not all of which is shown in the below code snippet. The Spring Security processing then continues in the standard way, to digitally verify the signed JWT:
class CustomTokenResponseConverter : Converter<Map<String?, String?>?, OAuth2AccessTokenResponse?> {override fun convert(tokenResponseParameters: Map<String?, String?>): OAuth2AccessTokenResponse {var idToken = tokenResponseParameters["id_token"]if (idToken != null) {idToken = JweDecryptor().decrypt(idToken);}val extraParams = mapOf("id_token" to idToken)return OAuth2AccessTokenResponse.withToken(accessToken).refreshToken(refreshToken).scopes(scopes).tokenType(accessTokenType).expiresIn(expiresIn).additionalParameters(extraParams).build()}}
To manage the JSON Web Encryption the code example first gets a private key object by loading a password protected PKCS12 file into a keystore. The jose4j security library is then used to perform the JWE decryption, which only requires a few lines of code:
class JweDecryptor {fun decrypt(encryptedJwt: String): String {val privateKey = loadPrivateKey()val jwe = JsonWebEncryption()jwe.key = privateKeyjwe.compactSerialization = encryptedJwtreturn jwe.plaintextString}}
From this point onwards the application works with an ID token that is the inner JWT of the nested JWT. The example demonstrates this by rendering the given_name and family_name claims from the ID token:
@Controllerclass UserController {@GetMapping("/")fun index(): String {return "index"}@GetMapping("/user")fun user(model: Model,@AuthenticationPrincipal oidcUser: OidcUser): String {model.addAttribute("userName","${oidcUser.idToken.givenName} ${oidcUser.idToken.familyName}")return "user"}}
Logout
The website also provides a basic OpenID Connect logout capability, but is careful not to send the decrypted ID token in the front channel and reveal PII. This is done by implementing a custom logout handler that omits the id_token_hint field mentioned in OpenID Connect RP Initiated Logout.
Conclusion
Web clients can use encrypted ID tokens to prevent personally identifiable information being revealed to the browser. This may not always work automatically with the web client's technology stack, though you can customize behavior using a JOSE compliant library that supports JSON Web Encryption. The web app can then continue to use ID token information in the standard way.
Customer Stories
Learn how organizations run identity and API security at scale.
Read customer storiesWas this helpful?