Mobile Dynamic Client Registration
On this page
Note
The example uses the Curity Identity Server, but you can run the code against any standards-based authorization server.
Overview
The introductory AppAuth code examples explained how to implement the OAuth mobile flow according to RFC8252, so see these articles if you are new to AppAuth:
This tutorial shows how to use Dynamic Client Registration (DCR) for a mobile app, as recommended in Curity's Mobile Best Practices. This provides a unique mobile client per end user, with improved options for detecting fraudulent mobile usage or dealing with stolen devices. Each instance also uses its own client secret during OAuth requests, making it closer to a confidential client and therefore more secure.
Registration Mechanisms
Dynamic client registration requires the mobile app to onboard the user by registering the user's application instance with an initial access token with a scope of dcr. Managing this is a little tricky and there are a number of possibilities:
| Option | Behavior |
|---|---|
| User authenticates | The end user can provide credentials in order to get the DCR access token |
| Device authenticates | A device can download a DCR access token from an API, perhaps by presenting a client certficate |
| Push notifications | Trusted devices can receive push notifications containing a DCR access token |
The first of these is easiest to demonstrate from an infrastructure viewpoint, and is used in this code example. As we shall see however, the user experience is a little tricky, so we will demonstrate one possible approach for keeping the user informed.
Get the Code
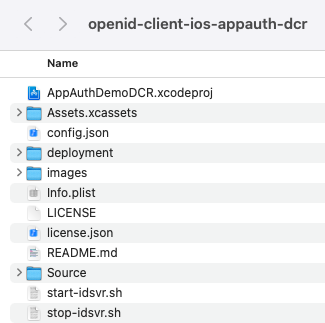
First download the code from the GitHub repository for your platform:
git clone https://github.com/curityio/openid-client-ios-appauth-dcr
git clone https://github.com/curityio/openid-client-android-appauth-dcr
Then change to that folder to view files. In this post we will describe iOS behavior, though Android behavior and code is almost identical and can be followed in an equivalent manner.
Quick Start
The easiest way to run the code example is to point it to a deployed and preconfigured instance of the Curity Identity Server, running in Docker. This is done via a script included with the example that is explained in the Mobile Setup how-to:
./start-idsvr.sh
The result is to provide a working internet URL for the Curity Identity Server, such as https://baa467f55bc7.eu.ngrok.io, ready for the mobile app to connect to. The Admin UI is also available and can be accessed using the following details:
| Property | Value |
|---|---|
| URL | https://localhost:6749/admin |
| User | admin |
| Password | Password1 |
The deployed system also includes a user account of demouser / Password1 that can be used to sign in:
Configuration
The code example uses a configuration file, which exists at the below locations, depending on the platform used:
| Platform | Configuration File Location |
|---|---|
| iOS | ./ios/config.json |
| Android | ./android/app/src/res/raw/config.json |
If you are using the above quick start, it will automatically be updated with the Curity Identity Server base URL, or you can provide the base URL of your own system if you prefer:
{"issuer": "https://baa467f55bc7.eu.ngrok.io/oauth/v2/oauth-anonymous","registrationClientID": "mobile-dcr-client","redirectUri": "io.curity.dcrclient:/callback","postLogoutRedirectUri": "io.curity.dcrclient:/logoutcallback","scope": "openid profile"}
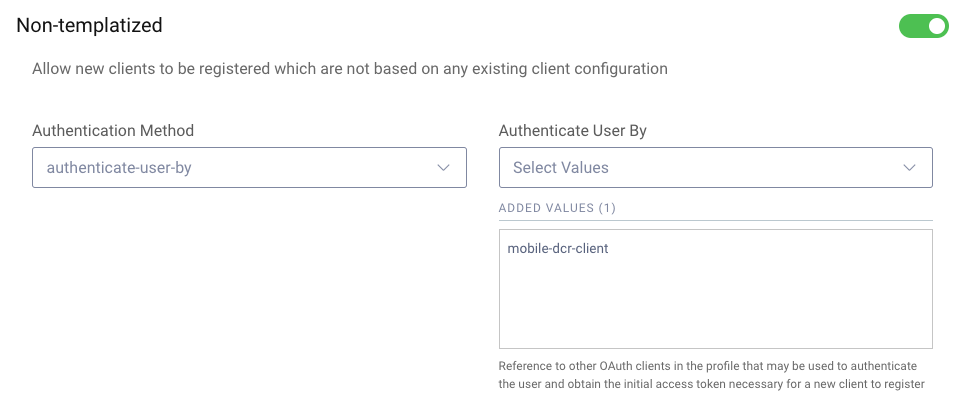
To configure Dynamic Client Registration manually, use the Admin UI and navigate to Profiles / Token Service / General / Dynamic Registration. Ensure that DCR is activated and select the option that users authenticate:
The initial authentication to get a DCR access token requires a static OAuth Client that uses the Authorization Code Flow (PKCE), with the full client XML shown below:
<client><id>mobile-dcr-client</id><client-name>mobile-dcr-client</client-name><no-authentication>true</no-authentication><redirect-uris>io.curity.dcrclient:/callback</redirect-uris><proof-key><require-proof-key>true</require-proof-key></proof-key><refresh-token-ttl>disabled</refresh-token-ttl><user-authentication><allowed-authenticators>Username-Password</allowed-authenticators><allowed-post-logout-redirect-uris>io.curity.dcrclient:/logoutcallback</allowed-post-logout-redirect-uris></user-authentication><capabilities><code></code></capabilities><validate-port-on-loopback-interfaces>true</validate-port-on-loopback-interfaces></client>
Run the App
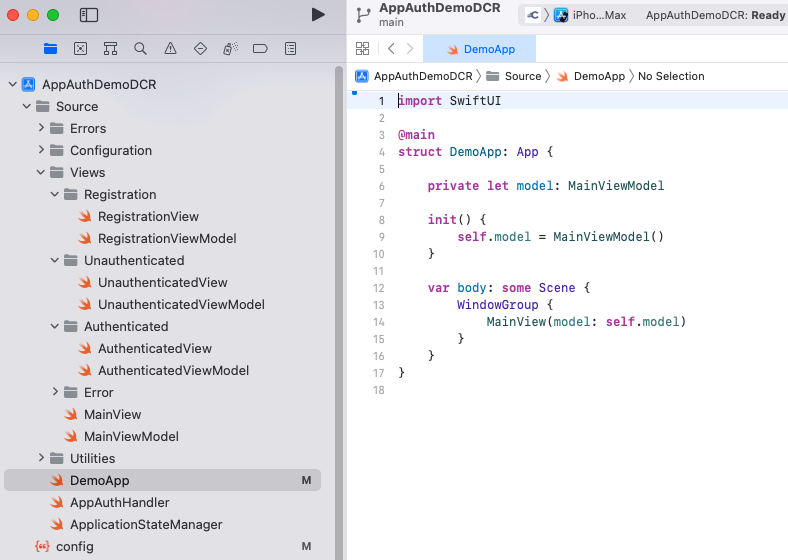
To run the iOS app, open the iOS code example folder in an up-to-date version of Xcode and click the build and run button:
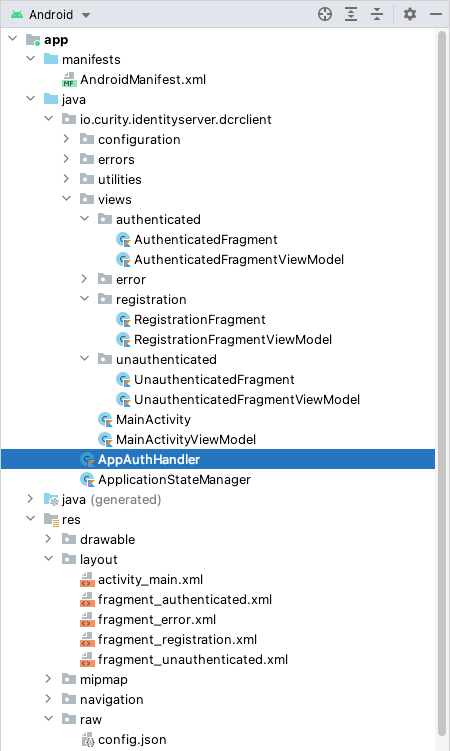
To run the Android app, open the Android code example folder in an up to date version of Android Studio and click the build and run button:
User Experience
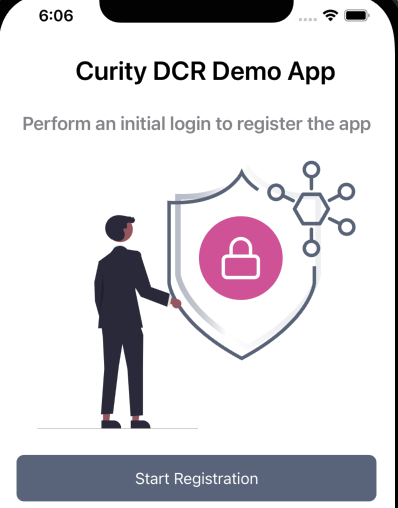
When a user first runs the app a DCR token must be returned, and the code example informs the user that they are performing a registration step for their application instance:
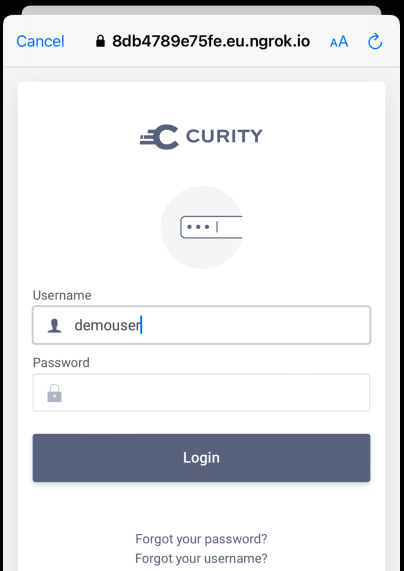
The user will then authenticate using an In-App Browser and with username and password authentication:
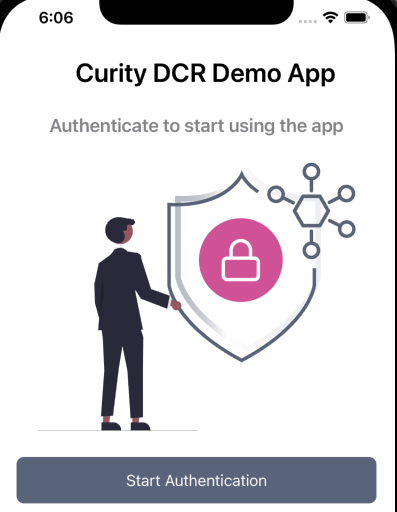
When the authentication flow completes and the code is redeemed for tokens, a DCR access token is returned to the app and it then sends a registration request. At this point the app has its own unique client ID and secret for the user's instance of the app. The user must then sign in again, using the dynamic client ID and client secret, to get application level tokens:
This is a little awkward from a UX viewpoint, but it only occurs once per user, and the second sign-in operation is automatic, using Single Sign On. The app then stores the registration response in secure mobile storage, so that the user's application instance never again needs to deal with DCR access tokens or show the registration screen.
Registration
The registration request and response data is shown below, and the request message also sends the DCR access token in the HTTP Authorization Header in the standard way:
{"redirect_uris":["io.curity.dcrclient:/callback"],"post_logout_redirect_uris":["io.curity.dcrclient:/logoutcallback"],"application_type":"native","grant_types":["authorization_code"],"scope":"openid profile"}
{"default_acr_values": ["urn:se:curity:authentication:html-form:Username-Password"],"application_type": "native","registration_client_uri": "https://baa467f55bc7.eu.ngrok.io/token-service/oauth-registration/87f1d9de-de2f-4e96-b27b-882cce0a3352","registration_access_token_expires_in": 31536000,"registration_access_token": "e99ab41e-52a1-4fa3-b21b-fb95a398c33a","client_id": "87f1d9de-de2f-4e96-b27b-882cce0a3352","token_endpoint_auth_method": "client_secret_basic","scope": "openid profile","client_id_issued_at": 1624011134,"client_secret": "tfs9nad3dweFAa1CqpUj5p6NC4-092hb5Gg4SVRhOkc","id_token_signed_response_alg": "RS256","grant_types": ["authorization_code", "refresh_token"],"subject_type": "public","redirect_uris": ["io.curity.dcrclient:/callback"],"post_logout_redirect_uris":["io.curity.dcrclient:/logoutcallback"],"client_secret_expires_at": 0,"token_endpoint_auth_methods": ["client_secret_basic", "client_secret_post"],"response_types": ["code", "id_token"],"refresh_token_ttl": 3600}
The app then saves the registration response to mobile secure storage in the code example's ApplicationStateManager class, and this information is deserialized whenever the app is restarted, to read the dynamic client's ID and secret into memory:
class ApplicationStateManager {init() {let data = KeychainWrapper.standard.data(forKey: self.storageKey + ".registration")let registrationResponse = try NSKeyedUnarchiver.unarchiveTopLevelObjectWithData(data!) as? OIDRegistrationResponseself.authState!.update(with: registrationResponse)}}
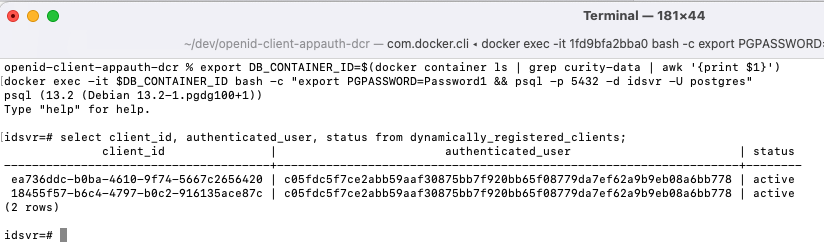
A list of registered users can be queried from the SQL database included with the code example, by first connecting to a query tool from a terminal window:
export DB_CONTAINER_ID=$(docker container ls | grep curity-data | awk '{print $1}')docker exec -it $DB_CONTAINER_ID bash -c "export PGPASSWORD=Password1 && psql -p 5432 -d idsvr -U postgres"
The following database query will then provide details of all dynamically registered mobile clients. This data storage enables an administer to revoke access for a user whose device is stolen, by updating the status to a non-active value:
select client_id, authenticated_user, status from dynamically_registered_clients;
Per Instance Credentials
All future requests to authenticate and get tokens then use unique credentials for that mobile client. The updated authorization code grant message will now contain these fields:
| Form Parameter | Example Value |
|---|---|
| grant_type | authorization_code |
| client_id | 87f1d9de-de2f-4e96-b27b-882cce0a3352 |
| client_secret | tfs9nad3dweFAa1CqpUj5p6NC4-092hb5Gg4SVRhOkc |
| code | Cg85vgCfElPckCgzPYDcZUrMekzA1iv5 |
| code_verifier | ex_OaauEnB0cLdBwXUXypYxr4j2CrkPNfWOsdI_lNrKAdgL1c-bx-Uizzsgb-0Eio58ohD85zKjWqWQc2lvjSQ |
| redirect_uri | io.curity.client:/dcrcallback |
The mobile app uses short lived access tokens that are silently renewed via a refresh token grant message that also uses the mobile client's unique credentials:
| Form Parameter | Example Value |
|---|---|
| grant_type | refresh_token |
| client_id | 87f1d9de-de2f-4e96-b27b-882cce0a3352 |
| client_secret | tfs9nad3dweFAa1CqpUj5p6NC4-092hb5Gg4SVRhOkc |
| refresh_token | 62a11202-4302-42e1-983e-b26362093b67 |
AppAuth Code
The mobile app's code now performs two separate authorization redirects, both using Authorization Code Flow + PKCE. The first of these is used to get a DCR access token in order to register the client and the second is used to sign the user in normally. Therefore the AppAuth logic is parameterized, where the following three fields are different for the two flows:
| Field | Registration Redirect | Authentication Redirect |
|---|---|---|
| Client ID | mobile-dcr-client | 87f1d9de-de2f-4e96-b27b-882cce0a3352 |
| Client Secret | None | tfs9nad3dweFAa1CqpUj5p6NC4-092hb5Gg4SVRhOkc |
| Scope | dcr | openid profile |
The mobile app's registration view runs an Authorization Code Flow via the following code, which results in a DCR access token being returned to the app:
let authorizationResponse = try self.appauth!.performAuthorizationRedirect(metadata: metadata!,clientID: self.config!.registrationClientID,scope: "dcr",viewController: self.getViewController(),force: true).await()if authorizationResponse != nil {var dcrAccessToken: String? = ""var tokenResponse: OIDTokenResponse? = niltry DispatchQueue.global().await {tokenResponse = try self.appauth!.redeemCodeForTokens(clientSecret: nil, authResponse: authorizationResponse!).await()}dcrAccessToken = tokenResponse?.accessToken
The DCR access token is then used in a separate Dynamic Client Registration flow, which is a simple HTTP POST. This uses the AppAuth support for authenticated DCR and sending an initial access token, as demonstrated by the following Swift code from the code example's AppAuthHandler class:
let nonTemplatizedRequest = OIDRegistrationRequest(configuration: metadata,redirectURIs: [redirectUri!],responseTypes: nil,grantTypes: [OIDGrantTypeAuthorizationCode],subjectType: nil,tokenEndpointAuthMethod: "client_secret_basic",initialAccessToken: accessToken,additionalParameters: extraParams)OIDAuthorizationService.perform(nonTemplatizedRequest) { response, ex inif response != nil {let clientID = response!.clientIDlet clientSecret = response!.clientSecret}
Managing Changes
The Curity Identity Server supports two forms of DCR as summarized in the following how-to resources, and which you can read more about in RFC7591. You should decide which of these behaviors you prefer for managing your mobile app's settings over time:
| Method | Description |
|---|---|
| Non Templatized DCR | All client details required are specified dynamically for every mobile instance, which provides the most fine grained control per user |
| Templatized DCR | A static client is used as a template to store common details shared across mobile instances, and changes to the template immediately come into effect for all users |
Templatized DCR uses a simpler request message, requiring only the client ID of a static template client, supplied as a software_id field. The response message returned would be the same as for non templatized clients, and would again have a unique client ID and secret per mobile client.
curl -X POST \https://localhost:8443/oauth/v2/oauth-dynamic-client-registration \-H 'Authorization: Bearer 25a3ee8e-451d-4d00-9ea4-4d8f258405bb' \-H 'Content-Type: application/json' \-d '{"software_id": "mobile-dcr-template-client"}'
AppAuth libraries do not support templatized DCR but it is easy to implement this simple POST request with any mobile HTTP stack.
Conclusion
Dynamic Client Registration provides extra security and administration options for mobile apps, and is fairly straightforward to implement using the support in the AppAuth libraries. When a user first runs the app they will use a DCR access token to register, and this will create a unique client ID and secret per device.
When using the User Authenticates option, care over the UX is recommended, in order to avoid confusing users. In this code example we showed how to manage this by guiding the user through a series of screens.
Customer Stories
Learn how organizations run identity and API security at scale.
Read customer storiesWas this helpful?