Configure Database Scopes
On this page
This tutorial guides through the steps necessary for setting up database scopes (DB scopes) in the Curity Identity Server.
What are Database Scopes?
Database scopes are scopes whose configurations the Curity Identity Server manages in an external database - thus the name. The configuration includes relations to other configuration items such as the token profile and Token Issuance Authorizers.
Traditionally, the Curity Identity Server treated scopes as static configuration items ("configuration-based scopes" or "config scopes"). With Database Scopes, this paradigm shifts. Conceptually, however, they work the same as described in the Scopes Explained article.
Why do you need Database Scopes?
Database scopes allow for fetching scope configuration on demand from an external database. Treating scopes as runtime information rather than static configuration allows scope related configuration to change and update independently of the configuration of the Curity Identity Server. This enables more agile and developer-friendly processes for secure and fast delivery.
Prerequisites
Before starting with the tutorial, ensure you have the following prerequisites in place.
- A running Curity Identity Server environment with support for ephemeral clients
- Admin UI access with permission to update a token profile
- An OAuth client you can use for testing
- Expert view enabled in Admin UI
If you miss some of the prerequisites, check out the Getting Started guides to get up and running with the Curity Identity Server. For ephemeral clients see the Ephemeral Clients tutorial. These guides give you a working setup for this tutorial. Make sure to enable the Expert View before continuing.
In addition, make sure, you also have the following:
- An SQL database to store scope configuration
Note that database scopes are currently an experimental feature and subject to change.
Prepare for the Database Operations
Database scopes utilize Entity Managers for read and write operations. Entities are data items that the Curity Identity Server stores and manages in external databases. Entities can have attributes and relations which makes them a perfect fit for database scopes.
For the entity manager to correctly handle and treat entities, it needs an Entity Schema that defines the appropriate attributes and relations for the supported entity types, the database scopes in this case.
Consequently, to load scopes from a database, you need to configure the following items:
- A JDBC data source (the connection to the SQL database)
- An entity schema with support for database scopes
- An entity manager that references the schema and JDBC data source
The following sections explain the steps to configure these items.
Step 1: Create a JDBC Data Source
To create a JDBC data source and connect to the SQL database, refer to the tutorial Get Connected to SQL Data Sources, or reuse an existing data source.
Note down the name of the data source. You need it later. This tutorial assumes the data source is named default-datasource.
Step 2: Create an Entity Schema for Database Scopes
Entity schemas are global configuration items that define the syntax of entities. Follow these steps to create an entity schema for the database scopes with the Admin UI.
- In the Facilities menu, hover the Entity Schemas entry.
- Click on the + symbol next to the entry to create a new entity schema.
- Enter a name for the entity schema, e.g.,
database-scopes-entity-schema, and click Create.
On the main configuration screen for the newly created entity schema, enable Profile Scopes. This configures the schema to support entities for database scopes.
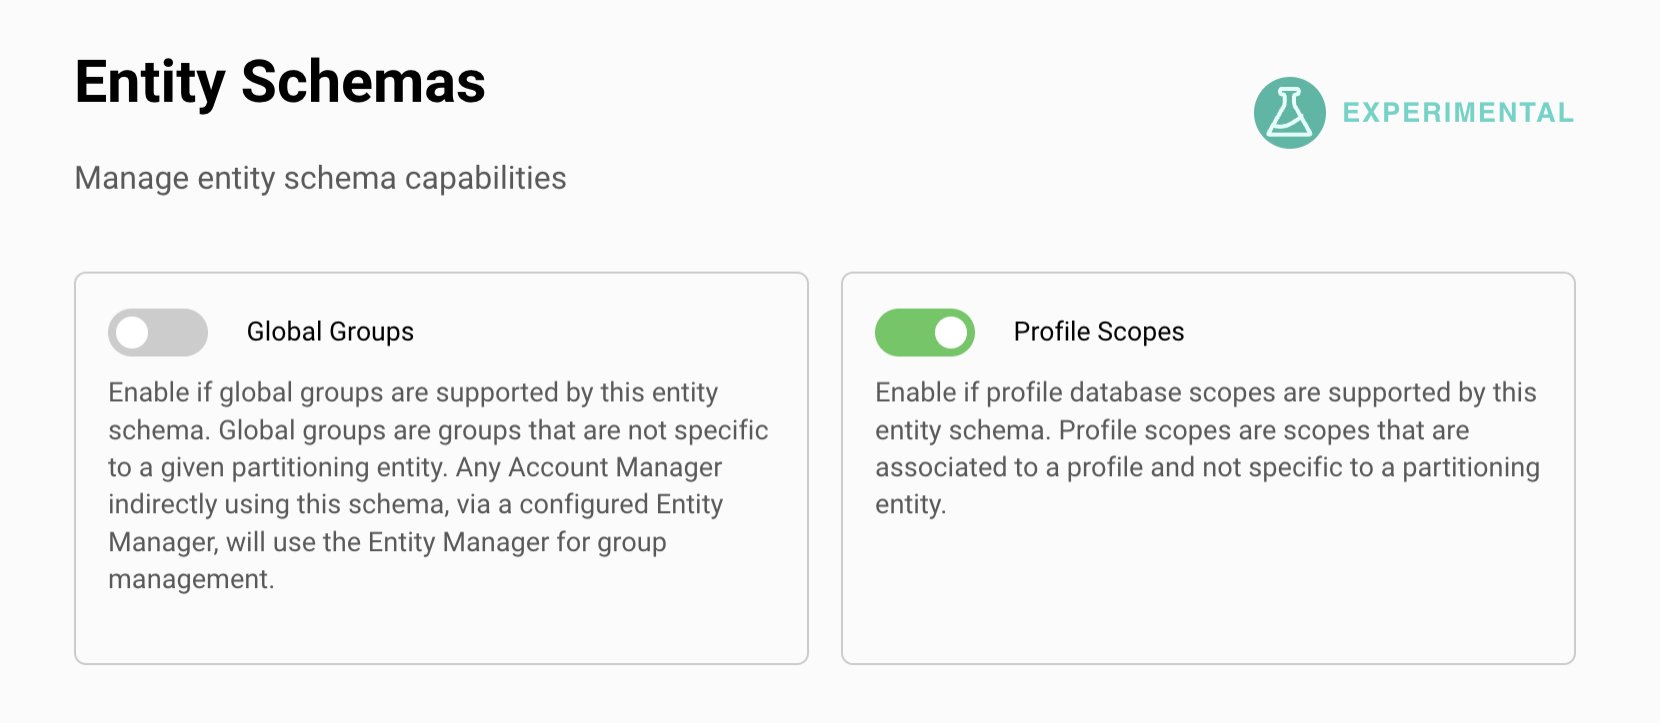
Scopes, including database scopes, are not global but specific for a token profile, thus the name "profile scopes". Later, you need to enable database scopes in the token profile. Before you get there, configure an entity manager that applies the entity schema on the data source.
Step 3: Create an Entity Manager
Entity managers are global configuration items that use the entity schema to read and write entities to a data source. Follow these steps to create a new entity manager for database scopes with the Admin UI.
- In the Facilities menu, hover the Entity Managers entry.
- Click the + symbol next to the entry to create a new entity manager.
- Enter a name for the entity manager, e.g.,
database-scopes-entity-manager, and click Create.
On the main configuration screen for entity managers, perform the following configuration.
- In the drop down menu for Entity Schema, select the entity schema from above,
database-scopes-entity-schema. - In the drop down menu for the Entity Data Source, select the JDBC Data Source from above,
default-datasource.
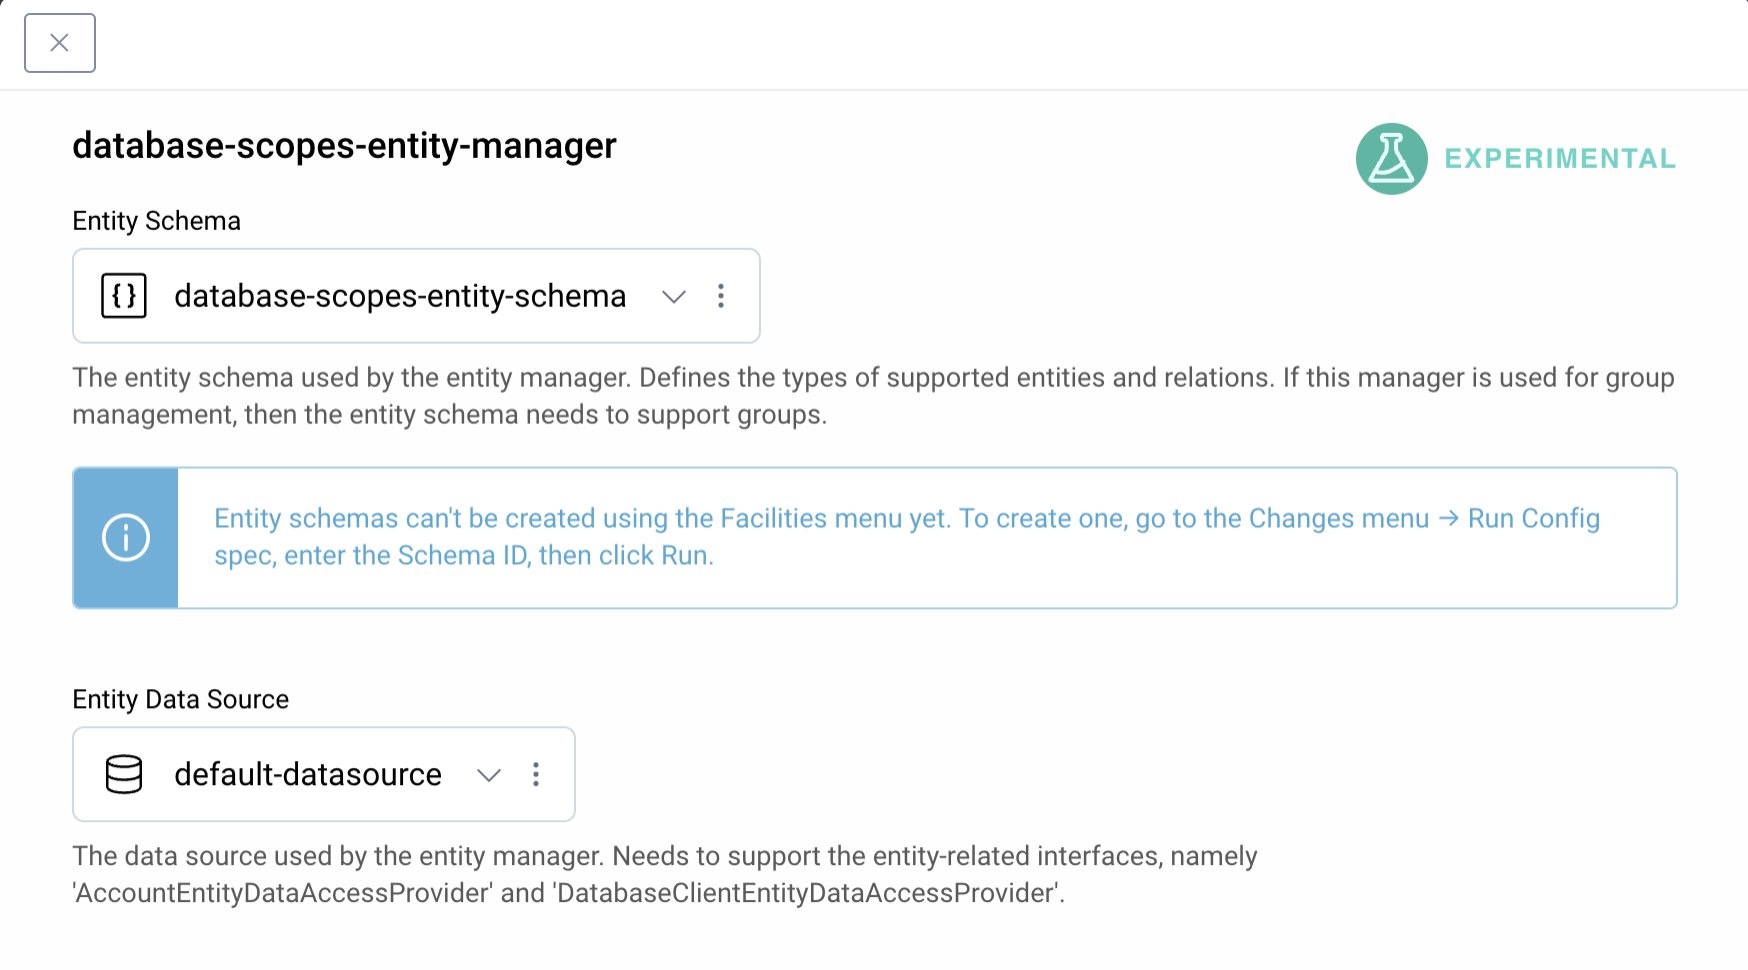
The data source points to the database where the entity manager assumes the data, the database scopes, according to the defined entity schema. You can now enable database scopes for a token profile.
Step 4: Enable Database Scopes for Token Profile
Scopes relate to token profiles. You need to explicitly enable database scopes on a token profile to enable the same to manage scopes in the database (via the entity manager).
- In the Admin UI, navigate to Profiles → Token Service (or other token profile).
- Open the General settings of the token profile from the left pane.
- Select Database Scopes from the shortcut menu on the top.
- Toggle on Enable Database Scopes.
A wizard opens.
- In the drop down menu for Entity Manager, select the entity manager from above,
database-scopes-entity-manager. Click Next. - Review the settings. Click Next.
- Commit the changes and click the Commit button.
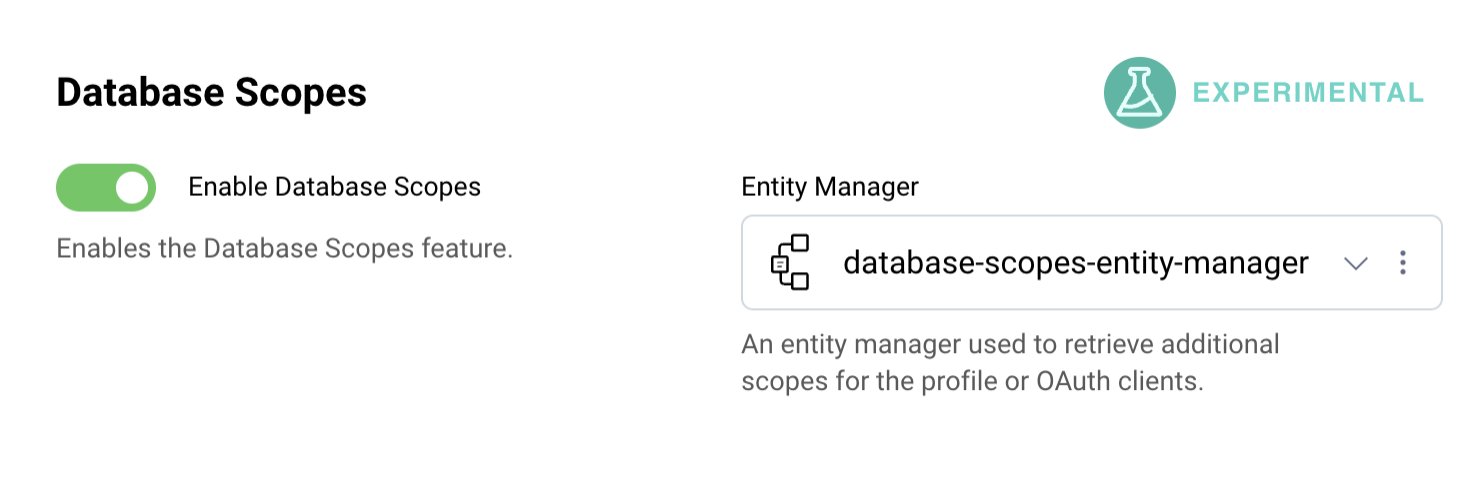
The token profile now supports database scopes. This means, its token issuer logic can read scope configuration from the external SQL database, and you can store scope configuration in the database. Try it out.
Step 5: Create Database Scopes
There are two ways to create, update or delete database scopes via the Curity Identity Server.
- The Database Clients GraphQL API
- The Admin UI
For the purpose of this tutorial, use the Admin UI to create a database scope.
- Navigate to Profiles → Token Service → Scopes.
- Select the Database Scopes tab in the Scopes pane.
- Click + New in the top of the pane.
- Enter a name for your database scope. Enter
readfor this tutorial. - Click the three-dot edit menu for the scope and click Edit.
- Enable Allowed in Ephemeral Clients.
- Click Save under the scope name to have the entity manager save the changes in the database.
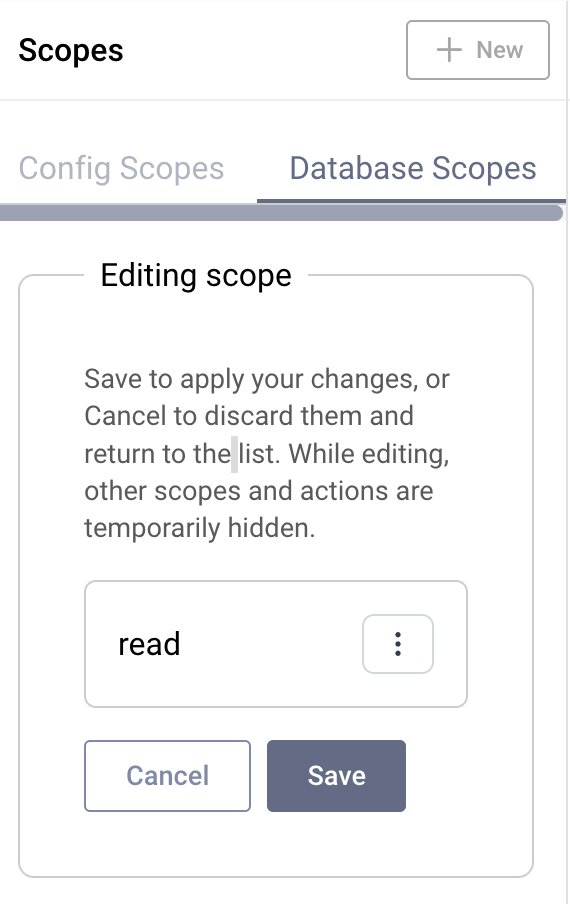
Step 6: Assign Database Scope to Client
Database scopes assume you have other dynamic requirements as well, like database clients or ephemeral clients. The following steps show how to assign a database scope to ephemeral clients using the Admin UI.
- Navigate to Profiles → Token Service.
- In the left pane, select General → Ephemeral Clients.
- Click on Scopes in the shortcut menu on top of the page.
- Click on Database Scopes to view the configuration settings for database scopes.
- Mark the
readscope from the list of database scopes to allow ephemeral clients to request that scope. - Commit the changes via the Changes menu.
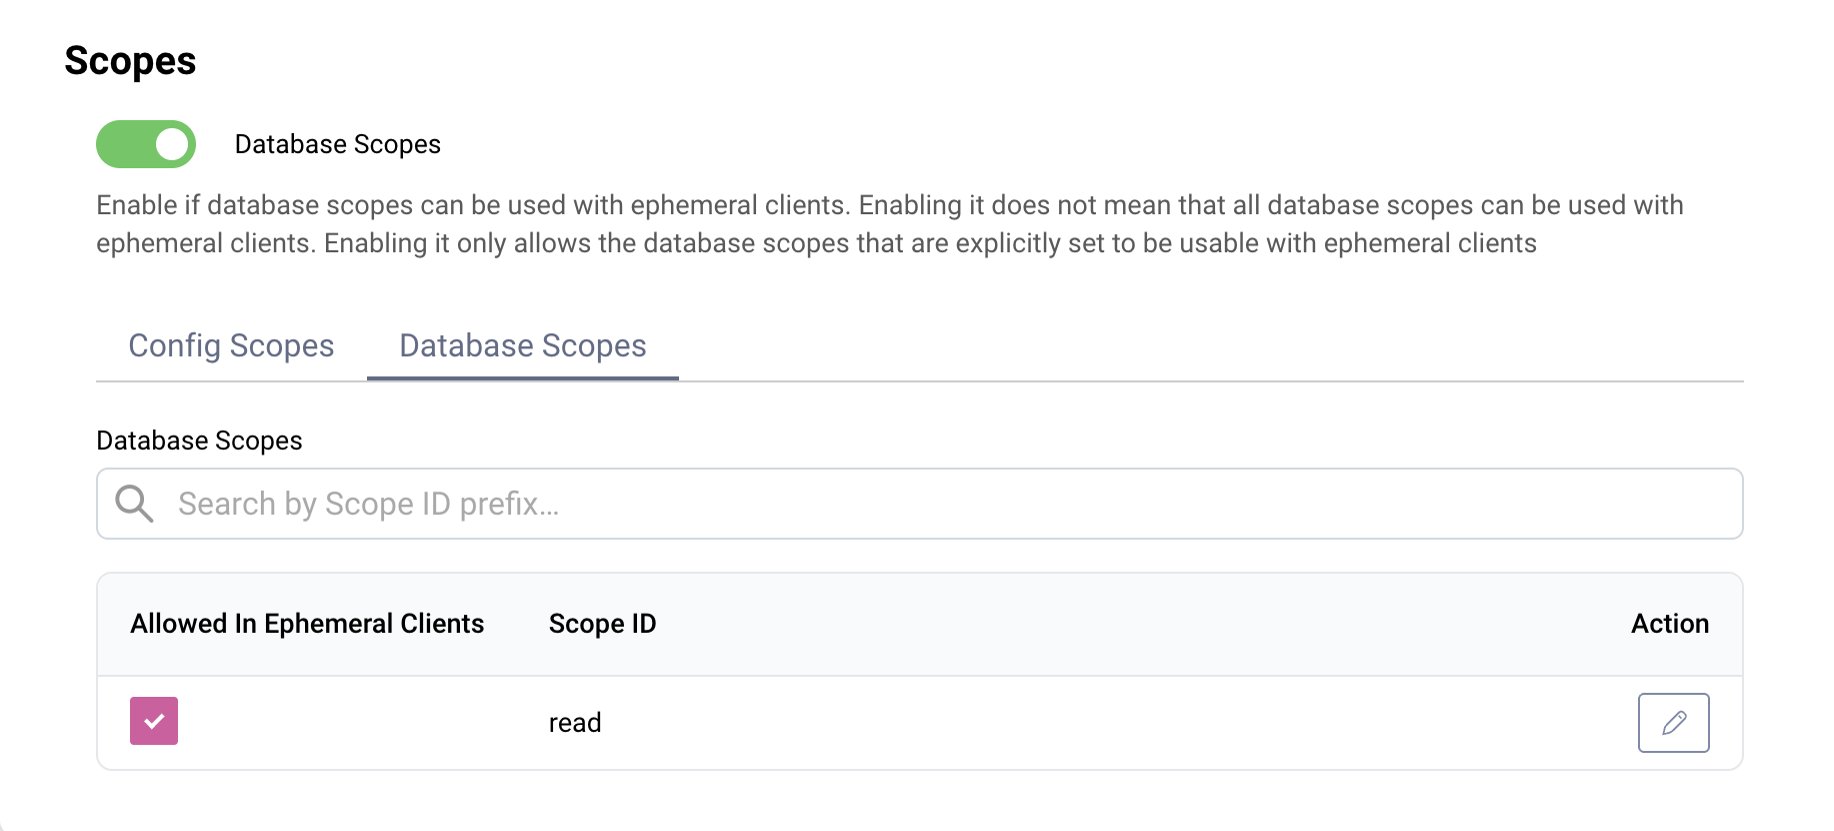
For assigning database scopes to database clients refer to the tutorial for Database Client Management with GraphQL.
You can only assign database scopes to database clients and ephemeral clients.
Step 7: Verify Setup
Use your test client to start an OAuth flow and request the read scope. For example, the following is an authorization request for an ephemeral client on www.client.example requesting the read scope.
https://login.demo.example/oauth/v2/oauth-authorize?response_type=code&client_id=https%3A%2F%2Fwww.client.example%2Fclient-metadata.json&code_challenge=UM3W-4IrL8ux33MDetFyJJ_DswphaiBkzwnEJAJaua8&code_challenge_method=S256&redirect_uri=http%3A%2F%2F127.0.0.1%3A8090%2Fcallback&scope=read&resource=https%3A%2F%2Fmcp.demo.example%2F
After successful authentication, the client can redeem the authorization code for an access token with the read scope:
{"token_type": "bearer","access_token": "_0XBPWQQ_0d726034-02d1-47ee-a8f8-e1c95732002b","refresh_token": "_1XBPWQQ_0bad9d8b-955b-4346-8c90-aef231154612","scope": "read","expires_in": 300}
Congratulations, you have now configured database scopes in the Curity Identity Server and verified the settings.
Customer Stories
Learn how organizations run identity and API security at scale.
Read customer storiesWas this helpful?