Configure Token Issuance Authorizers
On this page
This tutorial shows how to configure a Token Issuance Authorizer (TIA) in the Curity Identity Server. The authorizer ensures that the Curity Identity Server only issues a scope if the incoming request meets certain requirements. These requirements may be complex but for the purpose of this tutorial, the rule is simple: Authorize the scope only if the client specifically requested it for a defined resource.
What is a Token Issuance Authorizer?
Token Issuance Authorizers basically are rules assigned to a scope. The Curity Identity Server invokes them when it evaluates the requested scopes of an authorization or token request. This means, it evaluates the rules before it issues the scope to the access token.
Why do you need a Token Issuance Authorizer?
When you need fine-grained authorization, static client configuration is often not enough. Sometimes, you need control over not only which scopes a client may request but also when and under which conditions the authorization server should issue a scope to a client's access token. Just because a client is allowed to request a scope doesn't mean it should receive that scope in an access token. Token Issuance Authorizers let you evaluate runtime conditions before issuing a token with a certain scope, so you can enforce stronger, more dynamic and fine-grained policy decisions through the Curity Identity Server.
In this tutorial you learn how to use a script to define the rules for a Token Issuance Authorizer and how to assign the Token Issuance Authorizer to a scope.
Prerequisites
Before starting, ensure you have the following prerequisites in place.
- A running Curity Identity Server environment
- Admin UI access with permission to update a Token Service profile
- An OAuth client you can use for testing
- Expert view enabled in Admin UI
If you miss some of the prerequisites, check out the Getting Started guides to get up and running with the Curity Identity Server. These guides give you a working setup for this tutorial. Make sure to enable the Expert View before continuing.
Step 1: Define the Scope Policy
Write down the policy rules for the scopes before changing configuration. This gives you a good overview of what you need to configure to avoid mistakes. The rules for this tutorial are as follows:
- Allow the test client to read data (
readscope). - Allow the test client to write data (
writescope) only if it specifies an allowed resource.
You can represent these rules in a table to make review easier.
| Input Condition | Expected Result | Explanation |
|---|---|---|
| Untrusted client | Deny request. | Default behavior of the Curity Identity Server. There is no client configuration for the untrusted client. |
| Test client + disallowed scopes | Deny request. | Default behavior of the Curity Identity Server. Scope is not listed as allowed scope in client configuration. |
Test client + read scope | Allow request. | Default behavior of the Curity Identity Server. read scope is listed as allowed scope in client configuration and there is no TIA for the read scope. |
Test client + write scope | Deny request. | Enforced through TIA. write scope is listed as allowed scope in client configuration but not authorized when requested. The Curity Identity Server denies the request because there is no valid scope left. |
Test client + read and write scope | Allow only read scope. | The TIA does not allow the write scope. The Curity Identity Server issues the read scope only. |
Test client + write scope + disallowed resource | Deny request. | The TIA does not allow the write scope for the resource. The Curity Identity Server denies the request because there is no valid scope left. |
Test client + write scope + allowed resource | Allow request. | The TIA allows the write scope for the resource. |
Step 2: Create Scopes
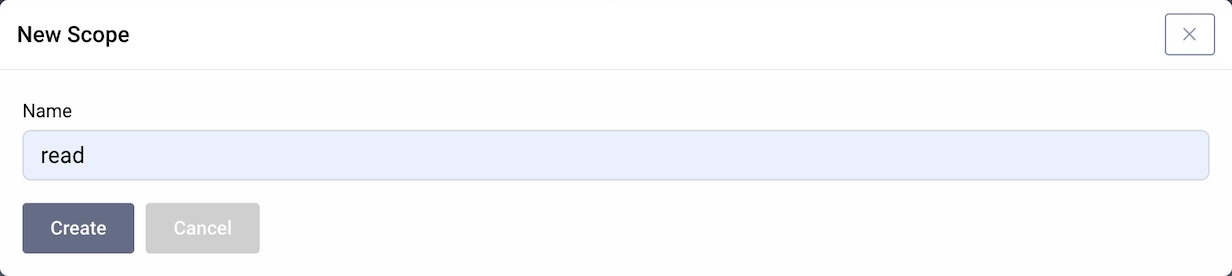
For the purpose of this tutorial, create two scopes, read and write.
- Navigate to Profiles → Token Service → Scopes.
- Click on the + New button next to "Scopes".
- Enter
readas the name of the new scope in the dialog. - Click Create.
- Repeat the steps for the
writescope. - In the Changes menu, click Commit to commit the changes.
Step 3: Assign Scopes to Client
The test client is expected to request read scope and write scope. Therefore, configure the client with both scopes. Follow these steps in the Admin UI.
- Navigate to Profiles → Token Service → Clients.
- Open your test client.
- In the Overview, click on the Scopes box.
- Add the
readscope to the test client. - Add the
writescope to the test client. - Commit the changes.

Step 4: Create a Token Issuance Authorizer
The Token Issuance Authorizer enables you to evaluate policies based on a requested scope and dynamically restrict what access clients can receive at runtime. In this tutorial, the policy only allows the write scope, if the client requested it for an example server, https://server.example.
Follow these steps to configure the Token Issuance Authorizer in the Admin UI.
- Navigate to Profiles → Token Service → Scopes → Token Authorization.
- Create a new Token Issuance Authorizers by clicking on +New.
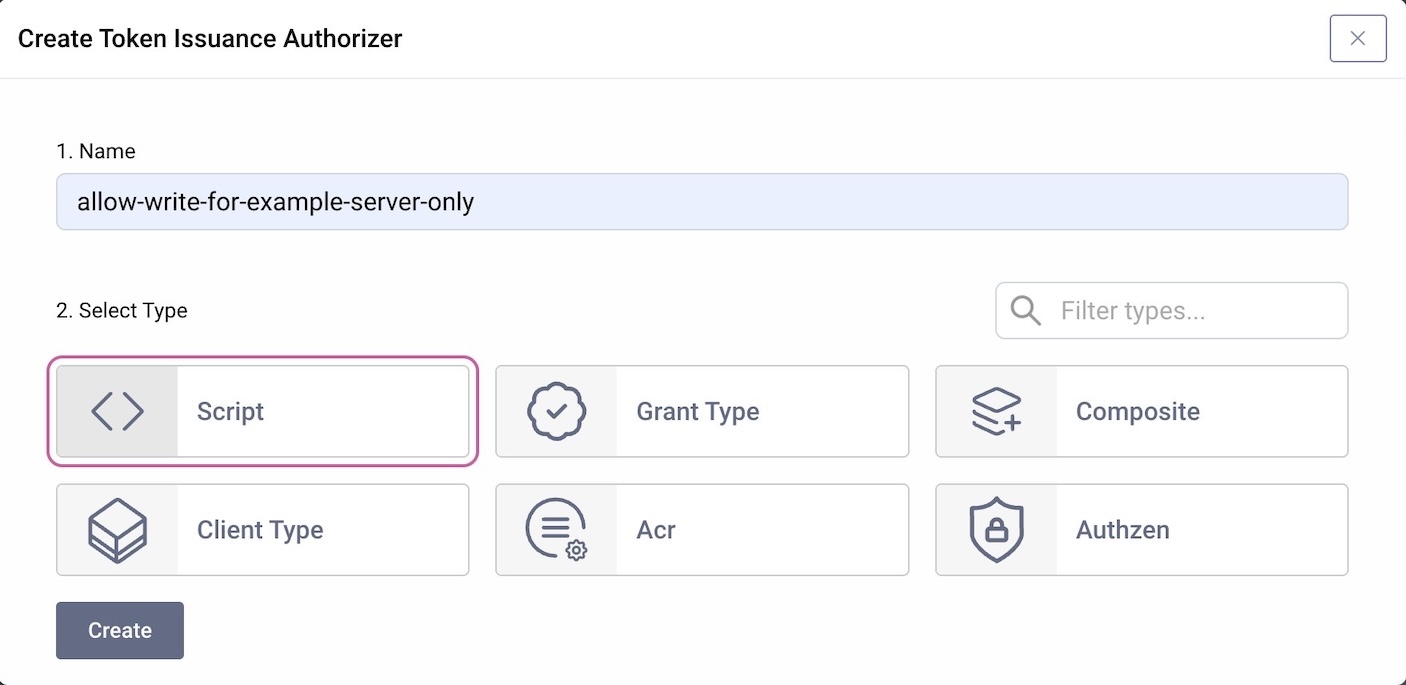
- Enter a name, e.g.
allow-write-for-example-server-only. - Select Script as the type for the Token Issuance Authorizer.
- Click Create.
- Add the following script for the policy.
/*** @param {se.curity.identityserver.procedures.tokenissuanceauthorizer.TokenIssuanceAuthorizerProcedureContext} context*/function result(context) {var requestedResources = context.request.getParameterValues("resource");var allowedResource = "https://server.example";var allowScope = false;allowScope = requestedResources && requestedResources.length === 1 && requestedResources[0] === allowedResource;if (allowScope) {return context.newResultBuilder().allow("write").build();} else {return context.newResultBuilder().build();}}
- Close the modal window.
- Commit the changes.
Step 5: Assign the Token Issuance Authorizer to the Scope
The Token Issuance Authorizer should get triggered when the client requests the write scope. Follow these steps in the Admin UI to assign the Token Issuance Authorizer to the scope.
- Navigate to Profiles → Token Service → Scopes.
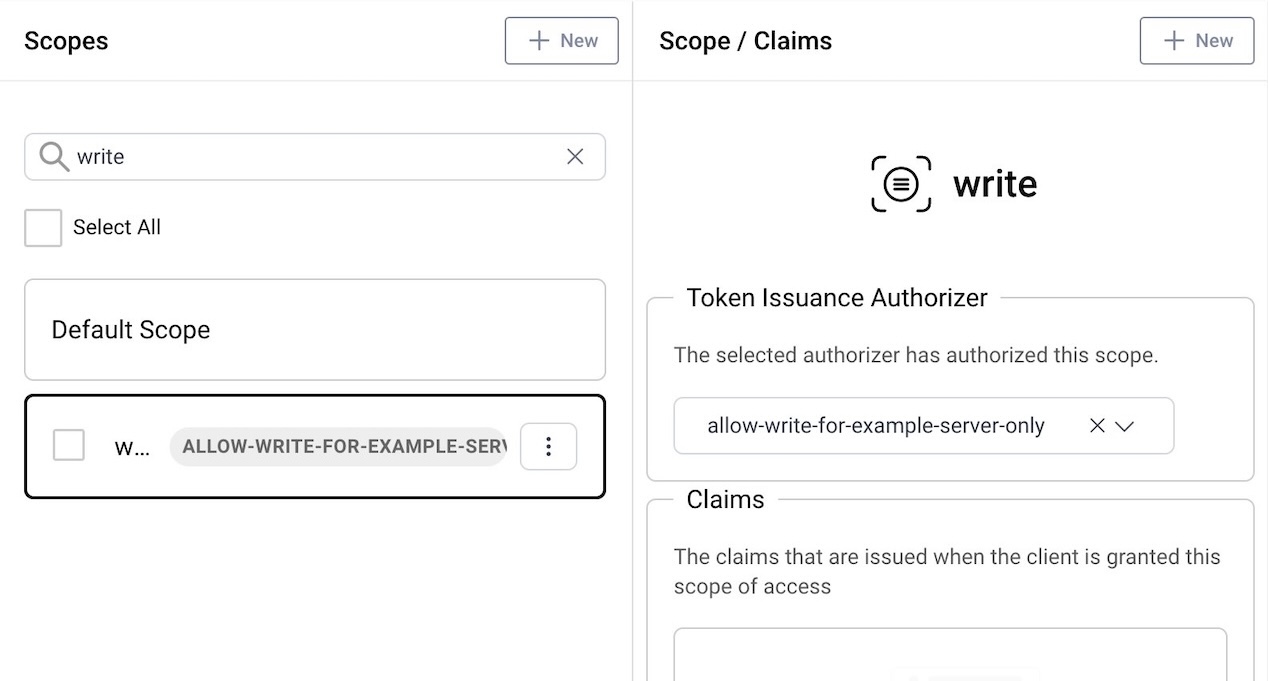
- In the list of scopes, search for and mark
writeto select the scope. - In the right panel, at the top select
allow-write-for-example-server-onlyfrom the dropdown menu to apply the Token Issuance Authorizer to the scope. - Commit the changes.
Step 6: Verify With Positive and Negative Tests
Use your test client to run a flow and request the read and write scope. For example, the following is an authorization request for the OAuth Tools app representing a deny case.
http://localhost:8443/oauth/v2/oauth-authorize?client_id=oauth-tools&response_type=code&redirect_uri=oauth.tools%3a%2f%2fapp%2fcallback%2fcode&state=1770905431829-vEZ&scope=read+write&code_challenge=vMWrcur5O5tYARZGK6XtqcG23qIdHH6YbYi-OMAMkXg&code_challenge_method=S256
If required, create an account and log in. When redeeming the authorization code for an access token, study the response from the Curity Identity Server. You can see that it issued the read scope only.
{"id_token": "eyJraWQiOiIxMTA0MTc...","token_type": "bearer","access_token": "_0XBPWQQ_cfb9c428-cc7c-4cc6-a6f9-5398875caa7e","refresh_token": "_1XBPWQQ_0cc90e54-6357-4e31-b721-7f9baf266248","scope": "read","expires_in": 299}
Use the same test client and modify the request. Add the parameter resource=https://server.example to the request as the following example illustrates:
http://localhost:8443/oauth/v2/oauth-authorize?client_id=oauth-tools&response_type=code&redirect_uri=oauth.tools%3a%2f%2fapp%2fcallback%2fcode&state=1770905431829-vEZ&scope=read+write&code_challenge=vMWrcur5O5tYARZGK6XtqcG23qIdHH6YbYi-OMAMkXg&code_challenge_method=S256&resource=https%3a%2f%2fserver.example
That detail changes the outcome of the Token Issuance Authorizer. The Curity Identity Server now returns a new access token that includes the write scope as well.
{"token_type": "bearer","access_token": "_0XBPWQQ_02ce23ce-71d0-4277-b319-6c516feeb5bd","refresh_token": "_1XBPWQQ_32d54f65-4edd-4ad8-9b4b-c5776f42324a","scope": "read write","expires_in": 300}
Types of Token Issuance Authorizer
This tutorial used a script to run custom rules on a scope. The script TIA can use an HTTP client that collects runtime client and user attributes, then sends them to an external HTTP service. If you need to implement complex logic, you can use the Java SDK to implement TIA plugins. You can also configure a global TIA that runs for all scopes before the Curity Identity Server triggers the rules for individual scopes.
The script TIA is just one of multiple built-in types of Token Issuance Authorizer you can use. Examples for other types are as follows.
Conclusion
The Curity Identity Server has two main rules that govern what scopes a client may receive in an access token:
- The client configuration that defines which scopes a client is allowed to request.
- Token Issuance Authorizers that define when to issue such a scope to an access token.
Token Issuance Authorizers enable the Curity Identity Server to restrict under which conditions it issues a scope to an access token. The tutorial showed an example with a simple script that allows a scope only under certain circumstances. For a complete description of what Token Issuance Authorizers (TIAs) can do, refer to the product documentation.
Customer Stories
Learn how organizations run identity and API security at scale.
Read customer storiesWas this helpful?