
Curity Access Control Rules
On this page
Access policies can control access to the different parts of the Curity configuration. You can configure unique policies for different access contexts and operations. For example, you can give a user create and read access for the admin UI for a specific part of the configuration but only read access from the CLI or RESTCONF.
The Curity Identity Server uses the Network Configuration Access Control Model (NACM) defined in RFC 8341 for access control rule definition and enforcement. The product documentation and the specification itself outline the specific details, but this article will introduce some of the basic ideas.
Network Configuration Access Control Model (NACM)
A core part of the access control configuration is the NACM rules. Rules can be defined using any configuration option (Admin UI, CLI, or RESTCONF). However, using the Admin UI is the easiest and most intuitive way.
A rule basically consists of four parts: path, access-operations, action and context. Here's an example:
| configuration | example value |
|---|---|
| path | /procedures |
| access-operations | read |
| action | permit |
| context | UI, CLI |
The above definition will permit read access to /procedures from the UI and the CLI. In addition to these building blocks for rules, another key component is defining who the rule applies to. The section below on Configuring Permissions in the Admin UI describes how to define permissions for specific groups.
The NACM Rule Evaluation Process
Section 3.4.5 of RFC 8341 outlines the process for evaluating the defined access rules. We highly recommend reviewing this section before configuring access rules. Here's a high-level overview of the hierarchy in rule evaluation:
- Check if the user is a member of any groups.
- Check what rules apply to the groups the user is a member of.
- Check if the rule has an explicit path, a
\*in the path, or no path defined. - Check the access-operation (
Read,Create,Delete,Update) - If there is matching criteria and the rule's action is permitted, the operation is allowed. Otherwise, it is denied.
If there are no matching criteria, the default read/write configurations could take effect if enabled.
Default Read/Write
It is possible to configure a default behavior for both read and write access to configuration settings. The Default Read Access and Default Write Access will trigger if no other explicit rules are configured for the setting access requested. Or, these may trigger if the user is not in any group(s) that have permissions set for the setting being accessed.
Use with care
These two options are fallback configurations that will take effect if no other explicit access rules are found. They can be viewed as fail open or fail close equivalents to firewall rules. As such, take special care when configuring these as it could lead to unwanted access.Rules Defined in the Data Model
The NACM rules configured in Curity are defined directly in the data model and, as such, will be a part of the overall Curity configuration. This makes access rules part of any backups of the configuration itself. It also allows for the parameterization of rules, which could seamlessly integrate with any CI/CD pipeline workflow.
Configuring Permissions in the Admin UI
You can set permissions for different parts of the Admin UI by navigating to the Permissions option for a given setting. The Permissions option is accessible by clicking the ellipsis (three dots) in the top right corner.

From the Permissions configuration view, you can set the permissions for a specific setting. You can also set permissions to apply to all children of that setting.
Groups already configured in the system will be available from the drop-down menu, and it's also possible to create new groups directly from this view. Note here that the group could be explicitly defined in Curity and assigned to a user. Or, the group could be assigned to a user by an external source. For example, a Credential Manager handles account verification for the Admin Service using an Active Directory (AD).
After highlighting a group in the list, the permissions first configure the access-operations (Read, Create, Delete, Update). After that, the context for permissions (UI, CLI or REST) is configured. Finally, you can choose to apply these configurations to all children of this setting and enable logging for permission decisions.
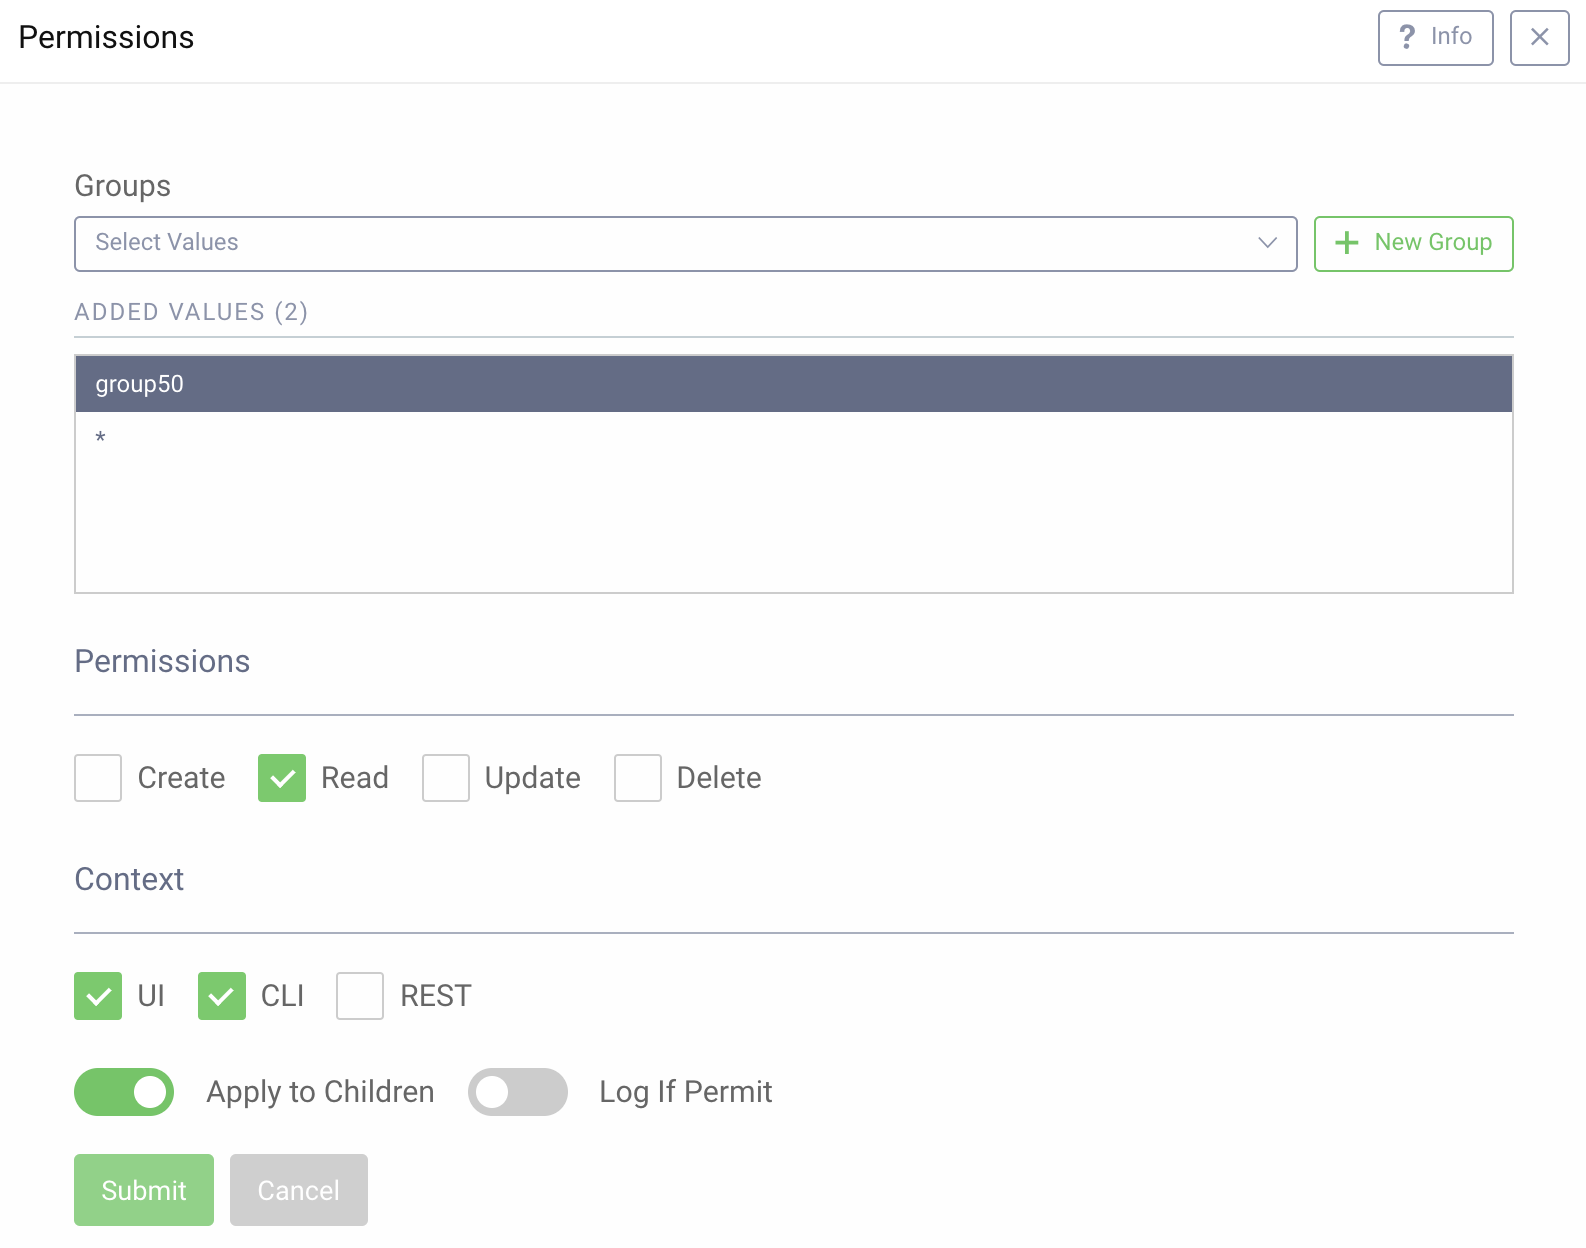
In the example above, group50 is given read permissions in the UI and CLI, and the setting applies to all children with no logging.
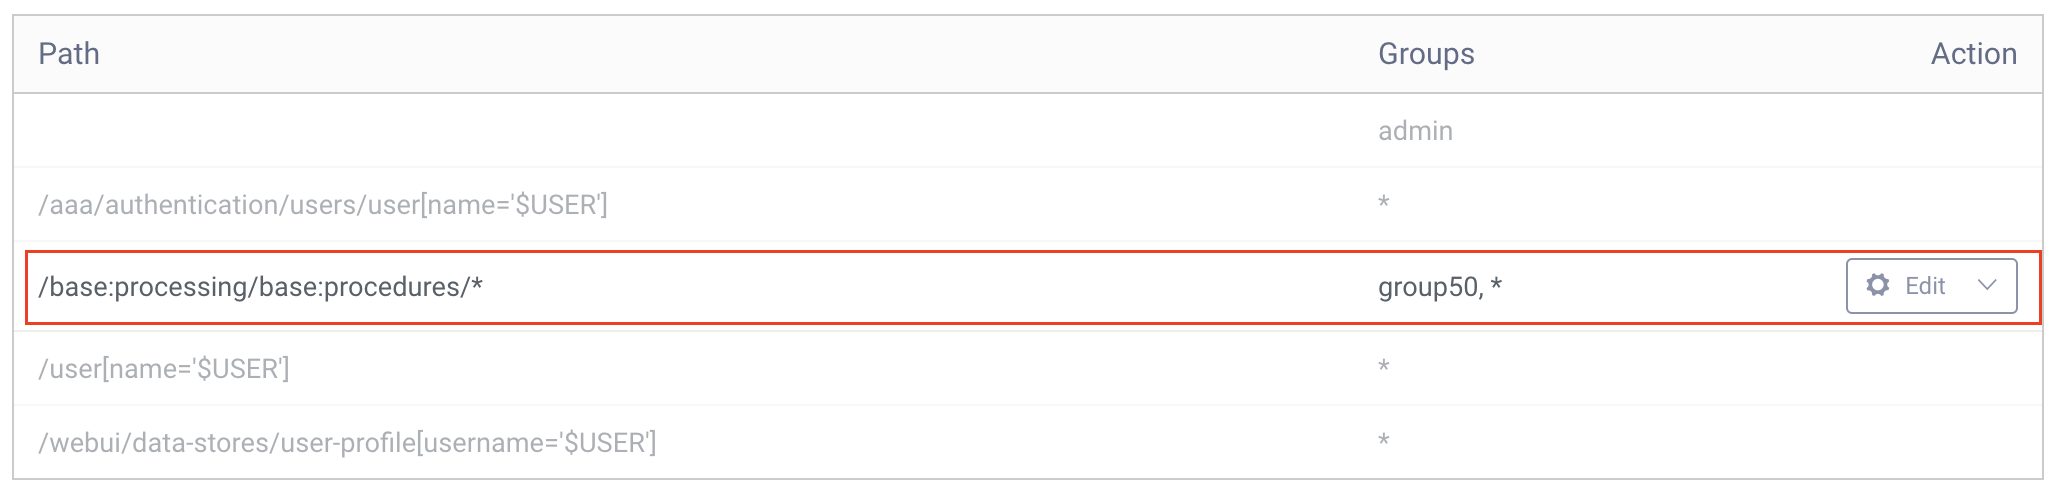
When reviewing permissions in System -> Permissions, the above configuration is now visible. From this view, we can see that the configuration was made for the procedures section of the configuration.
From the Curity shell (idsh), you can view the rule by listing all rules for group50 with the command show configuration nacm rule-list group50.
group [ group50 ];rule "0d0af40232073b4674eb35bcaac99bfb3e0e6cc63188dc0657f758d1fb104d4b#CONTEXT_ONE_PERMIT" {path /base:processing/base:procedures/*;access-operations read;action permit;comment "Created by Web UI";context webui;}rule "0d0af40232073b4674eb35bcaac99bfb3e0e6cc63188dc0657f758d1fb104d4b#CONTEXT_TWO_PERMIT" {path /base:processing/base:procedures/*;access-operations read;action permit;comment "Created by Web UI";context cli;}rule "0d0af40232073b4674eb35bcaac99bfb3e0e6cc63188dc0657f758d1fb104d4b#ALL_CONTEXT_DENY" {path /base:processing/base:procedures/*;access-operations *;action deny;comment "Created by Web UI";context *;}
The response lists the read rule with the permit action for both the Admin UI and CLI first, and then a _deny everything else for that path_ rule.
Summary
Curity offers several management options to configure access permissions; however, the Admin UI is the most intuitive option. Curity users can define rules for different sections of the configurations and assign them to groups. You can also define the context for specific access-operations, allowing a flexible way to assign specific access rules for the Admin UI, CLI, and RESTCONF.
For additional information, read the Curity product documentation on Access Control.

Join our Newsletter
Get the latest on identity management, API Security and authentication straight to your inbox.

Start Free Trial
Try the Curity Identity Server for Free. Get up and running in 10 minutes.
Start Free Trial


