Scripted Attribute Transformation
On this page
Authentication Actions
The Curity Identity Server offers some very powerful mechanisms to handle a variety of complex tasks during the authentication process. Some examples are looking up attributes in a data source, auto-linking accounts, auto-creating accounts and applying multi-factor authentication conditions. These tasks that are initiated as part of the authentication are referred to as Actions in the Curity Identity Server.
In this article we are going to explore how to use a Script Authentication Action to transform attribute information.
What attributes are available?
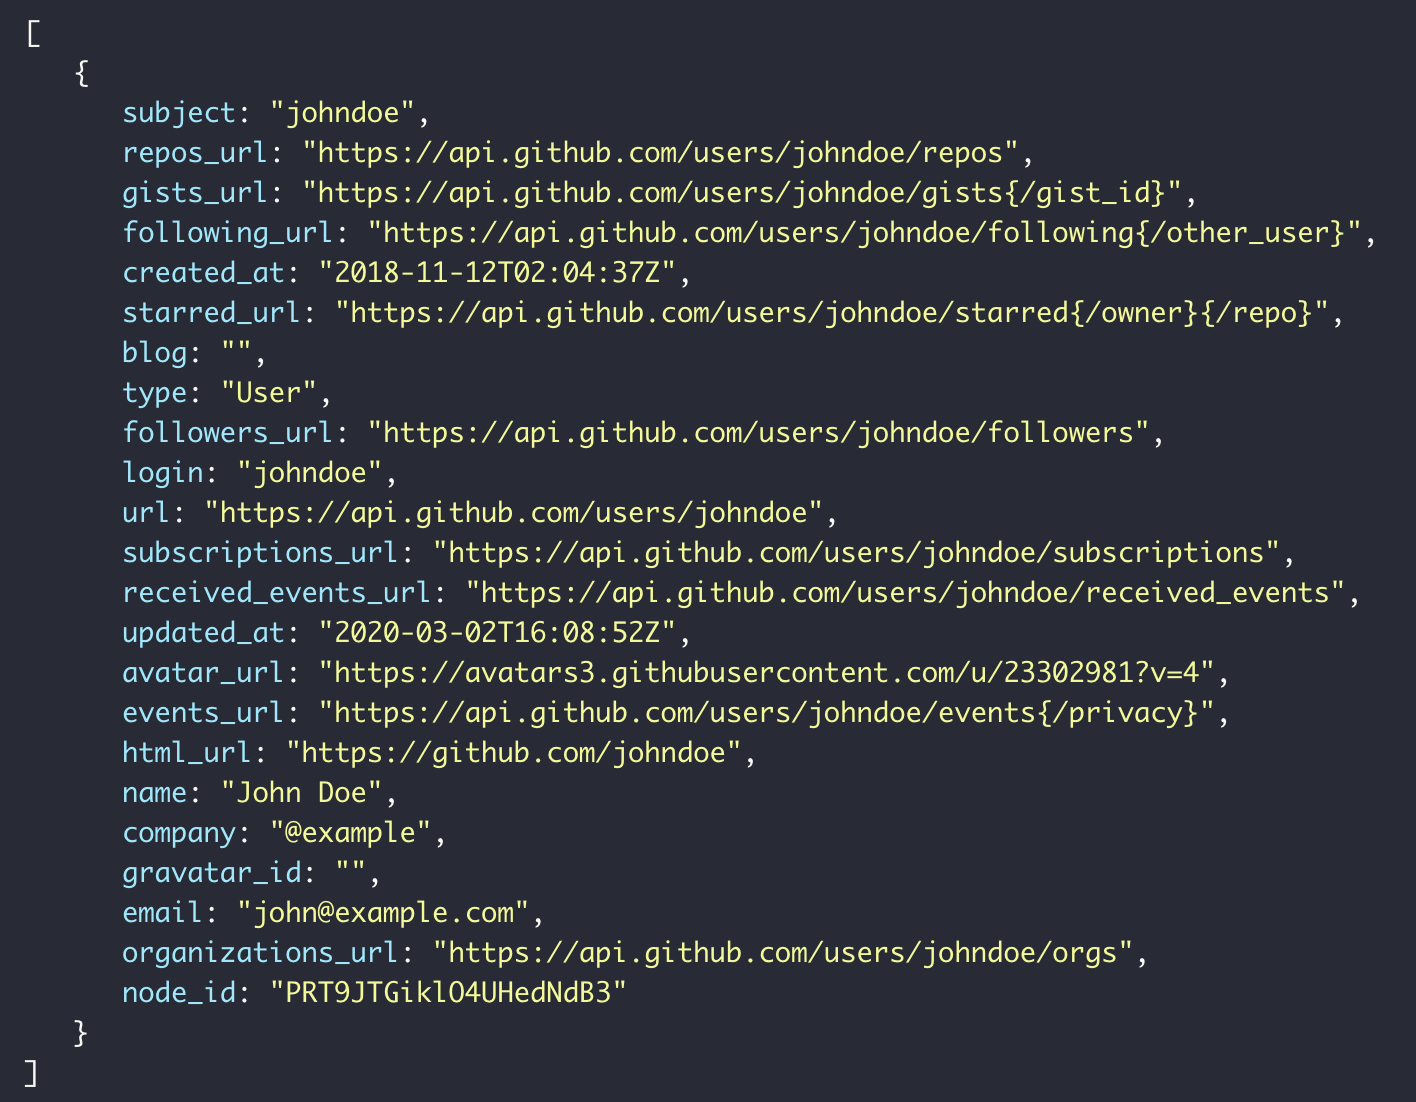
When working with attributes used in the authentication process it can be useful to use a Debug Action to reveal what attributes are available.
This is an example of attributes available after using a GitHub Authenticator. In this article we are going to look at how we can clean up the attributes provided as well as capturing the first, middle and last name of a user.

There are several other Actions that can be invoked to retrieve additional attributes during the authentication process. It is also possible to chain different Actions together. An example would be to first retrieve additional attributes from a database and then invoke the debug action in order to see what was actually retrieved.
Transforming the data
The attributes are available through transformationContext.attributeMap. In the below example a new object neededAttributes is created and populated with the attributes of interest.
There are a couple of transformations and actions taking place in this script:
- The provided
loginis mapped to a different attributeusername. - The
nameattribute is split in order to extractfirst,middleandlastname. This should be handled accordingly even if there is no middle name. - The attributes that are not explicitly handled and added to
neededAttributesare ignored. - The
neededAttributesare logged at debug level before returned back to the Authenticator.
function result(transformationContext) {var attributes = transformationContext.attributeMap;var neededAttributes = {};neededAttributes.subject = attributes.subject;neededAttributes.username = attributes.login;neededAttributes.fullname = attributes.name;neededAttributes.company = attributes.company;neededAttributes.email = attributes.email;var fullName = attributes.name.split(" ");if (fullName.length == 2){neededAttributes.firstName = fullName[0];neededAttributes.lastName = fullName[1];}else if (fullName.length == 3){neededAttributes.firstName = fullName[0];neededAttributes.middleName = fullName[1];neededAttributes.lastName = fullName[2];}logger.debug(neededAttributes);return neededAttributes;}
Sequencing actions
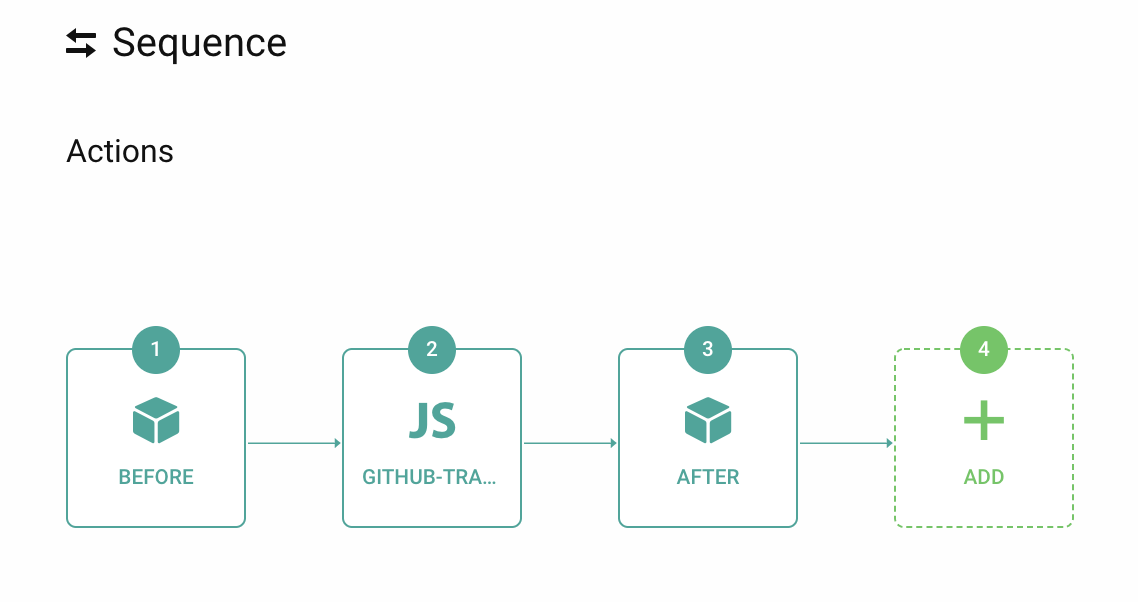
In order to see the transformation in the example it is possible to sequence Authentication Actions together like this.

In this short video snippet we can see all the attributes that are displayed in the BEFORE debug action. The transformation is then performed and the AFTER debug action displays the end result.
Conclusion
Authentication actions are a powerful tool available in the Curity Identity Server to handle different transformations in the authentication procedure. Attributes can be fetched and/or transformed in any number of ways using for example the Script action as exemplified in this article. The Debug Action is very useful in working through the implementation of different Authentication action.

Join our Newsletter
Get the latest on identity management, API Security and authentication straight to your inbox.

Start Free Trial
Try the Curity Identity Server for Free. Get up and running in 10 minutes.
Start Free TrialWas this helpful?


