
Authenticate Using Okta
On this page
The Curity Identity Server is able to use any external Identity Provider to authenticate users. This tutorial shows how to leverage the OpenID Connect protocol to authenticate users with their Okta accounts.
This tutorial assumes that you have a working and configured instance of the Curity Identity Server. If you need to quickly set one up, follow the getting started guides.
In an overview, configuring the integration of the two systems requires the following steps:
- Create an OIDC authenticator in the Curity Identity Server.
- Register an application in Okta Identity Platform to allow the Curity Identity Server to call Okta.
- Use the data from the registered application to finish configuring the authenticator in the Curity Identity Server.
Integrating Authorization Servers
In some use cases an external IDP may operate as an OAuth authorization server in other contexts. For example, the external IDP could be the authorization server of a business partner or a subdivision of your organization.
Create an OIDC Authenticator
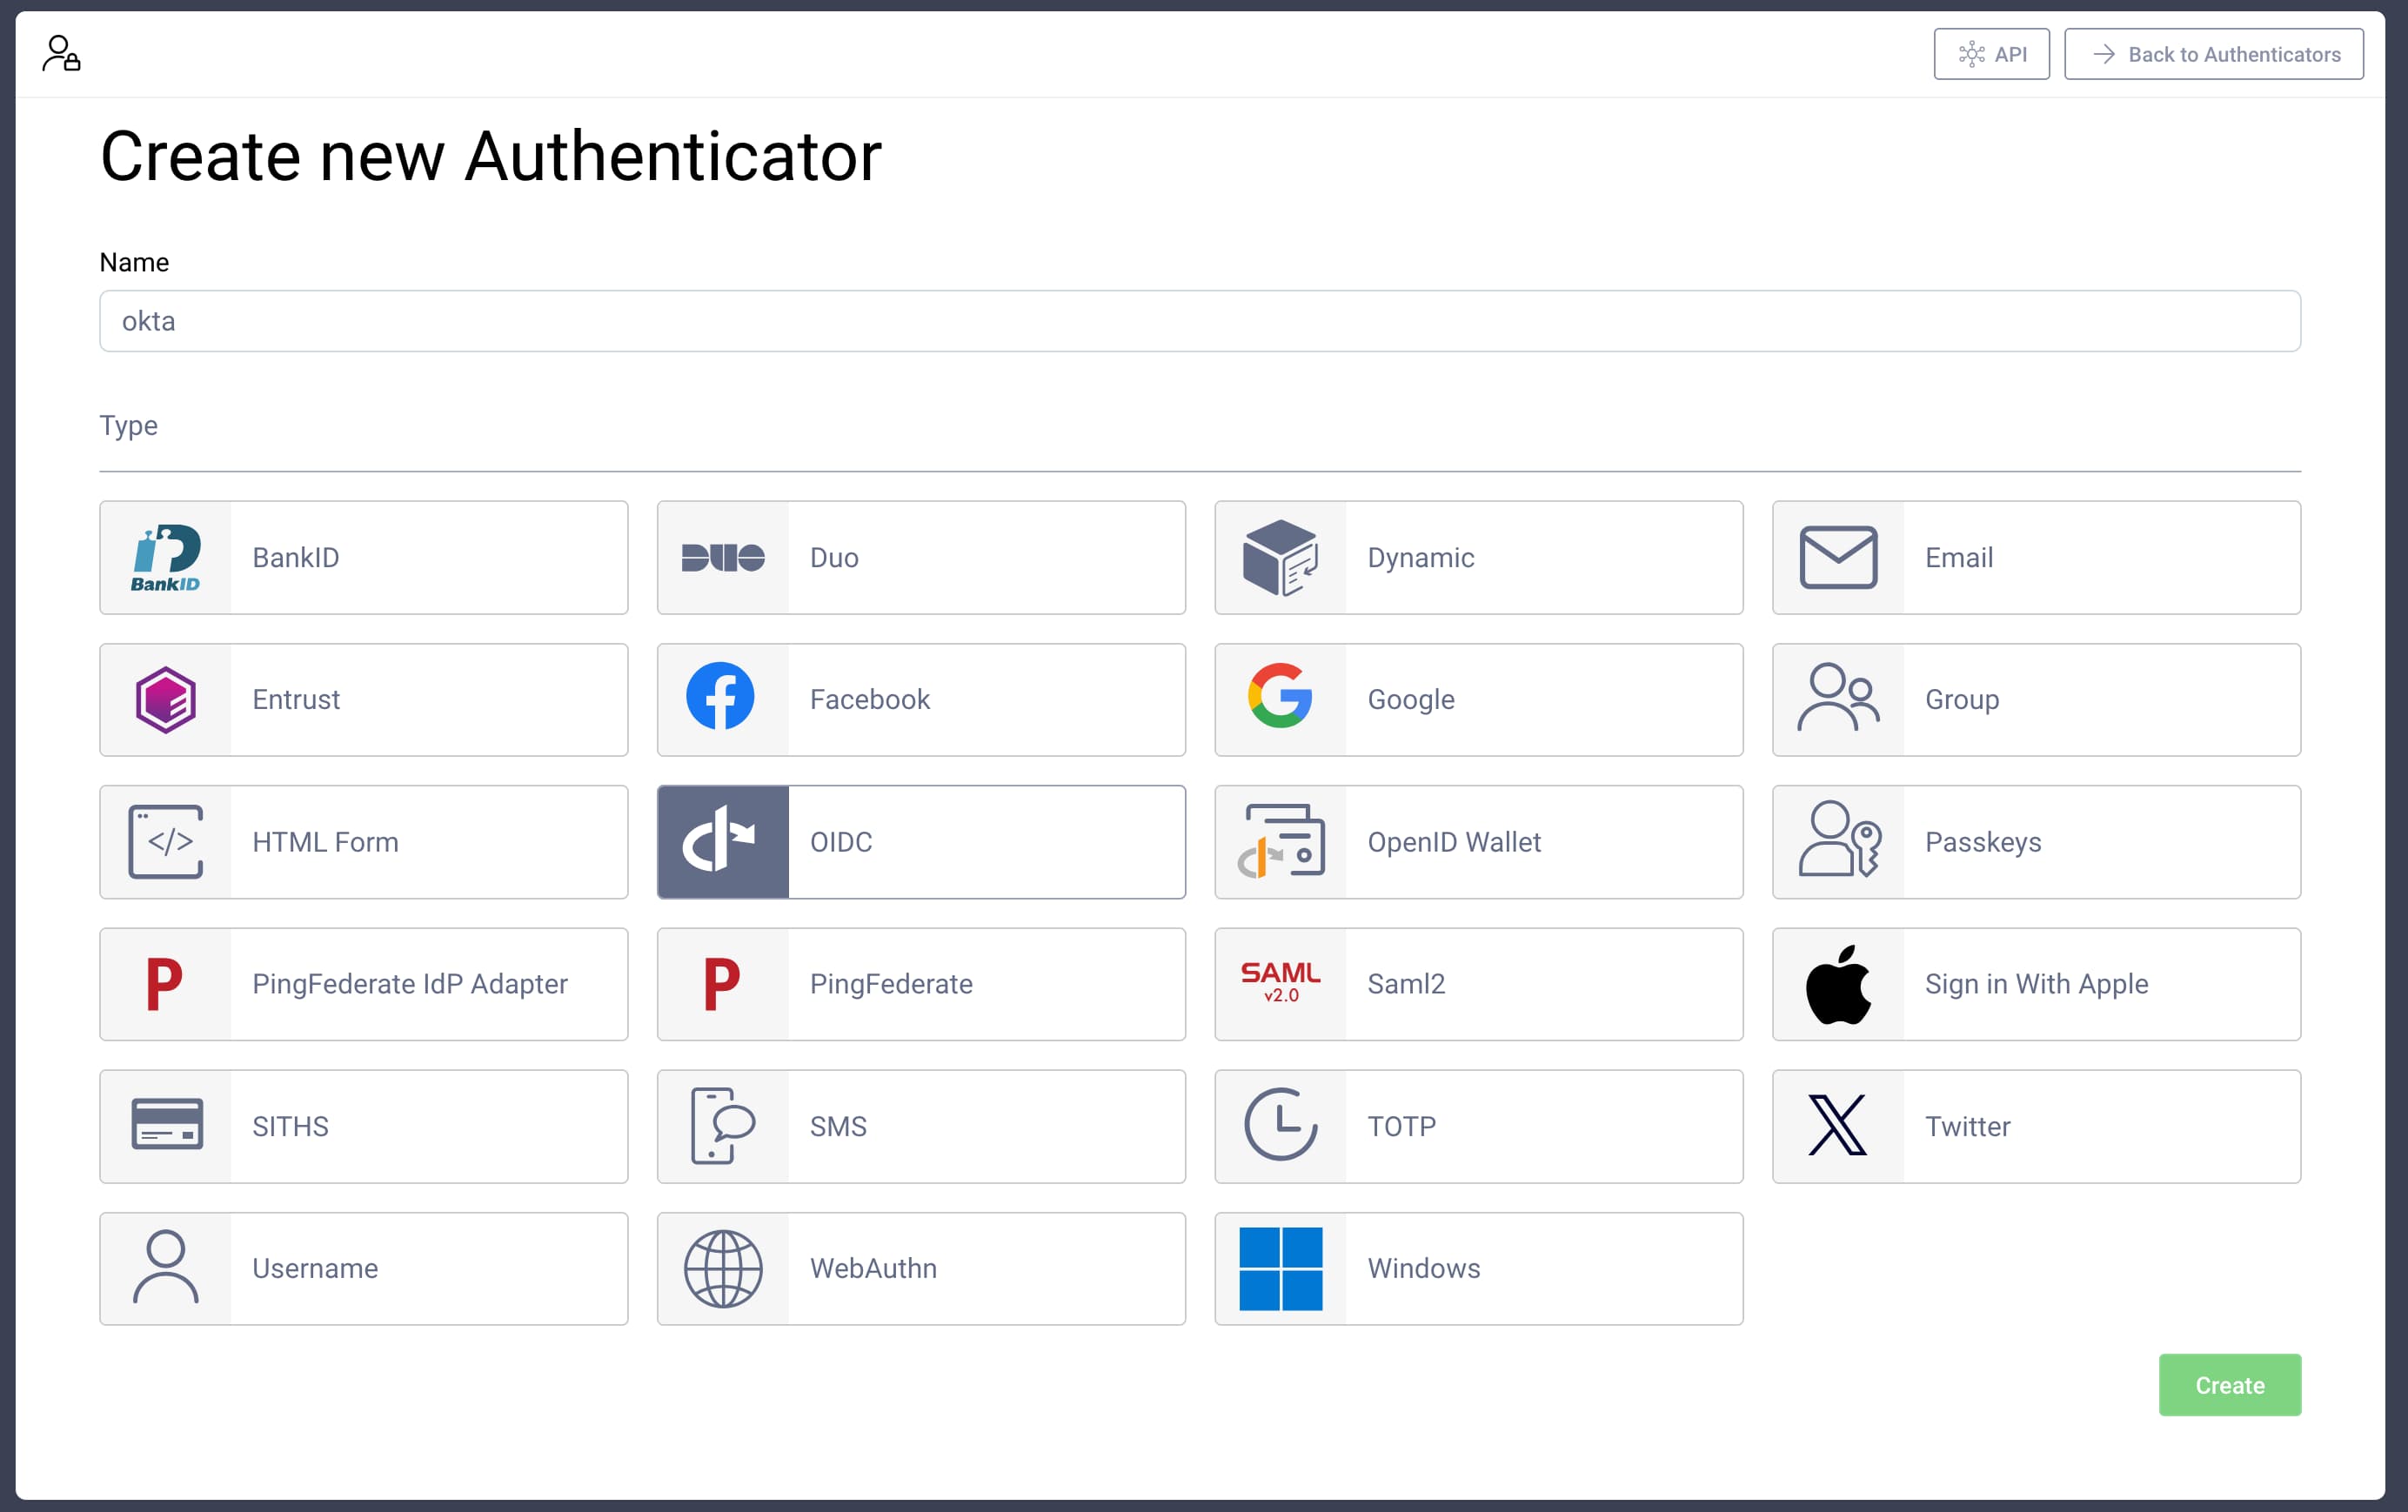
In the Curity Identity Server, go to your Authentication Profile → Authenticators and click on the + New Authenticator button. Give the authenticator a name (this tutorial uses okta) and select the OIDC type, then click Create. The following picture shows the authentication creation screen.
Next, find the callback URL that Okta will use to send the OIDC responses back to the Curity Identity Server. To do that, click on the ? Info button in the top right corner. You will see a popup similar to the following one:
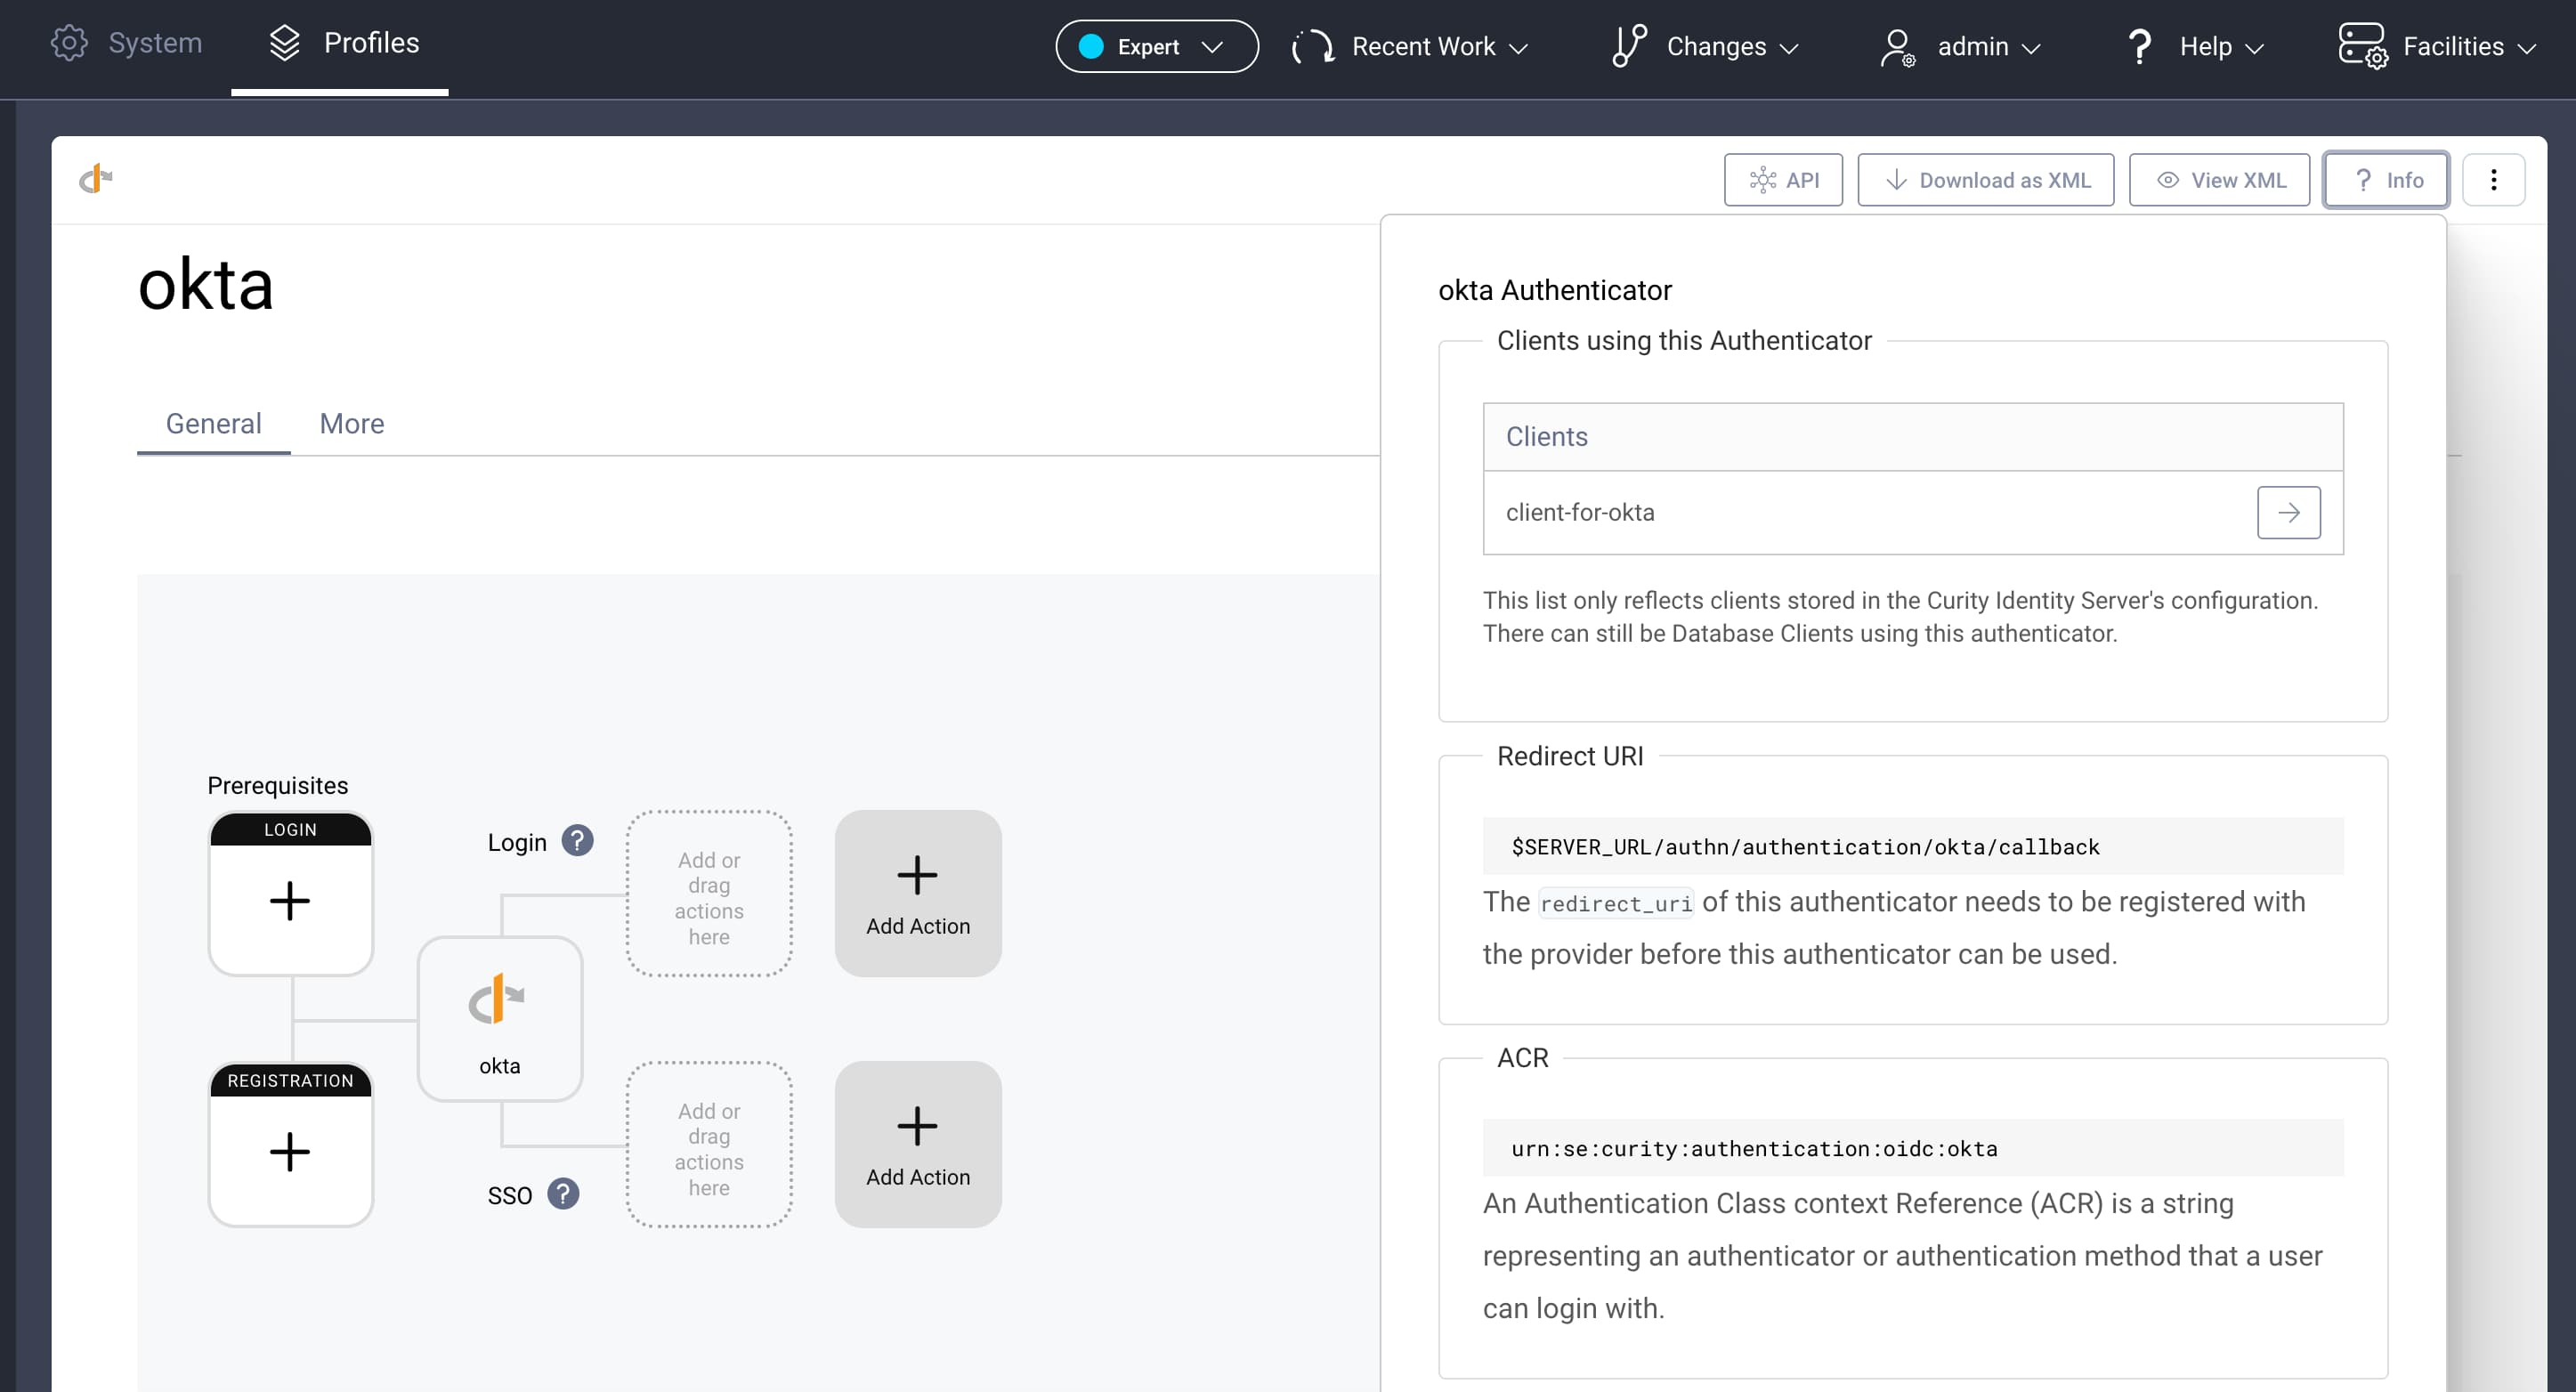
Locate the redirect URI, substitute the $SERVER_URL with your instance's base URL, then copy the value. The final redirect URI should have a value similar to this: https://localhost:8443/authn/authentication/okta/callback.
Register an Application
When you use OpenID Connect to authenticate at an external system, the external system requires the registration of an OAuth client. Okta calls this an App Integration and in this tutorial the application represents the Curity Identity Server.
Create a New App Integration
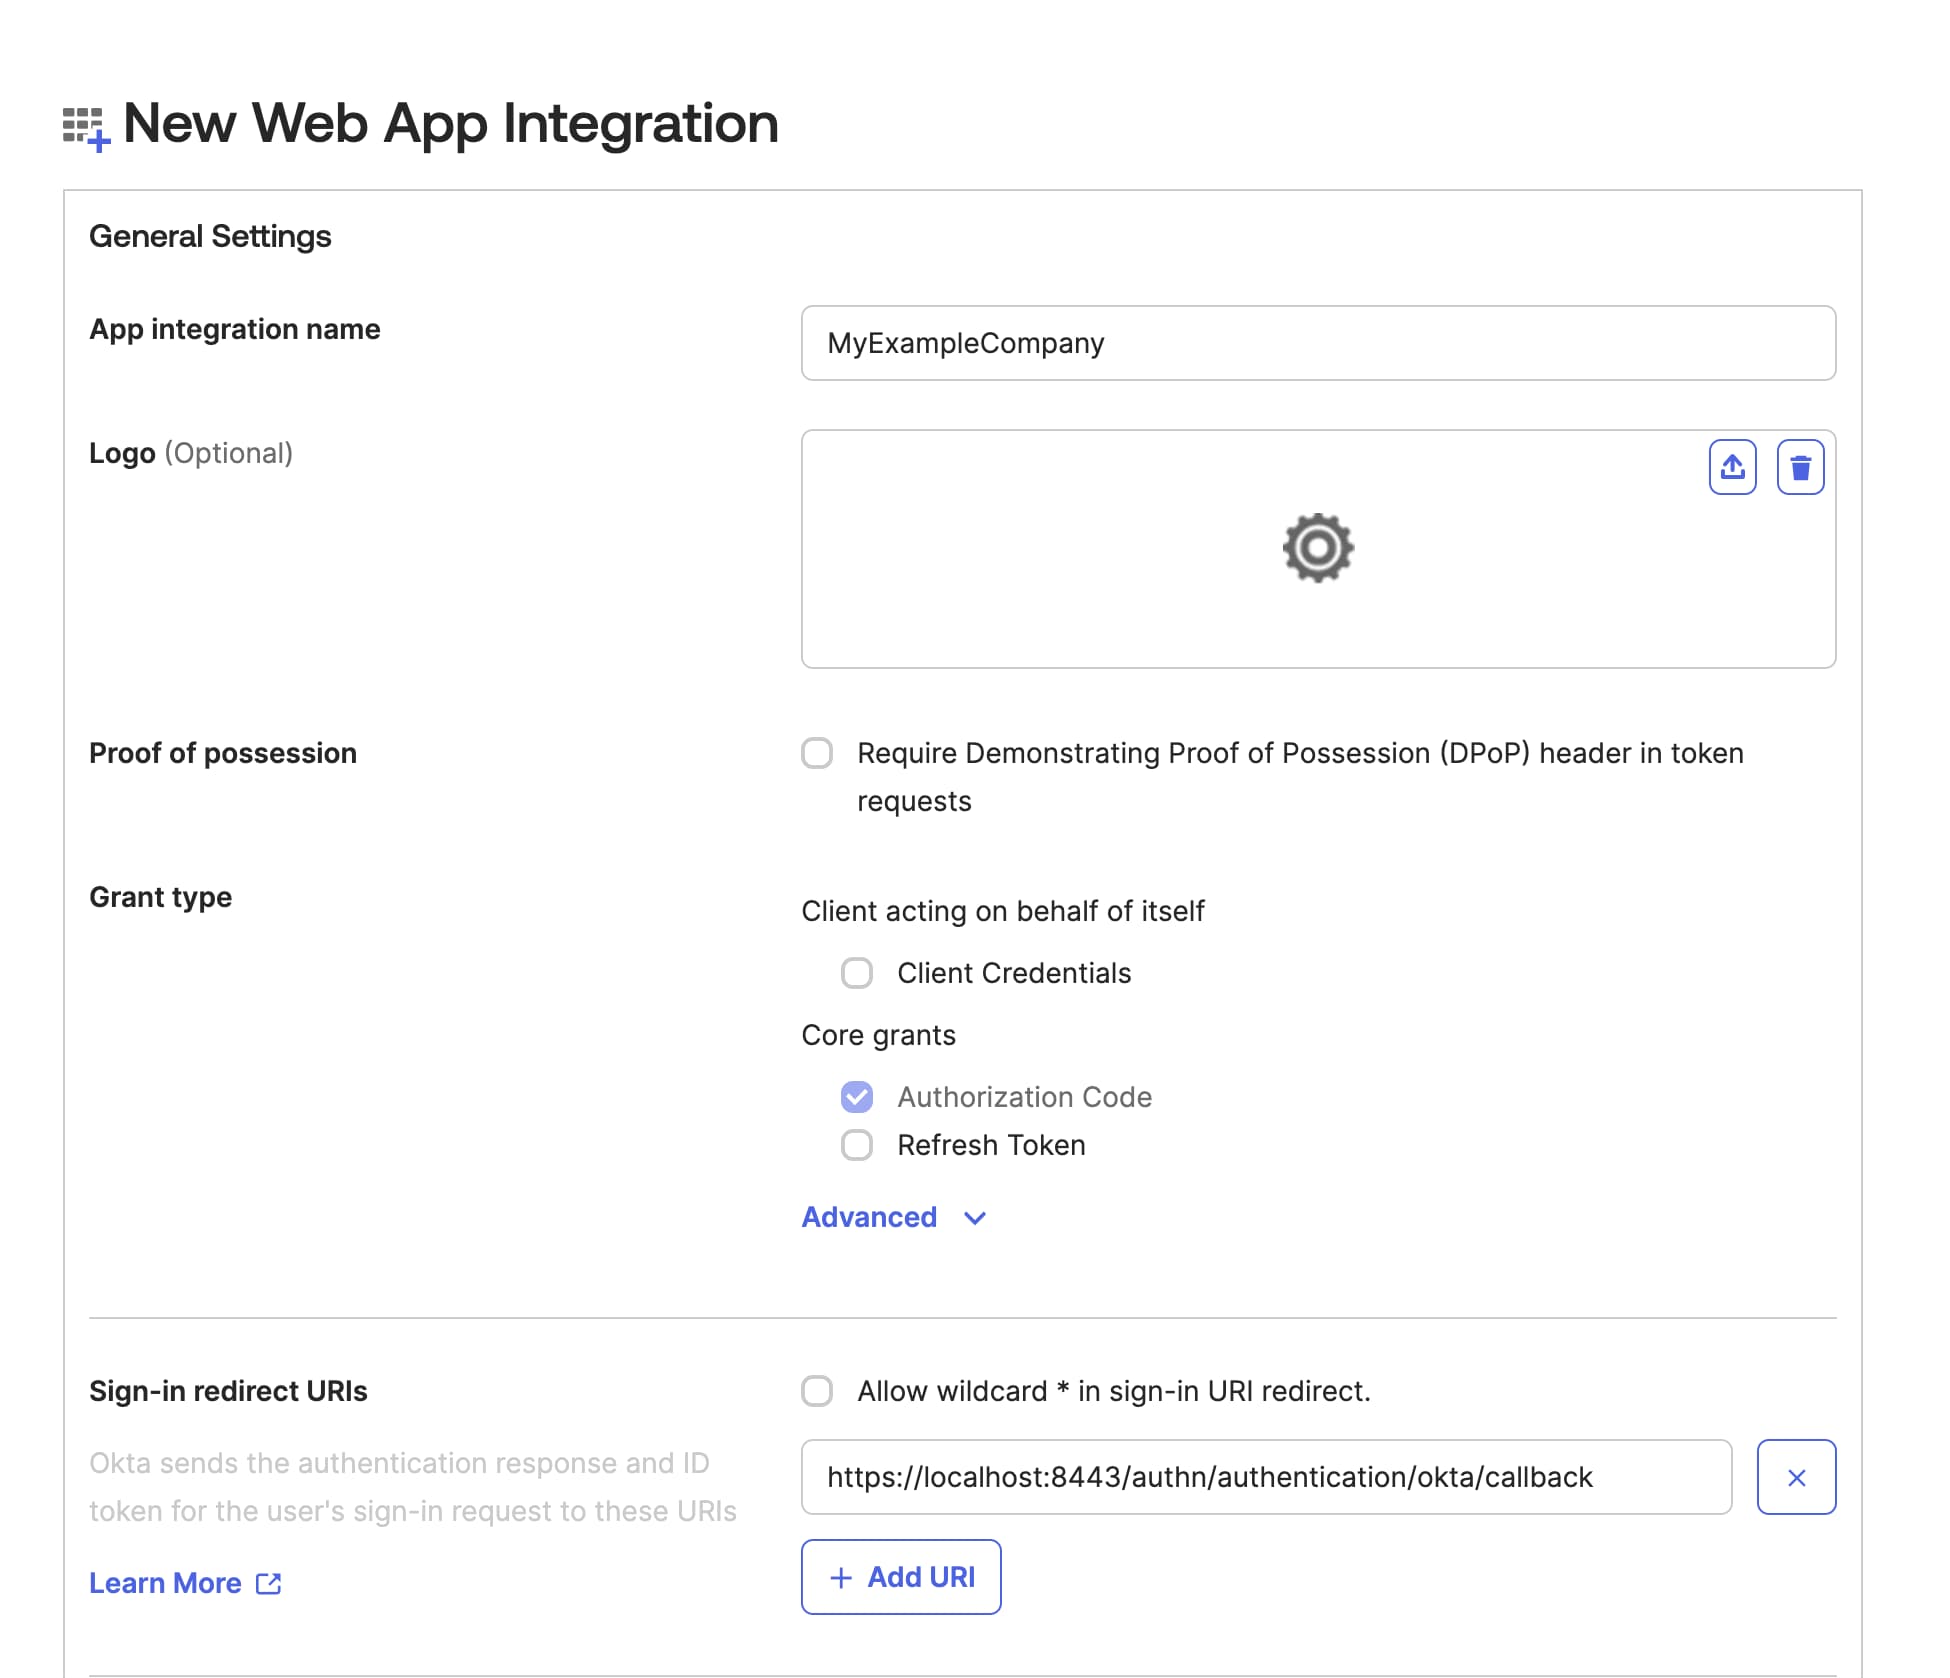
In your Okta Admin Console go to Applications -> Applications. Then click the Create App Integration button. Choose OIDC as the sign-in method and Web Application as the application type, then click Next. The following image shows the first screen of the application creation wizard.

You will then see the next screen of the wizard where you can give the application a name and a logo. Your users will see these when logging in with an Okta account using the Curity Identity Server. Next, paste the redirect URI to the Sign-in redirect URIs field. The wizard window should now look similar to this:
In the Assignments section choose which of your Okta users you want to allow to log in from the Curity Identity Server. For a quick start, you can select Allow everyone in your organization to access. Alternatively, you can limit access to chosen user groups. You can also skip assignments altogether and configure them later, where you can even limit access to concrete users. Finally, click Save.
You will now see the created OAuth client details, similar to this view:
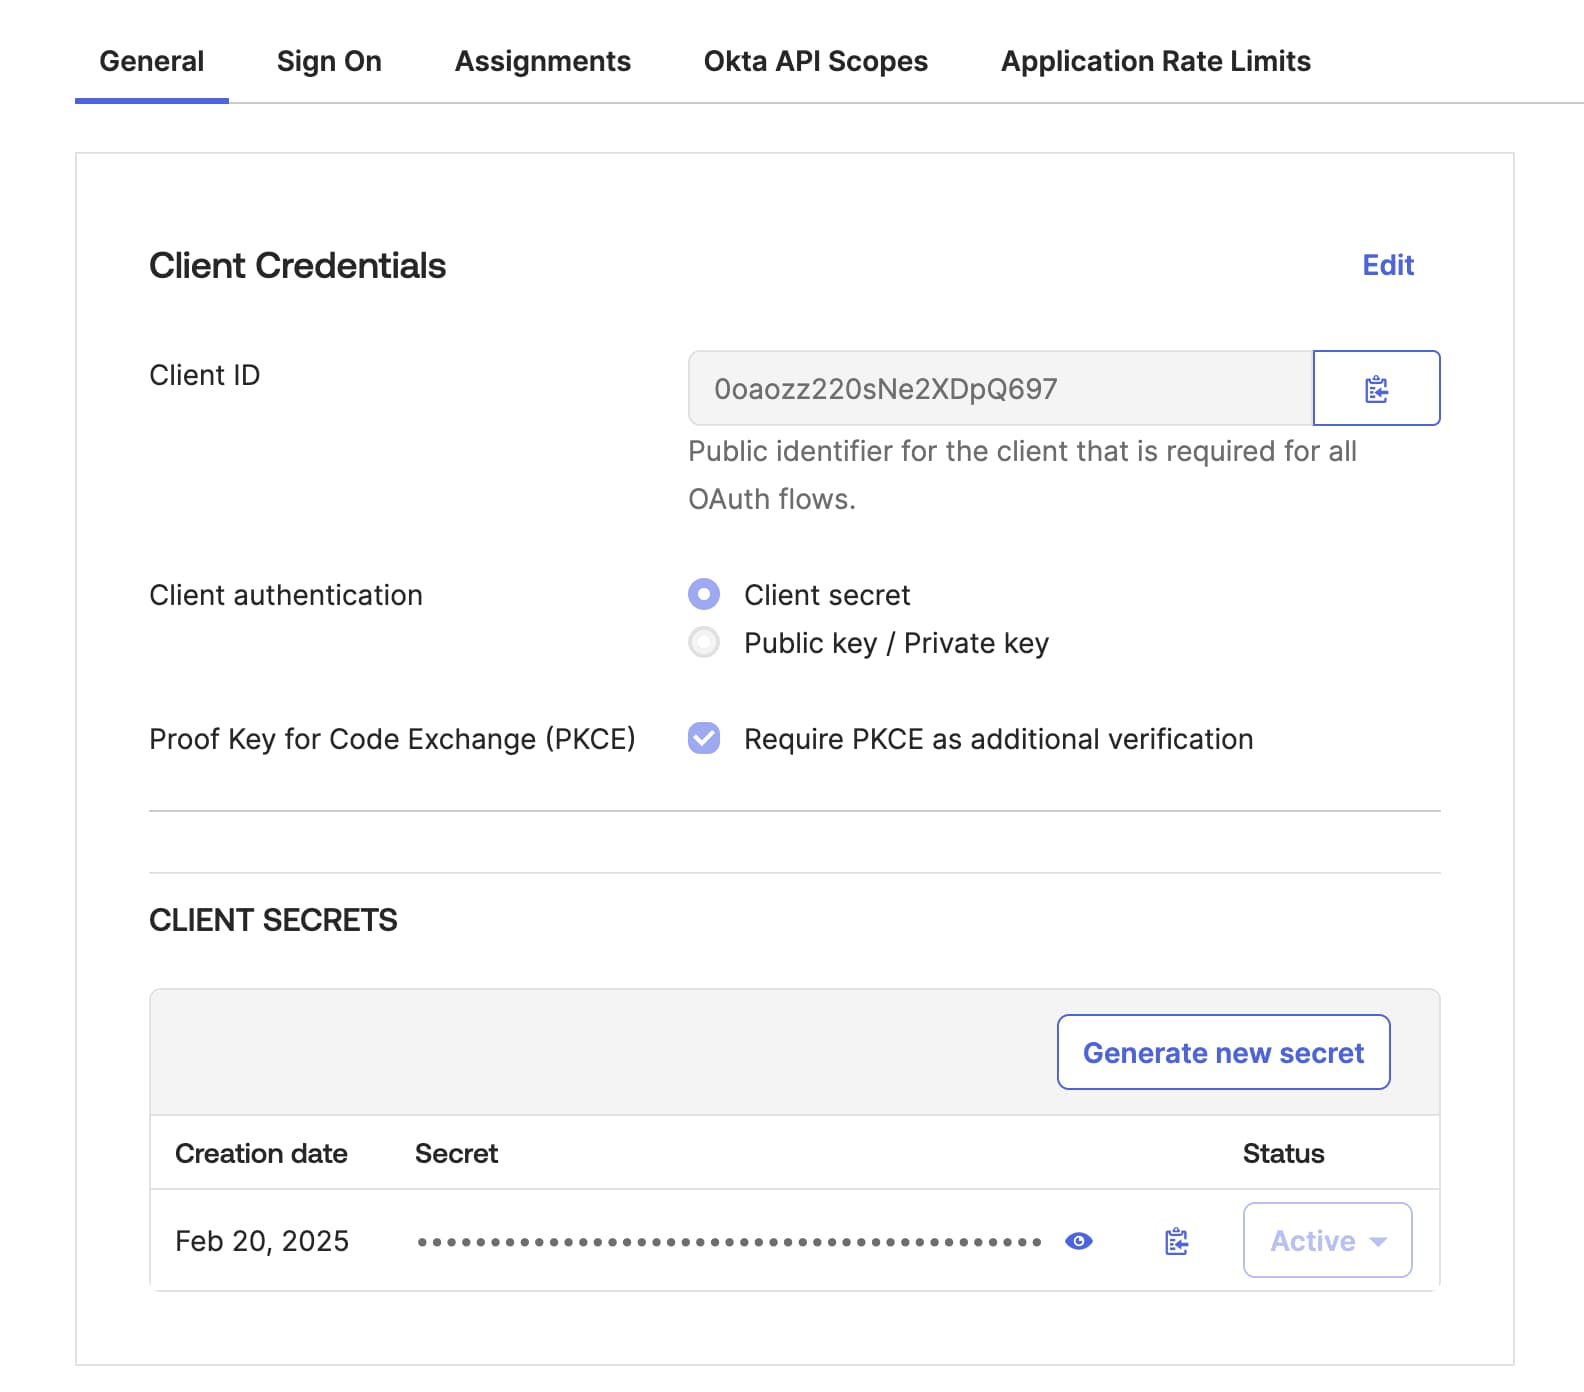
For enhanced security, enable the Require PKCE as additional verification option. To do that, click on Edit in the Client Credentials section, select the PKCE checkbox, then click on the Save button under the Client Secrets table.
Configure Client Authentication
You can choose how you want the Curity Identity Server to authenticate at Okta endpoints. By default, the application is configured with client secret, but you can use stronger authentication with asymmetrically signed JWTs.
The OAuth client is already created with a client secret. Copy the Client ID and Secret as you will need them to finish configuration in the Curity Identity Server.
Create an Okta Access Policy
Once you have an application in Okta, ensure that Okta's authorization server has an access policy. This policy allows the server to properly issue access and ID tokens during an OIDC flow. To add an access policy, in the Okta Admin Console, go to Security → API and select your chosen authorization server. Switch to Access Policies tab and click Add New Access Policy if you don't have one that suits your needs. Name the policy and select the clients (applications) it should apply to. At minimum, it should apply to the application you created in the previous step. Next, click the Add rule button, to create a rule. You will see a form similar to this:
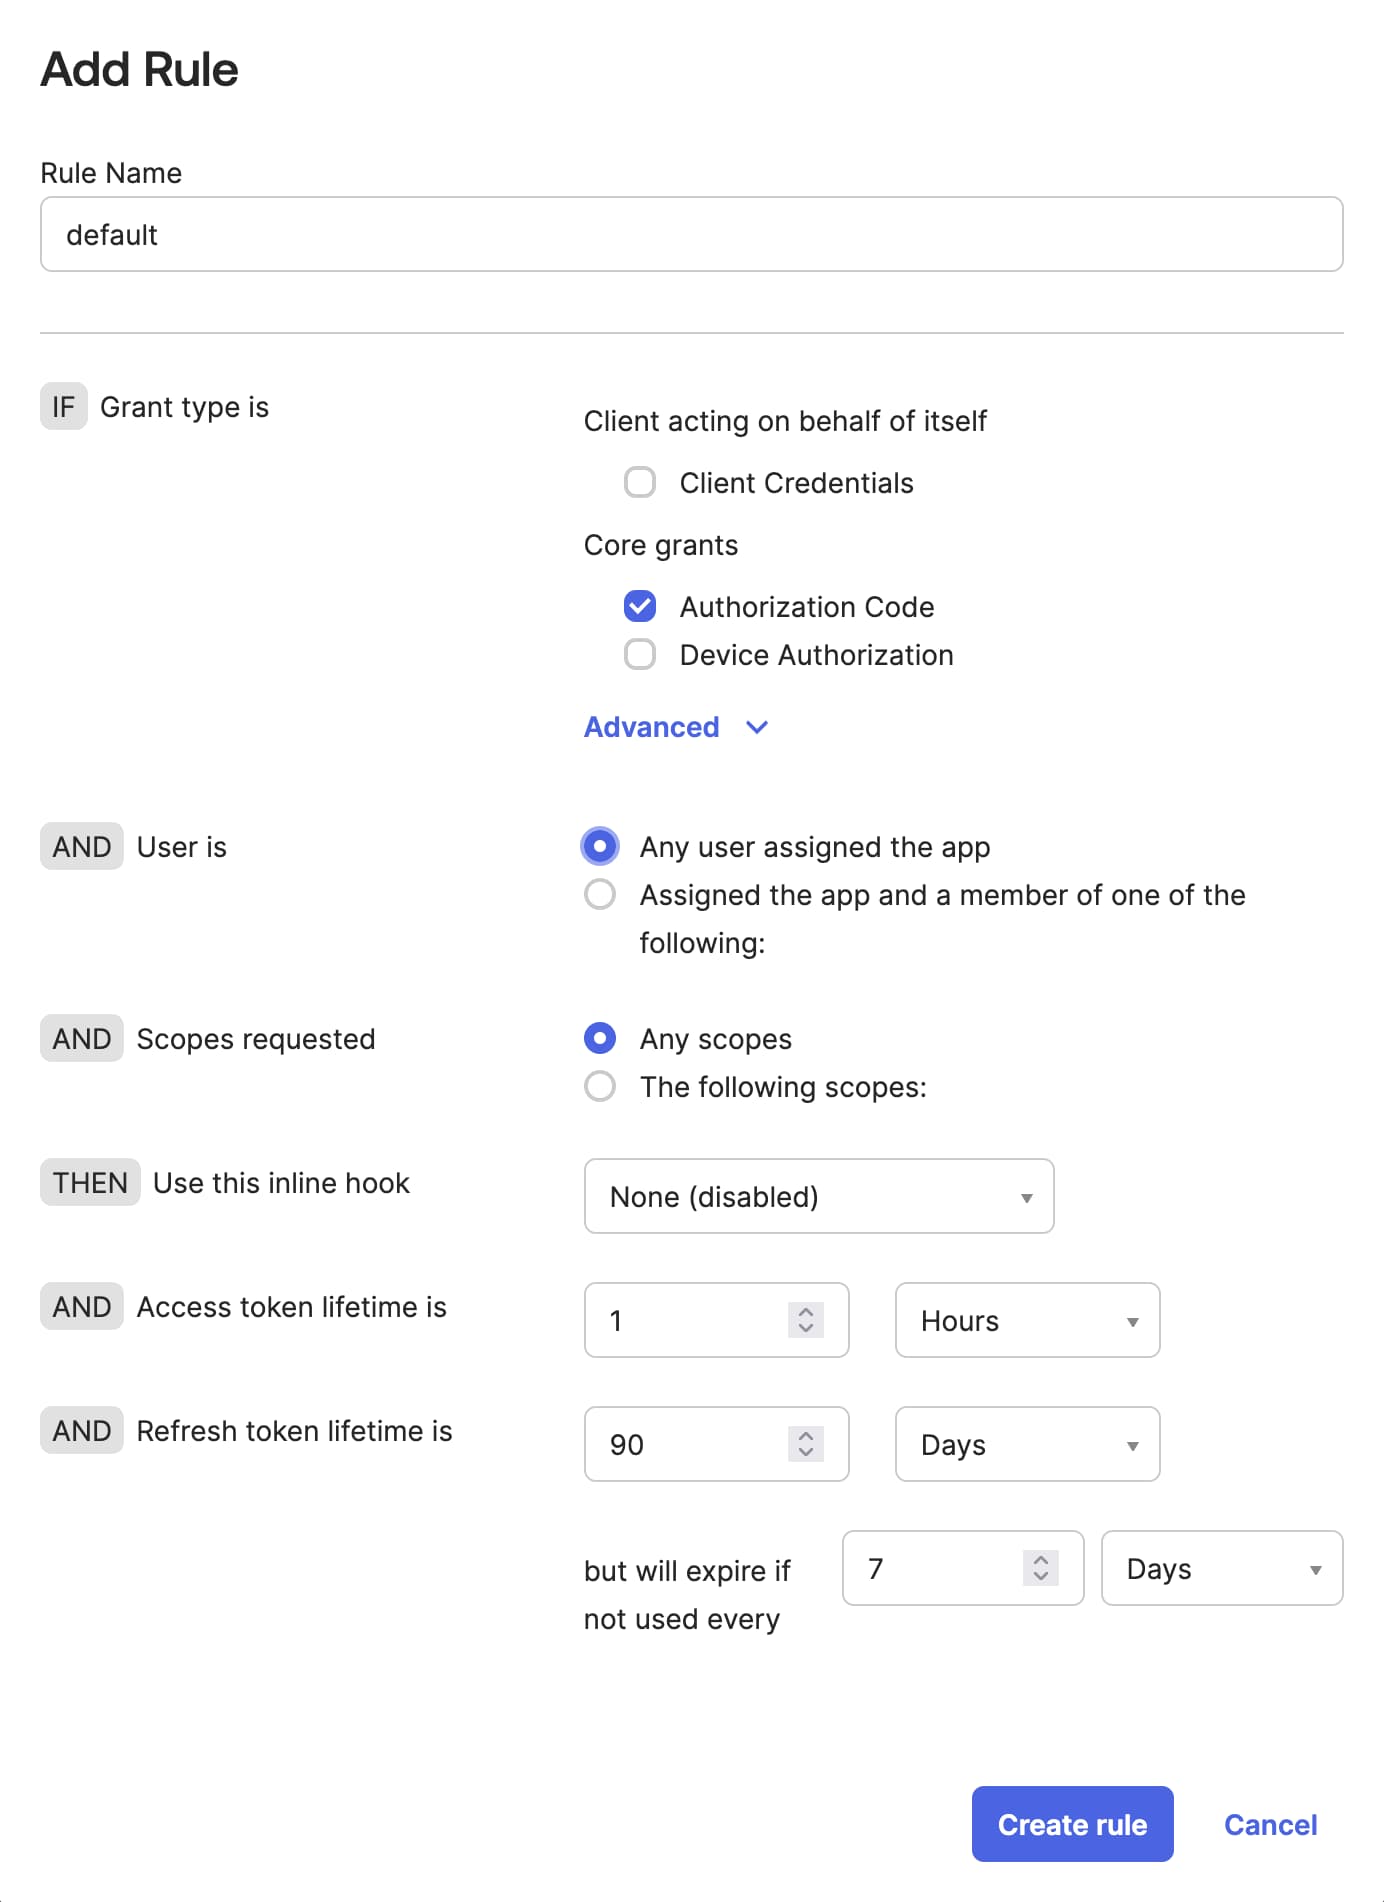
Name the rule and adjust it to suit your needs. For example, you can restrict access to particular user groups or add OpenID Connect scopes so that the Curity Identity Server receives particular user attributes in the ID token that it receives from Okta. For this tutorial's purposes you can leave all the default settings. Finally, click on Create rule.
You now have all the required setting on Okta side. You can now go back to the Curity Identity Server's admin UI to finish the setup.
Finish Configuration of the OIDC Authenticator
In the Curity Identity Server's admin UI go to your Authentication Profile → Authenticators and click on the previously added OIDC authenticator for Okta to edit it.
Enter the Configuration URL, which is the URL of the OpenID Connect metadata endpoint. For Okta, it has the following form:
https://{your-okta-domain}/oauth2/{OktaServerId}/.well-known/openid-configuration
For example, it can look similar to this value:
https://trial-1478656.okta.com/oauth2/default/.well-known/openid-configuration
To find your Okta server ID, in the Okta Admin Console go to Security → API. In the Authorization servers tab copy the name of the server that you want the Curity Identity Server to integrate with.
Next, paste the Client ID of your Okta application.
Scroll down and find Client Authentication Method. Configure authentication according to the option you chose in Okta.
In the Client Authentication Method dropdown select client-secret, then paste the application's secret from Okta.
Set any other parameters to suit your needs, like the scopes or clock skew. Then save the changes by selecting Commit from the Changes menu.
Test the Integration
You are now ready to test the integration. Run an authorization code flow against the Curity Identity Server to log in with an Okta account. Note that you will need a user configured in Okta and a client in the Curity Identity Server configured to use the Okta authenticator.
If you don't have a client in the Curity Identity Server, have a look at the Configure a Client tutorial.
Have a look at these tutorials if you need help with quickly running an authorization flow:
After you finish the authentication, you should eventually get an ID token similar to this:
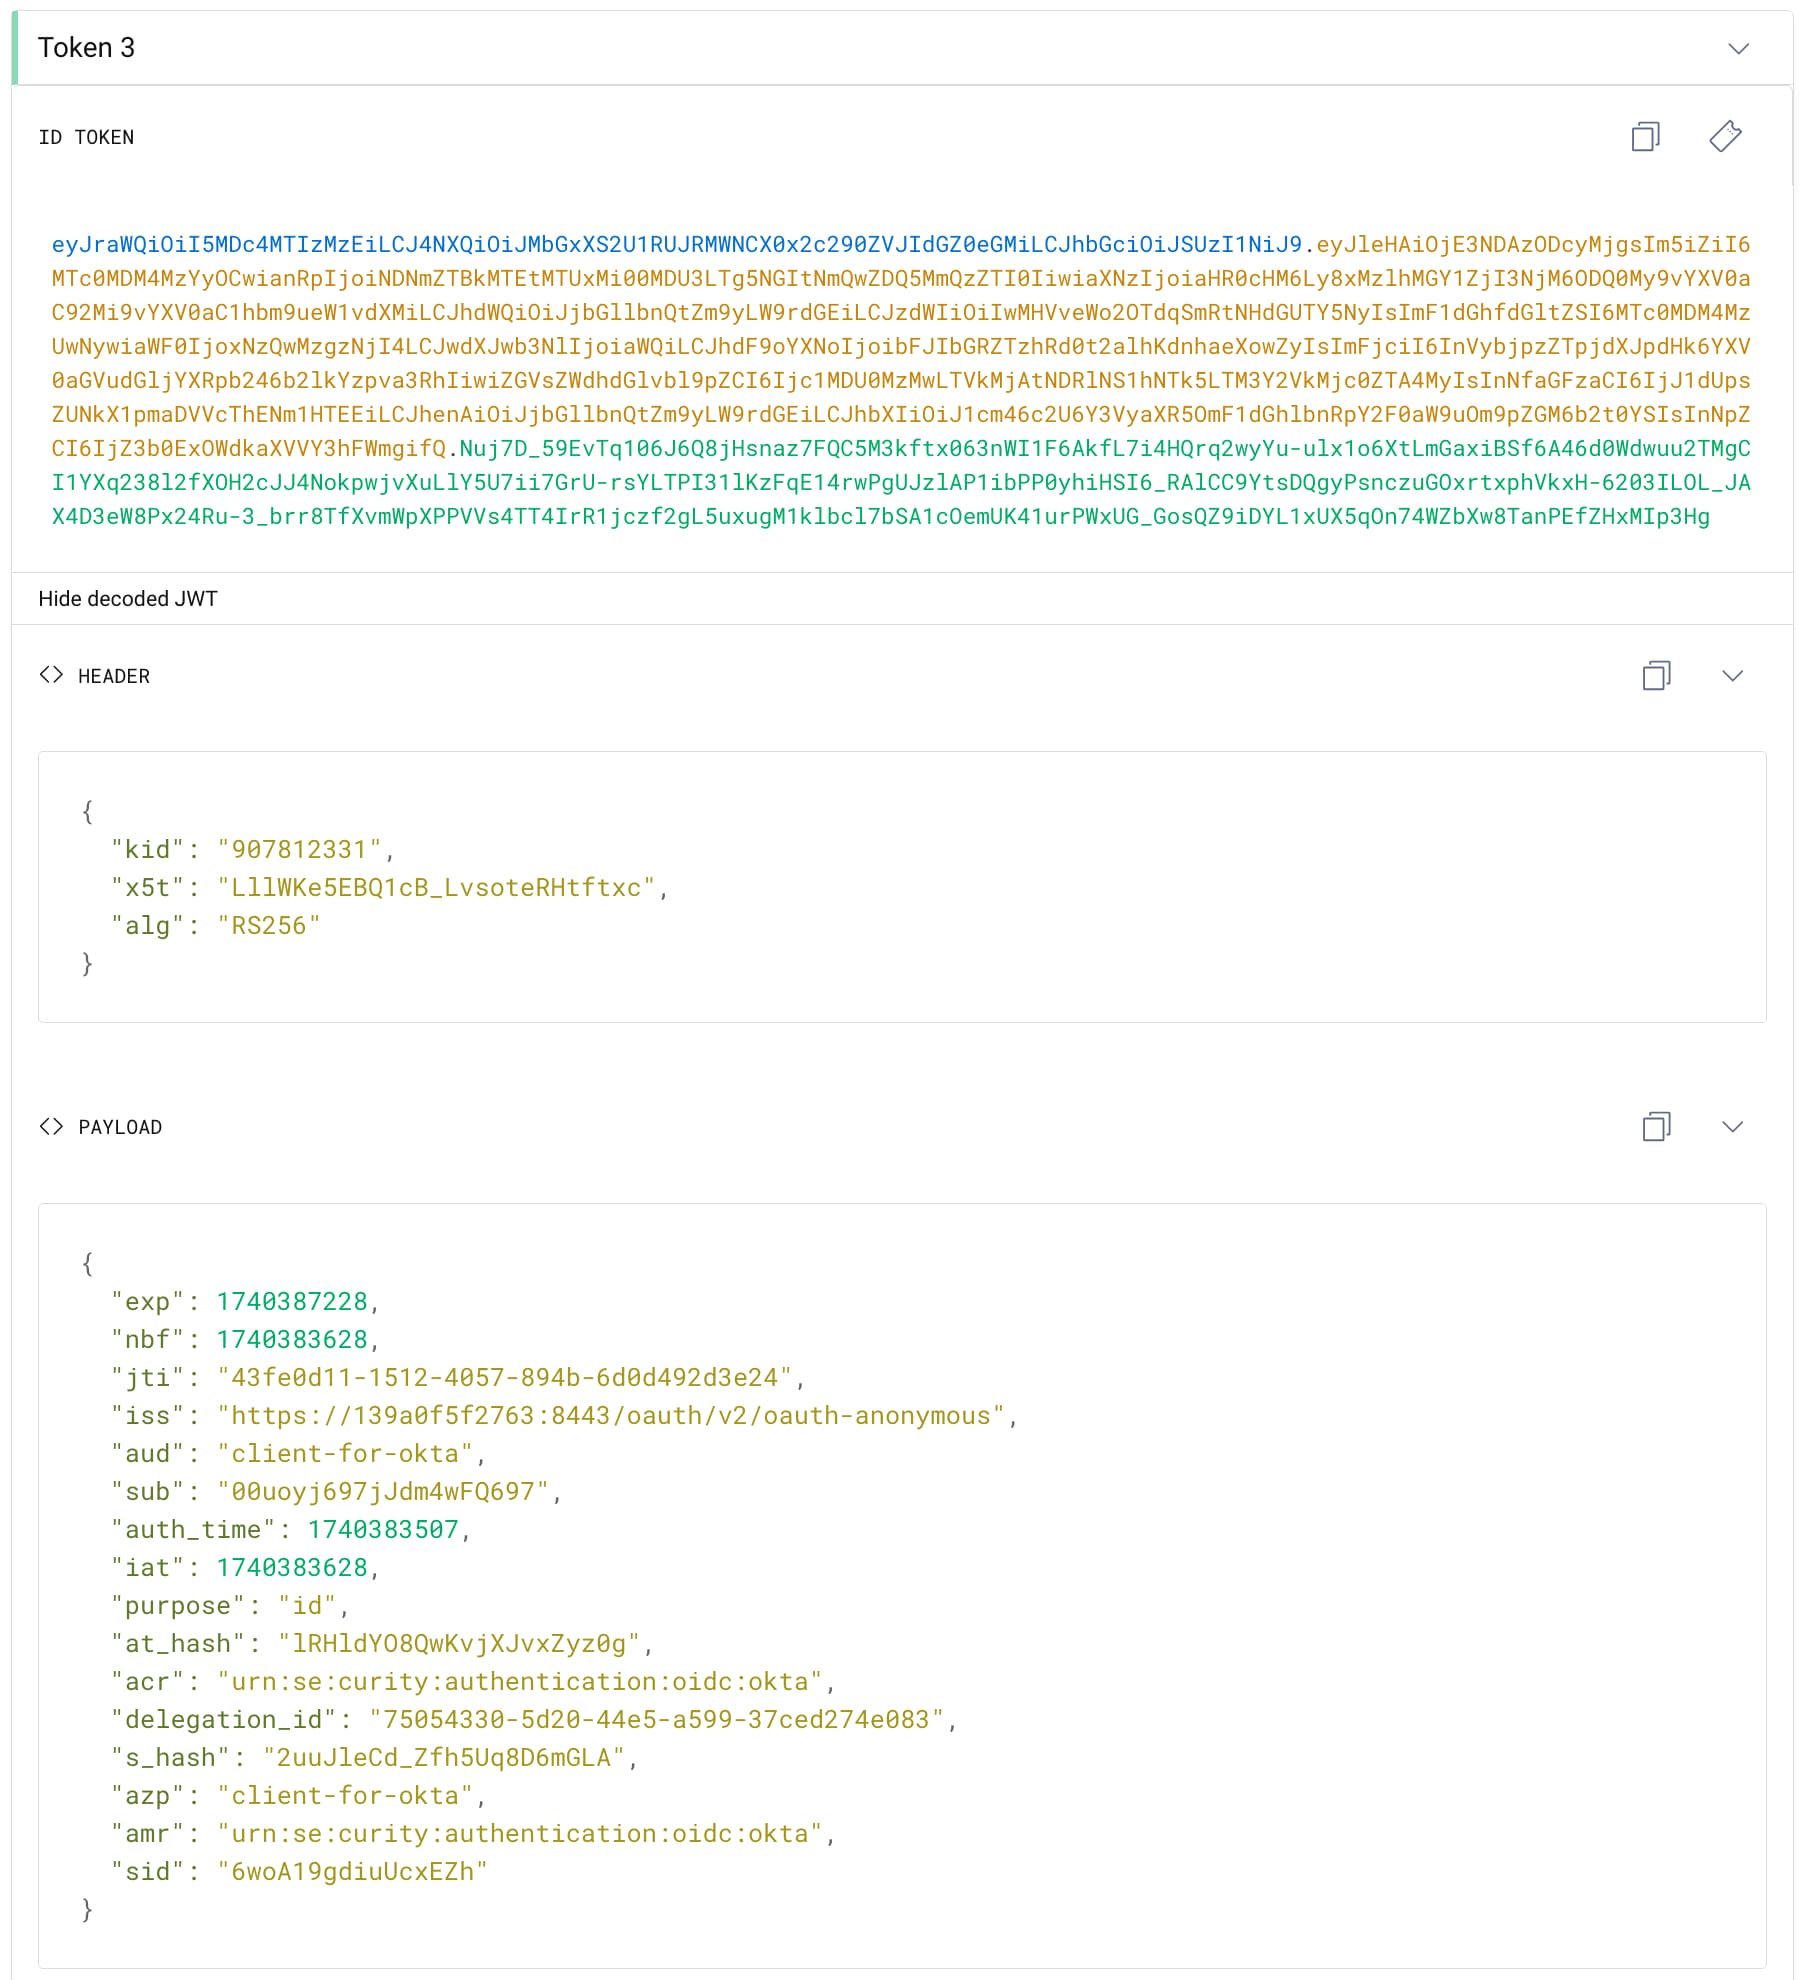
Note the sub claim, which is equal to the ID of the Okta user.
Control User Attributes
Sometimes, obtaining only the Okta user ID will not be enough to fulfill all your requirements. As a result of the OIDC flow you receive both an ID token and Okta's access token. You can use these to further enhance your authentication flow. For example:
- You can use the attributes from the ID token in the token designer or authentication action to issue correct claims to ID and access tokens issued by the Curity Identity Server.
- You can use the access token in an authentication action plugin to call Okta's APIs to get additional information about the user that the Curity Identity Server will further process.
- You can use the user attributes to set up and link user accounts in the Curity Identity Server. This will allow you to perform a lazy migration of your user base, or allow your users to log in with additional authenticators in the future.
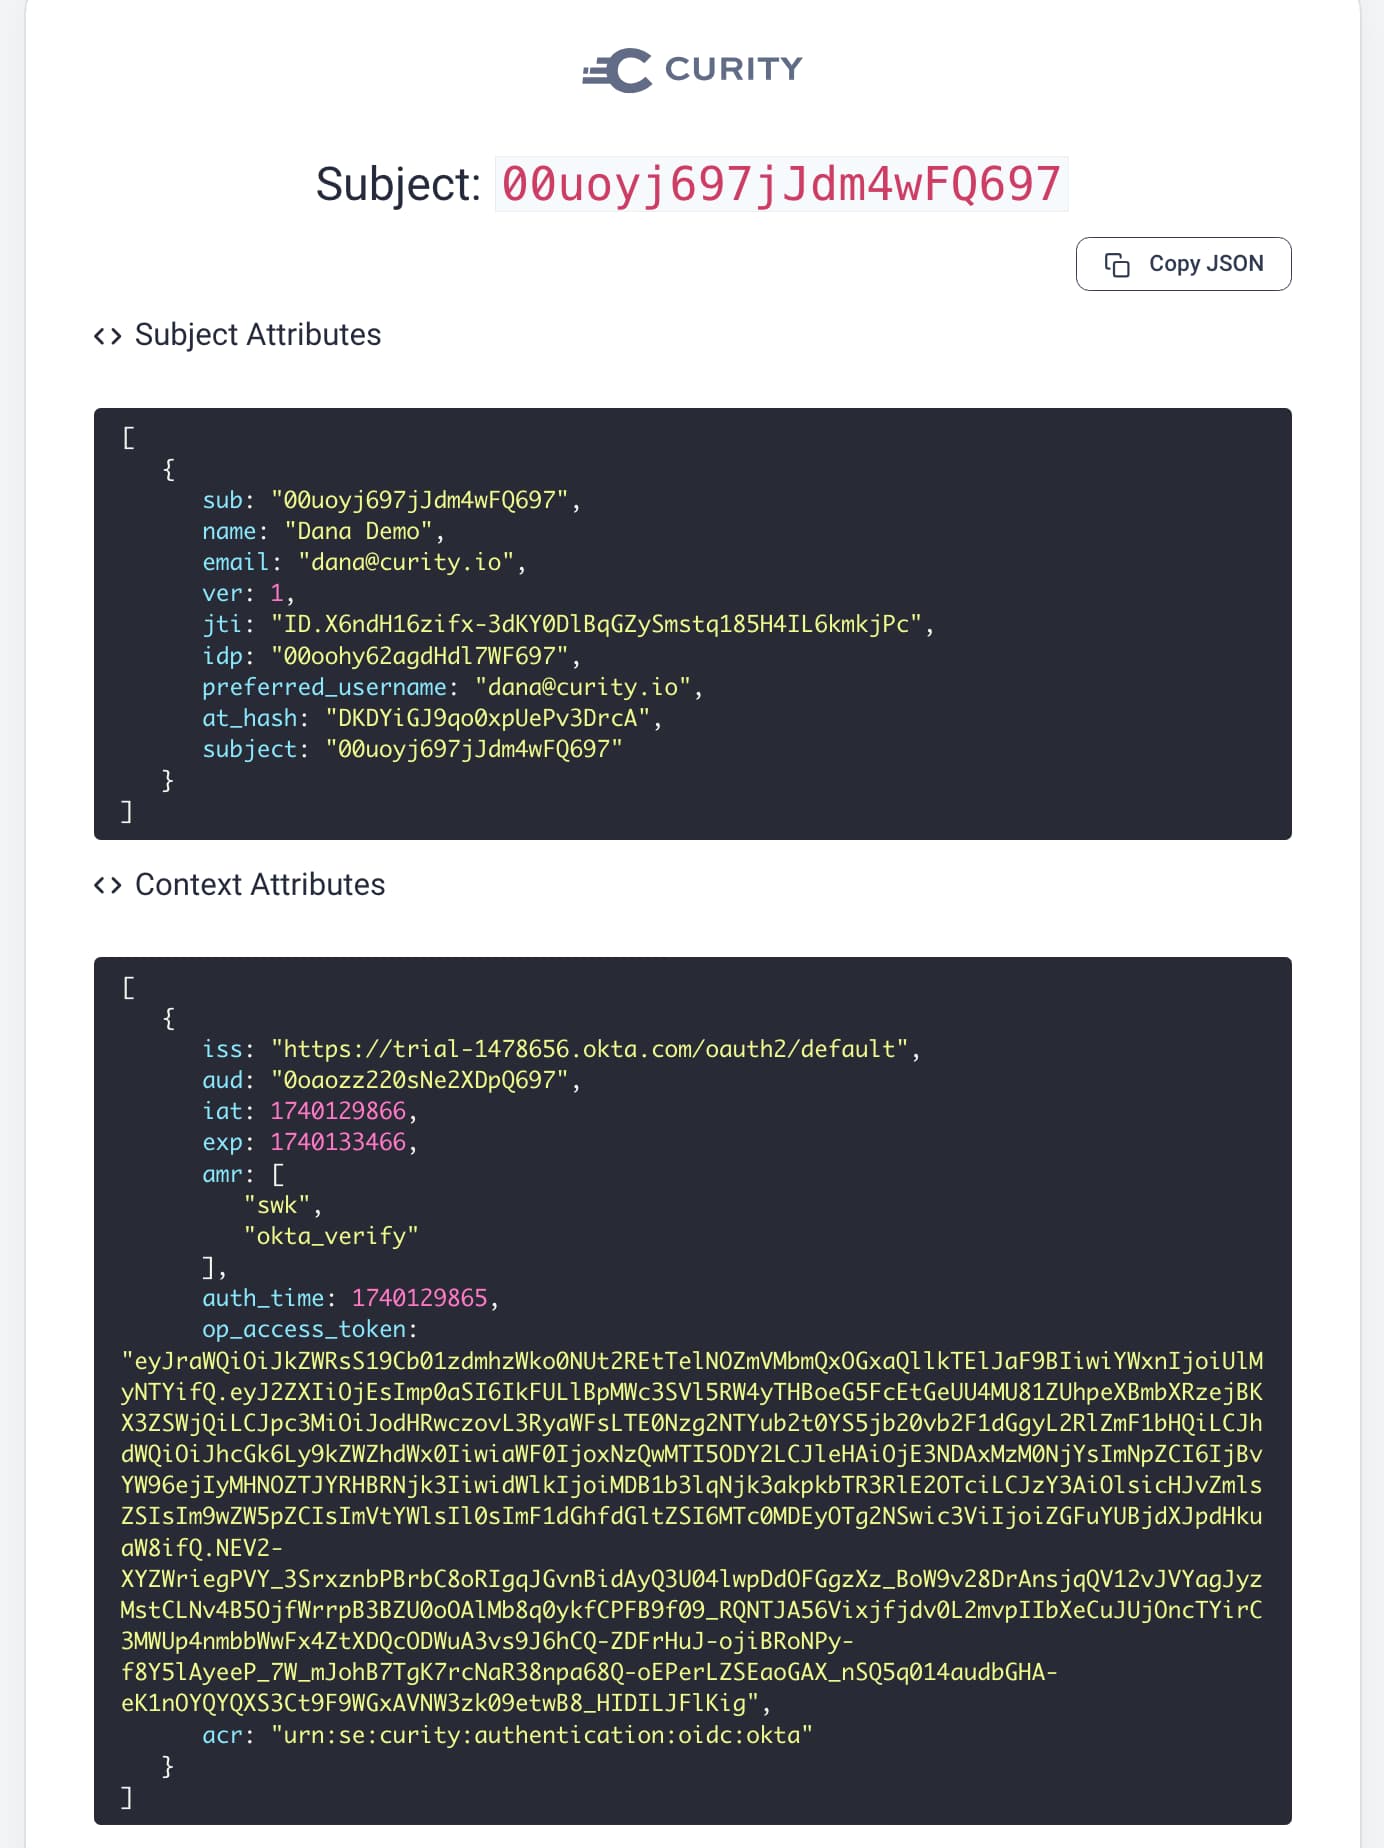
You can use the Debug action to learn the attributes returned by Okta. For example, if you add profile email to the list of scopes requested from Okta, then add a Debug action to the authentication flow, you will see additional information about the user returned from Okta:

Join our Newsletter
Get the latest on identity management, API Security and authentication straight to your inbox.

Start Free Trial
Try the Curity Identity Server for Free. Get up and running in 10 minutes.
Start Free TrialWas this helpful?