Configure Native Passkeys for Mobile Logins
On this page
Mobile apps can use the Hypermedia Authentication API (HAAPI) to run an OpenID Connect login in an API driven manner. Passkey logins then run with purely native screens, without invoking the system browser. The client side work is done by the HAAPI SDK, which calls native passkey APIs provided by the mobile operating system. Further background on passkeys is provided in the What are Passkeys? article and on the passkeys demo page.
Supported Platforms
The passkeys authenticator is available starting in version 8.6 of the Curity Identity Server. On Android, the native passkeys authenticator requires devices running Android 9 or higher, with version 3.4 or later of the HAAPI UI SDK. The Curity Android implementation is currently at an experimental level. On iOS, the native passkeys authenticator is supported on devices running iOS 15 or higher, with version 3.3 or later of the HAAPI UI SDK.
Configure Associated Domains
When using passkeys authentication, the HAAPI SDK calls native passkey APIs. The mobile app sends web credentials to the Curity Identity Server, and this must be permissioned by configuring associated domains. If this is not done, or if a non-compliant device is used, the app will fall back to a browser based flow for passkey logins. If a user with an older device attempts to use native passkeys, the HAAPI flow will present the following screen, to prompt the user to switch to the system browser:

Follow the instructions below to configure associated domains for Android or iOS.
The HAAPI SDK calls Credential Manager APIs and FIDO2 APIs. The Google docs describe how the backend domain where webcredentials are sent for cryptographic verification must host a Digital Asset Links JSON file. When using the passkeys authenticator, the Curity Identity Server hosts a file with the name assetlinks.json at a well-known URL. This must be an HTTPS URL that is accessible over the internet, and use a server certificate from a trusted authority. Google servers call this URL to verify the app to domain association.
https://login.example.com/.well-known/assetlinks.json
The file registers one or more mobile apps. Its content is similar to the following, where each entry consists of the app's package name and its signing certificate public details:
[{"relation": ["delegate_permission/common.handle_all_urls","delegate_permission/common.get_login_creds"],"target": {"namespace": "android_app","package_name": "io.curity.haapidemo","sha256_cert_fingerprints": ["67:60:CA:11:93:B6:5D:61:56:42:70:29:A1:10:B3:86:A8:48:C7:33:83:7B:B0:54:B0:0A:E3:E1:4A:7D:A0:A4"]}}]
Use the Admin UI of the Curity Identity Server to register all mobile apps that use native passkeys. Navigate to System → Deployment → Zones. The assetlinks.json document is then generated for you:

It is also possible to deploy a customized file, within the webroot folder of the Curity Identity Server. For Docker based deployments, you can place the file at the following location:
/opt/idsvr/usr/share/webroot/.well-known/assetlinks.json
The domain association must always be populated, so that the Curity Identity Server can validate the application ID sent by the HAAPI SDK. When required, prevent the automatic hosting by configuring the setting at System → Deployment → Service Roles → Other → Disable Android Asset Link Generation in the Admin UI.
Next, add the following line to the Android app's manifest file:
<application ...<meta-data android:name="asset_statements" android:resource="@string/asset_statements" /></application>
Then add an assets_statement string resource to the strings.xml file of the Android project, referencing the location of the assets file:
<string name="asset_statements" translatable="false">[{\"include\": \"https://login.example.com/.well-known/assetlinks.json\"}]</string>
Add the Passkeys Authenticator
After completion of mobile technical prerequisites, follow the Passkeys Authenticator tutorial to create the authenticator and configure the mobile app to use it. Understand the passkeys authenticator's configuration settings and how they affect the user experience.
Use External Security Keys
Currently, the native passkeys authenticator supports Google and Apple passkeys. To use FIDO security keys, configure a WebAuthn Authenticator with the following options, instead of a passkeys authenticator. This enables users to authenticate by inserting their FIDO2 device into a USB port, or scanning it using Near Field Communication (NFC).

Test Native Passkeys
Developers can test native passkeys using a purely local setup, by running the HAAPI UI SDK code examples. The ngrok tool is used to create an HTTP tunnel that exposes the Curity Identity Server over an internet HTTPS URL, as described in the Mobile Setup with ngrok tutorial. This provides the publicly available URL that is a prerequisite for native passkeys authentication on mobile devices.
Follow the instructions below to test native passkey authentication for Android or iOS.
If using an emulator, first ensure that it has Google Play Services installed. Also make sure you sign into your Google account. Next, enable options to simulate biometrics, e.g. by selecting Settings / Security & Privacy / Device Unlock / Face & Fingerprint Unlock. To save passkeys to Google password manager, also sign into your Google account. Then run the HAAPI Android Code Example deployment, first setting USE_NGROK=true at the top of the script. The script deploys an instance of the Curity Identity Server with an associated domains configuration.
export USE_NGROK='true'./start_idsvr.sh
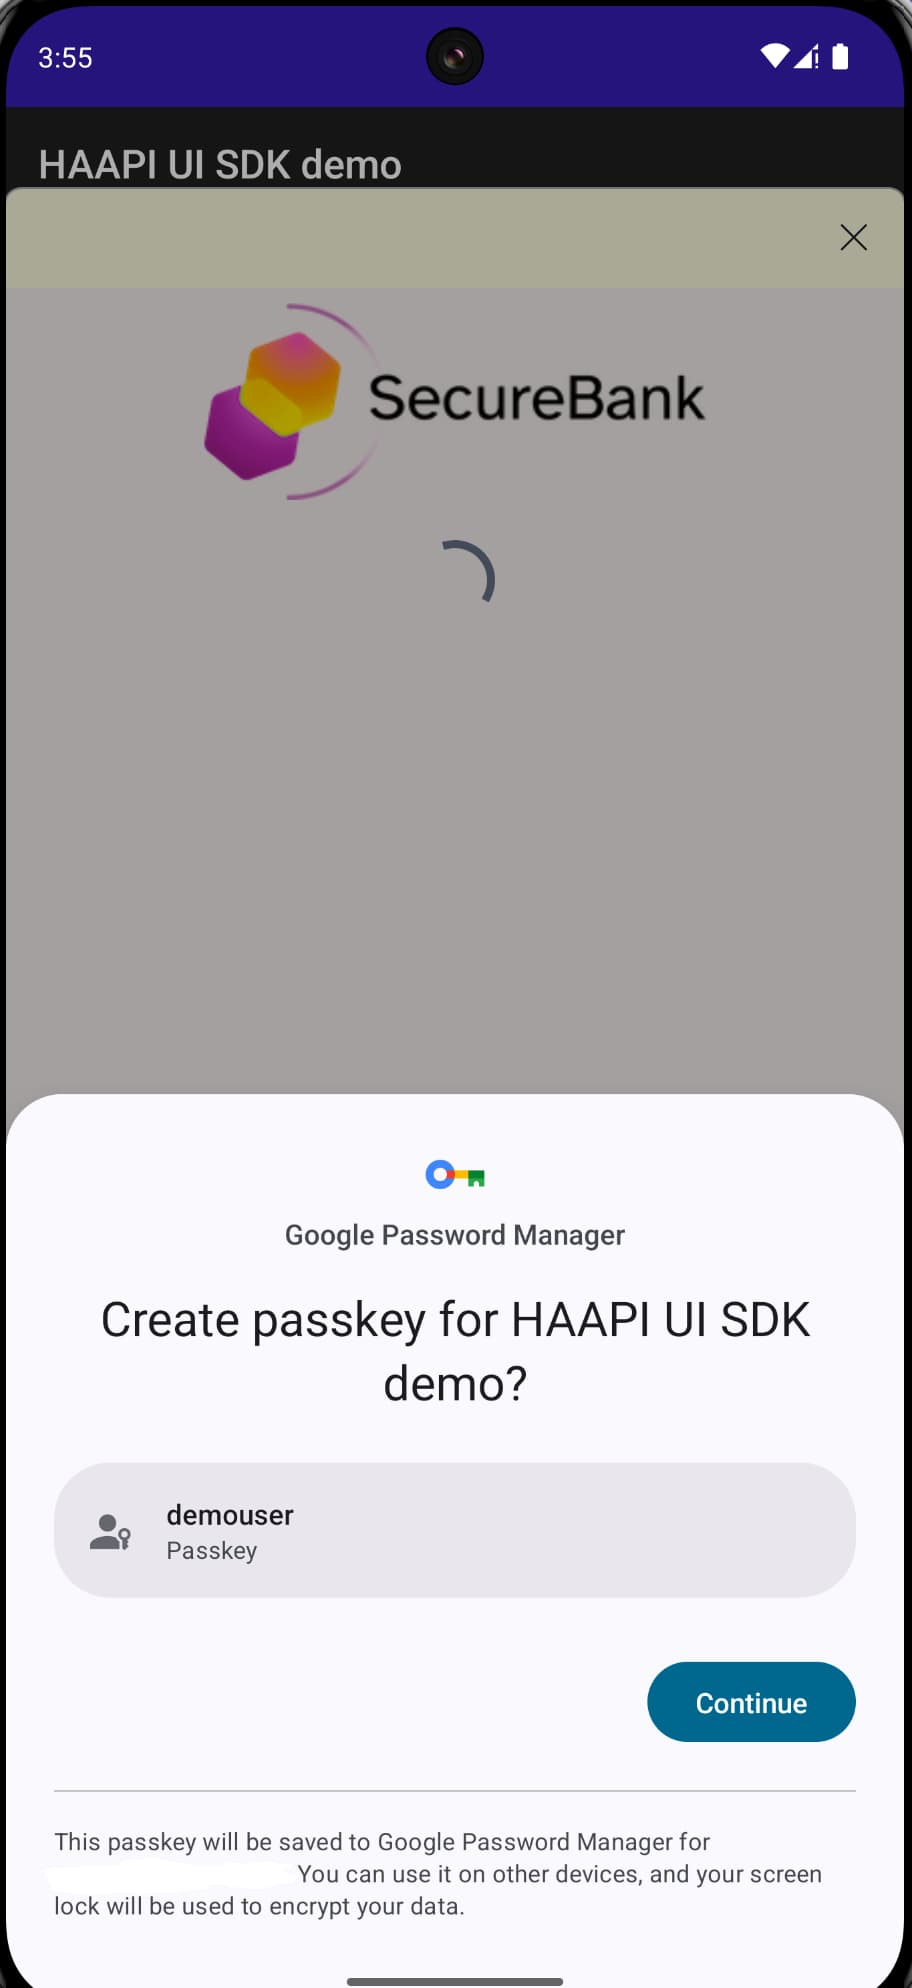
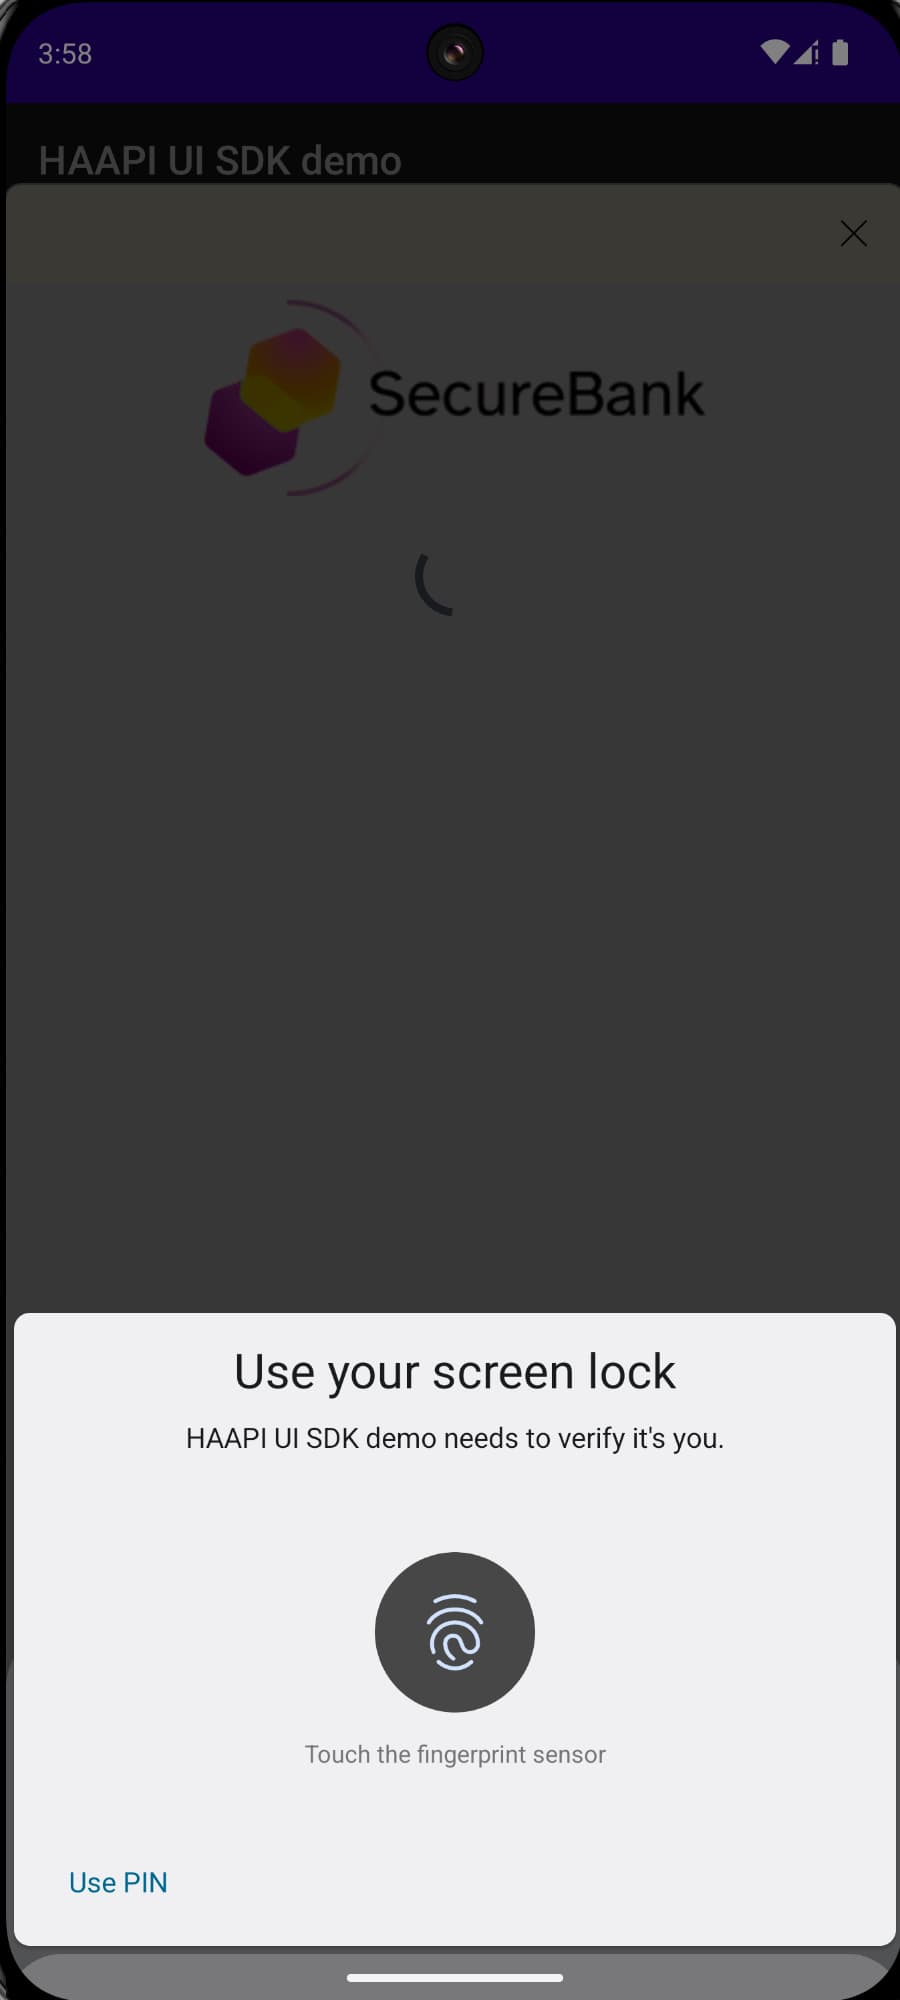
Open the project in Android Studio, then run the code example and select the Passkeys authenticator. On the first login, register a passkey, using the emulator's Extended Controls / Fingerprint option. On all subsequent logins, the user simply signs in with a biometric.


If you need to troubleshoot, or find out more about how HAAPI uses native passkeys, see the HAAPI UI SDK documentation.
Video Walkthrough
The following video demonstrates the user experience for passkey registration and passkey authentication:
Conclusion
When using the Hypermedia Authentication API in a mobile app, you get built-in support for strong user authentication using passkeys, with a purely native login user experience. This tutorial explained the configuration steps. By implementing an OAuth flow in this manner, you don't need to write any code, and your apps will receive tokens with which to call APIs, for an end-to-end security solution.

Join our Newsletter
Get the latest on identity management, API Security and authentication straight to your inbox.

Start Free Trial
Try the Curity Identity Server for Free. Get up and running in 10 minutes.
Start Free TrialWas this helpful?


