
Implementing the Phantom Token Approach Using OAuth Introspection
On this page
In most deployments, organizations should use reference tokens (opaque tokens) outside the internal network and then JSON Web Tokens (JWTs) within it. The phantom token approach allows for achieving this goal. You can find a detailed description of this pattern in the phantom token pattern article. This tutorial describes how to set up the Curity Identity Server for phantom tokens.
The pattern assumes that the system uses a single entrypoint to the internal network — an API gateway, sometimes called an API firewall or a reverse proxy. When the gateway receives a request with an opaque token it exchanges the token at the authorization server for a JWT. In an overview, the phantom token pattern looks like this:

This tutorial focuses on configuring the authorization server so that it can play its part in the pattern and exchange a reference token for a JWT. If you want to learn how to implement the pattern in a gateway, then have a look at the phantom token integrations page. There you will find tutorials that show how to implement the pattern in various gateways.
The authorization server can leverage the introspection endpoint to implement the pattern. The introspection response contains metadata associated with an access token, which in the Curity Identity Server translates to claims. By default, the result of an introspection is an unsigned JSON document. This means that you have to tweak the introspection behavior, so that the authorization server returns a signed JWT, which the API gateway can pass on to downstream APIs.
Preparing the Curity Identity Server
There are two ways of using the pattern in the Curity Identity Server. The Curity Identity Server can either:
- return only a JWT as a response from the introspection endpoint (the
application/jwtapproach), or - return the JWT additionally to all the other claims normally returned by the introspection (the
token procedureapproach).
If the API gateway does not require any information about the received access token, other than whether the token is valid, then use the application/jwt approach. If the API gateway needs to act on the contents of the token, and is not able to easily decode the JWT, then we recommend the token procedure approach.
In either case, first ensure that the Curity Identity Server exposes the introspection endpoint. The next section explains how to do it.
Enable the Introspection Endpoint
This tutorial assumes that you have a working instance of the Curity Identity Server, configured at least with the basic configuration wizard. Furthermore, the tutorial assumes that there is a token profile called token-service and a service role called default. If you need to quickly set up an instance of the Curity Identity Server, then have a look at the getting started guides.
Using the Example Configuration
If you're using the example configuration, you can skip this part. Your deployment already exposes the introspection endpoint and has a default signing key. You will also have a client called gateway-client that has the introspection capability. Skip ahead to Enabling Phantom Tokens.
To enable the introspection endpoint, complete these steps:
- Allow the introspection capability on the profile
- Add the introspection endpoint to the token profile if necessary
- Publish the introspection endpoint on the service profile
You can follow these steps either from the admin UI or by typing commands using a Command Line Interface.
Use the admin UI Expert mode
When following the steps in the Curity Identity Server, make sure that you are using the Expert mode of the admin UI. The admin UI uses the Expert mode by default, so remember to switch it back if you previously changed to the Normal mode. You can find more information about the modes in this overview.
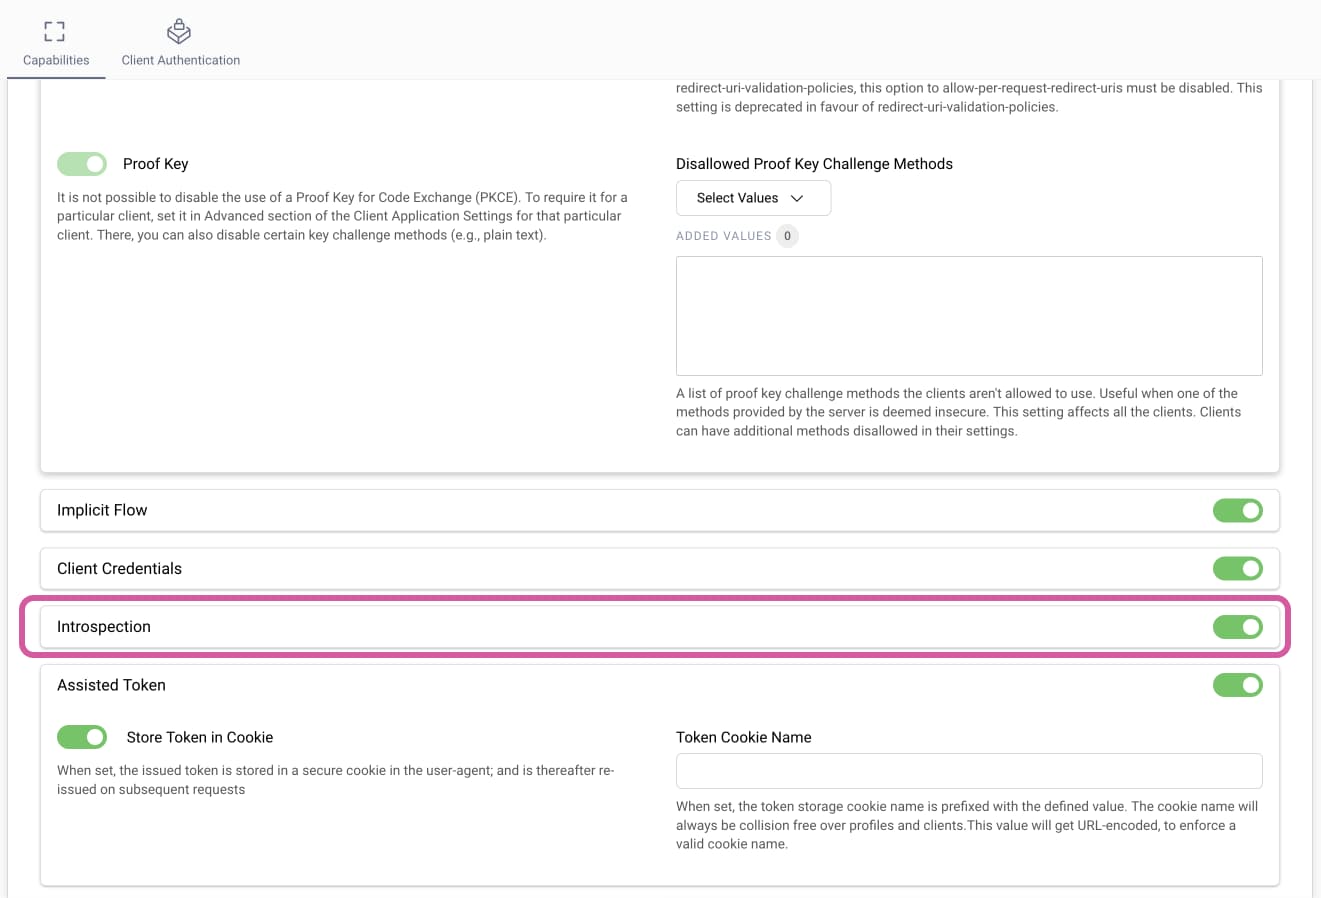
Go to Profiles → Token Service → General ��→ Client Settings. Enable the Introspection capability, as the screenshot below shows:
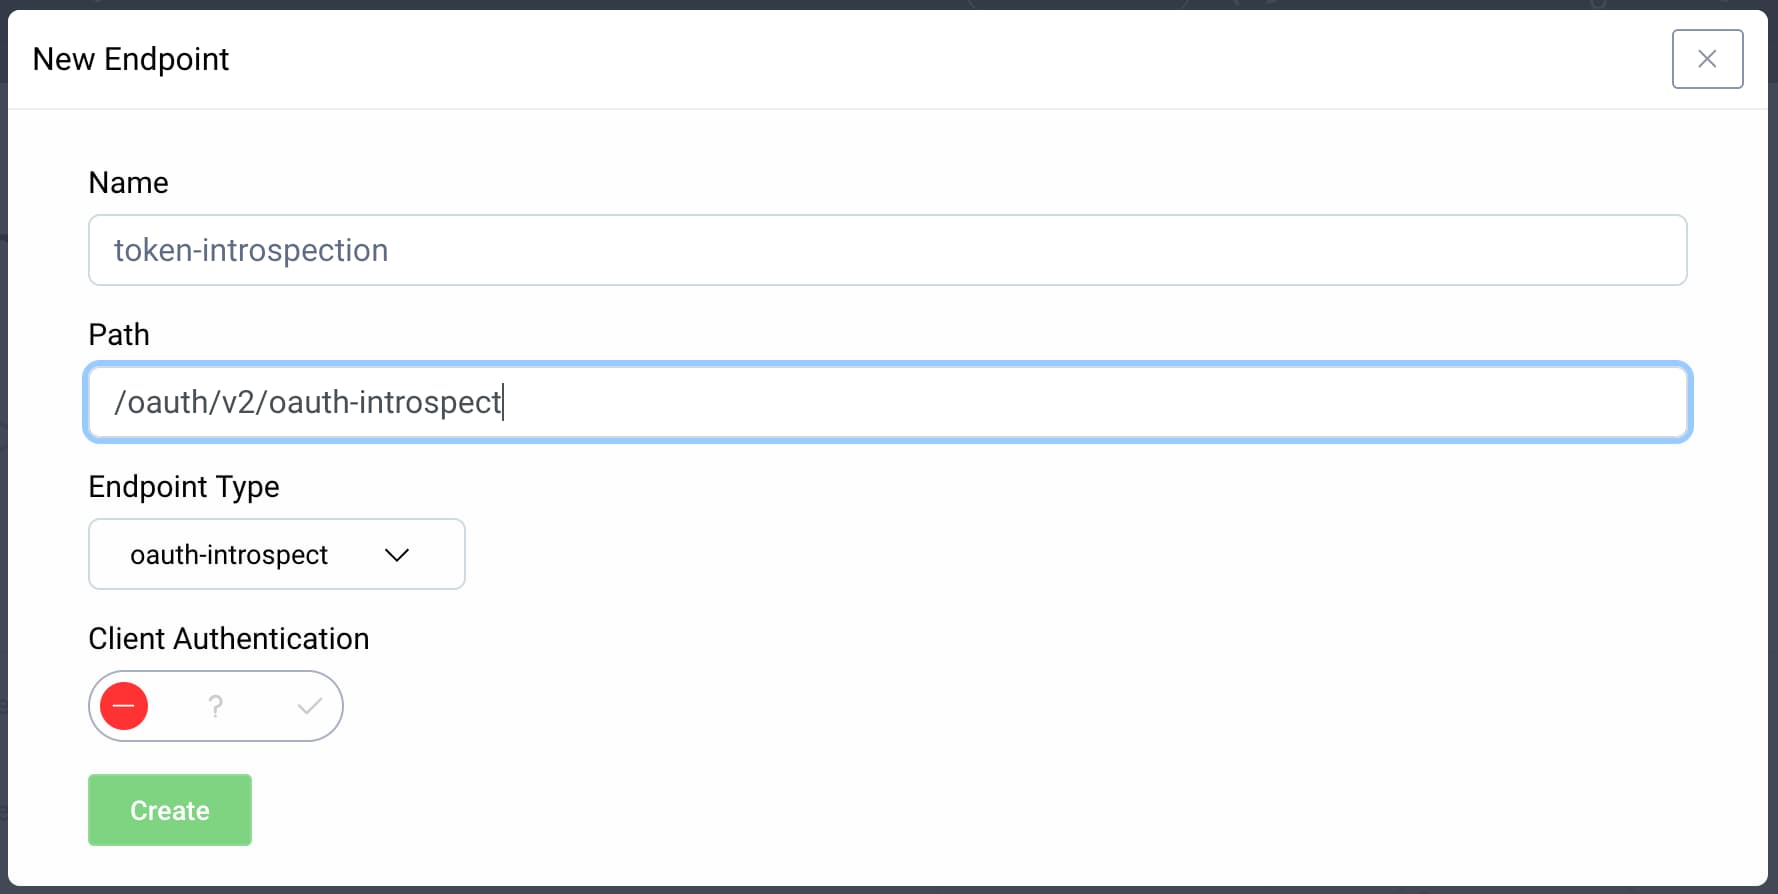
Next, go to Profiles → Token Service → Endpoints. If the endpoint with the type oauth-introspect doesn't exist, click + New Endpoint to create a new one. Give it a name and choose a path, e.g., /oauth/v2/oauth-introspect, then select oauth-introspect from the Endpoint Type dropdown. Click Create. The filled-in endpoint form should look similar to this:
You will see the newly added endpoint on the list of endpoints with a red Not Deployed button, as the following screenshot shows:

Click the button and select the default service role, then click OK. Finally, save the changes by selecting Commit from the Changes menu at the top.
Now the endpoint is set and active on the nodes that have the default service role. Next, ensure that the system has a JWT issuer with a signing key assigned.
Enable JWT Issuance
Use the following steps to check if there is a JWT issuer in the system and that it has a signing key.
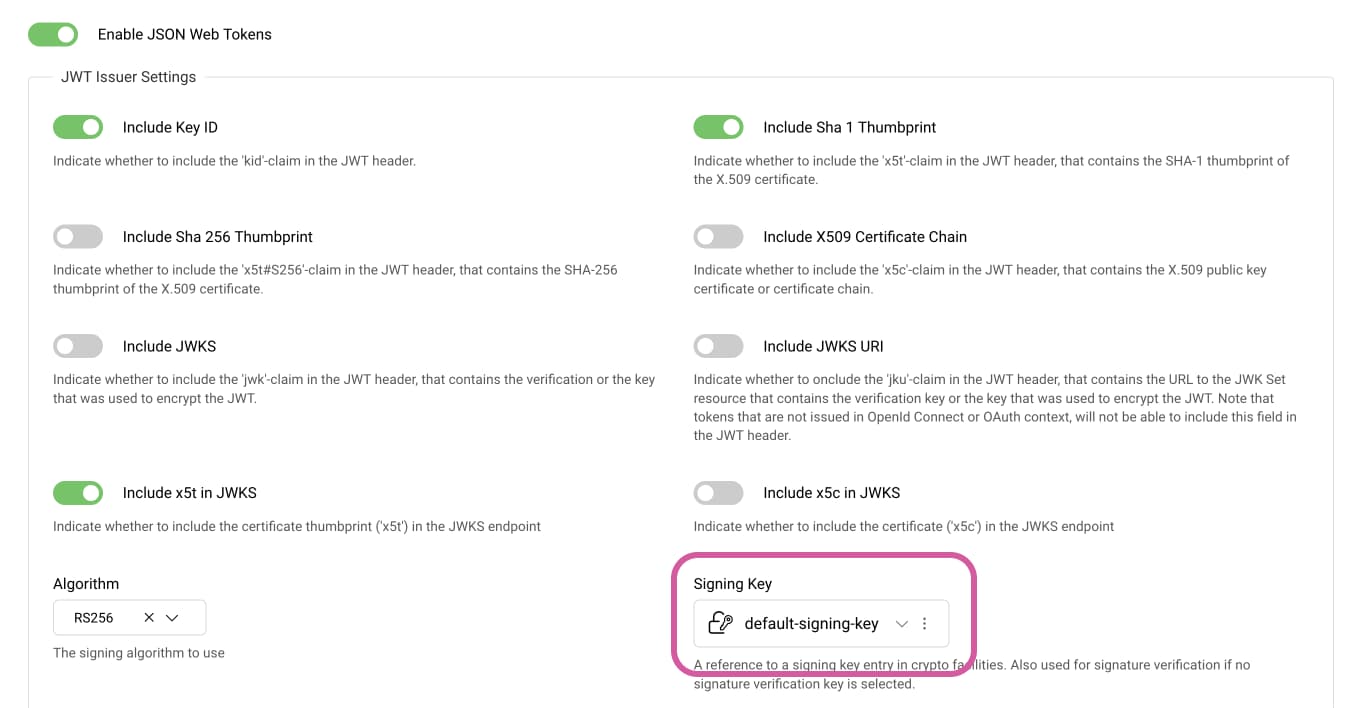
Go to Profiles → Token Service → Token Issuers. Ensure that Enable JSON Web Tokens is toggled on and that there is a key assigned in the Signing Key field. The following screenshot shows the default-signing-key assigned to the token issuer:
If you don't have a signing key, follow the instructions in this section.
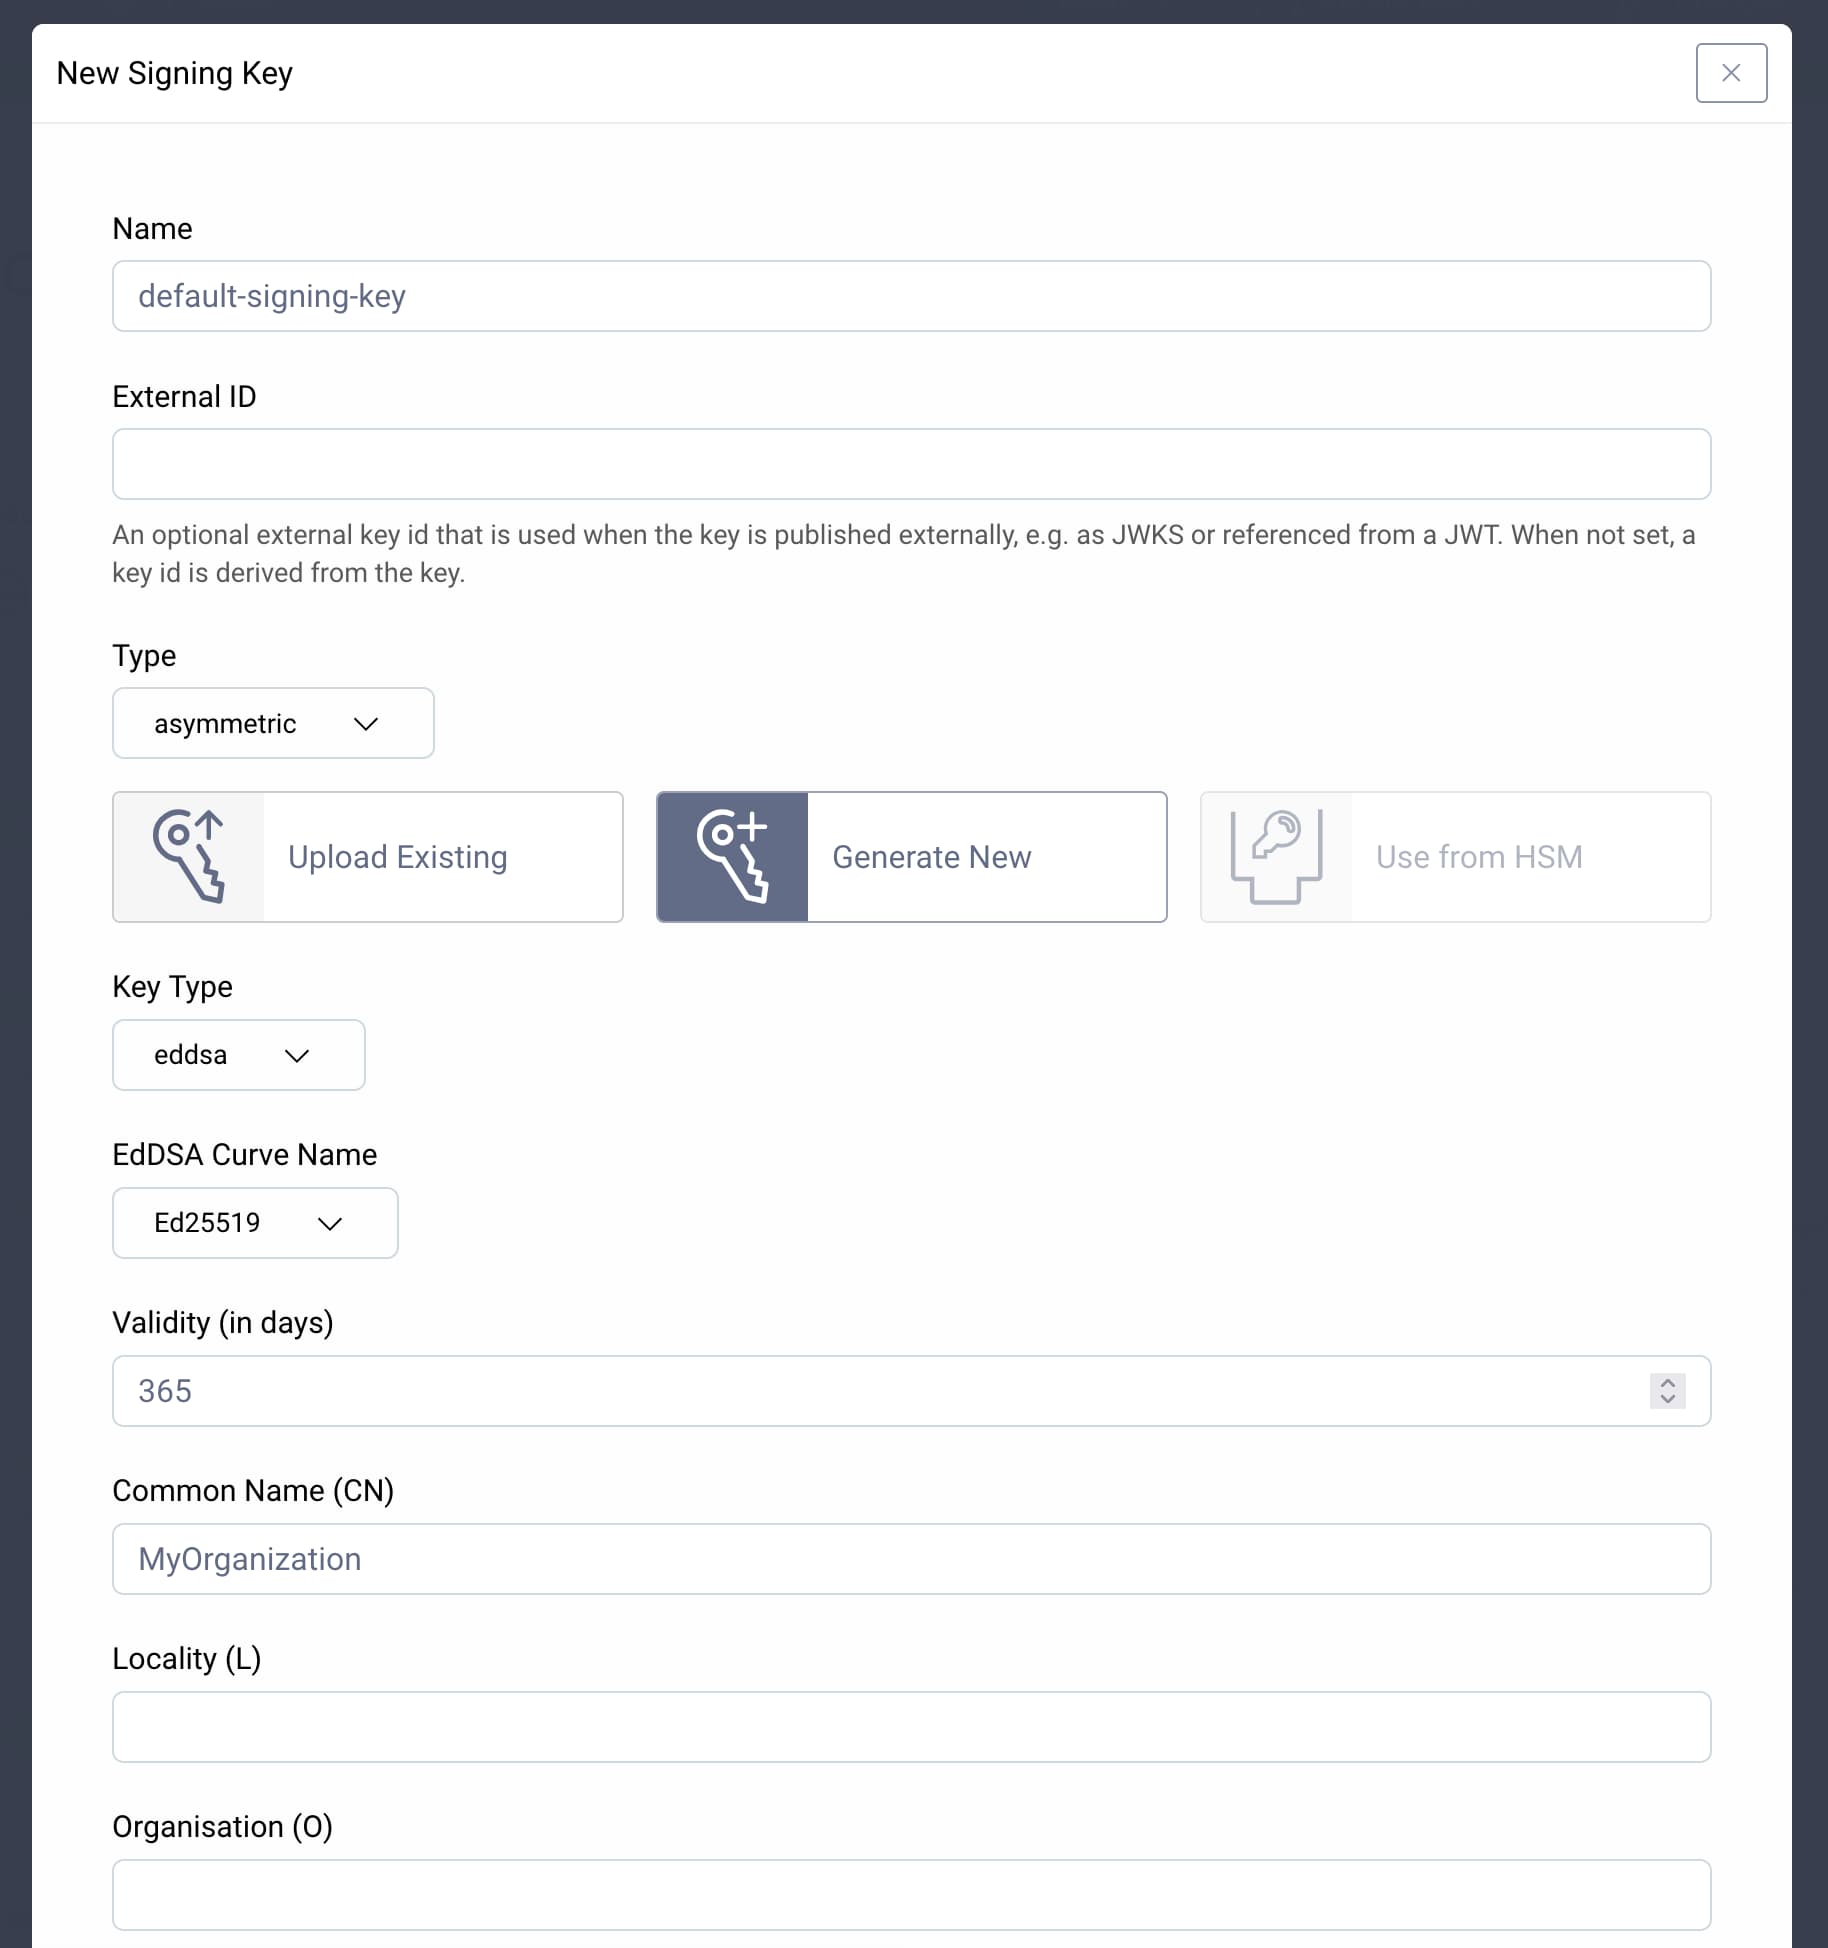
Open the Facilities menu in the top right corner and go to Keys and Cryptography → Signing → Signing Keys. Click the + button to add a new key pair. Give the key a name, choose the asymmetric type, and select Generate New. Choose a Key Type. We recommend to use an eddsa key, but you have to ensure that your APIs are able to verify signatures created with this algorithm. Fill in the required fields then click Create & Commit. The key creation form will look similar to this screen:
Next, create an OAuth client that will be able to perform the introspection.
Configure Client for Introspection
In the phantom token pattern, the API gateway or the reverse proxy needs an OAuth client to introspect incoming access tokens. Create a dedicated client for that purpose. Set up such a client with only the introspection capability, so that it cannot perform any other OAuth requests.
In the admin UI go to Profiles → Token Service → Clients and click on + New Client. Give the client an ID, e.g. gateway-client, as the following screenshot shows. Then, click Create.

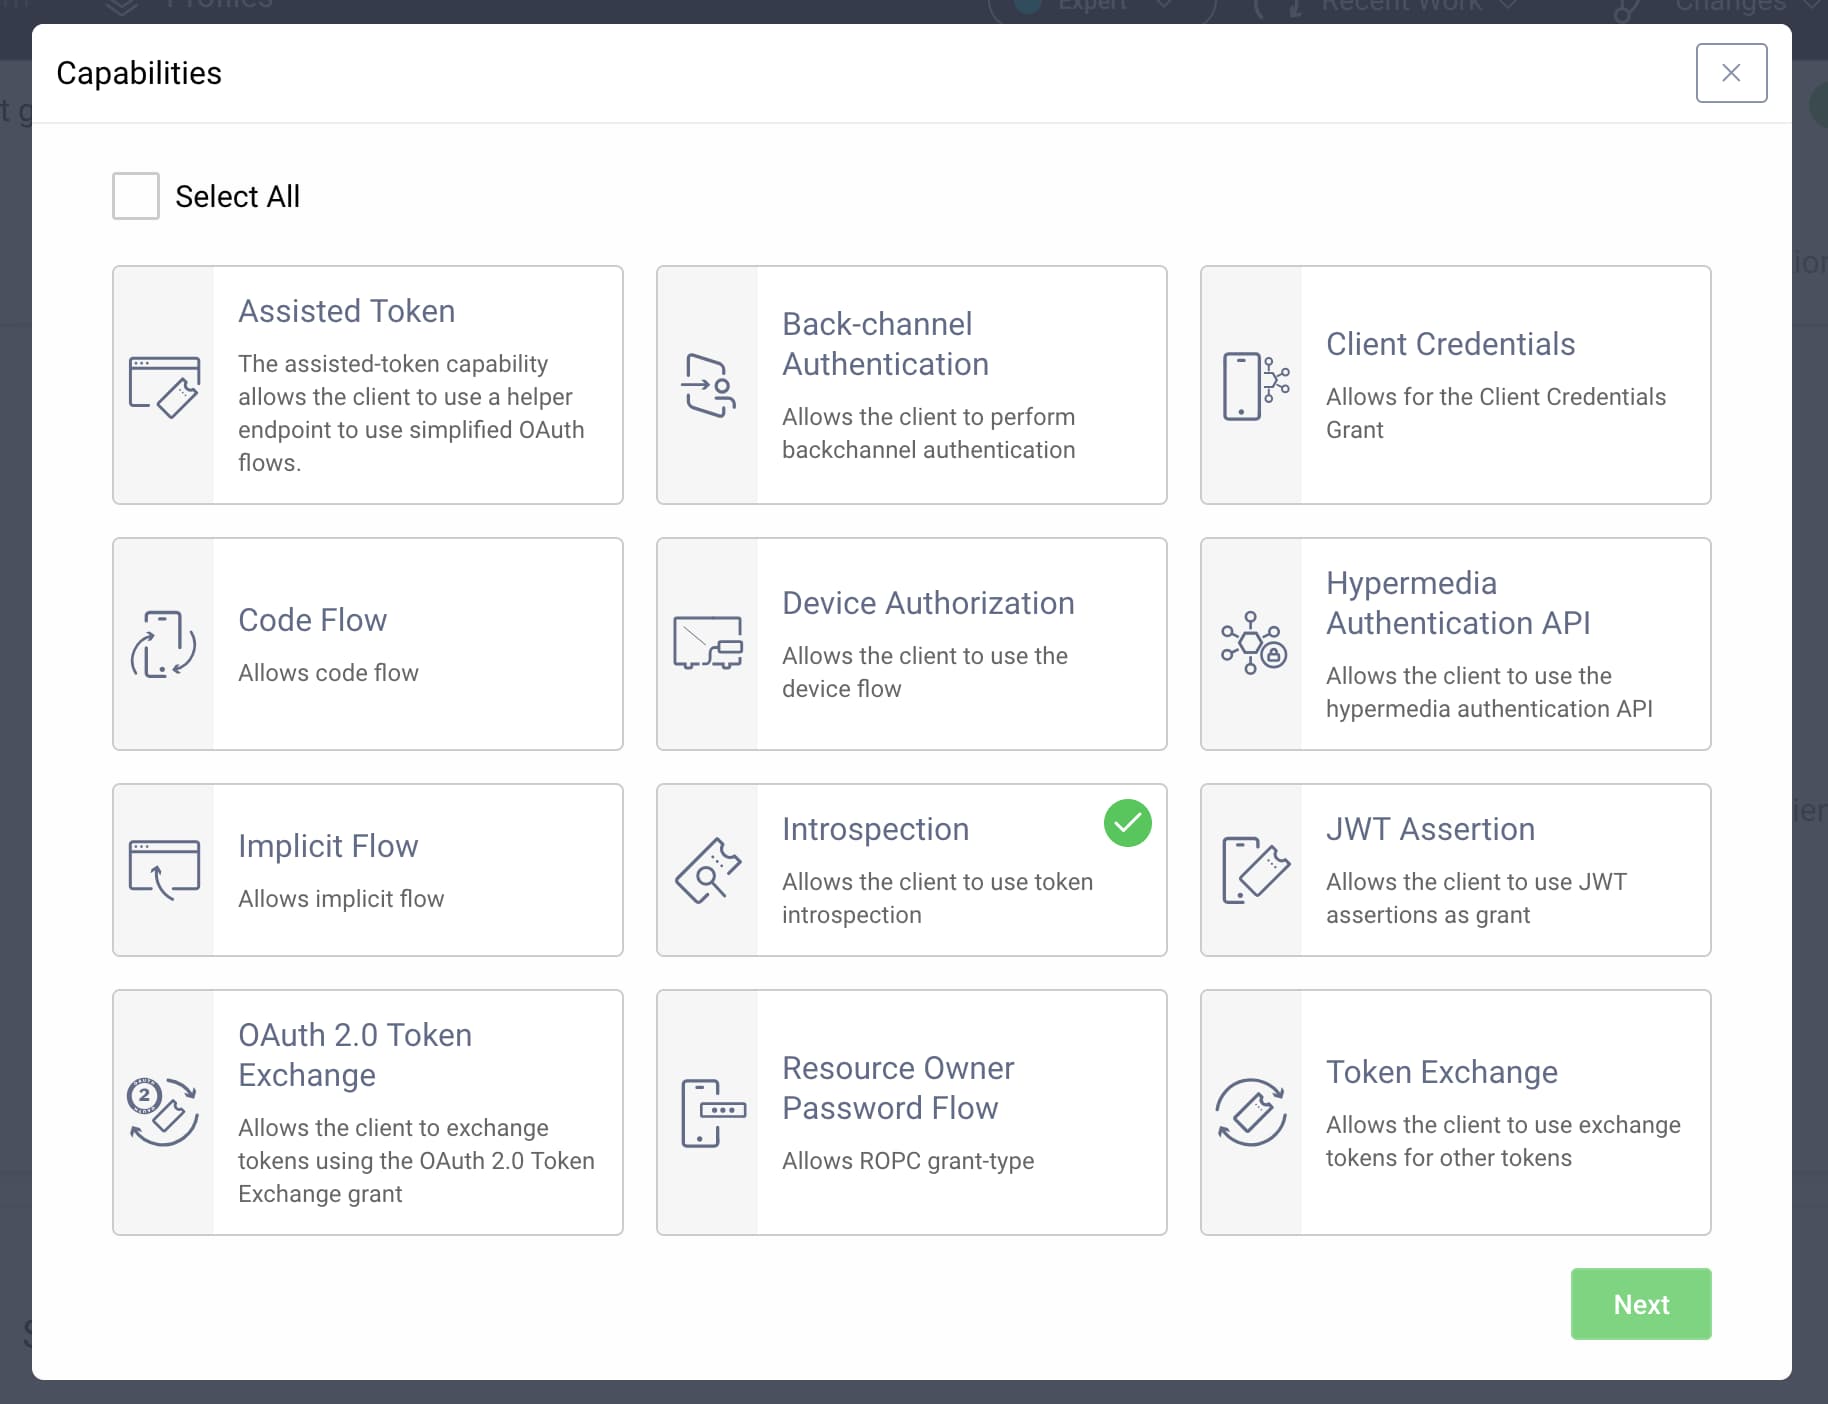
Scroll down to Capabilities and click Add capabilities. Select only the introspection capability as the screenshot below shows. Then, click Next.
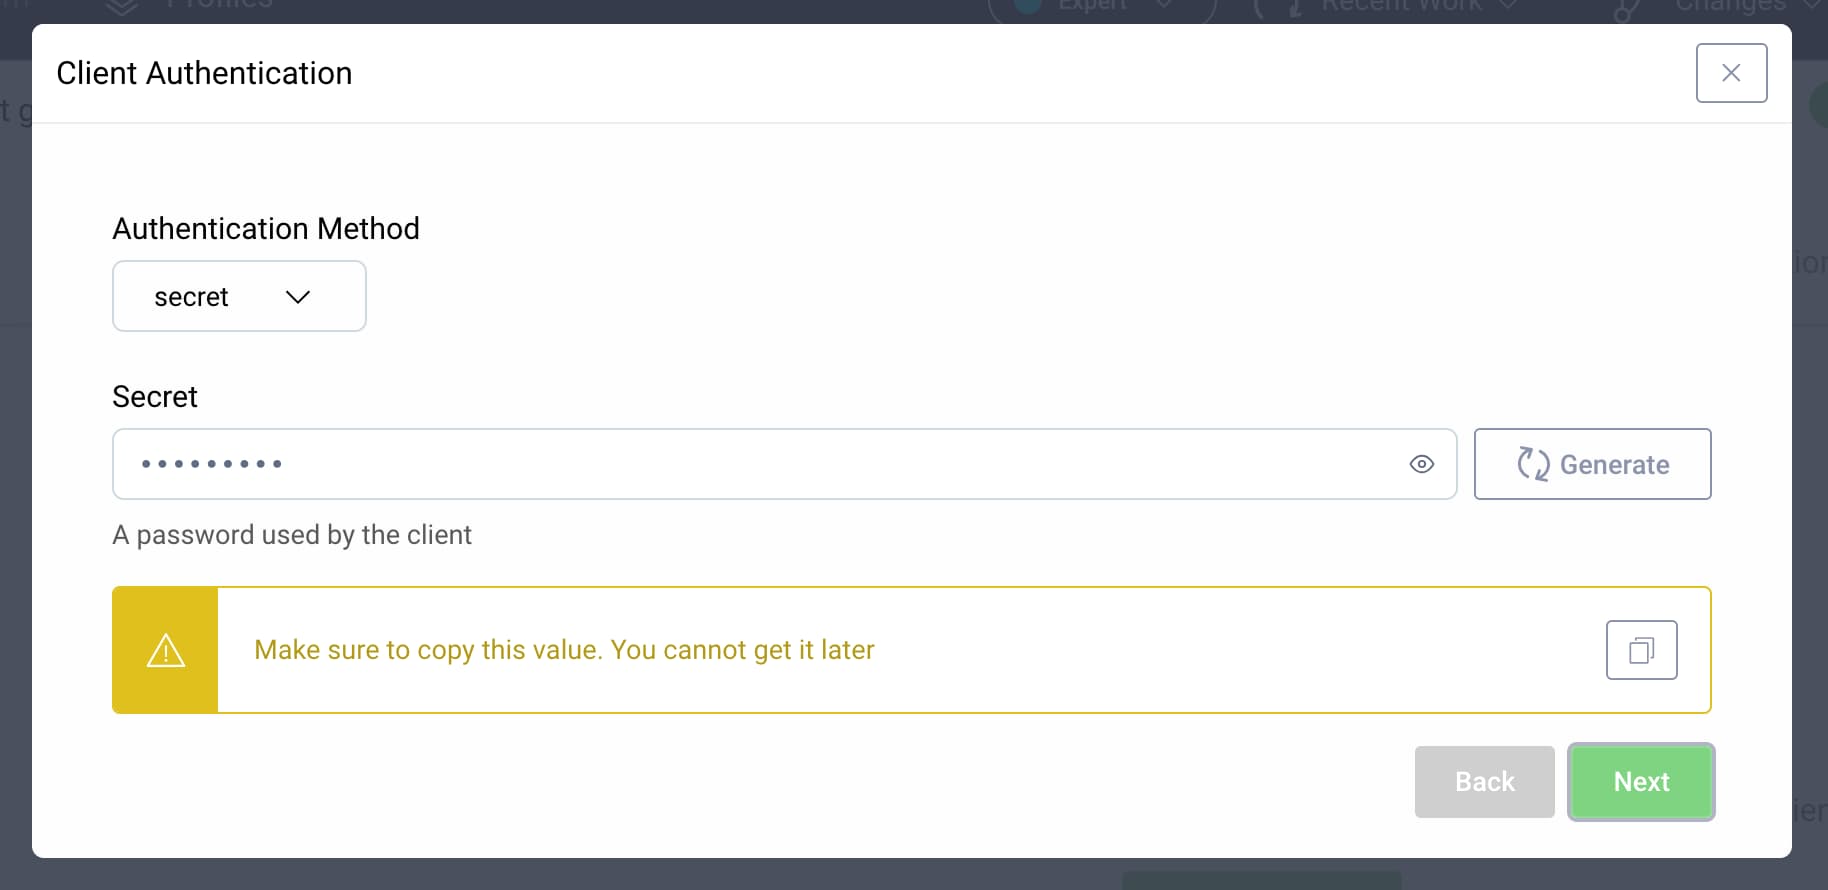
From the Authentication Method choose secret and enter a client secret, e.g. Password1. After clicking Next you will see a reminder to copy the client secret, as on this screen:
Click Next once more. Save changes by selecting Commit from the Changes menu at the top.
The Curity Identity Server has now all the configuration you need to enable phantom tokens.
Enabling Phantom Tokens
This tutorial mentions two ways of implementing phantom tokens in the Curity Identity Server. For testing purposes, you can try to implement both ways. In a production environment, you will normally need to only use one of them. Let's start with the simpler approach.
Application/JWT Approach
The application/jwt approach is the simpler way of the two options. In this approach, the gateway receives only the JWT that corresponds with the opaque token. You will usually use it in setups where the gateway does not need to operate on the token's claims — the gateway will simply forward the request with a JWT, if the token is valid.
This approach does not require any additional setup. Enable it by setting a special value in the Accept header of the introspection request. When the request has an Accept: application/jwt request header, the Curity Identity Server will respond with the JWT version of the incoming token.
Here is a curl example of an introspection request from the previously created gateway-client. The example uses this opaque token: ba06557a-c2b6-439e-85a0-759c8e953e14 and assumes that the instance of the Curity Identity Server runs on https://localhost:8443.
curl -X POST \https://localhost:8443/oauth/v2/oauth-introspect \-H 'accept: application/jwt' \-H 'cache-control: no-cache' \-H 'content-type: application/x-www-form-urlencoded' \-d 'token=ba06557a-c2b6-439e-85a0-759c8e953e14&client_id=gateway-client&client_secret=Password1'
Instead of the full JSON response, the Curity Identity Server responds with the JWT directly in the response body, similar to the following:
eyJraWQiOiItMzgwNzQ4MTIiLCJ4NXQiOiJNUi1wR1RhODY2UmRaTGpONlZ3cmZheT....LJHlj1Og
The gateway then copies the JWT to the Authorization header of the original request and forwards it to the API.
Token Procedure Approach
Sometimes the API gateway or a reverse proxy needs information from the token to make its own decisions. If you use the apllication/jwt approach, the gateway can decode the JWT and read the token's claims, but sometimes it might be inconvenient to do it in the gateway. For such situations you can use the token procedure approach in which you combine the regular introspection response with a phantom token.
To implement this approach, add a token procedure to the introspection endpoint. Follow these steps to implement the token procedure approach.
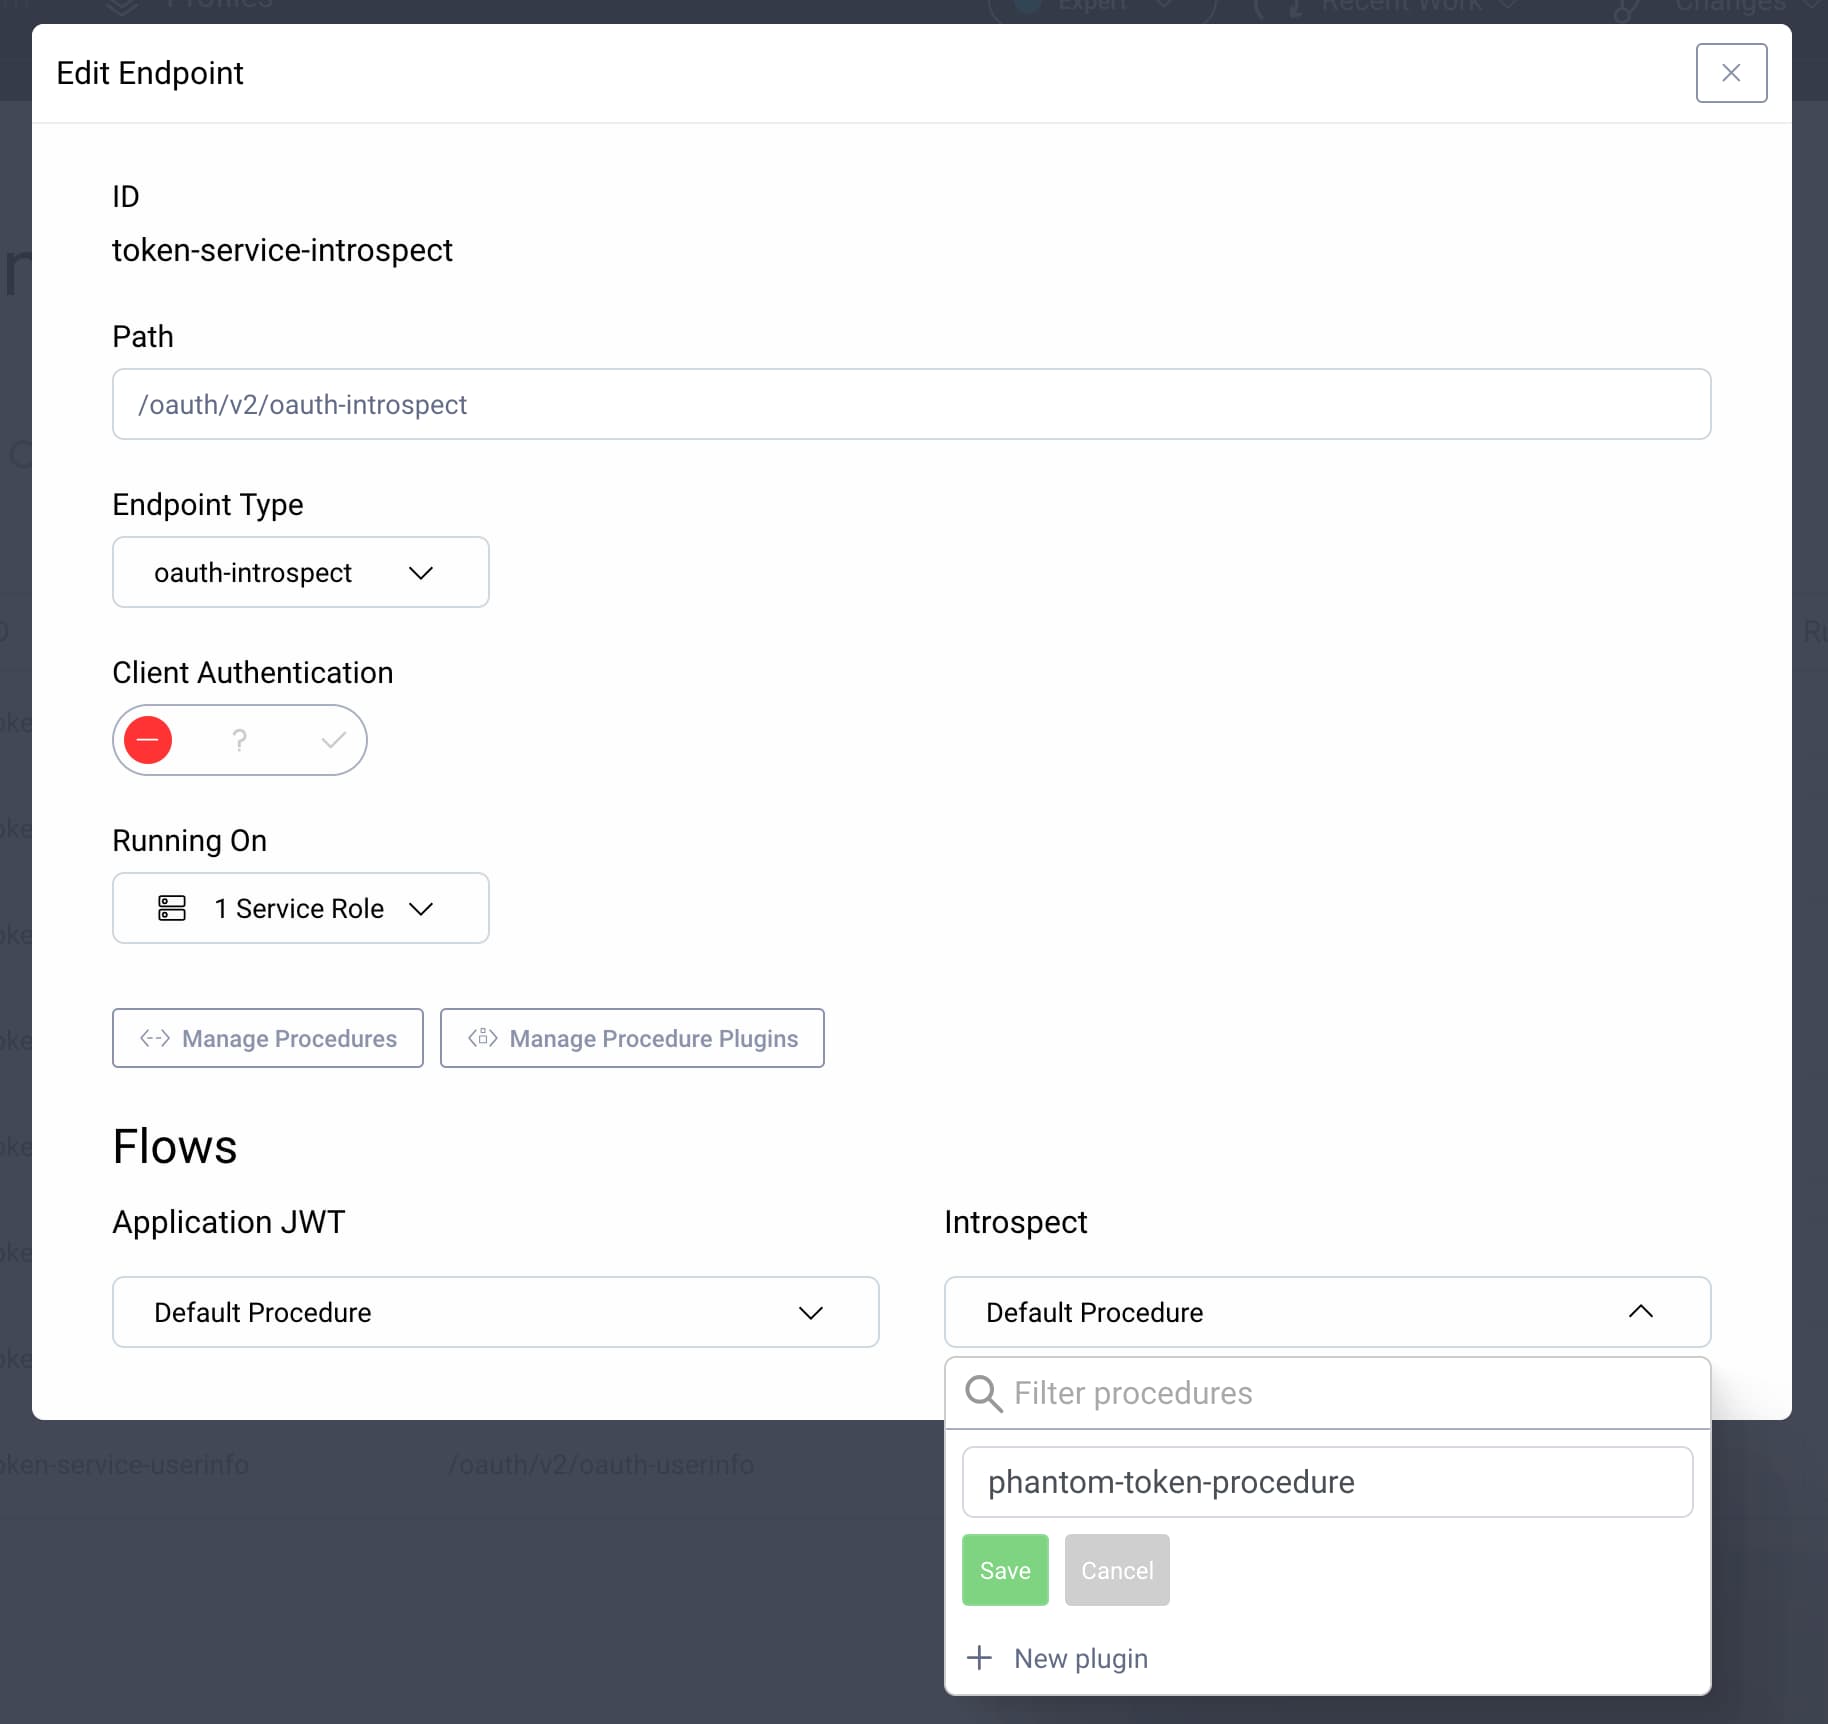
In the admin UI go to Profiles → Token Service → Endpoints. Click on the introspection endpoint. In the Introspect drop-down, select + New procedure, give it a name, e.g. phantom-token-procedure. The edit endpoint form should look similar to this screenshot:
Click Save. An editor pop-up window will open. Replace the default script with the following:
/*** @param {se.curity.identityserver.procedures.context.IntrospectionTokenProcedureContext} context*/function result(context) {var responseData = {active: context.presentedToken.active};if (context.presentedToken.active) {appendObjectTo(context.presentedToken.data, responseData);responseData.token_type = context.presentedToken.type;responseData.client_id = context.presentedToken.delegation.clientId;responseData.expired_scope = context.presentedToken.expiredScopes;var defaultAtJwtIssuer = context.getDefaultAccessTokenJwtIssuer();responseData.phantom_token = defaultAtJwtIssuer.issue(context.presentedToken.data,context.delegation);}return responseData;}
The only change from the default procedure is in the highlighted lines. This additional code gets the defaultAtJwtIssuer from the procedure context and uses it to create a new JWT access token based on the presentedToken. Then, the procedure adds the JWT to the response in a phantom_token field.
Click Update, then Close. Close the endpoint edit form, then save changes by choosing Commit from the Changes menu at the top.
Here is a curl example of an introspection request from the previously created gateway-client. The example uses this opaque token: ba06557a-c2b6-439e-85a0-759c8e953e14 and assumes that the instance of the Curity Identity Server runs on https://localhost:8443.
curl -X POST \https://localhost:8443/oauth/v2/oauth-introspect \-H 'cache-control: no-cache' \-H 'content-type: application/x-www-form-urlencoded' \-d 'token=ba06557a-c2b6-439e-85a0-759c8e953e14&client_id=gateway-client&client_secret=Password1'
If you use a valid opaque token you should see a response similar to the following one. You can see the phantom token in the highlighted line.
{"sub": "demouser","purpose": "access_token","iss": "https://localhost:8443/oauth/v2/oauth-anonymous","active": true,"token_type": "bearer","client_id": "server-client","aud": "https://api.demo.example","nbf": 1512642625,"scope": "read","expired_scope": [],"exp": 1512642925,"delegationId": "aca9436d-fefc-4aaa-8385-fbcb6a7847be","iat": 1512642677,"phantom_token": "eyJraWQiOiIxNTQzMTE2MDE1I..."}
Testing the Implementation
To test the implementation, you need to obtain an opaque access token, which you will exchange for a JWT. To do that, first run a code flow against the Curity Identity Server. You have two options to do that:
- You can test using OAuth tools(recommended).
- You can also follow the code flow tutorial to run the flow using a browser and curl.
To run the test, you need a client capable of running the code flow and at least one authenticator. You can follow the tutorials in the getting started guides if you need to configure these.
Once you complete an OAuth flow and get an opaque access token you can use it to make a curl request to the introspection endpoint. The Curity Identity Server will respond accordingly to the approach you implemented and to the value of the request's Accept header.
If you want to test an end-to-end flow with an API gateway that performs the translation, then have a look at the tutorials in the phantom token integration section. You will find tutorials that show how to implement the pattern in concrete gateways. For example, the NGINX phantom token module tutorial uses the NGINX reverse proxy and the Curity phantom token module to implement the pattern.

Join our Newsletter
Get the latest on identity management, API Security and authentication straight to your inbox.

Start Free Trial
Try the Curity Identity Server for Free. Get up and running in 10 minutes.
Start Free TrialWas this helpful?


