Integrating with Kong Open Source
On this page
Overview
This article will show how to to implement the Phantom Token Pattern using the Kong Open Source API Gateway. This will result in an end to end solution with the following behavior:
- An OAuth Client will get an opaque access token
- The opaque access token will be sent to an API via Kong
- The opaque token will be introspected to get a JWT, which will be forwarded to the API
- The API will successfully validate the JWT and return some data
Run the Default Kong Docker Image
First ensure that Docker Desktop is installed locally as a prerequisite. Next create a local folder called kong and add a minimal docker-compose.yml file:
version: '3.8'services:my_kong:image: kong:3.0.0-alpineports:- 8080:8080- 8081:8081volumes:- ./kong.yml:/usr/local/kong/declarative/kong.ymlenvironment:KONG_DATABASE: 'off'KONG_DECLARATIVE_CONFIG: '/usr/local/kong/declarative/kong.yml'KONG_PROXY_LISTEN: '0.0.0.0:8080'KONG_ADMIN_LISTEN: '0.0.0.0:8081'
This tutorial uses a DB-less and Declarative Configuration which provides the simplest local deployment options. A kong.yml file is needed, which will initially contain only some default content:
_format_version: '2.1'_transform: true
Next run Kong with the following command, which will download the docker image:
docker-compose up --force-recreate
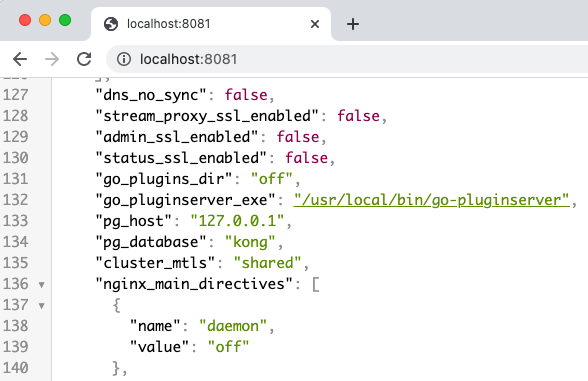
The example setup runs Kong on port 8080 and there is also an admin endpoint that can be browsed to at http://localhost:8081, to visualize the system settings:
Deploy the Phantom Token Plugin
Next extend the deployment to include the phantom token plugin, which is done by creating a custom Dockerfile. The luarocks command uses git to download LUA files, and it may be necessary to run git config commands first, depending on your environment.
FROM kong:3.0.0-alpineUSER rootRUN git config --global url."https://".insteadOf git:// && \git config --global advice.detachedHead false && \luarocks install kong-phantom-token 2.0.0USER kong
This deploys three files called handler.lua, schema.lua and access.lua to the docker image, inside a phantom-token folder within the Kong plugins location, which is a path such as /usr/local/share/lua/5.1/kong/plugins. The Docker Compose file then needs to reference the additional plugin in the KONG_PLUGINS environment variable.
In addition, the standard Kong image should not be used and instead the custom image built from the Dockerfile that installs the phantom token plugin should be used. Replace image: kong:3.0.0-alpine with build: ./ in the Docker Compose file.
version: '3.8'services:my_kong:build: ./ports:- 8080:8080- 8081:8081volumes:- ./kong.yml:/usr/local/kong/declarative/kong.ymlenvironment:KONG_DATABASE: 'off'KONG_DECLARATIVE_CONFIG: '/usr/local/kong/declarative/kong.yml'KONG_PROXY_LISTEN: '0.0.0.0:8080'KONG_ADMIN_LISTEN: '0.0.0.0:8081'KONG_PLUGINS: 'bundled,phantom-token'KONG_NGINX_HTTP_LUA_SHARED_DICT: 'phantom-token 10m'
Also edit the kong.yml file, to add an API route that points to an API that will run at port 3000 on the host. The plugin is configured to point to the Curity Identity Server's introspection endpoint on the host, and this configuration assumes that the default ports are being used. In order for the Kong docker container to be able to route requests to the local computer, a host name of host.docker.internal is used:
_format_version: '2.1'_transform: trueservices:- name: demo-apiurl: http://host.docker.internal:3000/apiroutes:- name: demo-api-routepaths:- /apiplugins:- name: phantom-tokenconfig:introspection_endpoint: http://host.docker.internal:8443/oauth/v2/oauth-introspectclient_id: api-gateway-clientclient_secret: Password1token_cache_seconds: 900scope: read
A this point you can re-run the docker-compose command to start Kong with the custom plugin activated. The following commands can be used from another terminal to confirm that the plugin and configuration have been correctly deployed within the running container:
CONTAINER_ID=$(docker container ls | grep my_kong | awk '{print $1}')docker exec -it $CONTAINER_ID sh -c "ls /usr/local/share/lua/5.1/kong/plugins/phantom-token"docker exec -it $CONTAINER_ID sh -c "cat /usr/local/kong/declarative/kong.yml"
Run an API on the Host
Next an API will be run on the host, and called via port 8080, so that the request is routed via Kong. The phantom token plugin will introspect incoming access tokens to get a JWT, then forward them to the real API endpoint.
If you prefer, you can choose a different technology from the API Code Examples, or plug in your own API. This tutorial will use the Kotlin Example API, which you can download via this command:
git clone https://github.com/curityio/kotlin-api-jwt-validation
Next edit the API's api.properties file to ensure that it points to your instance of the Curity Identity Server:
port=3000jwks_endpoint=http://localhost:8443/oauth/v2/oauth-anonymous/jwksissuer_claim=http://localhost:8443/oauth/v2/oauth-anonymousaudience_claim=api.example.com
Then run the API, and this particular sample requires Maven and Java 8+ to run:
cd kotlin-api-jwt-validationmvn packagejava -jar target/secureapi-1.0-SNAPSHOT.jar
The Kong API Gateway will route requests to these URLs on the host computer:
| URL | Description |
|---|---|
http://localhost:8443/oauth/v2/oauth-introspect | The introspection endpoint of the Curity Identity Server |
http://localhost:3000/api/data | The sample API endpoint which will receive a digitally signed JWT |
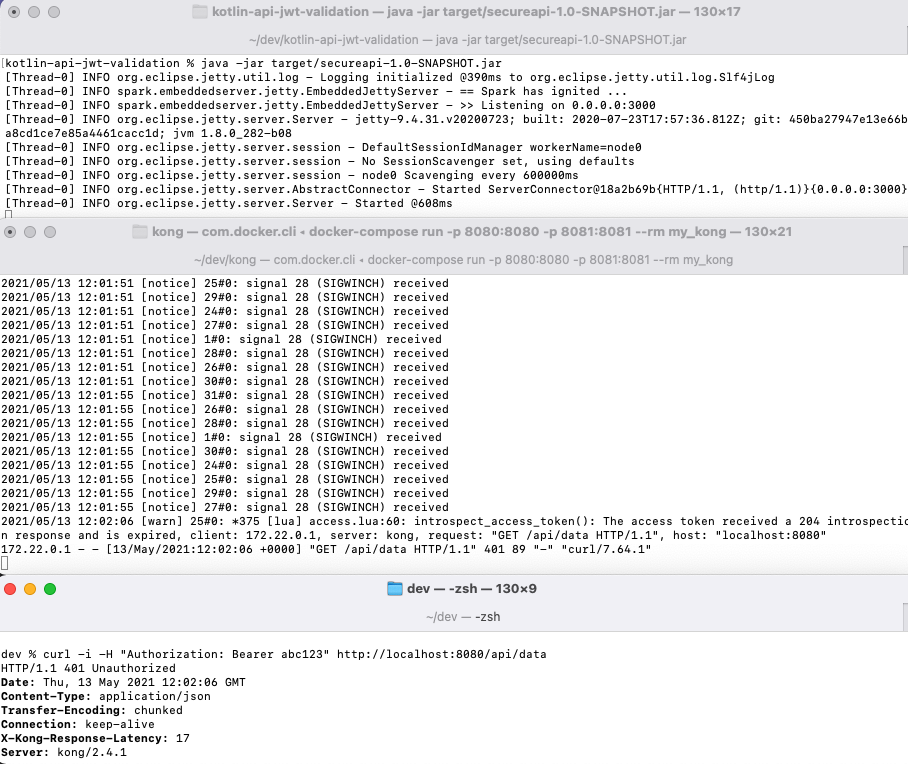
Next call the sample API with the following command, where a real token is not being supplied to the phantom token plugin, so the request will fail validation:
curl -i -H "Authorization: Bearer abc123" http://localhost:8080/api/data
As expected, this results in an introspection failure, and you can understand the cause from the phantom token plugin's log output, which is routed to stderr:
Plugin Implementation Details
There are plenty of online tutorials on Writing LUA plugin for Kong, and only the following simple logic is needed to implement the phantom token pattern:
- Read the opaque access token from the incoming request's HTTP Authorization Header
- Call the introspection endpoint, sending an
accept: application/jwtheader - Update the API request's HTTP Authorization Header with the JWT before routing it
- Cache the JWT for future requests with the same access token, using Kong's built in cache
With LUA and Kong this is quite simple to code, and the access.lua file contains the details of the OAuth processing code:
function _M.run(config)if ngx.req.get_method() == "OPTIONS" thenreturnendlocal access_token = ngx.req.get_headers()["Authorization"]if access_token thenaccess_token = pl_stringx.replace(access_token, "Bearer ", "", 1)endif not access_token thenngx.log(ngx.WARN, "No access token was found in the Authorization bearer header")invalid_token_error_response()endlocal res = verify_access_token(access_token, config)local jwt = res.bodyif not verify_scope(jwt, config.scope) thenerror_response(ngx.HTTP_FORBIDDEN, "forbidden", "The token does not contain the required scope: " .. config.scope)endngx.log(ngx.INFO, "The request was successfully authorized by the gateway")ngx.req.set_header("Authorization", "Bearer " .. jwt)end
Test the End to End Flow
Next configure a simple OAuth client in order to get an opaque access token. This tutorial uses a simple Client Credentials client that uses a read scope. An additional introspection client is also required, and is used by the phantom token plugin in the Kong docker container. The combined configuration XML for both clients is shown below and can be imported:
<config xmlns="http://tail-f.com/ns/config/1.0"><profiles xmlns="https://curity.se/ns/conf/base"><profile><id>token-service</id><type xmlns:as="https://curity.se/ns/conf/profile/oauth">as:oauth-service</type><settings><authorization-server xmlns="https://curity.se/ns/conf/profile/oauth"><scopes><scope><id>read</id></scope></scopes><client-store><config-backed><client><id>api-client</id><client-name>api-client</client-name><secret>Password1</secret><audience>api.example.com</audience><scope>read</scope><capabilities><client-credentials/></capabilities></client><client><id>api-gateway-client</id><client-name>api-gateway-client</client-name><secret>Password1</secret><capabilities><introspection/></capabilities></client></config-backed></client-store></authorization-server></settings></profile></profiles></config>
Next get an opaque access token via the following simple curl request:
curl -u 'api-client:Password1' -X POST http://localhost:8443/oauth/v2/oauth-token \-d grant_type=client_credentials \-d scope=read
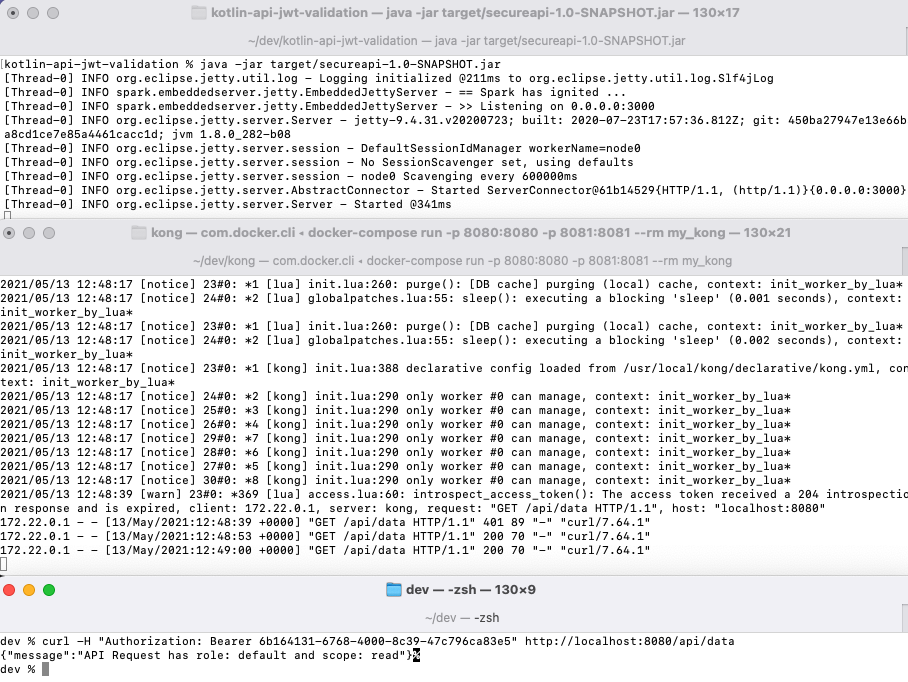
Take the access token from the response and then run a second curl request to send a valid token through Kong to our API:
curl -H "Authorization: Bearer e4d51903-0f9d-41e5-b50e-b7fe7d630612" http://localhost:8080/api/data
You should now see a successful end to end flow, where the Kotlin API validates the JWT and echoes back some scopes and claims contained in it:
For debugging purposes it can also be useful to test the introspection manually from the host, with the following command. Notice that a special form of OAuth introspection is used, with accept=application/jwt, so that the response is a digitally signed JWT and not a JSON object:
curl -u 'api-gateway-client:Password1' \-H "accept: application/jwt" \-X POST http://localhost:8443/oauth/v2/oauth-introspect \-d token=e4d51903-0f9d-41e5-b50e-b7fe7d630612
Handle CORS Requests
If you are making cross domain API requests from an OAuth secured Single Page Application (SPA), you will also need to ensure that any error responses from the plugin are readable by the SPA. This can be done by configuring trusted web origins as follows:
_format_version: '2.1'_transform: trueservices:- name: demo-apiurl: http://host.docker.internal:3000/apiroutes:- name: demo-api-routepaths:- /apiplugins:- name: phantom-tokenconfig:introspection_endpoint: http://host.docker.internal:8443/oauth/v2/oauth-introspectclient_id: api-gateway-clientclient_secret: Password1token_cache_seconds: 900scope: readtrusted_web_origins:- http://www.example.com
Conclusion
The phantom token pattern can be quickly implemented in an API Gateway, since it typically only requires a small plugin. Once this is working on a development computer it is then easy to use Docker in the same way to publish to deployed environments. Using the phantom token approach results in a secure solution, where no sensitive token details are exposed to internet clients.
Customer Stories
Learn how organizations run identity and API security at scale.
Read customer storiesWas this helpful?