Attribute Authorization Manager
On this page
The Curity Identity Server provides SCIM and GraphQL API endpoints for managing customer user accounts. GraphQL can also be used to manage other identity resources, including OAuth database clients. The following tutorials introduce the endpoints. An organization can access these APIs using either a built-in client called the DevOps Dashboard, or from its own client applications.
Since the identity resources contain sensitive information, access must be authorized, which is done using an authorization manager. When using the DevOps dashboard a Groups Authorization Manager is used, and access levels are combined with dashboard specific rules. More generally, the groups authorization manager allows only coarse-grained access control. For an organization's own clients, the attribute authorization manager provides more powerful fine-grained acess control, and is usually the best choice. This tutorial explains the setup.
Fine-Grained Authorization Use Cases
Starting in version 7.3 of the Curity Identity Server, the attribute authorization manager enables you to implement use cases such as these. This is managed by composing rule lists, where each entry acts like an access control list (ACL) for a particular identity resource area.
| Use Case | Description |
|---|---|
| Edit profile access | Users only have access to their own account, and can update their name details |
| Read or write only access | The user can update their password but not read it |
| Deny access | The user is denied access to identity details administered by another party, such as roles |
Access Tokens
When configuring access, start by gaining an understanding of how the client's access token payload will be used. In the following example, the client uses an accounts scope to gain access to user information stored in the Curity Identity Server. A role claim is also used, and users with a role of customer could be given permissions to only read and write their own account details.
{"sub": "bob","purpose": "access_token","iss": "https://login.example.com/oauth/v2/oauth-anonymous","active": true,"role": "customer","token_type": "bearer","client_id": "web-client","aud": "example.com","nbf": 1671185832,"scope": "openid accounts","exp": 1671186132,"delegationId": "acbb74b4-7d7c-4723-9f4e-eb1af497b950","iat": 1671185832}
For further details on how to assign roles or groups to customer users, then issue these values to access tokens, see the Implementing Role Based Security tutorial.
Create the Authorization Manager
To create a new attribute authorization manager, navigate to System → Authorization and create one, using the Type=Attribute option. Initially it is an empty container, that grants no access to identity resources.
Rule Lists
The attribute authorization manager can assign different permissions based on groups or roles. To grant customers access to account information, configure a rule list with a required scope. The following example grants client applications, that use a custom scope named accounts, access to GraphQL user endpoints (the context):
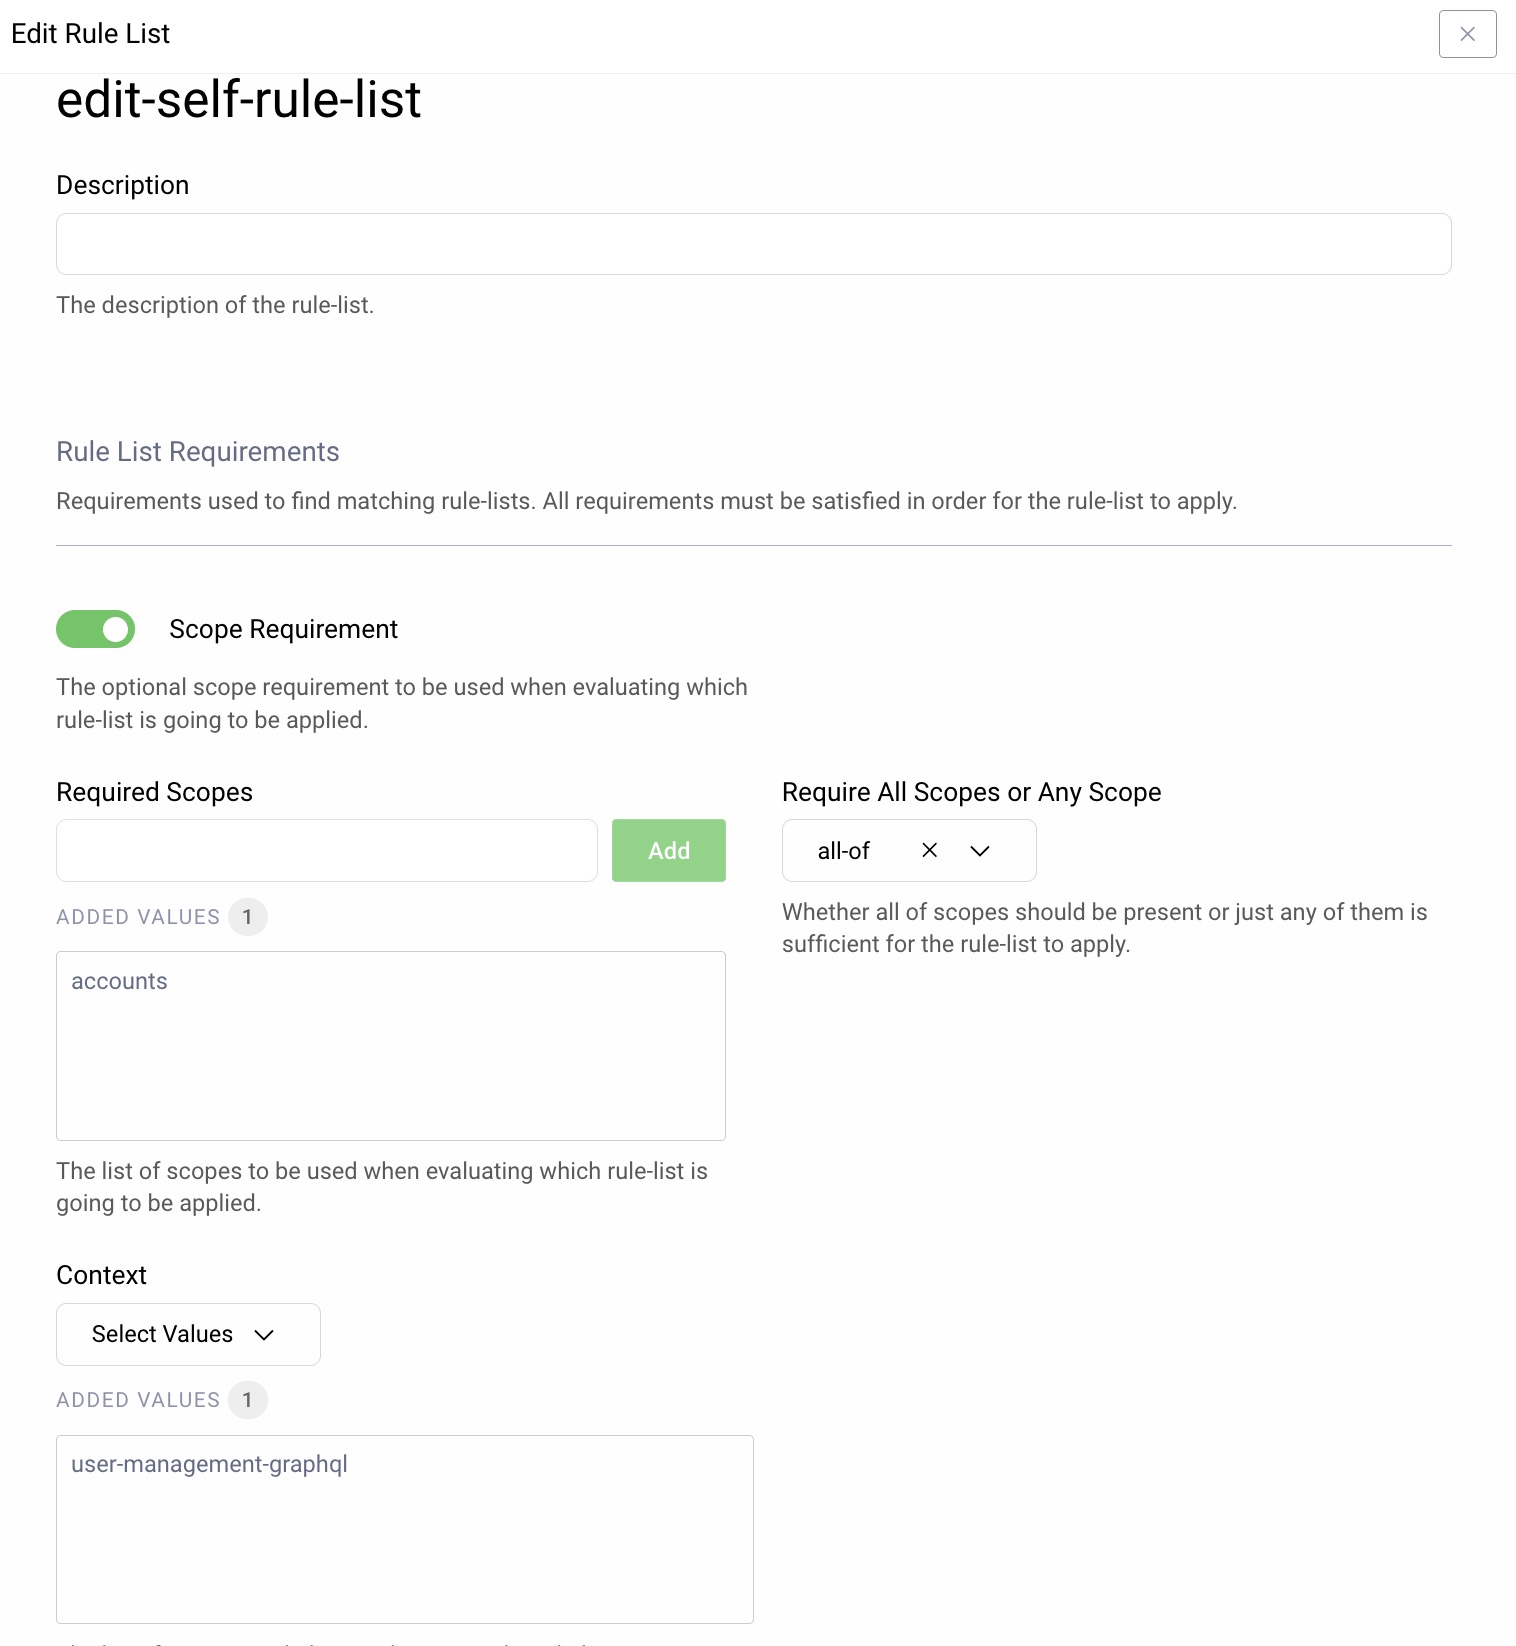
Next, required claims are configured, to match subsets of users. In this example, access tokens for users with role=customer are granted GraphQL access, but restricted to that user's own account information, due to the Require Subject Match option.

Multiple rule lists can be configured, in various ways. If required, access to other identity resources can be managed in the same way, including the user's registered devices and dynamically registered clients.
Rules
Once basic access to resources have been configured, the finer-grained details are implemented using rules. In the following screenshot, a customer user is authorized to change their name and email:
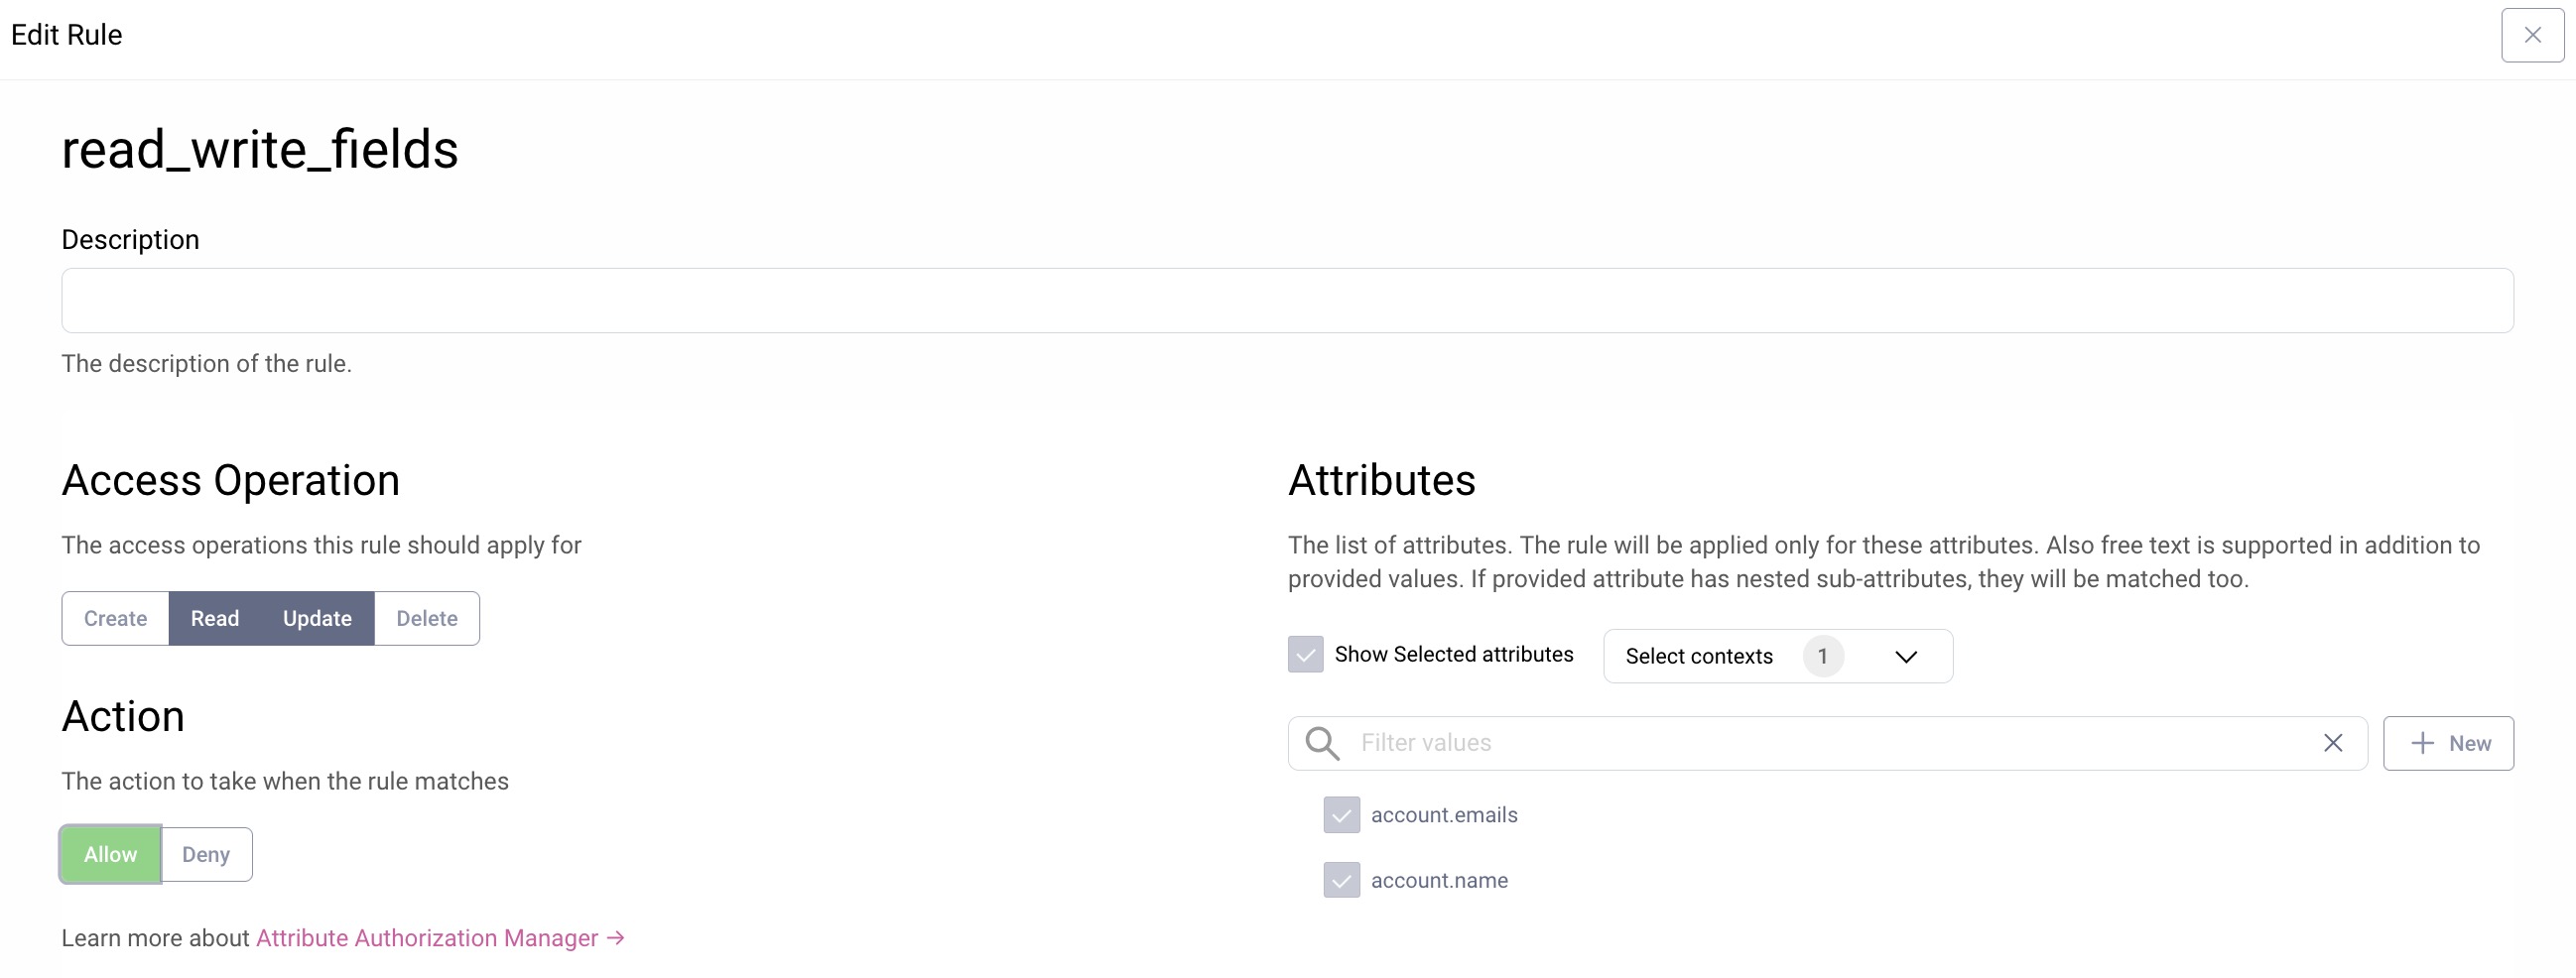
Additional attributes for the given context can be added by clicking + New. When adding the new attribute it is important to add a prefix that matches one of the chosen contexts that the rule is for. For the GraphQL user management context the prefix can for example be accounts, device or linkedAccount. Other contexts will have different prefixes.
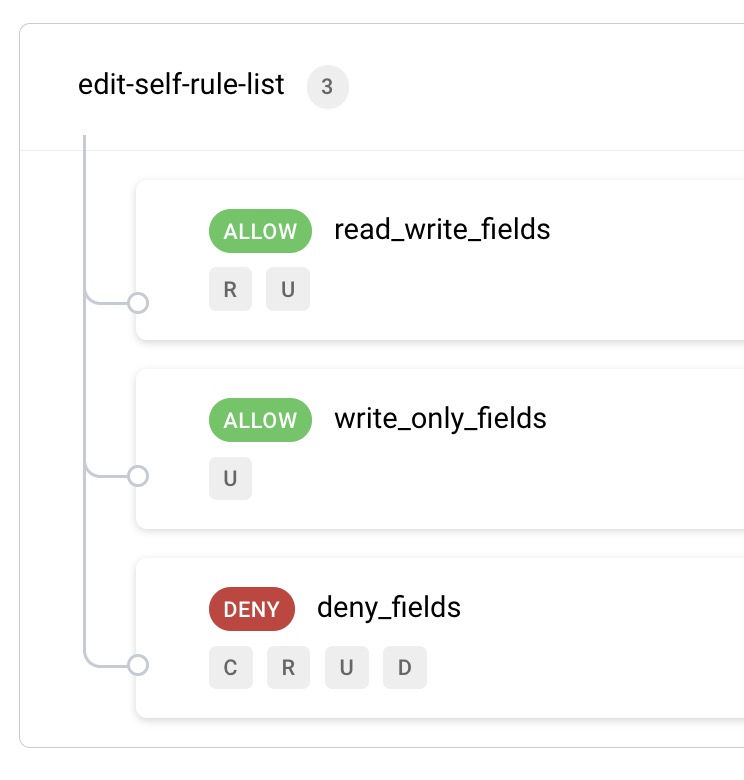
An overall rule list can set multiple rules on which attributes of identity resources are allowed or denied access. Here, a number of rules have been defined for the use cases listed at the start of this tutorial:
Rule Evaluation
As for any access control list (ACL) based system, it is possible for multiple rules to conflict. In this case the first match wins, and the following behavior is also enforced. In most normal scenarios the behavior will be intuitive:
- For write operations all attributes must be
Allowedin order to prevent inconsistent mutations - For read operations any
Deniedattributes are filtered out of responses
If the Default Allow Read or Default Allow Write options in the rule list are activated, they are applied when none of the configured rules are matched. The following sections describe some example rule evaluations.
Example Read Operation
In this GraphQL query, the application is trying to read the following values, where the displayName and roles fields have been configured in Deny rules:
query findAccount{accountByUserName(userName: "demouser") {idname {givenNamefamilyName}displayNameemails {value}roles {value}}}
In the query results, the displayName and roles fields are therefore filtered out of results, and their true values are not returned:
{"data": {"accountByUserName": {"id": "c02d2dde-ee25-11eb-9535-0242ac130005","name": {"givenName": "Demo","familyName": "User"},"displayName": null,"emails": [{"value": "demo@user.com"}],"roles": []}}}
Example Write Operation
In the following GraphQL mutation, the application is trying to update the user's password, which is allowed by a rule, whereas displayName is not used in any rule, and the Default Allow Write setting is not configured:
mutation updateAccount{updateAccountById(input: {accountId: "c02d2dde-ee25-11eb-9535-0242ac130005",fields: {password: "Password1"displayName: "Unauthorized update"}}) {account {name {givenNamefamilyName}displayNameemails {value}}}}
This results in all updates being rejected with the following response:
{"data": {"updateAccountById": null},"errors": [{"message": "Attribute 'account.displayName' is forbidden for 'UPDATE'.","locations": [],"extensions": {"classification": "authorization-error"}}]}
Video
The following video provides a visual walkthrough on using the attribute authorization manager, with a focus on securely accessing user account data in applications:
Other Authorization Options
Finally, it is also possible to extend the authorization behavior for identity resources, when you have deeper requirements. The following tutorials show how to develop a plugin to externalize authorization manager decisions to an entitlement management system.
Conclusion
Attribute based authorization enables organizations to take control over the details of identity resource management. Scopes and claims enable identity privileges to be assigned across multiple clients and users. Rules and rule lists associated to these scopes and claims are then enforced by the Curity Identity Server during API requests.
Customer Stories
Learn how organizations run identity and API security at scale.
Read customer storiesWas this helpful?