On this page
Intro
The Authentication Actions Concepts article explained the concept of authentication actions in the Curity Identity Server. This tutorial provides a worked example, for a scenario where there are regional regulations or preferences on how Multi-factor Authentication (MFA) should be applied. For an application with existing internet users, it might then be necessary to prompt the user for their region when they next sign in, then run some custom logic. This might result in a workflow similar to the following being designed, where only one of the MFA condition actions evaluates to true:

This tutorial describes how to implement the workflow with the Curity Identity Server, using authentication actions. Check out the example on GitHub to quickly run the end-to-end flow on your computer.
Example Authentication Workflow
The end-to-end flow is summarized in the following sections, to show how custom data and custom logic are combined with the use of authentication factors.
Capturing Custom Attributes
This example captures the user’s country code in a custom user attribute, using the following sequence, which is encapsulated within a Sequence Action:
| Action Name | Action Type | Description |
|---|---|---|
| Country Load | Data Source | Loads the country code if it exists |
| Country Prompt | Attribute Prompt | Prompts the user to enter a country code if it does not exist |
| Country Update | Update Account | Saves the country code to the user account |
The country code is first populated by the attribute prompt action, then saved to action attributes:

The country code is then available in the update account action, which saves it back to the data source:
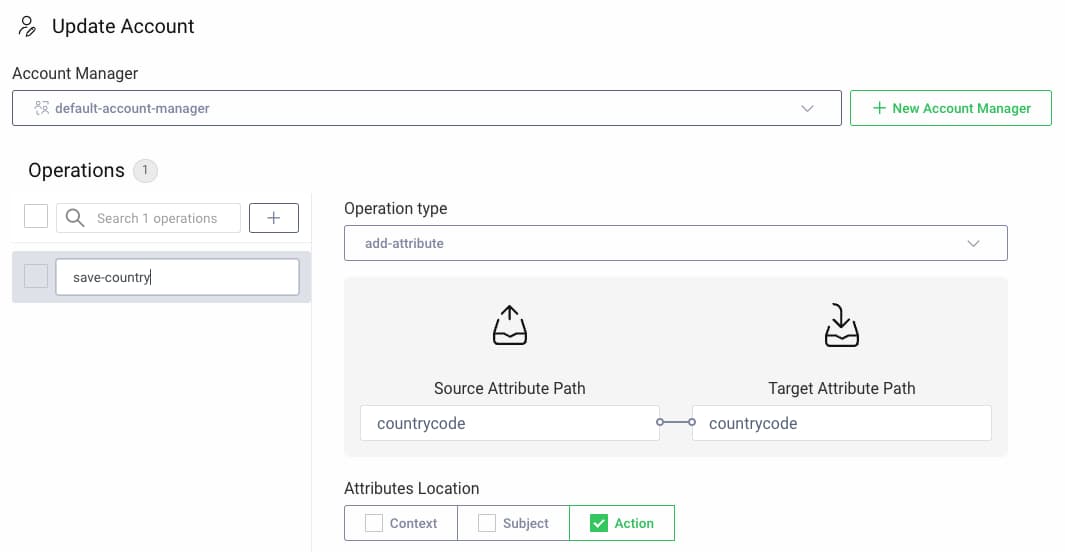
When the user first logs in they are prompted to provide a country code. On subsequent logins the load action fetches the country code from the data source, and the user is no longer prompted.
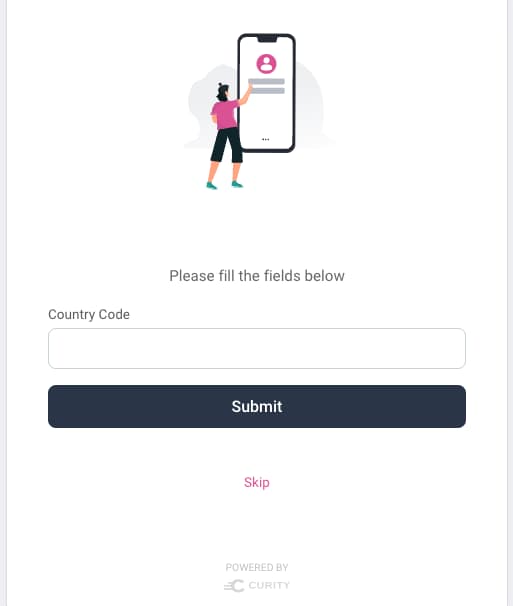
Applying Custom Logic
The example uses the following simple logic to calculate a second factor based on the country provided, then creates a new action attribute to indicate the second authentication factor. This script could scale to more complex logic, and make decisions in arbitrary ways.
function result(context) {'use strict';var attributes = context.attributeMap;if (attributes.countrycode === 'IN' || attributes.countrycode === 'CN') {attributes.totpRequired = true;} else {attributes.emailRequired = true;}return attributes;}
Conditional MFA Logic
The example workflow uses an MFA sequence, and selects one of two conditional MFA objects, based on the action attributes set by the scripted logic. Either email verification or a time based One Time Password (TOTP) is used as the second factor:
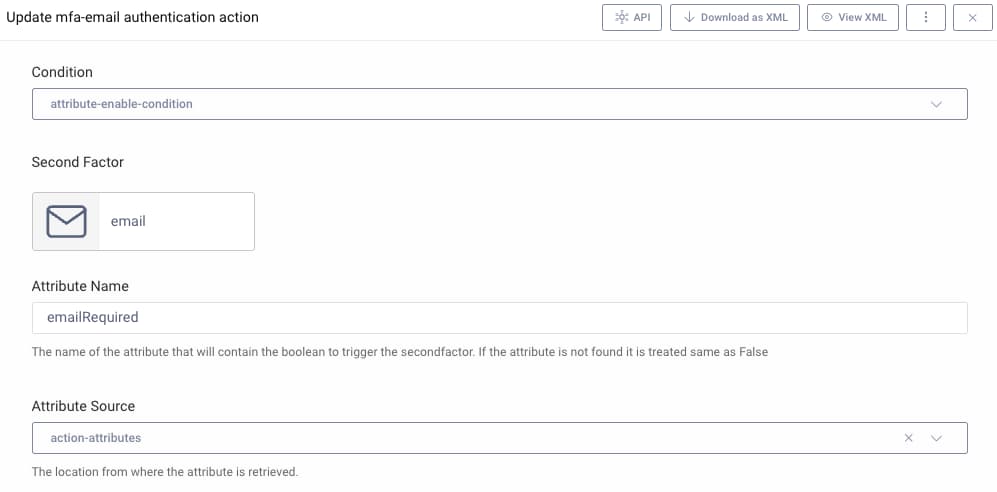
Running the Example Workflow
Use the link at the top of this page to clone the GitHub repository, and also ensure that Docker is installed. Then copy a license.json file into the root folder and run the deployment script:
./deploy.sh
Next, login to the Admin UI at https://localhost:6749/admin, with credentials admin / Password1. To see how actions have been configured, navigate to Authentication Service → Actions.
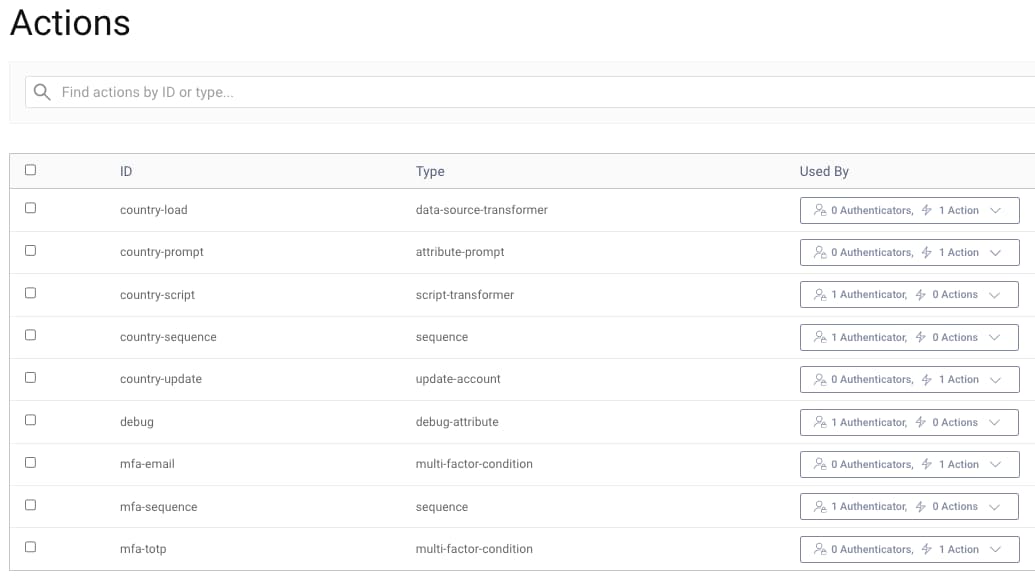
Also view the HMTL Form authenticator, which is configured to use the actions as part of its login flow:
Later, when you are finished with the deployment, you can free resources with the following command:
./teardown.sh
Test Setup
One way to quickly perform end-to-end testing is to use OAuth Tools, in conjunction with ngrok, as explained in the below sections. First re-run the deployment with the following commands:
export USE_NGROK=true./deploy.sh
Then browse to https://oauth.tools and create an environment, then enter the Metadata URL reported by the deployment script, and click the refresh button:

Next switch to the Code Flow page, ensure that your environment is selected, then enter the following three fields:
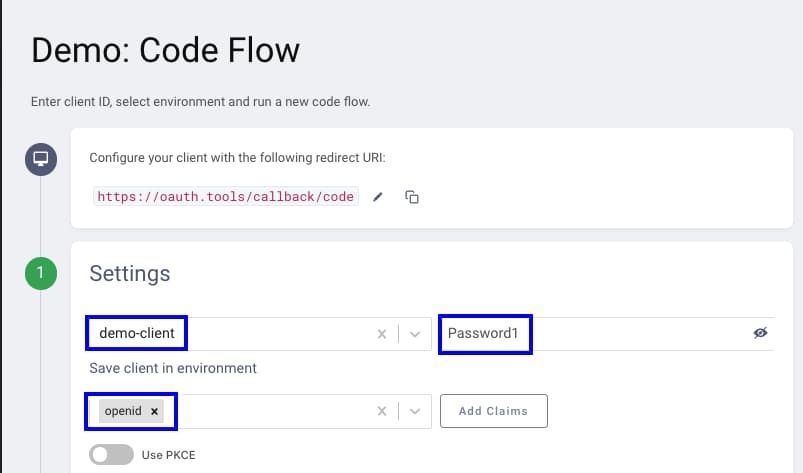
Second Factor Setup
To use the email second factor, run the Admin UI and navigate to Facilities → Email Providers → SMTP, then replace the default values:
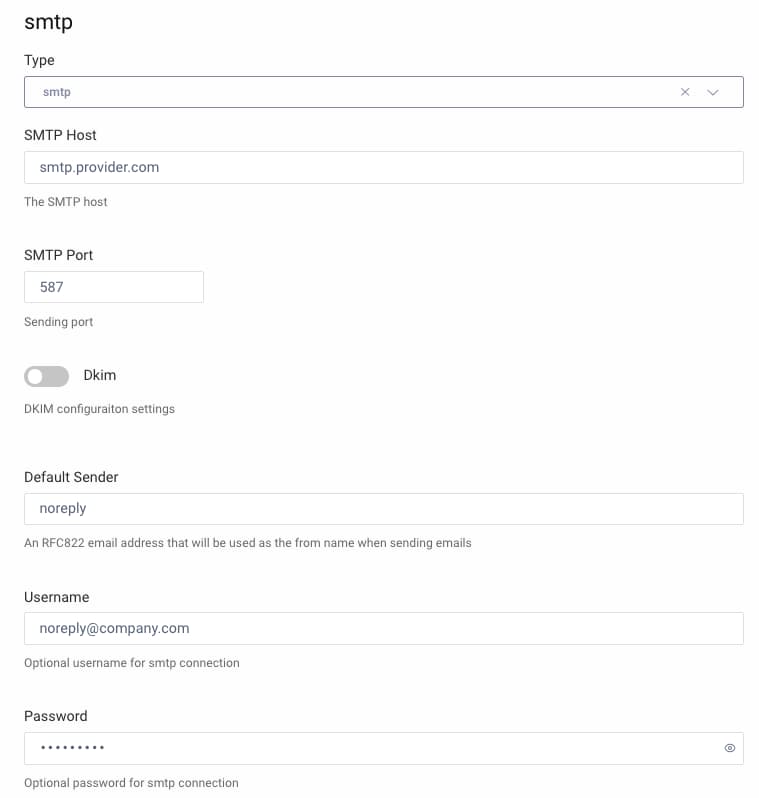
To use the TOTP second factor, run an app such as Google Authenticator on your mobile phone. Select Register new device and a QR code will be presented, which you can scan with the app, to complete the technical setup.
User Authentication
Run the code flow and you will first be prompted with the HTML form screen, which manages the initial username and password factor. Select Create account, then register with your own email address:
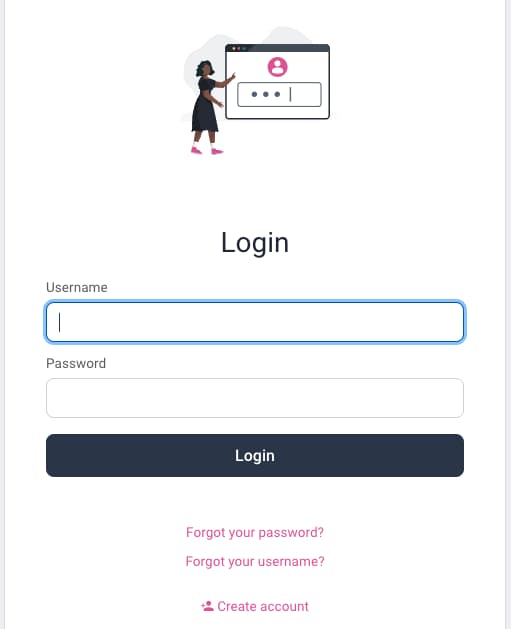
You can then test either form of multi-factor authentication and also inspect the action attributes used. At the end of the flow, the example deployment is configured to show all calculated attributes using the Debug Action. This action is useful for troubleshooting during development.
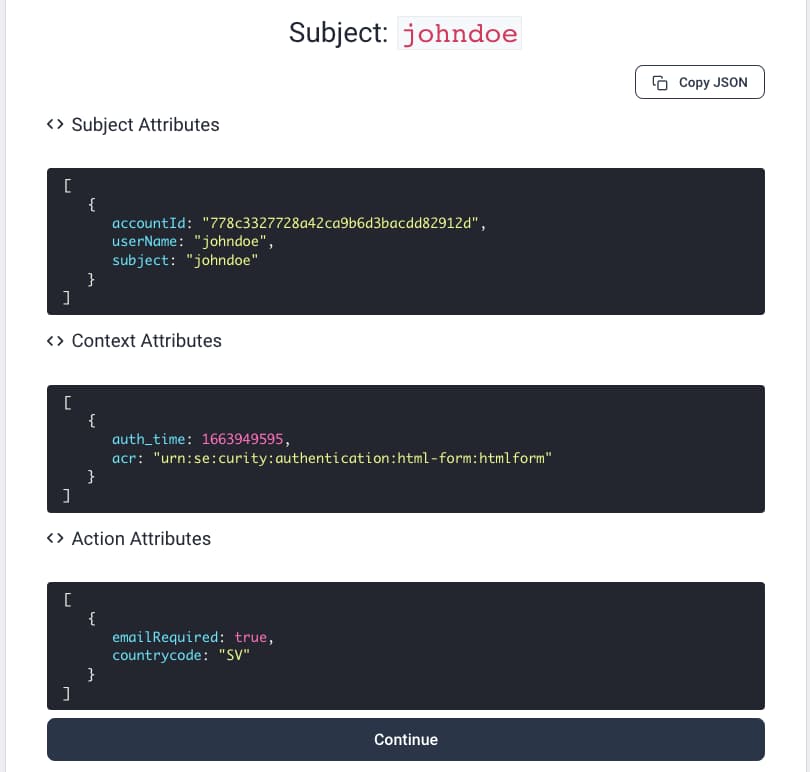
Attribute Storage
The example deployment uses a PostgreSQL database and stores custom user attributes within the accounts table of the Curity database schema. To view the data you can first connect to the deployed Docker container:
CONTAINER_ID=$(docker ps | grep postgres | awk '{print $1}')docker exec -it $CONTAINER_ID bash
From inside the container, connect to the database:
export PGPASSWORD=Password1 && psql -p 5432 -d idsvr -U postgres
Then query the data that has been written by the Update Account authentication action:
select * from accounts;
User data is cleared on every deployment, so you need to re-run user registration each time. This enables the complete authentication flow to be tested multiple times.
Conclusion
Authentication is not a one-size-fits-all solution. Instead, behaviors are composed together to form a workflow. As well as proving the user's identity with one or more factors, it is common to need to manipulate data. This tutorial showed how to inject custom data and custom logic into your authentication workflow, to enable full control over behavior.

Join our Newsletter
Get the latest on identity management, API Security and authentication straight to your inbox.

Start Free Trial
Try the Curity Identity Server for Free. Get up and running in 10 minutes.
Start Free TrialWas this helpful?


