
On this page
Note
The example uses the Curity Identity Server, but you can run the code against any standards-based authorization server.
Curity provides a JavaScript assistant for OAuth that supports the Assisted Token-, Implicit- and Code Flow as well as logout and session management.
The assistant is available as a npm library and can easily be added to a project with the command: npm install @curity/oauth-assistant. Get the example application by cloning this tutorial's GitHub link. This article will use the example in order to showcase how to use the assistant in a Single Page Application (SPA).
Best Practice Update
For best results and strongest security it is no longer recommended to implement OAuth for your production SPAs solely in Javascript. See the SPA security best practices for an alternative design.
Some flows used by the OAuth assistant may also be impacted by recent same-site cookie restrictions, if the user agent no longer sends the required cookies. See the OAuth cookie best practices article for further information.
Setting Up the Example
The steps needed to get the example running are:
- Clone the example repository
- Install dependencies to run the example
- Start the example app
- Make modifications specific to the environment
To install the assistant with the example, install dependencies and start the app, run:
git clone git@github.com:curityio/oauth-assistant-example.gitcd oauth-assistant-examplenpm installnpm start
The defaults can now be modified in /defaultAuthorizeSettings.js. Change parameters such as base_url, client_id, issuer,
allowed_origins as needed.
Initializing the Assistant
The assistant receives a settings object during initialization. The object with default settings is available in defaultAuthorizeSettings.js. You can find details of the settings in the assistant's documentation on npm. The settings configure things such as the issuer, what client to use, what flow to use, how framing should be configured, etc.
const defaultAuthorizeSettings = {base_url : "https://localhost:8443",client_id : "oauth-assistant-client",issuer : "https://localhost:8443/oauth/v2/oauth-anonymous",redirect_uri : window.origin + "/assisted.html",for_origin : window.origin,flow_type : "code",iframe : {targetElement : 'body',width : null, // take default valueheight : null, // take default valuebackdrop : {visible : true, // default is truestyle : null, // take default valuebackdropClass : "backdrop-class"}},allowed_origins : ["https://localhost:8443", "http://localhost:8080"], // default is [window.origin]check_session_iframe : null,session_polling_interval: 5, // polling interval in seconds, default is 5allowed_jwt_algorithms : ['RS256'],jwt_sig_public_key : { // allowed formats are jwk | jwks_uri | pem | issuer | metadata_url | rawformat : 'issuer', // in case of issuer, the issuer value will be taken from jwt payloadvalue : null},debug : false,};
You can also use environment variables to start the example application preconfigured. See the example's README for details.
Note that once you start a flow using the app, the applicaton will cache the settings object in the browser's local storage. Remember to clear the browser's storage if you later change the default settings.
Methods
The assistant has methods that allow you to initiate an authorization flow, like authorize() or authorizeHiddenFrame(). It also exposes methods for managing tokens, like getToken(), getIDToken(), refresh(), or revoke(). See the assistant's npm page for a list of all the exposed methods.
Optional Parameters
The methods for authorization take a parameters object as input. This can be any number of optional parameters to pass in with the authorization call. In the example app, you can set these options by entering a JSON into the provided form, for example:
{"scope" : "openid","state" : "123","prompt": "login"}
Configuring the Curity Identity Server
The app requires you to have a properly configured client in the Curity Identity Server. The default client ID is oauth-assistant-client — make sure to have a client with this ID, or adjust the app's settings. The client should have the Implicit Flow, the Code Flow, and the Assisted Token Flow enabled.
The client should have the Authentication method set to no-authentication. Also remember to correctly configure Redirect URIs, Allowed Origins and Allowed Post Logout Redirect URIs according to the environment the example app is running in.
For Redirect URIs use these two values:
- a URL that points to the root of the application (for example,
http://localhost:8080/) - a URL that points to
/assisted.html(for example,http://localhost:8080/assisted.html)
Make sure to configure the client with the openid scope, so that you can use all the features of the example app.
If you've changed the default settings for the audience in the client's settings, then ensure that the client ID is returned in the audience claim. Otherwise, the application will reject the ID token.
To use flows that require frames, make sure to add the application's URL for proper CORS handling. In the Curity Identity Server's admin UI go to System → Deployment → Zones and add the application's base URL to Allowed Origins for CORS (for example, http://localhost:8080).
An example configuration is available in the Example Config section.
Note
In the example configuration, the client has all the aforementioned flows enabled. In a production environment, you would normally use separate clients for different flows.
Running the Flows Using the Example App
Make sure that your setup meets all the prerequisites:
- initialize the application with correct settings,
- provide optional authorization flow parameters,
- set up the Curity Identity Server with the correct client.
You can now use the example application to test the different flows.
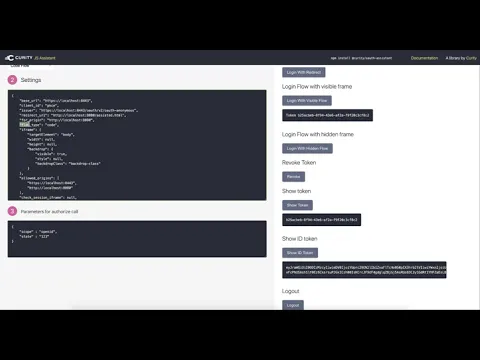
Login Flow With Redirect
When executing this flow, the browser will redirect the user to the Curity Identity Server for authentication. After successful authentication the user will be redirected back to the example application with an authorization code. When the application detects that it received the code, it will automatically finish the flow and redeem the code for tokens. You can then use the Show Token and Show ID Token buttons to display the received tokens.
Note
Login with Redirect cannot be used with the Assisted token Flow.
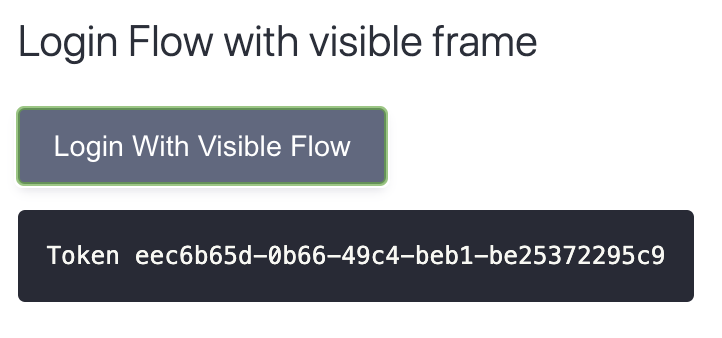
Login Flow With a Visible Frame
This flow will display the authentication in a visible frame. If the user is already logged in, then the frame will flash quickly and disappear. If you want to force re-authentication, then set the authorization request parameter "prompt": "login". Alternatively, you can use the Logout button to log out the user.
The application will automatically display the token after finishing the flow.
Login Flow With a Hidden Frame
This flow will first try to obtain tokens using a hidden frame. If user interaction is required (the user needs to log in), then the application will fall back to opening a visible frame. This approach uses the assistant's authorizeHiddenFallbackToVisible(parameters) method.
Login Flows With a Popup Window
These flows will open the authentication in a popup window. If you choose the Login With Hidden Frame Fallback to Popup option, then the application will first try to run the authorization flow in a hidden frame and open the popup only if the user needs to log in.
Revoke Token
This calls the revocation endpoint to revoke the current token. After calling this method, the assistant also clears any tokens from the memory, so the Show Token button will show No Token.
Show Token
This invokes the assistant's getToken() method to get an access token obtained earlier with one of the flows.
Show ID token
This calls the assistant's getIDToken() method to get an ID token obtained earlier with one of the flows. Note that the application will get an ID token only when you configure the "scope": "openid" authorization request parameter.
Refresh
This refreshes the access token, if possible. The assistant can run a refresh flow if the authorization server returned a refresh token together with an access token.
Logout
This calls the assistant's logout() method, which, in turn, calls the authorization server's logout endpoint to end the user's session. The assistant will also drop any tokens it possesses. You can find more details on the logout process in the article OpenID Connect Single Logout.
Demo Video
Example Config
You can save the example configuration to an XML file, then import it using the Curity Identity Server's admin UI. You should merge the configuration with an existing one, as the XML contains only the entries relevant for this tutorial. The configuration assumes that you have previously configured the Curity Identity Server with the default configuration (for example, by running the Setup Wizard). If this is not the case, then you might have to tailor the configuration to match your envirionment (for example, use correct profile ID).

Join our Newsletter
Get the latest on identity management, API Security and authentication straight to your inbox.

Start Free Trial
Try the Curity Identity Server for Free. Get up and running in 10 minutes.
Start Free TrialWas this helpful?