
On this page
Overview
OpenID Connect (OIDC) is the industry-standard protocol for modern authentication in web applications. OpenID Connect provides a flexible and secure way to authenticate users.
This code example covers how to integrate OpenID Connect into a .NET website. It shows how to use .NET's web security framework to implement an OpenID Connect flow then retrieve OAuth tokens to call APIs.
Note
The example uses the Curity Identity Server, but you can run the code against any standards-based authorization server.
Get the Code Sample
Clone the code repository from the link at the top of this page, then view the configuration in the appsettings.json file:
{"OpenIDConnect" : {"ClientId": "dotnet-client","ClientSecret": "U2U9EnSKx31fUnvgGR3coOUszko5MiuCSI2Z_4ogjIiO5-UbBzIBWU6JQQaljEis","Issuer": "http://login.example.com:8443/oauth/v2/oauth-anonymous","Scope": "openid profile","CallbackPath": "/callback","PostLogoutRedirectUri": "http://www.example.com:5000","TokenEndpoint": "http://login.example.com:8443/oauth/v2/oauth-token"},"Logging": {"LogLevel": {"Default": "Information","Microsoft": "Warning","Microsoft.Hosting.Lifetime": "Information"}}}
To run the example using real-world URLs, add the following two DNS names to your computer's hosts file where www.example.com represents the website and login.example.com the OpenID provider.
127.0.0.1 www.example.com login.example.com
Run the website with the following standard .NET commands:
dotnet builddotnet run
Then browse to http://www.example.com:5000. To reduce infrastructure for developers, this example uses plain HTTP. For deployed systems, follow Microsoft guides for configuring endpoints to update to an HTTPS setup.
Identity Server Configuration
To enable OpenID Connect, you also need to register the .NET website with the OpenID provider so that it trusts the app. Make sure the registration, i.e. client ID, client secret and scope at the OpenID provider and the appsettings.json file match. Set http://www.example.com:5000/callback for the redirect URI and http://www.example.com:5000 for the post-logout URI.
The following XML provides the client configuration for the Curity Identity Server. You can save it as an XML file and then import the file via the Changes / Upload menu option of the Admin UI.
<config xmlns="http://tail-f.com/ns/config/1.0"><profiles xmlns="https://curity.se/ns/conf/base"><profile><id>token-service</id><type xmlns:as="https://curity.se/ns/conf/profile/oauth">as:oauth-service</type><expose-detailed-error-messages /><settings><authorization-server xmlns="https://curity.se/ns/conf/profile/oauth"><client-store><config-backed><client><id>dotnet-client</id><secret>U2U9EnSKx31fUnvgGR3coOUszko5MiuCSI2Z_4ogjIiO5-UbBzIBWU6JQQaljEis</secret><redirect-uris>http://www.example.com:5000/callback</redirect-uris><scope>openid</scope><scope>profile</scope><user-authentication><allowed-post-logout-redirect-uris>http://www.example.com:5000</allowed-post-logout-redirect-uris></user-authentication><capabilities><code></code></capabilities><validate-port-on-loopback-interfaces>true</validate-port-on-loopback-interfaces></client></config-backed></client-store></authorization-server></settings></profile></profiles></config>
Run the Website
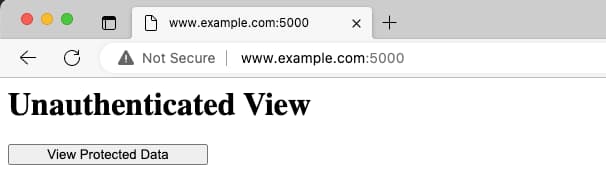
The website is intentionally minimalist since its only purpose is to demonstrate security. The initial page is a simple, unauthenticated view:
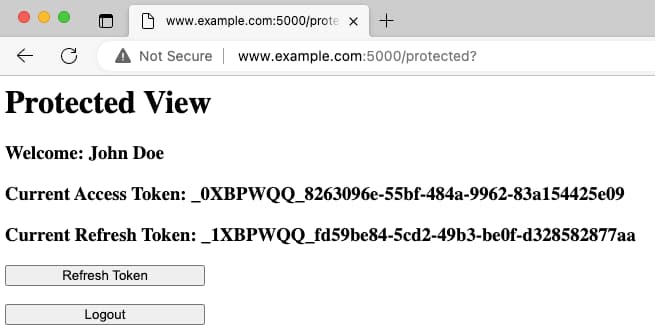
After you have authenticated, the website renders a protected view. The page lists the current access token, which the website needs for calling APIs. It also shows buttons for refreshing tokens and logging out.
Integrating .NET Security
Security is implemented in the Startup.cs file. First, the Configure method enables authentication and authorization:
public void Configure(IApplicationBuilder app, IWebHostEnvironment env){app.UseRouting();app.UseAuthentication();app.UseAuthorization();app.UseEndpoints(endpoints => {endpoints.MapRazorPages();});}
Next, the ConfigureServices method indicates how to manage authentication. The following code snippet shows the most important OpenID Connect and cookie settings:
public void ConfigureServices(IServiceCollection services){JwtSecurityTokenHandler.DefaultInboundClaimTypeMap.Clear();services.AddAuthentication(options => {options.DefaultScheme = CookieAuthenticationDefaults.AuthenticationScheme;options.DefaultChallengeScheme = OpenIdConnectDefaults.AuthenticationScheme;}).AddCookie(CookieAuthenticationDefaults.AuthenticationScheme, options => {options.Cookie.SameSite = SameSiteMode.Strict;options.Cookie.SecurePolicy = CookieSecurePolicy.SameAsRequest;}).AddOpenIdConnect(options => {options.SignInScheme = CookieAuthenticationDefaults.AuthenticationScheme;options.CorrelationCookie.SameSite = SameSiteMode.Strict;options.CorrelationCookie.SecurePolicy = CookieSecurePolicy.SameAsRequest;options.NonceCookie.SameSite = SameSiteMode.Strict;options.NonceCookie.SecurePolicy = CookieSecurePolicy.SameAsRequest;options.Authority = Configuration.GetValue<string>("OpenIdConnect:Issuer");options.ClientId = Configuration.GetValue<string>("OpenIdConnect:ClientId");options.ClientSecret = Configuration.GetValue<string>("OpenIdConnect:ClientSecret");options.CallbackPath = Configuration.GetValue<string>("OpenIdConnect:CallbackPath");options.ResponseType = OpenIdConnectResponseType.Code;options.ResponseMode = OpenIdConnectResponseMode.Query;options.GetClaimsFromUserInfoEndpoint = true;string scopeString = Configuration.GetValue<string>("OpenIDConnect:Scope");scopeString.Split(" ", StringSplitOptions.TrimEntries).ToList().ForEach(scope => {options.Scope.Add(scope);});options.TokenValidationParameters = new TokenValidationParameters{ValidIssuer = options.Authority,ValidAudience = options.ClientId};options.Events.OnRedirectToIdentityProviderForSignOut = (context) =>{context.ProtocolMessage.PostLogoutRedirectUri = Configuration.GetValue<string>("OpenIdConnect:PostLogoutRedirectUri");return Task.CompletedTask;};options.SaveTokens = true;});services.AddAuthorization();services.AddRazorPages();}
Security Flow
The code example uses Razor pages to represent views. The pages with an Authorize attribute require authorization. If the request to such page does not include a valid, secure cookie, the .NET framework triggers an OpenID Connect redirect.
[Authorize]public class ProtectedModel : PageModel{...}
Authentication Flow
The .NET framework first uses the issuer URL to locate the OpenID Connect metadata endpoint. This is done by appending a standard subpath and is called via a GET request. The response contains public endpoints that the framework calls during user authentication and to receive tokens.
GET /oauth/v2/oauth-anonymous/.well-known/openid-configuration HTTP/1.1Host: login.example.com:8443
When OpenID Connect authentication begins, the .NET framework runs a code flow, expressed via response_type=code. For that, it generates the state and PKCE values, and stores them in a temporary cookie, along with the URL of the protected page. Finally, the framework sends the authorization request, that is a GET request with the required parameters for the code flow, to the authorize endpoint at the OpenID provider.
GET /oauth/v2/oauth-authorize HTTP/1.1Host: login.example.com:8443client_id=dotnet-client&redirect_uri=http://www.example.com:5000/callback&response_type=code&scope=openid profile&code_challenge=WhmRaP18B9z2zkYcIlb4uVcZzjLqcZsaBQJf5akUxsA&code_challenge_method=S256&state=CfDJ8Nxa-YhPzjpBilDQz2C...&nonce=638088910888703720.YzY3...
The user then authenticates at the OpenID provider, after which the provider returns a response to the browser containing code, state and iss parameters. So, this response does not contain tokens.
GET /callback HTTP/1.1Host: www.example.com:5000code=I9xL9DY9jAYHPuHSiW2OpWUaNRW4otei&state=CfDJ8Nxa-YhPzjpBilDQz2CBMWR7SYDKEzCoODTBw5oO...&iss=https%3A%2F%2Flogin.example.com%3A8443%2Foauth%2Fv2%2Foauth-anonymous
The .NET framework validates the state, after which it posts a token request to the OpenID provider to redeem the code for tokens.
POST /oauth/v2/oauth-token HTTP/1.1Host: login.example.com:8443Content-Type: application/x-www-form-urlencodedclient_id=dotnet-client&client_secret=U2U9EnSKx31fUnvgGR3coOUszko5MiuCSI2Z_4ogjIiO5-UbBzIBWU6JQQaljEis&code=I9xL9DY9jAYHPuHSiW2OpWUaNRW4otei&grant_type=authorization_code&redirect_uri=http://www.example.com:5000/callback&code_verifier=HlfffYlGy7SIX3pYHOMJfhnO5AhUW1eOIKfjR42ue28
The OpenID provider returns a response containing a set of tokens, after which the .NET framework redirects the user's browser to the protected page originally requested.
{"id_token":"eyJraWQiOiIzMjgwMTUwMzgiLCJ4NXQiOiJMd ...","token_type":"bearer","access_token":"_0XBPWQQ_c0f0677f-5aa9-4c4e-a3d4-c0f53db4037a","refresh_token":"_1XBPWQQ_197003c2-704f-4475-923c-2b40e5f5d696","scope":"openid profile","expires_in":299}
Cookies Issued
The .NET framework writes the tokens received into encrypted HTTP-only session cookies. The code example uses only the most secure cookies with SameSite=strict. This helps to prevent Cross Site Request Forgery (CSRF) vulnerabilities. Storing tokens in cookies means the security is stateless and easy to manage. The Curity Identity Server uses small opaque tokens by default, reducing the cookies' size.
Set-Cookie: .AspNetCore.CookiesC1=CfDJ8Nxa-YhP... path=/; samesite=strict; httponly secureSet-Cookie: .AspNetCore.CookiesC2=mgOEjpmn6gcD... path=/; samesite=strict; httponly secure
Using Tokens
The ID token contains values similar to the following to represent proof of the authentication event. The .NET framework verifies the ID token before issuing session cookies. You can use the TokenValidationParameters to customize validation if required. The aud claim should be the client ID of the web app, and the iss claim should be the expected issuer identifier of the OpenID provider.
{"exp": 1673298677,"nbf": 1673295077,"jti": "3af7521b-5b24-475e-b368-c859c812ff19","iss": "http://login.example.com:8443/oauth/v2/oauth-anonymous","aud": "dotnet-client","sub": "642a797c311f0b7aef3db4e0a292bc69b924e6496d1e87aa3b28672c01611da7","auth_time": 1673295077,"iat": 1673295077,"purpose": "id","at_hash": "XW3GHVL_-VKsLzft-8PMyg","acr": "urn:se:curity:authentication:html-form:htmlform","delegation_id": "a7be55d5-598b-4d4f-9bef-be7cbdb5b14c","s_hash": "kQsASAVXIrk43CDx8O1jTw","azp": "dotnet-client","amr": "urn:se:curity:authentication:html-form:htmlform","nonce": "638088910888703720.YzY3...","sid": "eP33QugPjfhjexas"}
After it validated the tokens, the .NET framework builds a ClaimsPrincipal from the ID token. This code example uses the GetClaimsFromUserInfoEndpoint property to get name details for display from the OAuth user info endpoint. The .NET framework includes these values also in the .NET ClaimsPrincipal. In the Curity Identity Server, use the token designer to control where to include which claims.
The code example also shows how to get access tokens from within the web backend, which it needs when calling APIs. When the access token expires, the code example shows how to refresh access tokens, which results in the following refresh token request:
POST /oauth/v2/oauth-token HTTP/1.1Host: login.example.com:8443Content-Type: application/x-www-form-urlencodedclient_id=dotnet-client&client_secret=U2U9EnSKx31fUnvgGR3coOUszko5MiuCSI2Z_4ogjIiO5-UbBzIBWU6JQQaljEis&grant_type=refresh_token&refresh_token=_1XBPWQQ_197003c2-704f-4475-923c-2b40e5f5d696
The OpenID provider returns a new set of tokens, and the .NET framework rewrites the secure cookies.
Finally, the logout operation results in a request to the end-session endpoint, and the web app also expires its session cookies at this point:
GET /oauth/v2/oauth-session/logout HTTP/1.1Host: login.example.com:8443post_logout_redirect_uri=http://www.example.com:5000&id_token_hint=eyJraWQiOiIzMjgwMTUwMzgiLCJ...
An ID token is simply base64-encoded JSON, so it is recommended to ensure that no personally identifiable information (PII) is revealed in the browser history or server logs. In this tutorial, the web app received PII from the user info endpoint so that the logout request does not reveal any sensitive information.
Finishing Touches
A real .NET application would need to extend the code example to implement logic for handling error and expiry conditions. The OpenID provider can return various error responses in the above messages in error and error_description fields. For further details on handling these, see the OAuth troubleshooting for developers tutorial.
In most real-world deployments, multiple instances of the .NET secured website would be hosted in a cluster, then accessed using a load balancer. You then need to use a shared cookie decryption key and ensure that the web application returns external URLs to the browser during OpenID Connect redirects. See the Microsoft guides on Data Protection and Load Balancing Configuration for further details on these topics.
Conclusion
Using OpenID Connect in .NET provides a secure, scalable authentication solution for modern web applications. This tutorial showed how to quickly implement an end-to-end OpenID Connect flow in .NET. Only simple code is needed, after which protected views are secured. The code example implementation follows OAuth best practices for browser-based apps since only the most secure HTTP cookies are issued to the browser.

Join our Newsletter
Get the latest on identity management, API Security and authentication straight to your inbox.

Start Free Trial
Try the Curity Identity Server for Free. Get up and running in 10 minutes.
Start Free TrialWas this helpful?