
On this page
The initial Implement MCP Authorization code example demonstrates how to put together a working Model Context Protocol (MCP) authorization flow. As a result, AI agents can onboard and gain a restricted level of access to APIs. Users approve the AI agent's level of access, which depreciates to zero standing privilege after a short time.
AI agents are a new type of user agent. The MCP clients that the AI agent runs can download MCP resources from the MCP server. Resources can be HTML forms that run in the AI agent and call the MCP server, in a similar manner to browser-based applications.
This code example uses the OpenAI Apps SDK to build a ChatGPT widget app that runs in an iframe within ChatGPT's web interface. The code example is secured with a step-up authentication flow for an example financial use case.
Step-Up User Experience
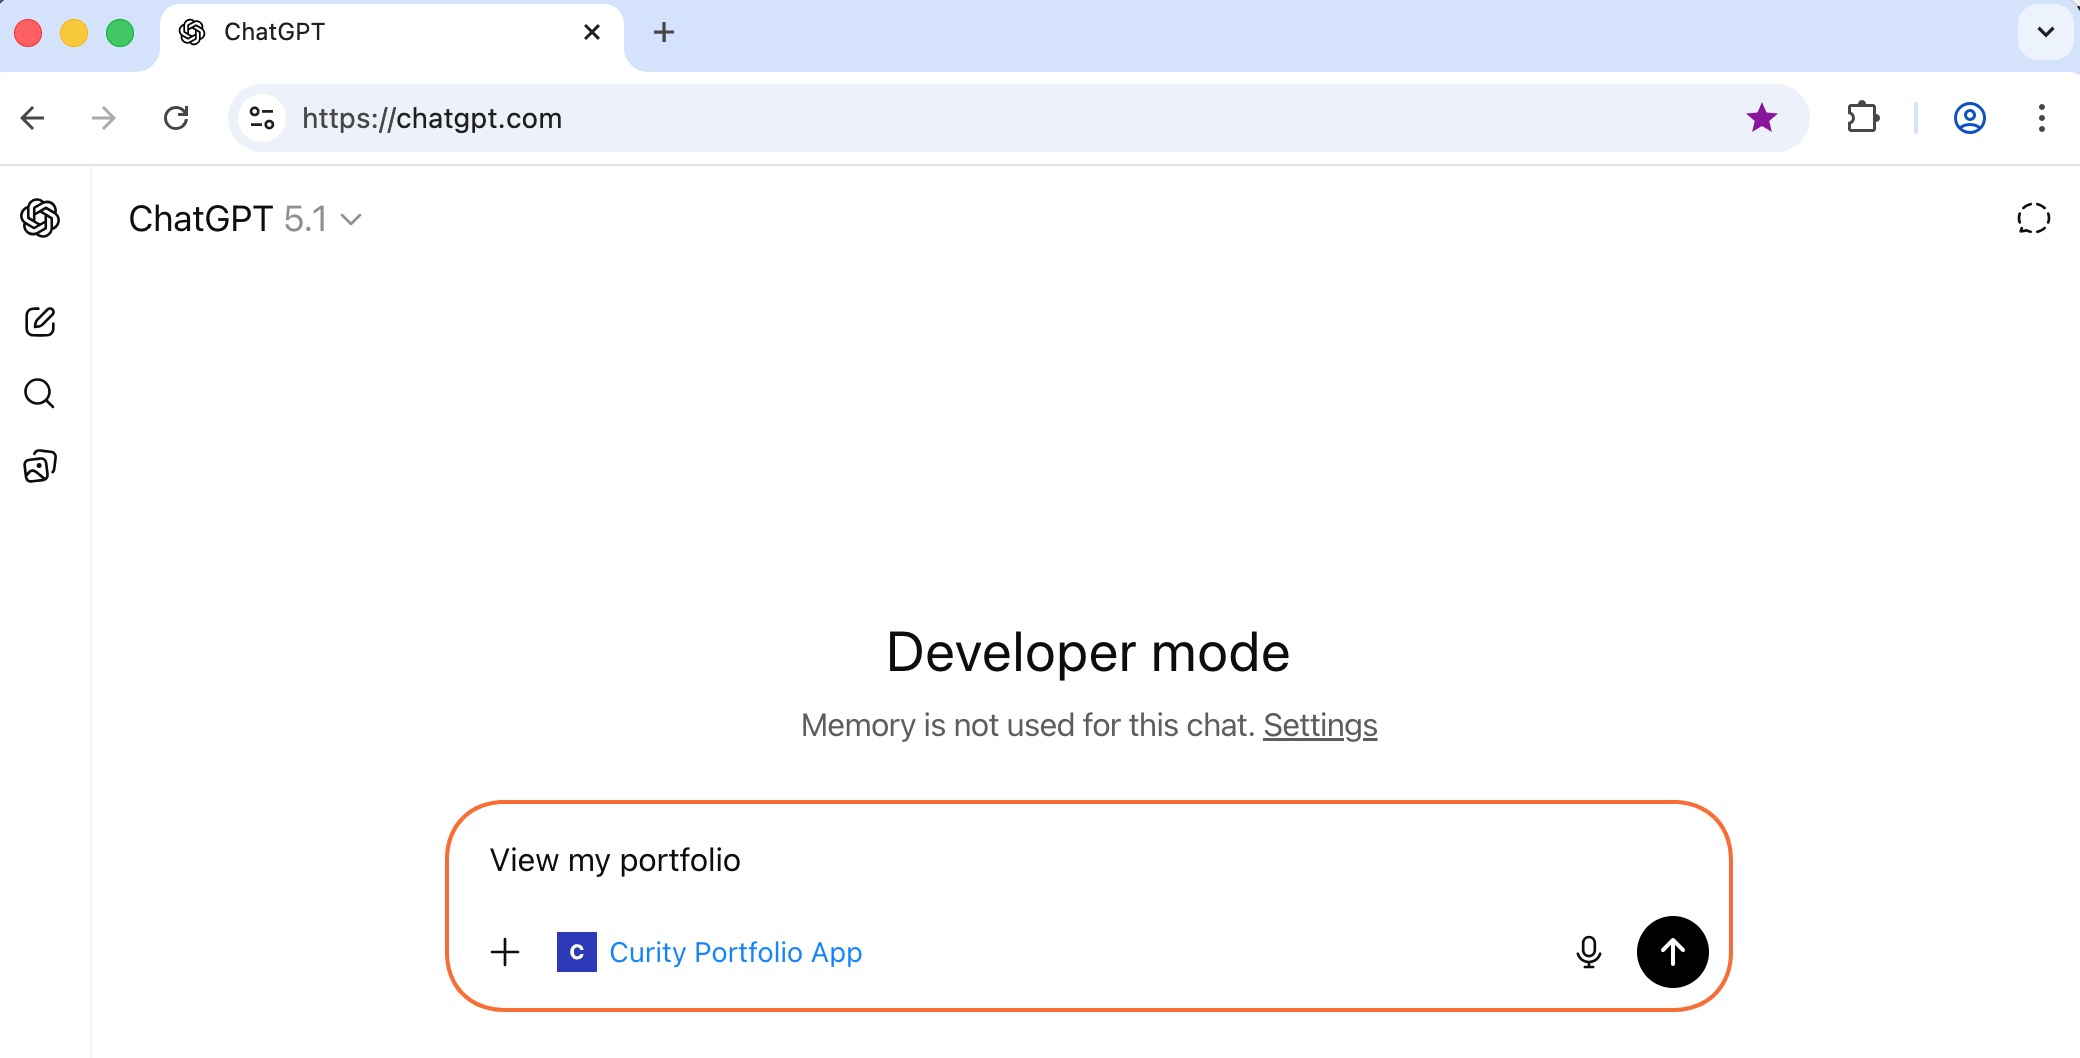
First, the user configures the MCP server's URL in ChatGPT. Since the MCP server uses MCP authorization, ChatGPT triggers user authentication in the system browser. The example uses email authentication and provides a test user account. After the user authenticates, ChatGPT receives a low privilege access token.
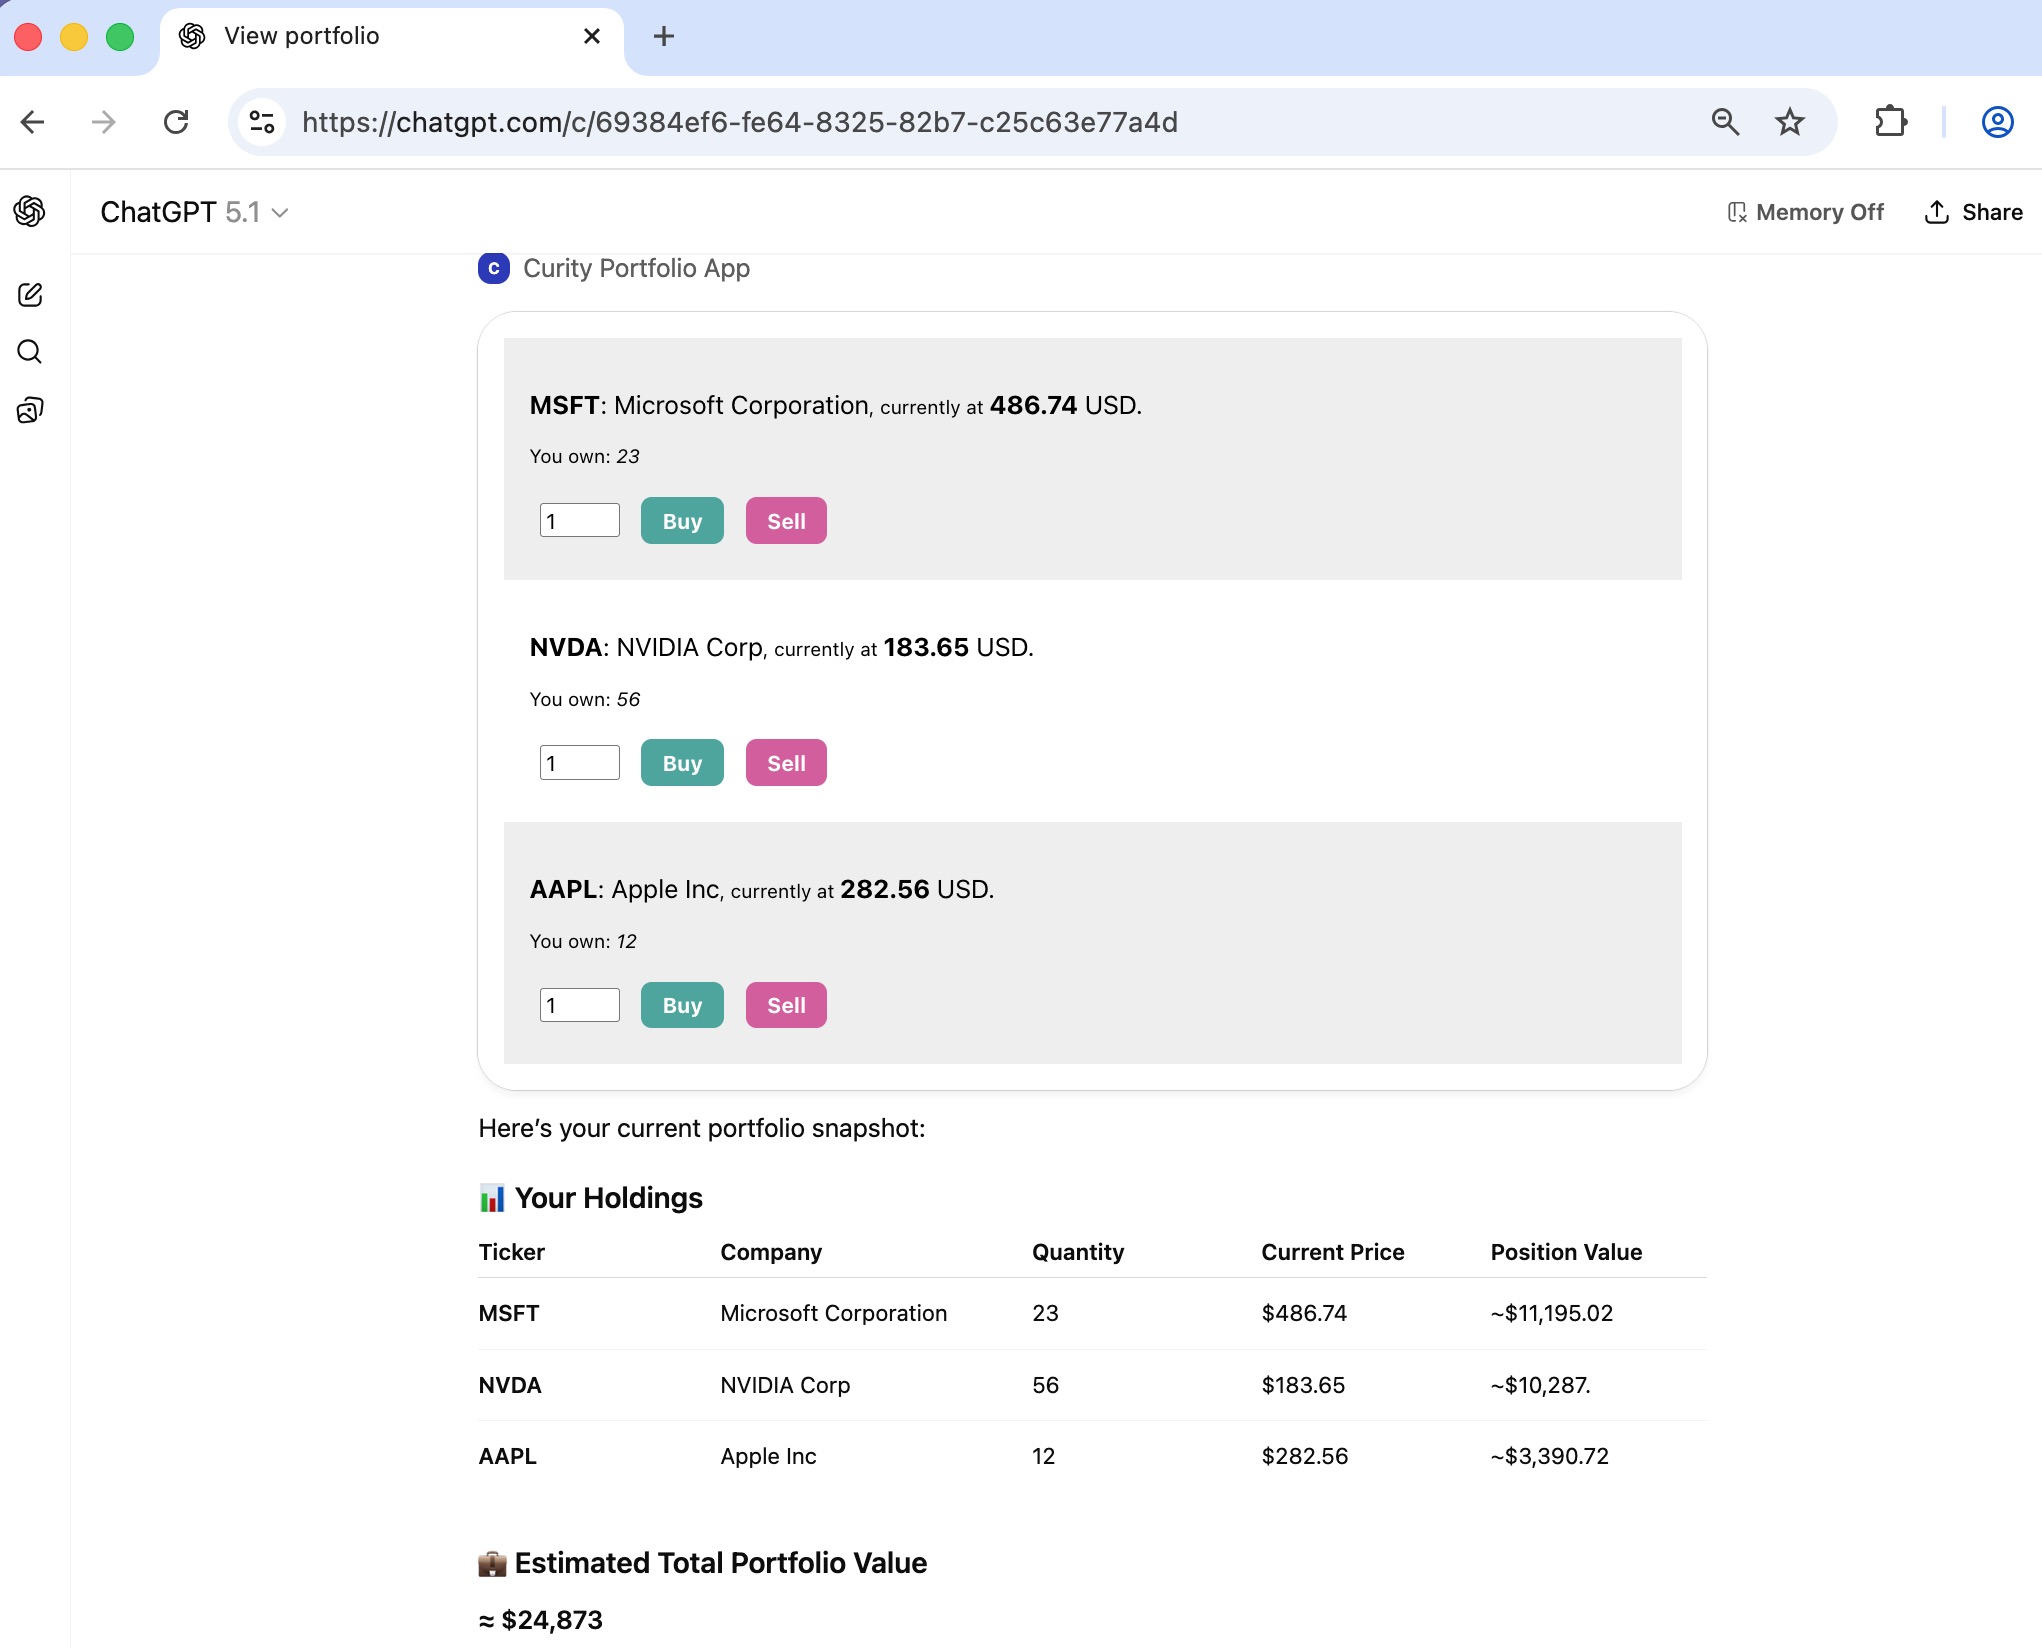
This example's MCP server exposes tools to get information about the user's stock portfolio and to buy or sell stocks. When the user requests their portfolio, ChatGPT determines the tool to call, sends the access token and gets the user's portfolio data. The widget app downloads and runs in an iframe, to render tool results in custom ways. The user can then interact with the MCP server and ask a natural language question.
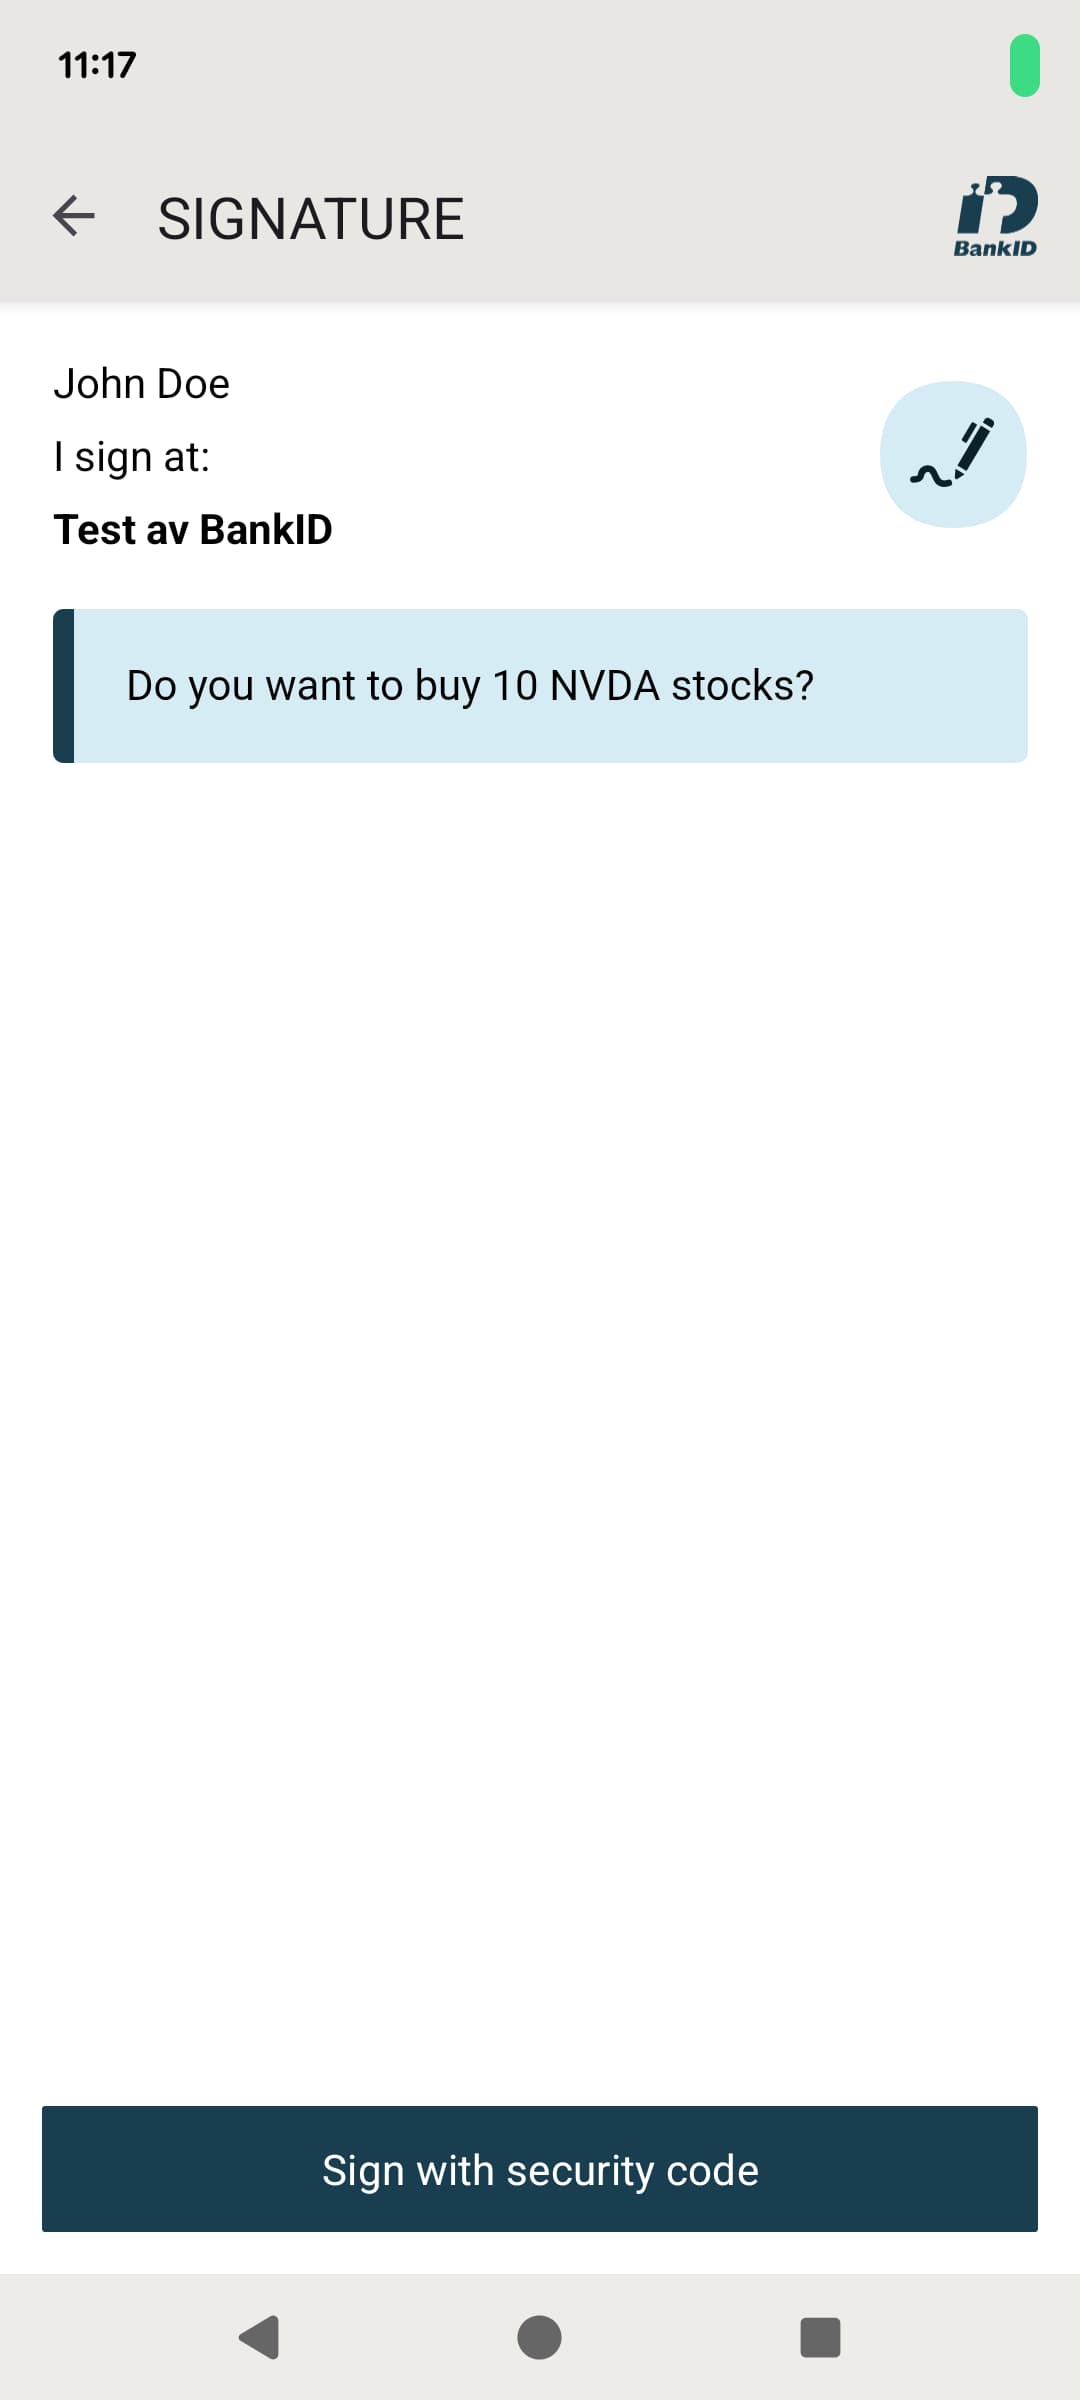
Next, the user can choose to buy or sell stocks, to initiate a high-privilege operation. Therefore, the MCP server must run a new code flow to obtain a high privilege access token. The user remains within the ChatGPT web interface, which renders a BankID animated QR code.

In the example flow, the user opens their instance of the BankID app and scans the QR code to identify themselves and approve the transaction. A BankID Signing Consentor records the transaction details in a non-repudiable manner.
Video Walkthrough
The following short video visually demonstrates the flow and shows the user actions both within the ChatGPT app and within the BankID mobile app.
Step-Up Security Flow
The example step-up flow uses a financial-grade security technique called the Lodging Intent Pattern. The following diagram summarizes how the code example applies that pattern to an AI use case.
- ChatGPT's MCP client runs an initial email authentication flow, to get an access token with scope
portfolio. - ChatGPT's MCP client sends the access token in a tool request to initiate a buy or sell transaction.
- The MCP server validates the access token and creates an unconfirmed transaction at the Portfolio API.
- The MCP server initiates an API-driven authentication flow that uses BankID as a signing consentor.
- The MCP server receives multiple responses with BankID QR codes.
- The ChatGPT widget receives MCP server responses and renders them as an animated QR code.
- The user either scans the QR code with their high security BankID mobile app, or opens the app on the same device, and consents to the payment.
- The flow completes, and the MCP server receives an access token with a high privilege scope like
transaction_123, which is valid only for completing the given transaction. - The MCP server calls the Portfolio API with the high privilege access token to complete the transaction.
During the flow, the ChatGPT widget polls the MCP server, which polls the Curity Identity Server, which polls BankID's servers. When the transaction completes, the MCP server returns a final API response to the widget. The widget then uses JavaScript to update its web interface with new stock balances.
The flow demonstrates the following key behaviors:
- Modern User Experience: Using the system browser to launch BankID would not enhance security and would result in an awkward user experience. Therefore, the step-up flow uses the Hypermedia Authentication API (HAAPI) to run an API-driven flow and enable the user to scan the BankID QR code from within ChatGPT.
- Strong Security: Only the MCP server comes into contact with the high-privilege access token, which never leaves the backend environment. The high-privilege access token also uses a prefix scope that restricts its usage to a specific transaction.
MCP Server Operations
The MCP server implementation uses Node.js and the Express HTTP server to provide the following operations.
| Operation | Description |
|---|---|
| portfolio_widget | An MCP resource that ChatGPT calls when it connects to the MCP server. |
| get_portfolio | An MCP tool that ChatGPT calls, whose data the widget uses to render a table. |
| buy_stock | An MCP tool that the widget invokes when the user clicks a buy button in the widget or ask the chatbot to buy stock. |
| sell_stock | An MCP tool that the widget invokes when the user clicks a sell button in the widget or ask the chatbot to sell stock. |
| continue_authorization | An MCP tool that the widget calls to poll for BankID completion. |
The code implements logic specific to ChatGPT MCP Servers. The portfolio_widget operation serves a UI bundle with a MIME type of text/html+skybridge, to instruct ChatGPT to treat the payload as a sandboxed HTML entry point and inject the ChatGPT widget runtime.
server.registerResource("portfolio-widget","ui://widget/portfolio-widget.html",{},async () => {// Update the widget URI for every download during developmentconst widgetAppBundle = readFileSync('widget/dist/bundle.js', 'utf-8');return ({contents: [{uri: "ui://widget/portfolio-widget.html",mimeType: "text/html+skybridge",text: `<!doctype html><html><head><link rel="stylesheet" href="${configuration.externalBaseUrl}/mcp/app.css"><link rel="stylesheet" href="${configuration.externalBaseUrl}/mcp/bundle.css"></head><body><div id="root"></div><script type="module">${widgetAppBundle}</script></body></html>`.trim(),_meta: {"openai/widgetPrefersBorder": true,},},],})},);
ChatGPT Widget App
The ChatGPT widget app is a React project that builds to a static UI bundle deployed with the MCP server. The React code uses the techniques from the OpenAI Apps Quickstart. When ChatGPT loads the widget into an iframe, the widget's window has a window.openai object that serves as a bridge to ChatGPT. The widget can then call window.openai.callTool to initiate fetch requests to the MCP server. The widget can read the window.openai.toolOutput object to process data from tool responses.
When the widget needs to trigger buying or selling of stocks it calls the corresponding MCP tool via the OpenAI bridge. The MCP server then begins a backend HAAPI flow and returns structured content to instruct the widget what to do next. Until BankID authentication completes, the response instructs the widget to render the BankID QR code and poll the MCP server again.
const updateStock = async (toolToCall: Tool, id: string, delta: number) => {let updateStockResult: CallToolResponse;const newState = {} as any;updateStockResult = await callTool(toolToCall.toolName, { id, quantity: delta });// Handle errors if requirednewState.error = updateStockResult.structuredContent?.error;shouldPoll.current = false;if (!newState.error) {// Handle the step-up response that begins pollingif (updateStockResult.structuredContent?.authMessage) {newState.authMessage = updateStockResult.structuredContent.authMessage;shouldPoll.current = true;}}setWidgetState({...widgetState,...newState});}
The polling operation calls the MCP server with a one second delay to check if BankID authentication is complete. If not, the widget updates its state with the latest BankID QR code from the MCP server response, to trigger a re-render and achieve an animated effect, then polls again. Eventually, authentication completes and the widget uses MCP server response data to render new balances. The following code shows an abridged version of the code.
const pollAuthentication = async () => {const timeout = (ms: number) => {return new Promise(resolve => setTimeout(resolve, ms));}await timeout(1000);const toolResult = await window.openai?.callTool('continue_authorization', { });switch (toolResult.structuredContent.authMessage.message ) {case 'authentication_complete':const originalTool = toolResult.structuredContent?.continueOperation;const originalToolResult = await window.openai?.callTool(originalTool.name, { id: originalTool.parameters.id, quantity: originalTool.parameters.delta });setWidgetState({...widgetState,portfolio: originalToolResult.updatedPortfolio,authMessage: undefined});shouldPoll.current = false;break;case 'authentication_failed':reportError(toolResult);shouldPoll.current = false;break;default:setWidgetState({...widgetState,authMessage: toolResult?.structuredContent.authMessage,});shouldPoll.current = true;break;}}
MCP Server API-Driven Code Flow
The MCP server receives a low-privilege access token from ChatGPT and then needs to initiate a step-up flow on behalf of the user in the access token. The MCP server triggers an API-driven code flow with the following main steps to get the high-privilege access token.
- ChatGPT's MCP client sends a tool request to the MCP server with the initial access token.
- The MCP server starts an API-driven code flow with an OAuth HAAPI client that uses an access token authenticator and the BankID signing consentor.
- The access token authenticator runs first, to receive and verify the low privilege access token.
- The access token authenticator completes automatically and sets the authenticated subject from the access token.
- The BankID signing consentor runs next, to allow the user to confirm the transaction.
- When the user confirms the transaction in BankID, the MCP server receives an authorization code.
- The MCP server makes a token request with the authorization code and the high privilege
transaction_scope. - The MCP server receives a high privilege access token that it uses to complete the transaction at the Portfolio API.
The MCP server acts as an OAuth DPoP client to run the HAAPI code flow. The following code shows how the flow begins with a sendAuthorizationRequest operation with the high privilege scope, and ends with a postAuthorizationCode operation to get the high privilege access token.
async function sendAuthorizationRequest(stepupScope: string): Promise<Response> {const url = new URL(ensureAbsoluteUrl(config.authorizationEndpoint));url.searchParams.append('response_type', 'code');url.searchParams.append('client_id', config.haapiClientId);url.searchParams.append('redirect_uri', config.redirectUri);url.searchParams.append('scope', stepupScope);url.searchParams.append('state', generateRandomState());url.searchParams.append('acr', config.acr);return client.get(url.toString(), haapiHeaders)}async postAuthorizationCode(url: string, code: string, redirectUri: string): Promise<TokenResponse> {const response = await this.postForm(url,{grant_type: 'authorization_code',code: code,redirect_uri: redirectUri,}, {'Accept': 'application/json','Authorization': this.getBasicAuthHeader(),});return await response.json() as TokenResponse;}
Access Token Authenticator
The Access Token Authenticator is an authenticator plugin for the Curity Identity Server. The following XML shows how to configure the plugin with the expected properties of the MCP client's access token.
<config xmlns="http://tail-f.com/ns/config/1.0"><profiles xmlns="https://curity.se/ns/conf/base"><profile><id>authentication-service</id><type xmlns:auth="https://curity.se/ns/conf/profile/authentication">auth:authentication-service</type><settings><authentication-service xmlns="https://curity.se/ns/conf/profile/authentication"><authenticators><authenticator><id>access-token</id><authentication-actions><login>second-factor-authentication</login><sso>second-factor-authentication</sso></authentication-actions><access-token xmlns="https://curity.se/ns/ext-conf/access-token"><key-verification><id>default-signature-verification-key</id></key-verification><allowed-oauth-client-ids>mcp-server-haapi</allowed-oauth-client-ids><required-audience>https://mcp.demo.example/</required-audience><required-issuer>https://login.demo.example/oauth/v2/oauth-anonymous</required-issuer><required-scopes>portfolio</required-scopes></access-token></authenticator></authenticators></authentication-service></settings></profile></profiles></config>
The plugin's code extracts the sub claim from the access token and uses it to set the authenticated subject and complete first-factor authentication. The HAAPI client that uses the access token authenticator is also configured to use a BankID signing consentor.
Run the Example
You can run the end-to-end flow on a local computer. To do so, clone the GitHub repository using the link at the top of this page. Follow the README instructions to understand prerequisites and run the following steps, after which you can run the full end-to-end flow.
- Run a local Docker deployment that hosts the example MCP server, the Portfolio API and the Curity Identity Server.
- Use the ngrok tool to expose local MCP server and OAuth endpoints to the internet.
- Configure ChatGPT with an MCP server URL such as
https://1b3889fd3a66.ngrok-free.app/mcp. - Follow the BankID Login instructions to install the app and create a test account.
Once the deployment is up and running, follow the README instructions to run the Admin UI and inspect the authentication and OAuth client settings. The READMEs also explain more about ways to view MCP and HAAPI messages, or run the widget or MCP server in development mode.
Alternative Implementations
The code example demonstrates a generic design pattern in terms of a concrete use case, where ChatGPT is the AI agent and BankID is used for step-up. More generally, you could use any widget technology that aligns with the Model Context Protocol Apps Protocol. You could use the Curity Identity Server to implement step-up authentication in various alternative ways:
-
For low or medium sensitivity data, you might decide to use the HTML Form Authenticator and email authentication for step-up. To do so, you would add a Multi-Factor Authentication Action to the access token authenticator, to trigger email authentication as a second factor.
-
In some high sensitivity payment use cases, you might use Verifiable Credentials to identify the user and record the transaction.
Summary
AI agents and MCP clients can operate as full-fledged user agents and run frontend web forms. These forms can provide custom user experiences within the AI agent's frontend environment. The MCP client must initiate user authentication according to the MCP authorization specification, and use the system browser.
When you use the Curity Identity Server to secure MCP servers, you can use API-driven flows to manage step-up authentication and high-privilege operations. For high sensitivity data you can incorporate financial-grade user authentication and consent. As a result, you optimize both security and user experience.

Join our Newsletter
Get the latest on identity management, API Security and authentication straight to your inbox.

Start Free Trial
Try the Curity Identity Server for Free. Get up and running in 10 minutes.
Start Free TrialWas this helpful?