Test using OAuth Tools
On this page
OAuth Tools is a great tool for testing OAuth flows. It is a public web application that acts as an OAuth client application and communicates with the Curity Identity Server endpoints. OAuth Tools already comes with a configured playground out of the box. This could suffice for some very simple tests, but it does not allow to tweak the configuration in place in the Curity Identity Server. In this article you will learn how to configure OAuth Tools to integrate with a different instance of the Curity Identity Server like an instance under your control.
OAuth Tools App
OAuth Tools is also available as an app for macOS, Windows and Linux. Curity customers with a license and organizations evaluating the Curity Identity Server can download the app from the Curity Developer Portal.
The instructions in this article still apply as both the web version and the app are configured in the same way.

Configuring a Workspace
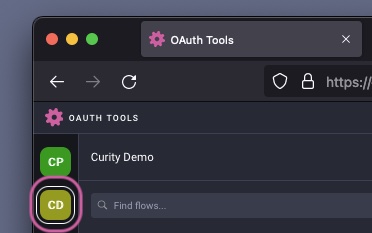
When visiting OAuth Tools for the first time a set of pre-defined flows will be visible on the left side. These flows are all using the pre-configured Curity Playground workspace. This tutorial provides instructions on how to set up a workspace in OAuth Tools that instead uses a different instance of the Curity Identity Server (wherever that is installed).
Start by clicking the + in the left side panel to add New Workspace. Give the new workspace a name (Curity Demo for example), then click Create Workspace. If WebFinger is enabled (recommended) in the Curity Identity Server, click the Use webfinger button and enter the URL of the Curity Identity Server, ex. https://idsvr.example.com. This would correspond to the configured Base URL in Curity.
Use WebFinger
Webfinger is enabled by default if you use the Basic Setup Wizard. Otherwise, you can enable it on the System page, by activating the Enable WebFinger for Issuer Discovery toggle.
If WebFinger is not enabled enter the Issuer or Metadata URL. The Issuer URL looks something like this https://idsvr.example.com/oauth/v2/oauth-anonymous and the Metadata URL like this https://idsvr.example.com/oauth/v2/oauth-anonymous/.well-known/openid-configuration.
Finding the Issuer value
To find the issuer ID value in the Admin UI navigate to Profiles → Token Service → General. Then click the ? Info button in the top right corner.

Either of these options should discover the endpoints needed to test a configured client.
Local Curity installation
If the Curity Identity Server is installed locally it might not be possible for the web-based version of OAuth Tools to reach the instance. This can be resolved by leveraging a reverse proxy like ngrok for example. The Exposing Curity Using ngrok article outlines details on how to configure ngrok.
This is typically not an issue when using the app version of OAuth Tools.
Configuring a Client
With a workspace configured in OAuth Tools, a client can be added to use for testing. In the Clients tab of the newly configured workspace, click New Client.
Enter the Client ID/Name and Secret and enable the flow(s) that corresponds to the client configured in the Curity Identity Server from the previous step, Configure client.
This tutorial uses a client with the ID www that can run the Code Flow.
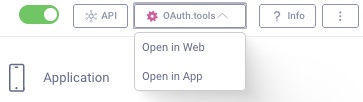
Automatically Import a Client
You can automatically import the client information from the Curity Identity Server. In the admin UI, navigate to the Client you want to import into OAuth Tools. In the right upper corner, expand the OAuth Tools drop-down menu and select Open in Web (or Open in App if you run OAuth Tools as an app).
Test a Code Flow
You should now have a working environment with client data in the OAuth Tools app. When you open the app, you will see a list of your environments on the left side. Make sure you have the correct environment selected. You can now start testing.
- Ensure to select the right environment.
- Click the + to Start Flow and choose the flow to test. Select
Code Flowin this case.

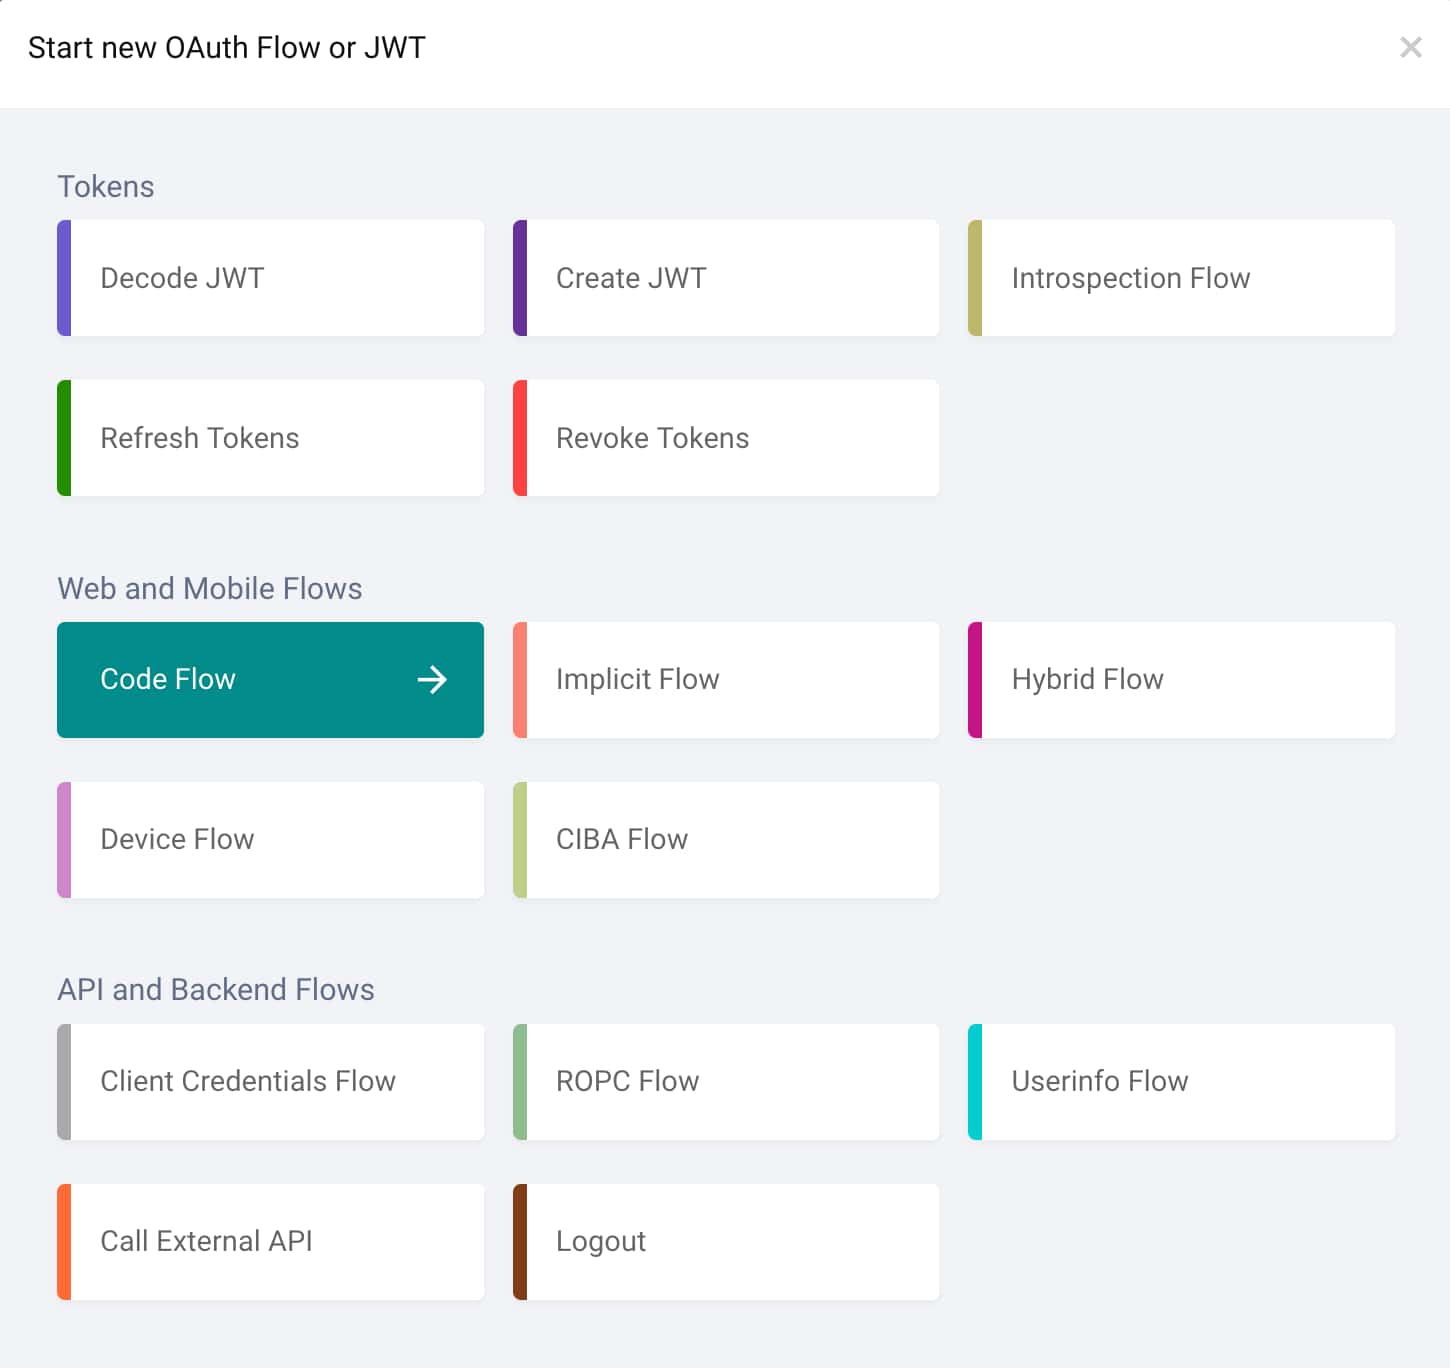
- From the drop-down, choose the
wwwclient, enter its client secret and also choose theopenidscope.
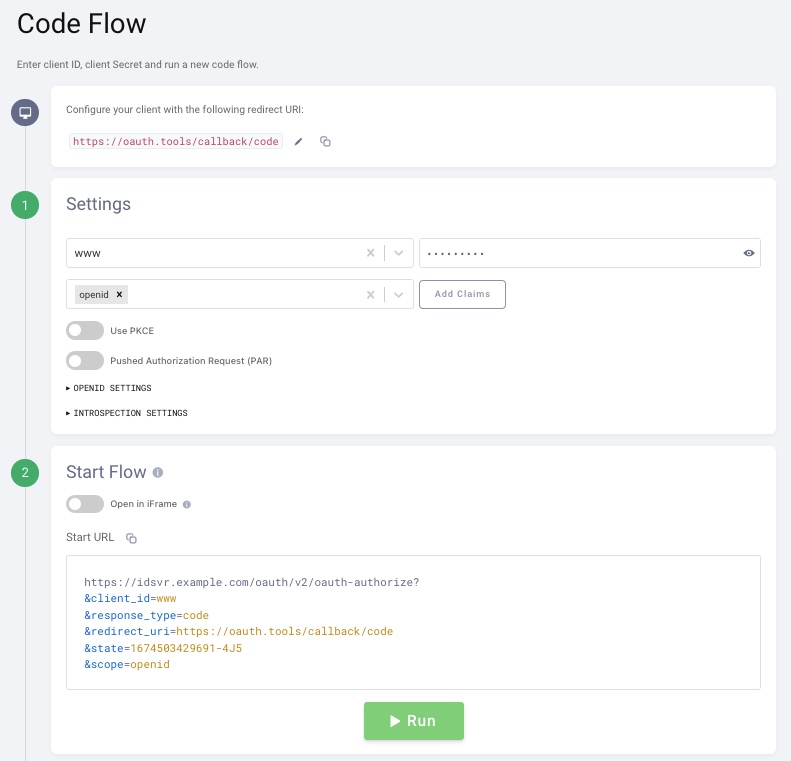
- Scroll down and click the Run button to begin a code flow.
When the code flow runs, the Curity Identity Server identifies the client from the client_id request parameter and runs its authentication policy. In the example setup, the client's authentication policy uses an HTML Form Authenticator. Initially though, you do not have a user account with which to sign in. You can use the self-sign feature of the authenticator to create an account.
To create a user with the HTML Form Authenticator, click the Create account link on the form:

Fill out the information for the new account. Username, email and password are mandatory fields. Submit the form and finish account creation by clicking the Create account button under the form. After successful account creation you have the option to Return to login.
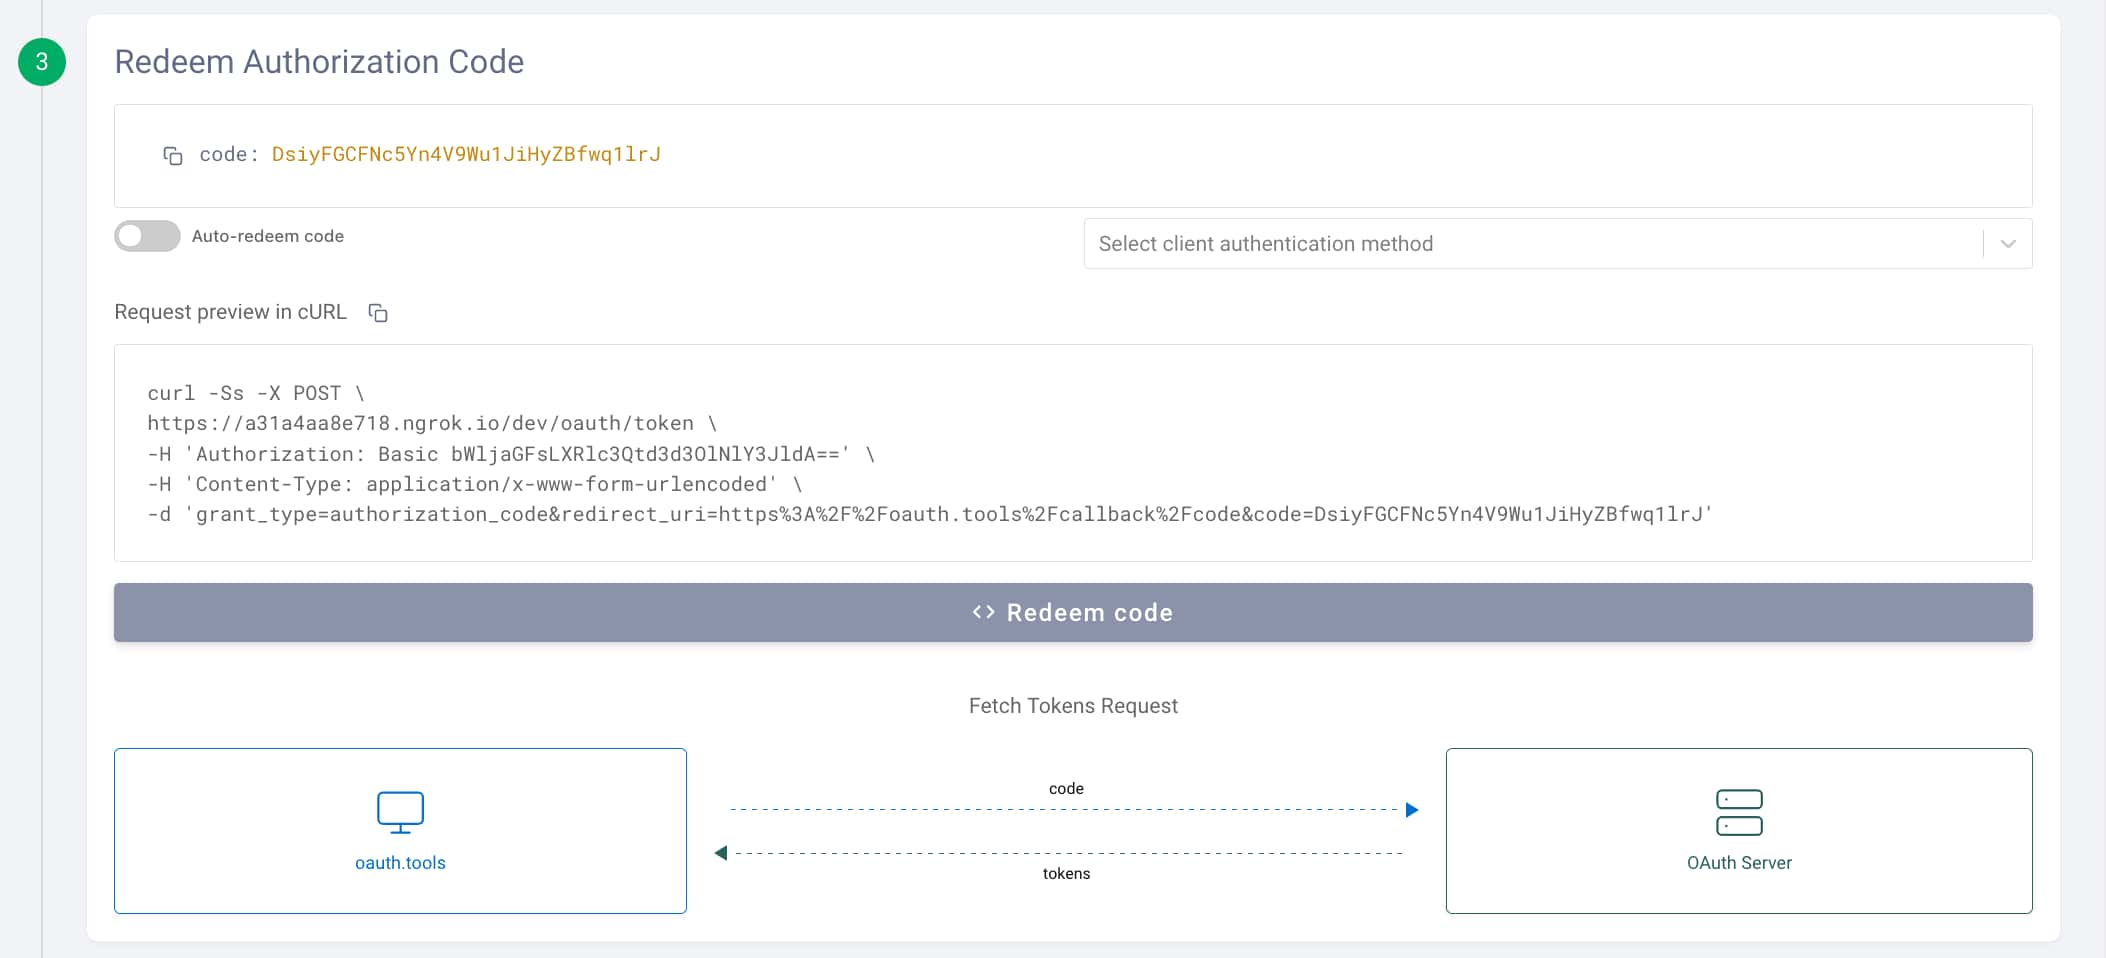
Now, proceed with the login. Use the newly created account to authenticate. The OAuth Tools client then receives an authorization response that contains an authorization code. Click the Redeem code button to exchange the authorization code for a set of OAuth tokens.
There are now 3 tokens: an Access Token, a Refresh Token, and an ID Token. The client must send the openid scope to receive an ID Token.
You can run a code flow many times. By default, Single Sign-On automatically authenticates the user and you can use the prompt=login option to force a new login every time. To streamline exchanging the code for future tests you can enable Auto-redeem code, to automatically complete the flow and get tokens.
Next Steps
This concludes the basic "Getting started" track. Head over to the summary article that also covers further suggested reading on additional advanced configuration and integration options.
Customer Stories
Learn how organizations run identity and API security at scale.
Read customer storiesWas this helpful?