Test using cURL
On this page
There are several ways to test an OAuth flow and different tools that can be used in the process. In this article you will learn how to use cURL and a browser to run through the Code Flow.
This tutorial assumes that you have completed the steps to configure the username-password authenticator and the first client.
Retrieve a Code
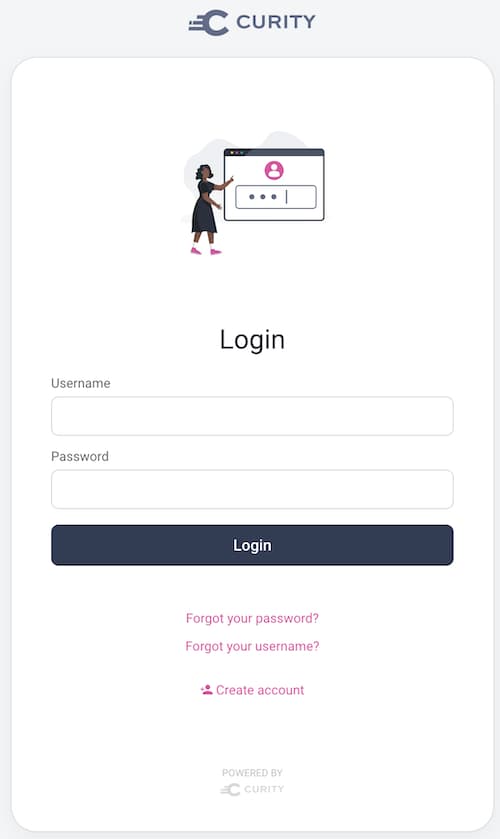
Start in the browser. Enter the following example URL to start the flow. This triggers the Authenticator configured for the www client. The response_type tells the Curity Identity Server to return a code. Provide a redirect_uri that matches one of the redirect URIs configured for the client in the Curity Identity Server.
https://localhost:8443/oauth/v2/oauth-authorize?client_id=www&response_type=code&redirect_uri=https://localhost/callback&scope=openid
Change hostname
Replace localhost:8443 to match the hostname and port of your installation of the Curity Identity Server. This should match the configured Base URL in the System view, in the Deployment section.
If an account is available, use it to log in. If this is the first time running through this test chances are that no account exists. In this case, create an account.
To create a user with the HTML Form Authenticator, click the Create account link on the form:

Fill out the information for the new account. Username, email and password are mandatory fields. Submit the form and finish account creation by clicking the Create account button under the form. After successful account creation you have the option to Return to login.
Log in with the account. After a successful authentication the browser redirects to a URL that looks like this:
https://localhost/callback?code=k6sdxUQjtZiaDjAJsH2bDWBwknZ6XXjb&session_state=DvrfPGQ5NmQiQHRUKRsSA5bKq7ccEtdWQPFP1rvu89Y%3D.cH1KuVFQm8Sv&iss=https%3A%2F%2Flocalhost%3A8443%2Foauth%2Fv2%2Foauth-anonymous
For the next step extract the code from the URL. In the above example, the code is k6sdxUQjtZiaDjAJsH2bDWBwknZ6XXjb.
Redirect URI
Note, that the browser got redirected to the redirect_uri that was passed in the original request to the server.
Redeem Authorization Code
The next step in the code flow is an HTTP POST request to the token endpoint of the Curity Identity Server. As part of this request, the server requires the client to authenticate. In this case, the client is configured to use secret as the authentication mechanism, i.e. it has a username and password (client id and secret). Simply specify the credentials as part of the command, e.g., -u www:Password1.
Add also the grant_type, redirect_uri, and code as url-encoded parameters.
curl -Ssk \https://localhost:8443/oauth/v2/oauth-token \-u www:Password1 \-d grant_type=authorization_code \-d redirect_uri=https%3A%2F%2Flocalhost%2Fcallback \-d code=k6sdxUQjtZiaDjAJsH2bDWBwknZ6XXjb
Untrusted Certificate
The command above specifies the -k flag of curl because the default certificate of the Curity Identity Server is self-signed and not trusted by curl. If the default certificate is replaced by a trusted one, the -k is no longer needed.
The response looks something like this:
{"id_token": "eyJraWQiOiI4NzQ1ODQ3NTQiLCJ4NXQiOiJFbTlmdFpuVnFxQzdVVkxhTGJ2Y2M1ZkhPT2ciLCJhbGciOiJSUzI1NiJ9.eyJleHAiOjE2MDUzMTAyMzYsIm5iZiI6MTYwNTMwNjYzNiwianRpIjoiODY4NDM0Y2YtMGY4Zi00OTNhLTliNGEtNDgzNDhmNGJjZmY1IiwiaXNzIjoiaHR0cHM6Ly9pZ2dib20tY3VyaXR5Lm5ncm9rLmlvL29hdXRoL3YyL29hdXRoLWFub255bW91cyIsImF1ZCI6Ind3dyIsInN1YiI6ImE5NmQ2MjEwOGYwYzllNThkMGYzZTI2ZWM0MmQ1ODMzMDUxZDI2MjMwYTlhOTQ2MDFjOTg5NzZhMDNjMjA3NDQiLCJhdXRoX3RpbWUiOjE2MDUzMDU2OTAsImlhdCI6MTYwNTMwNjYzNiwicHVycG9zZSI6ImlkIiwiYXRfaGFzaCI6IjNPZWtnMk9MVUdaOWp0NXYxUTVCY1EiLCJkZWxlZ2F0aW9uX2lkIjoiZDJjZGUyNWYtN2M3Ny00ZDk2LTkwNmQtMjhmMTVlMTRhZjQxIiwiYWNyIjoidXJuOnNlOmN1cml0eTphdXRoZW50aWNhdGlvbjpodG1sLWZvcm06dXNlcm5hbWUtcGFzc3dvcmQiLCJhenAiOiJ3d3ciLCJhbXIiOiJ1cm46c2U6Y3VyaXR5OmF1dGhlbnRpY2F0aW9uOmh0bWwtZm9ybTp1c2VybmFtZS1wYXNzd29yZCIsInNpZCI6IlJCV29vaFpJZ1Y2UFIzcVEifQ.PhWxwlWeJbgNQCk4Vz7OiijOE0njN6IMdPCeGWKtT_kFs9HBw10QVmmgiG74tu-WHG2TOedsl6o_k3xaOgwptvSXlwlM7P5EK_AJAegYqzQtA32m7RcuPT3vn7_1aPcy2K-cbiWDaF7DI-g5SfPIKIbFFFVF0eVMR53VW2uDk55VhIVdkhSKIL8_jNZu__sl_PGLyNtFxBYeVmgad18FClWGStsRy0pqhlvtwVKZglyipBFpce0JdPIs2TenjtkzoBEilerAj1TkA8Sth3G_3NHHtteI8HDXtKTJGg3DhjTozoeerWAQDI-yt1LPhNdZtpn_GuxOP4SN_HGlczOf5Q","token_type": "bearer","access_token": "664c267a-5a84-4cb4-a1e9-7301759cee01","refresh_token": "000789a1-31d4-4db5-895e-8f4ff2544314","scope": "openid","expires_in": 300}
There are three tokens now: an Access Token, a Refresh Token and an ID Token. The ID Token was issued because the request included the openid scope.
Next Steps
This concludes the basic "Getting started" track. Head over to the summary article that also covers further suggested reading on additional advanced configuration and integration options.

Join our Newsletter
Get the latest on identity management, API Security and authentication straight to your inbox.

Start Free Trial
Try the Curity Identity Server for Free. Get up and running in 10 minutes.
Start Free TrialWas this helpful?


