
Adding Claims from Authentication
On this page
Authentication Attributes into Claims
The Curity Authentication Service has a very large support for collecting user attributes during authentication using authentication actions to lookup attributes in external repositories, dynamically prompting for additional authentication methods, adding geo data, etc. These collected attributes are not automatically added to tokens issued by the Curity Token Service, instead each attribute has to be configured to be issued. This article will shed some light on how this is done.
The Claims Provider
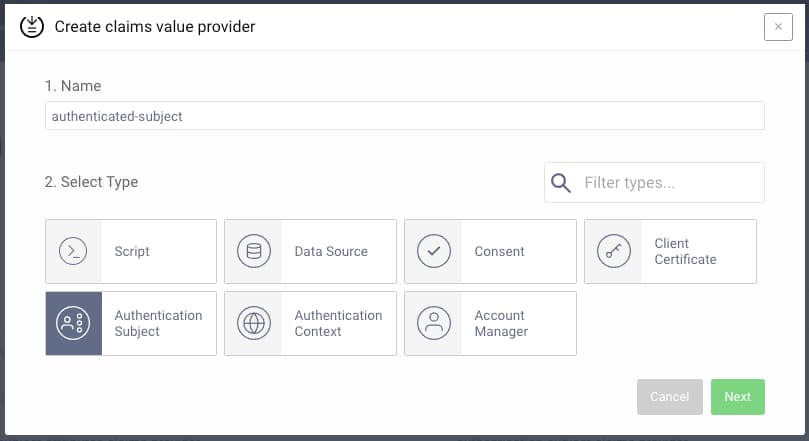
In this article the focus will be on the Authentication Subject claims provider. This type is not added by default, and will have to be added before the claims definitions can be added. To add this through the admin UI, follow these steps or import the configuration file.
Go to Profiles -> Token Profile -> Claims Providers. The click the + New Claims Value Provider button.
Adding a Claim
Default tokens do not contain any user related data, other than the sub and contextual information like acr. Additional claims that are supposed to go into tokens are configured with the Token Designer available from the Scopes menu. The preconditions for a claim ending up in a token can be read about in Claims Explained.
A claim has three parts of configuration concerning the value: Claims Provider, Atttributes and Transformation. Consider these screenshots of an email claim:
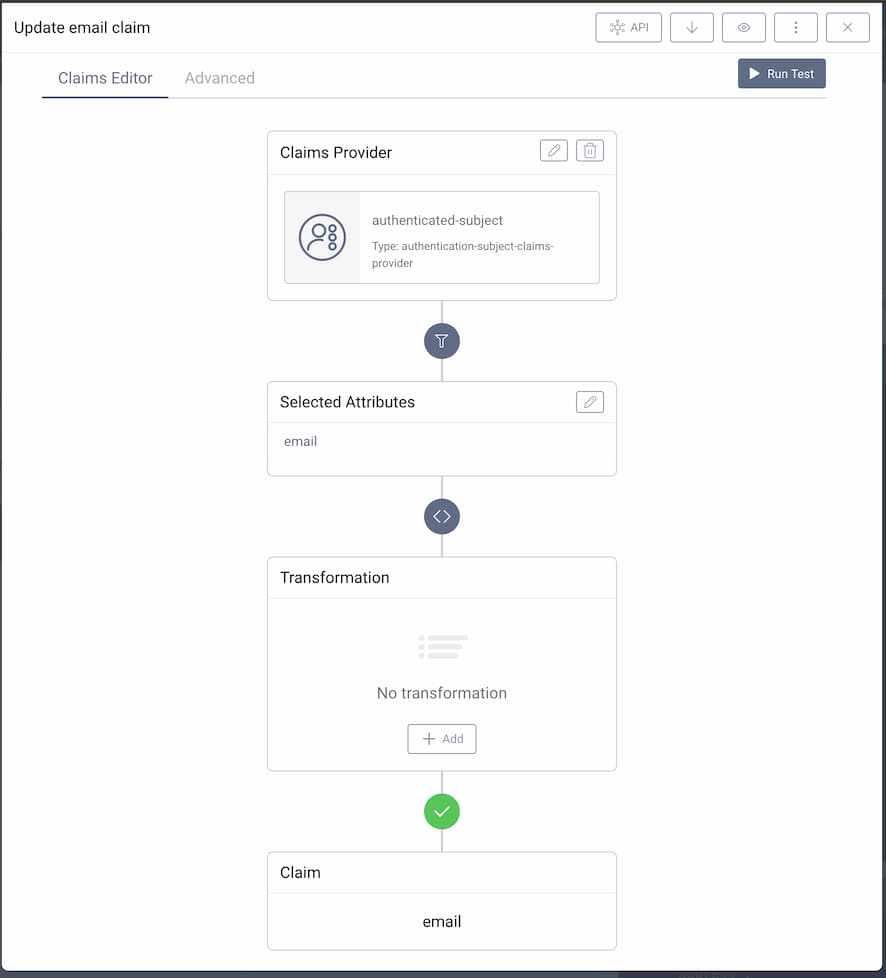
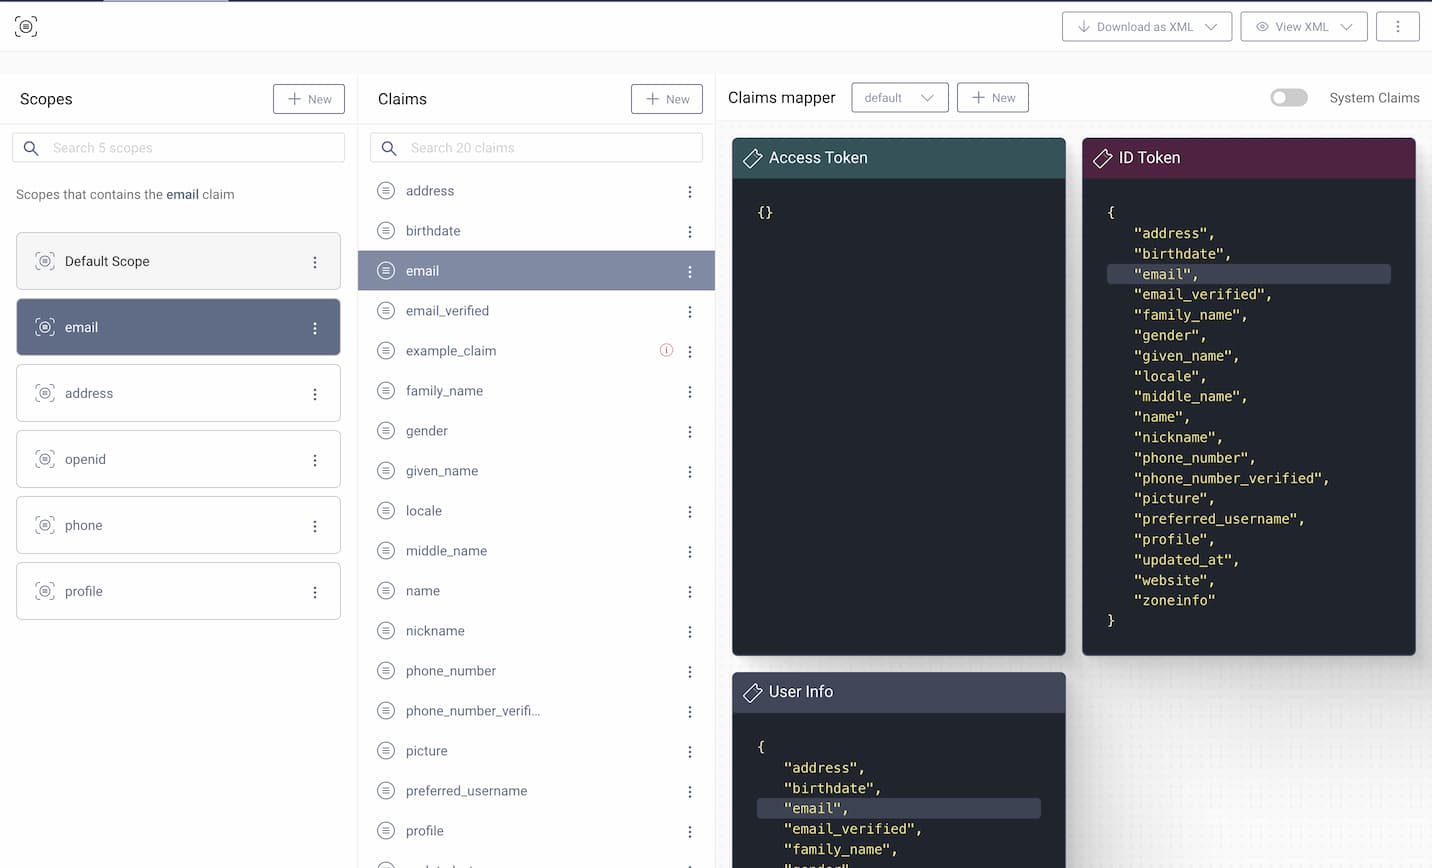
This configuration chooses the authenticated-subject as the source of the value. In the subject there is an attribute email, the value of which will be added to the email claim without any transformation. In addition, the claim is configured to be included in both id_token and userinfo when a client is granted the scope email. In the end, this means that a client requesting the scope email will get an ID Token containing the email claim, if an attribute called email can be be found in the output of the authentication. It might be easy to know exactly what attributes are in the authenticated subject, but many times you will have to search the log files to find out exactly how the responses look like. To help with that type of debugging,the Debug Authentication Action can be used.
Testing Claims Providers Straight From the UI
You can easily test configuration of Claim Value Providers and transformations straight from the admin UI. To do that, open the testing tab by clicking on Run Test button in the upper right corner. The Working with Claims tutorial describes in greater detail how to run those tests.
Debug Authentication Action
The Debug Authentication Action can be added to any authenticator, and it will show a screen with the current attributes of your authentication transaction. It can be added multiple times, so that you can see what happens with the attributes after each authentication action. If it's put last in the chain it will show you the output of the authenticator. This is very useful to be able to find the attributes you need when issuing claims.
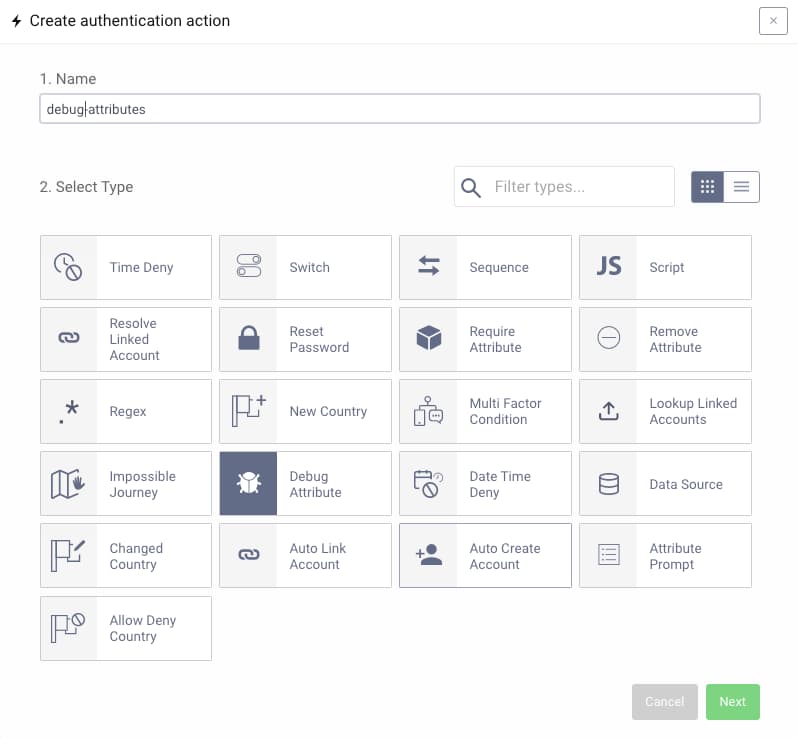
Creating the Action
You can add the debug action as any other authentication action.
Adding the Action to an Authenticator
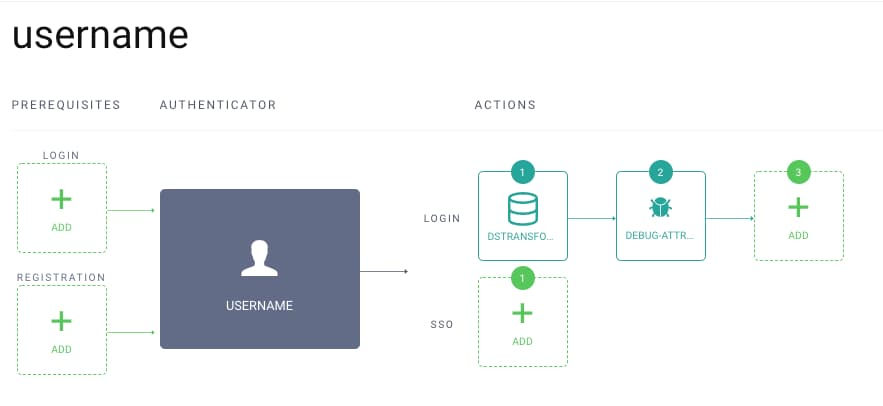
In this screenshot, the action has been added to an authenticator with an action that performs a lookup for additional attributes in a data source, and then runs the debug action to show the attributes.
Running the Authentication Flow
When an authentication flow is run, the last step will be a screen like this:
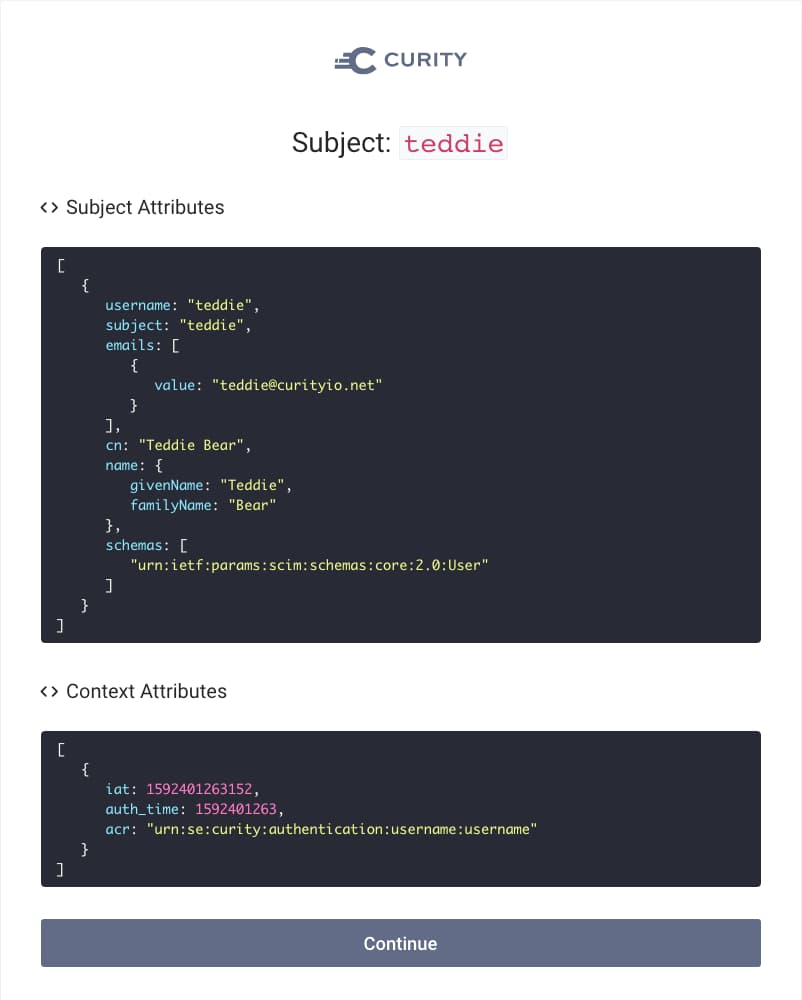
Here you see all the current subject attributes in the authentication transaction, together with the Context Attributes, which could be picked up using the Context Attributes provider. We also see that there is no email attribute, but there is emails which could be used instead if the formatting is a bit different.
Transforming the Claim
Since this data source output the single email as a SCIM-style list, some scripting is needed to get the actual value to put into the claim. This is done in the Transformation panel of the claim's configuration.
Below is the email claim with transformation. Note that in the Selected Attributes panel now the emails attribute is chosen.
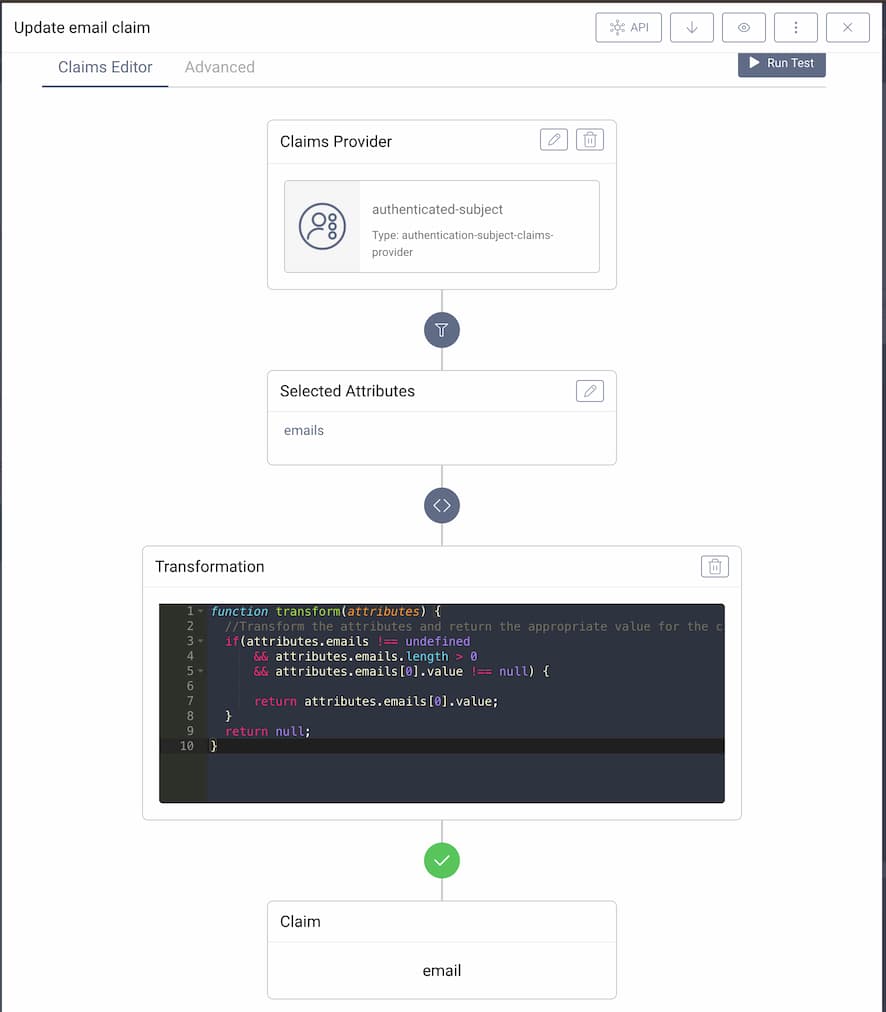
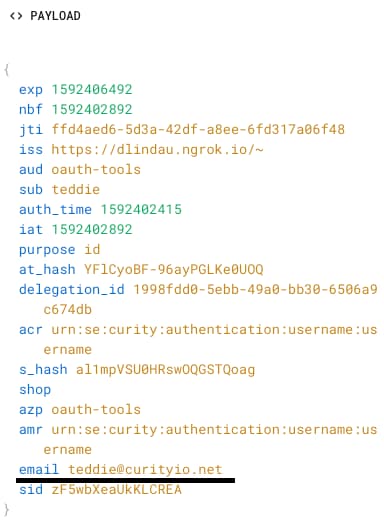
With this configuration, the email claim will now be added to the ID token, using the value of the first email that can be found in the emails attribute from the authenticated subject.
Conclusion
Using the Authenticated Subject claims provider, all the attributes obtained during authentication can be used to issue tokens. This is perfect when attribute lookups are already performed during authentication, as it will avoid unnecessary lookups during token issuance. If there needs to be some dynamics, or if only certain clients needs the actual claim, perhaps the Script or Data Source claims providers can be a better fit.
Join our Newsletter
Get the latest on identity management, API Security and authentication straight to your inbox.
Start Free Trial
Try the Curity Identity Server for Free. Get up and running in 10 minutes.
Start Free Trial


